The YITH WooCommerce Gift Cards plugin allows you to sell gift cards in your shop. Each gift card has a unique code that the recipient of the gift card can enter on the Cart page to use that credit to pay for his purchase.
Overview
How to create a gift card product
The gift card is a type of WooCommerce product. To sell a gift card in your shop you have to create a new product (Products > Add new) and then, in Product data select the “Gift Card” product type (1).

Then, if you want to sell a virtual gift card that will be sent by email to the recipient, you have to check the “Virtual” option (2).

Note: If the “Virtual” checkbox is not checked, the customer will purchase the gift card, but he will not be able to enter the recipient’s email address or choose the delivery date. In this case, the shop owner will have to print a physical gift card (with the same code generated with the purchase of the gift card) and will send it to the customer that placed the order.
In the Gift Card Options panel, you can set the gift card’s amounts (3). The customer will be able to choose one of the amounts you set.

And, in the option below, you can set an optional expiration date for this gift card (4). This option overrides—for this specific gift card—the global rule related to all the gift cards’ default expiration you can find in the General tab of the plugin options panel.

Now you can add a description, upload a nice product image to represent your gift card and publish the product. Your customers can start buying gift cards from your store!
When a customer buys a gift card, a code is automatically generated and, in the Dashboard tab, you will be able to check all the codes, their balances and other useful information.
How to create image galleries for your gift cards
With this plugin, you can create all kinds of gift cards to sell in your store. You can, for example, create a “Christmas” gift card, a “Birthday” gift card and so on. For each gift card, you can create a specific gallery of images so users can customize the gift cards they want to send to their families or friends.
For example, if you want to create a “Christmas” gallery of images and show this type of images on your gift card product page, you must:
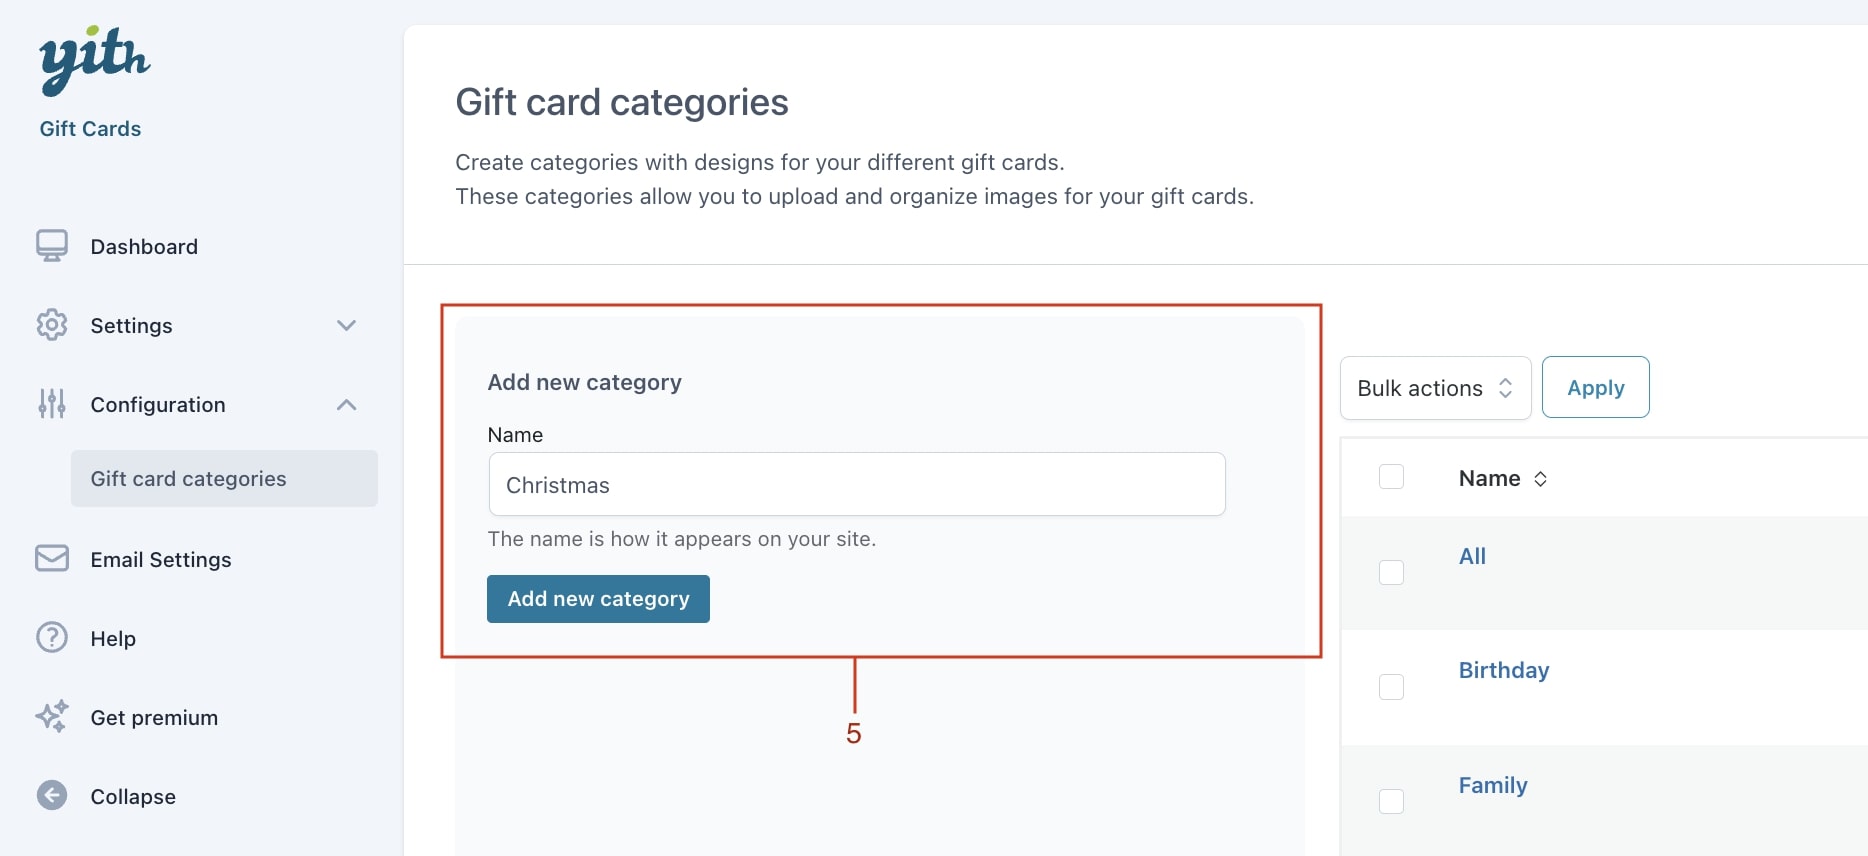
- Create a “Christmas” category in the Image Categories tab (5)
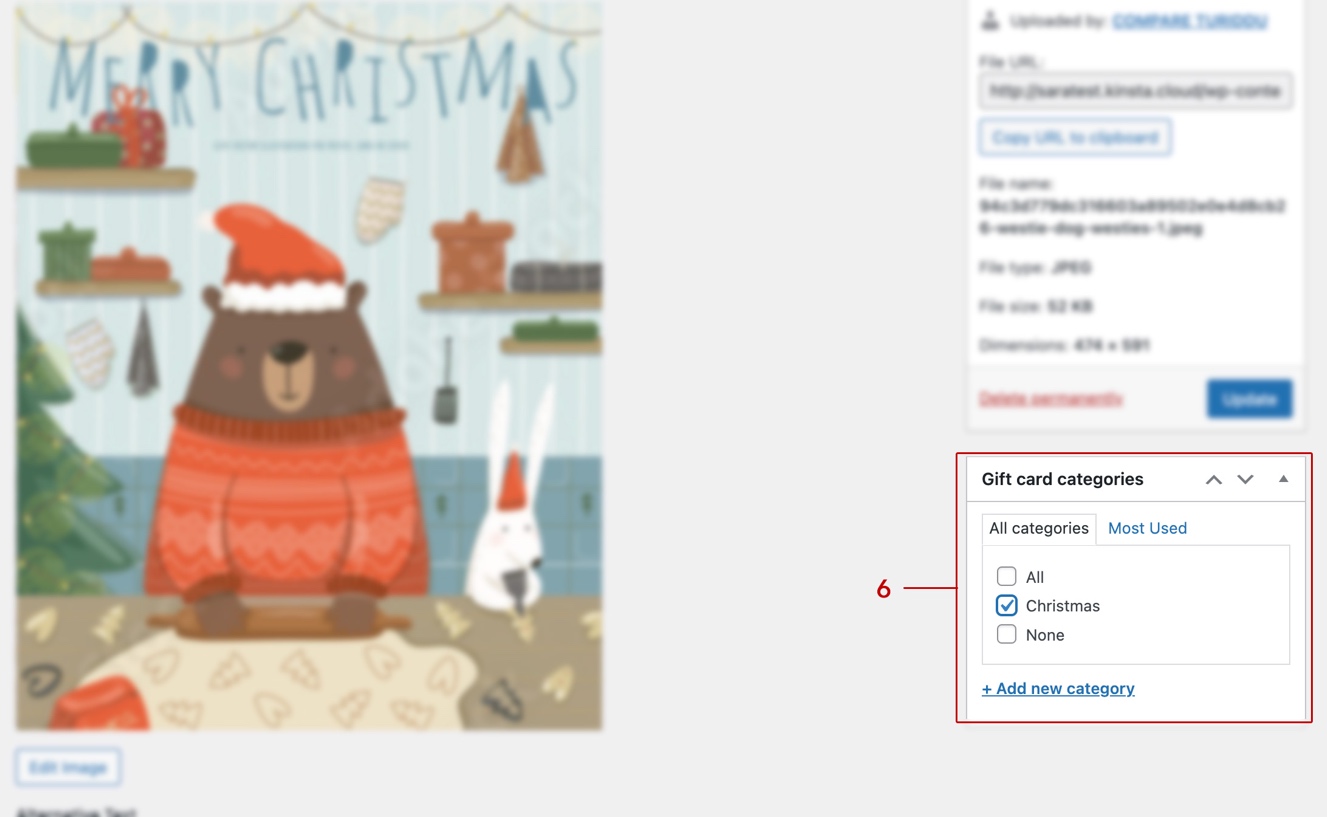
Upload the images you want to assign to the Christmas category in Media > Add new and then click on “Edit” on each image you uploaded. Then, you will be able to associate the image with a category (6).
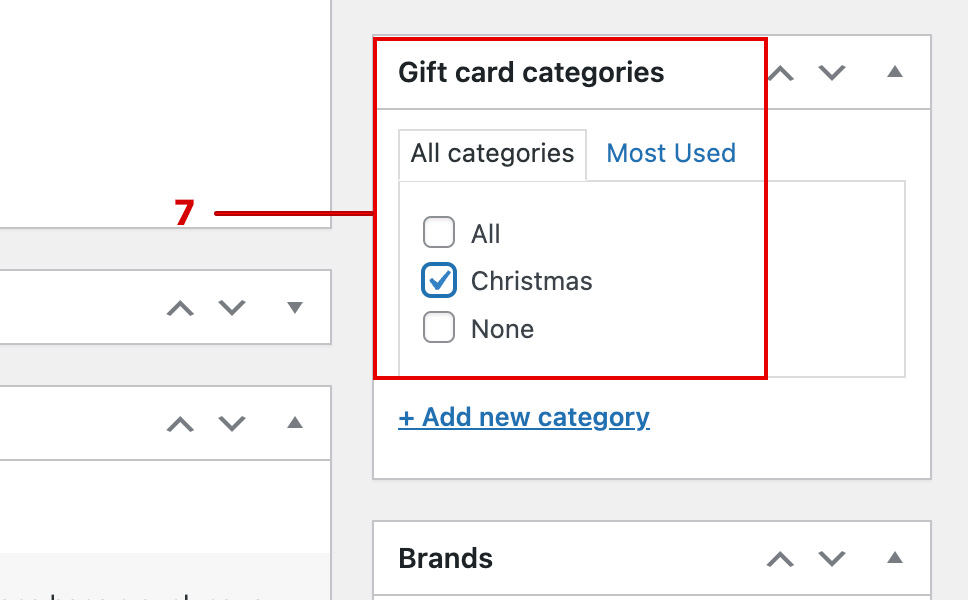
Open the gift card product and assign the same category (7).
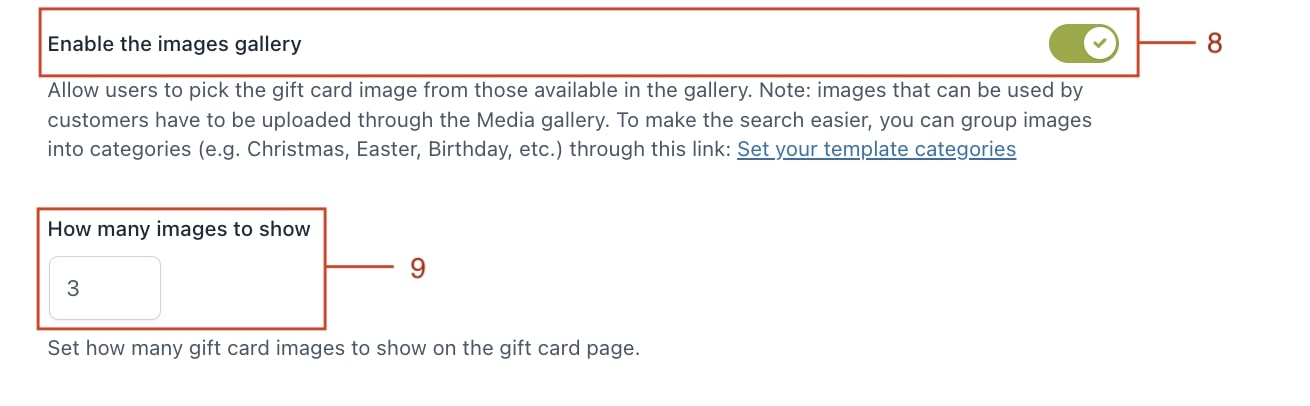
Then, in the General tab, enable the image gallery (8) and choose how many images to show on the gift card page (9).
How to create a gift card code manually
If you want to share a gift card code without asking the user to purchase the gift card in your store, you can create a code manually in the Dashboard tab.
- Click on the “Create code” button (9)

- Fill in the fields with the information needed (10). You can enter a custom code or generate it by clicking on the related button. This code is the one the user must enter in the Cart field to use the gift card credit on his purchase.

How to add your store logo to the gift card
If you are not able to insert your store logo in the images that the users can use to customize their gift cards, you can enable an option to automatically put the logo above these images.
In the General tab, in the Email options section, enable the “Add your shop logo on gift cards” option (11) and then use the uploader below to upload your logo image. This image will be automatically added to the gift card images.
Delivery options for a virtual gift card
In the General tab, in the Recipient & delivery section, you will find some options related to virtual gift card delivery.
- Choose if you want to make the recipient’s name and email address mandatory forcing users to fill in that information (12)
- Decide if you want to allow users to choose the delivery date or not (13). If the option is enabled, users will see a calendar where they can pick a date to deliver the gift card. If disabled, it will be automatically sent right after the purchase.
- If you decided users can choose a delivery date you can then decide the time to send them (14) (for example, every day at 4 p.m.).

Gift card’s redemption
In the General tab, in the Cart & Checkout section (15), you can:
- Choose the position of the “Apply gift card code” field on the Cart page;
- Choose the position of the same field on the Checkout page.

Need more options? Check the premium features
This version of our plugin works like a charm, but the premium one is an even more powerful tool to increase sales and conversions. By upgrading to the premium version, you can:
- Manage the stock of each gift card product
- Enable an optional QR code in gift cards
- Import and export gift cards into a CSV file
- Allow users to enter a custom amount (and set a minimum and/or maximum amount)
- Allow users to upload a custom image or photo to customize the gift card
- Choose to attach a PDF version of the gift card to the related email
- Notify the sender via email when the gift card is delivered to the recipient
- Allow users to enter the gift card code into the standard coupon code field (instead of showing two different fields in the cart and checkout)
- Create a custom page where users can check their gift cards’ balance
- Enable the “Gift this product” option on product pages to sell gift cards linked to specific products
- … And so much more!
Need support?
No problem, we’re here to help. Based on your hosting company, you can get support through the following channels.
Feel free to contact Bluehost Chat Support or Phone Support via 888-401-4678.
For Bluehost India: phone support via 1800-419-4426 - chat support via https://helpchat.bluehost.in
Feel free to contact our Crazy Domains team through the online support page: https://www.crazydomains.com/help/