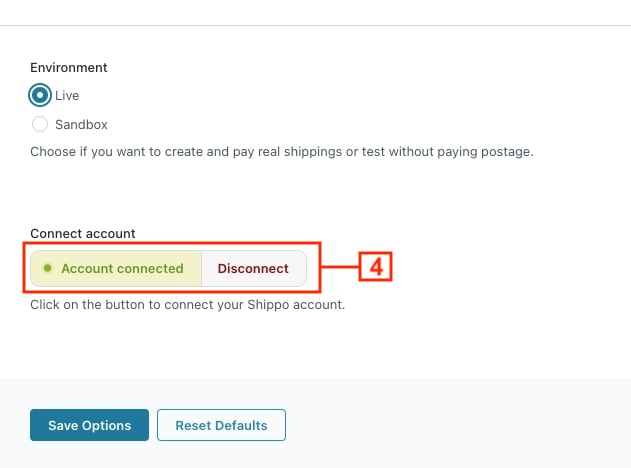
In the General Options tab, enable the YITH Shippo Shippings plugin (1) and choose if you want to use the plugin in test mode (just for test – no payment will be required to create a shipment) or in live mode. Then click on the “Connect” button (2).
This will open a new window (3) in which the system will ask you to create an account on Shippo. If you already have one, you can click on the Login link placed below the Sign Up button.
Once your account is successfully connected and linked to your store, this notice (4) will replace the connect button. Now you can start to configure the plugin options.
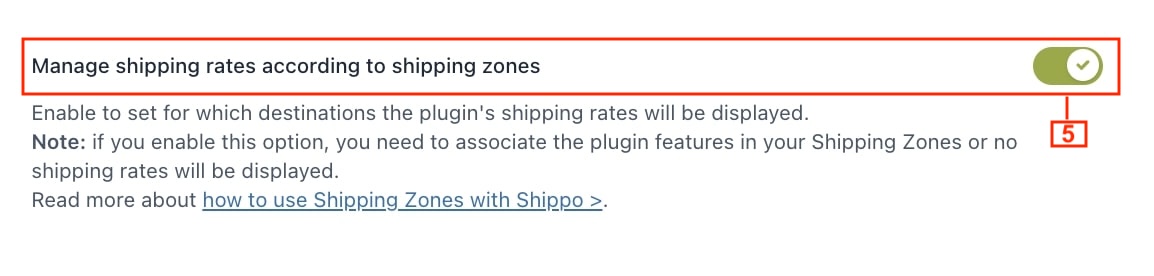
First of all, you need to choose if you want to manage the shipping rates according to different shipping zones. By using shipping zones, you can set different shipping costs or carriers for specific countries – e.g.: free shipping and UPS for national shippings, 25$ and DHL for international shippings, and so on…).
In order to do that, you need to create the shipping zones (read more about how to create shipping zones in WooCommerce) and then enable this option in the Shipping Options > Shipping Rates tab (5).
Only by enabling this option, you will be able to create shipping rate rules and set other advanced options based on the customers’ shipping address.
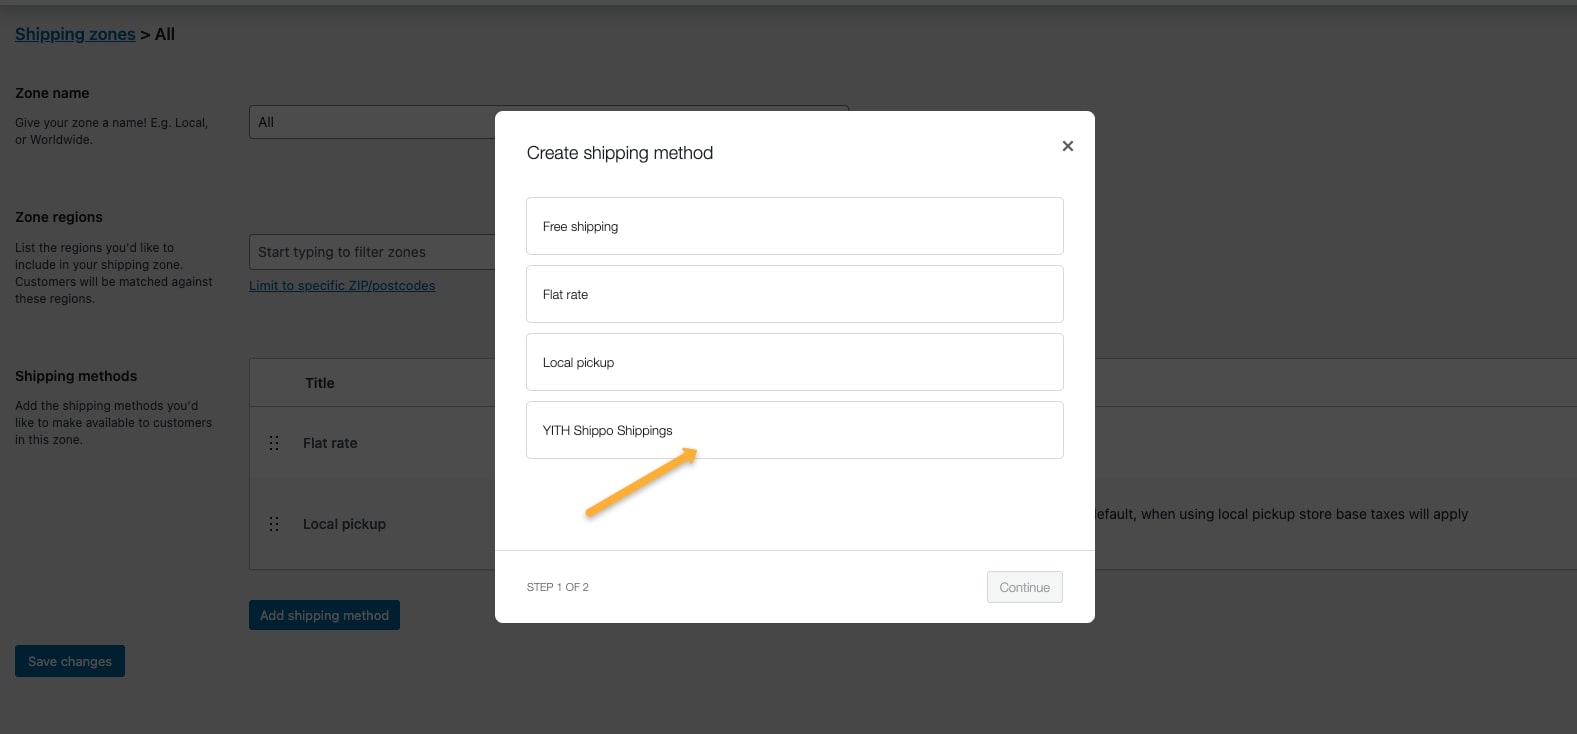
To link Shippo to your shipping zones in WooCommerce, select YITH Shippo Shippings when creating the shipping method.
The created shipping method will be then added to the list.
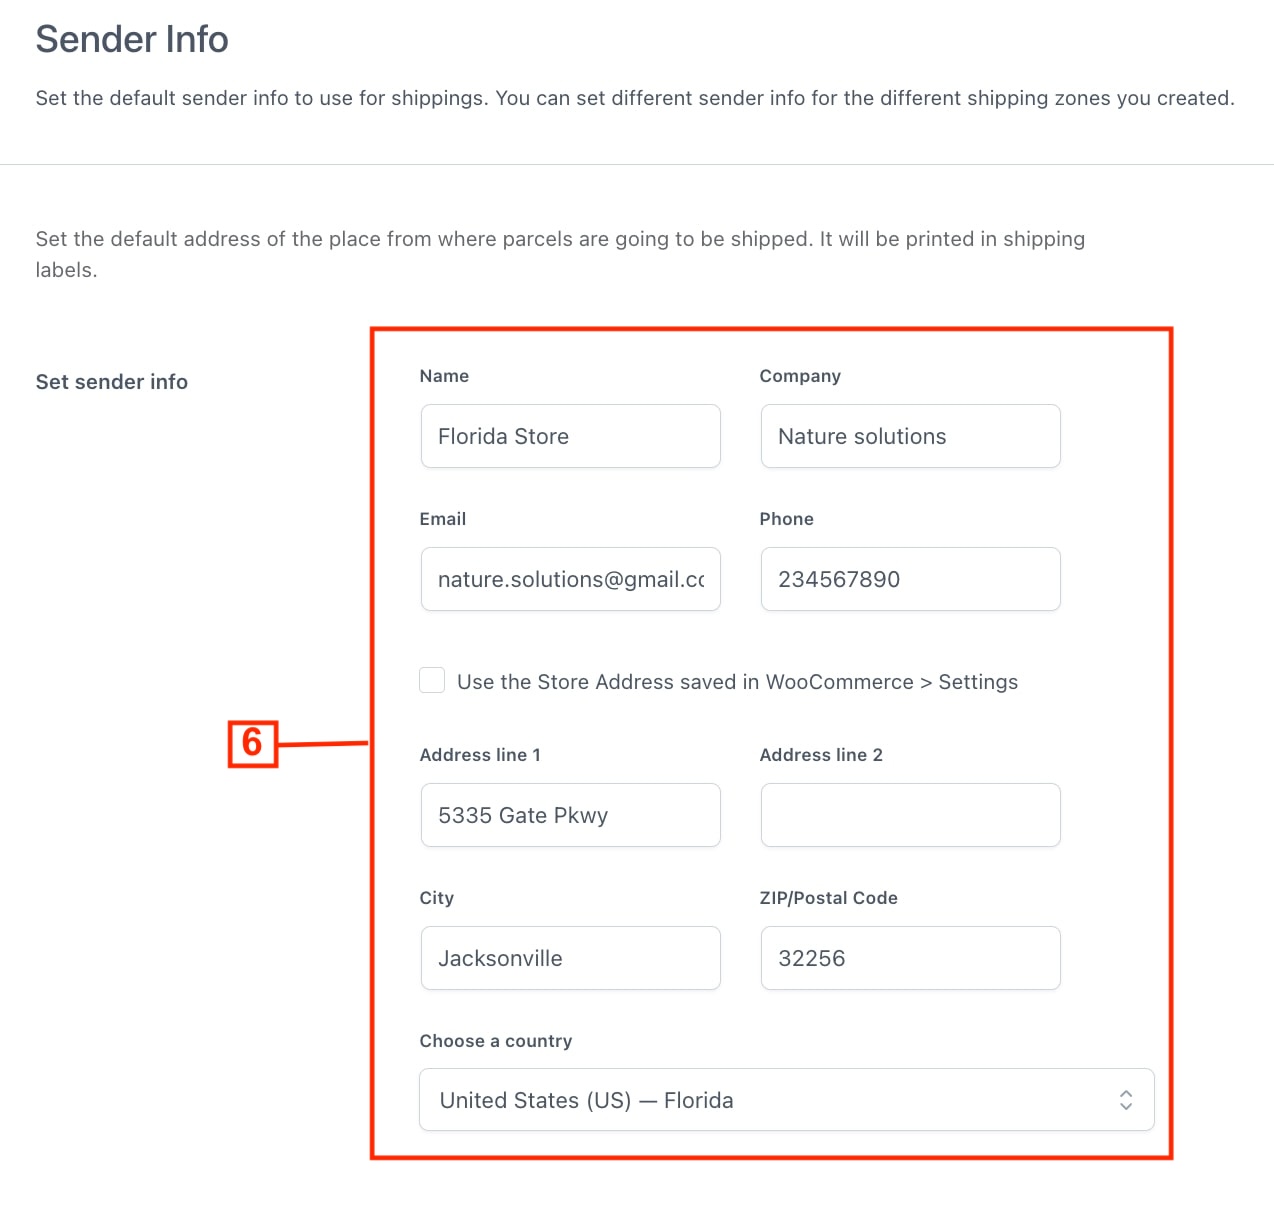
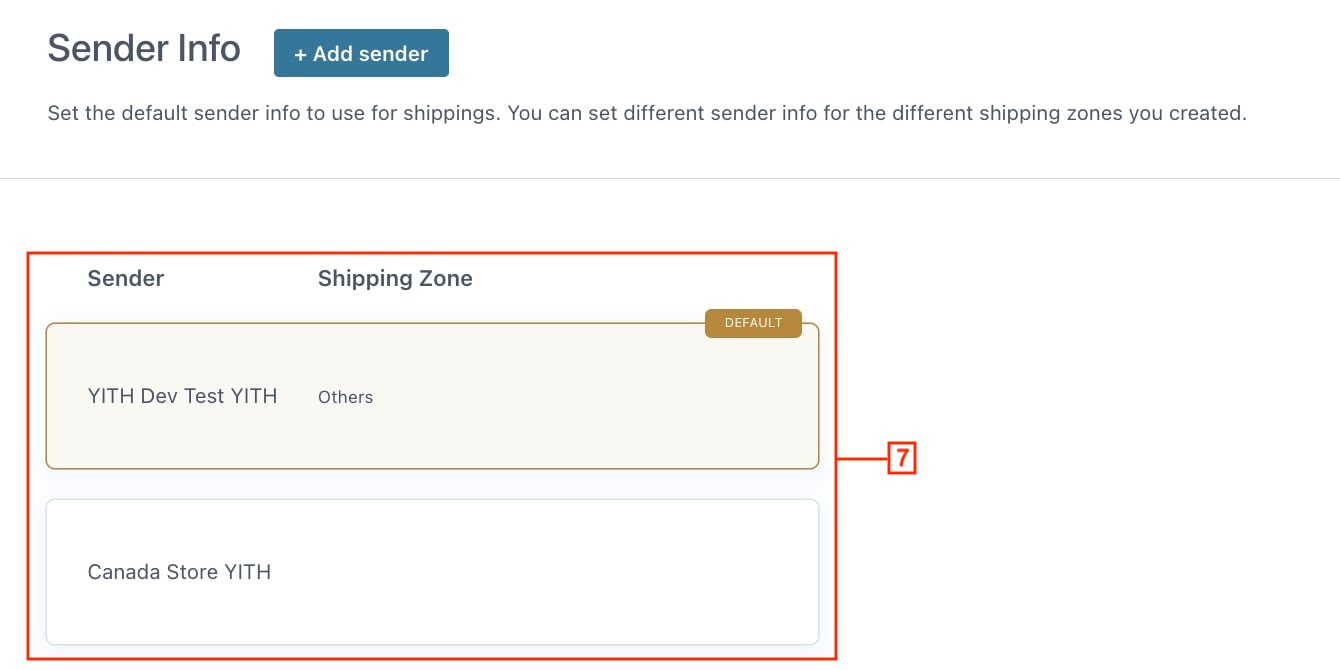
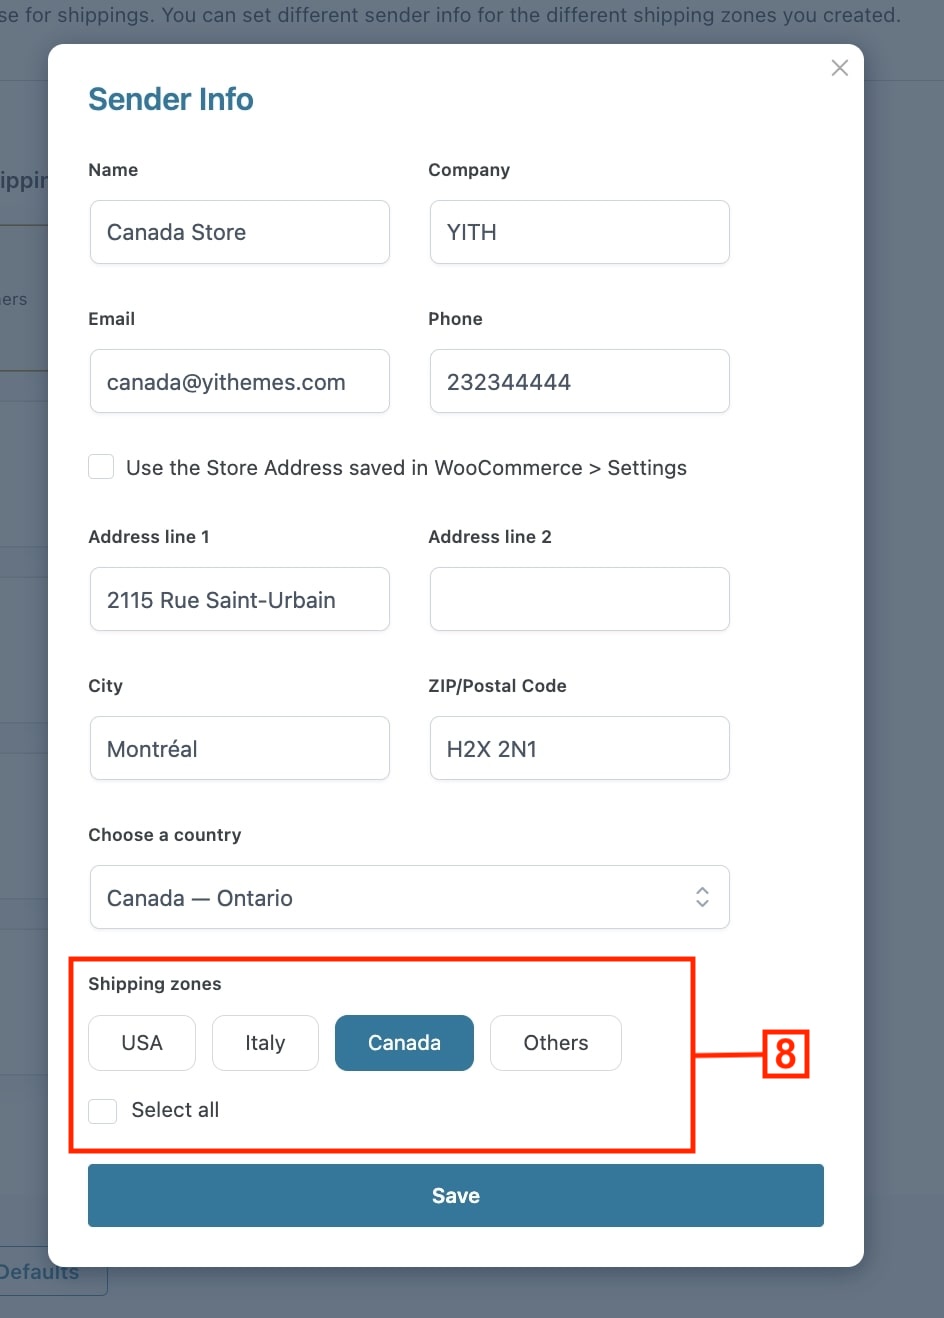
In the Shipping Settings > Sender Info tab you can set the default Sender address for your shippings (6). You can fill the form with the Store address set in WooCommerce > Settings or set a different address.
If you enabled the shipping zones option, you will be able to set multiple senders (7) and associate specific sender information to specific shipping zones (8).
In the Shipping Settings > Shipping Rates tab you can find all the options related to shipping rates:
Validate products (9): products must have weight and dimensions set for live shipping rates to work. Use this option to check if all your products have this info or if you need to fix anything.
Manage shipping rates according to shipping zones (10): as we already explained, by enabling this option you will be able to create rules, charge costs, and set carriers for specific shipping zones.
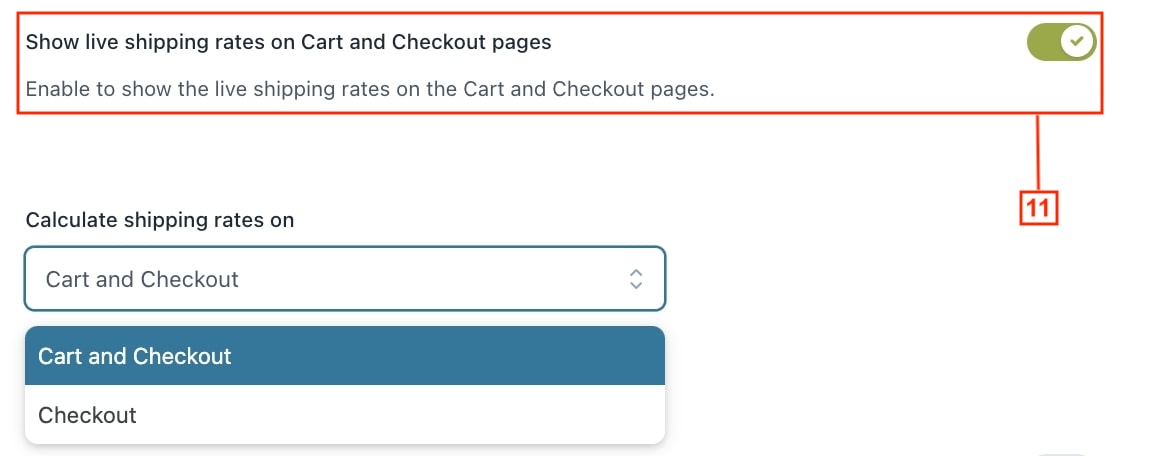
Show live shipping rates on Cart and Checkout pages (11): enable this option to show the shipping rates to your customers on the Cart and Checkout pages.
Require insurance (12) and Require signature (13): enable these options to only show the shipping services in which insurance and signature are available.
Limit rates to show (14): enable this option if you want to limit the maximum number of shipping rates to show (e.g.: max “3”).
Filter rates according to their cost (15): enable this option if you want to set a minimum and/or maximum cost for the shipping rates to show. The other services will be hidden (e.g.: “show only shipping rates with a max cost of 15$”)
Show delivery time (16): enable this option if you want to show also the estimated delivery time to your customers.
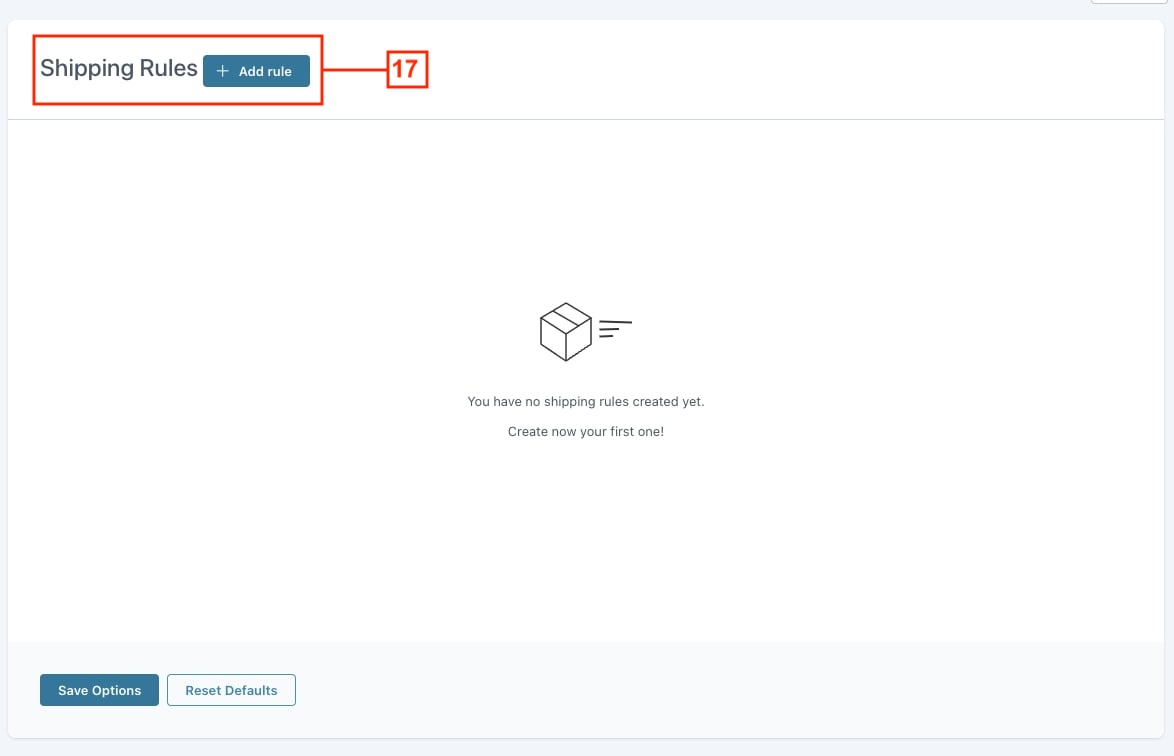
The Shipping Rules give you advanced control of the shipping rates to show and charge when certain criteria are met.
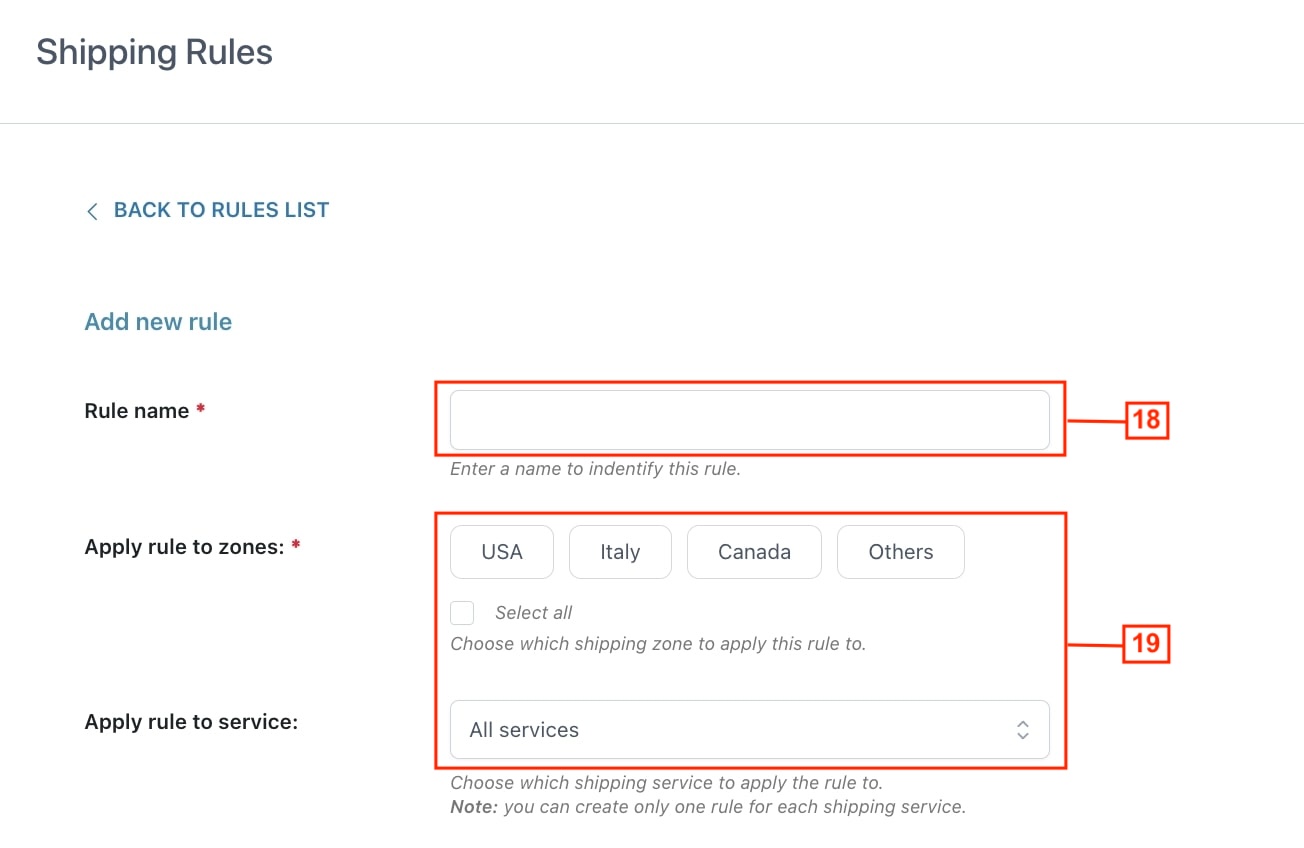
Click on the “Create rule” button (17) to create a new shipping rule;
Enter a name to identify the rule (18) and choose which shipping zones and shipping services (19) you want to apply the rule to;
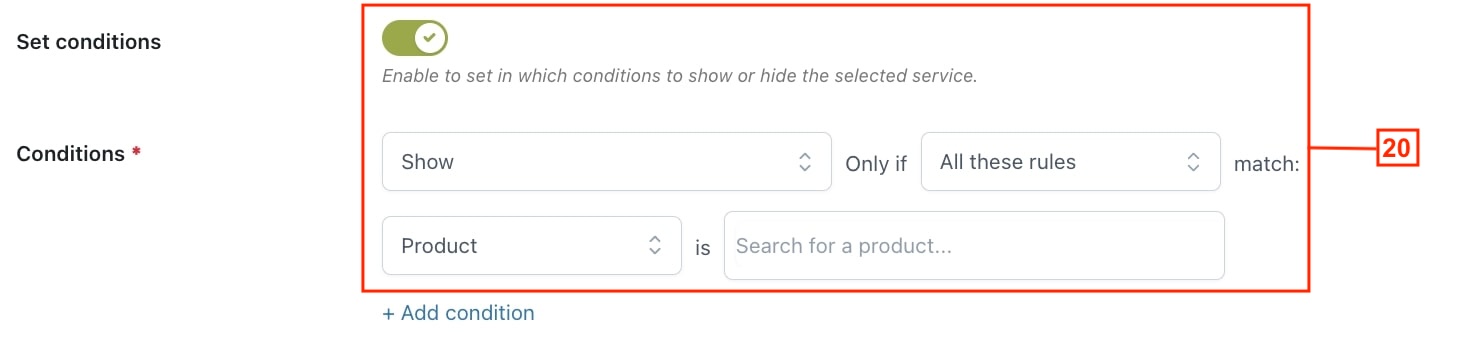
Choose if you want to add a product or category condition (20): you can choose to show or hide a specific shipping service according to products or product categories added to the cart;
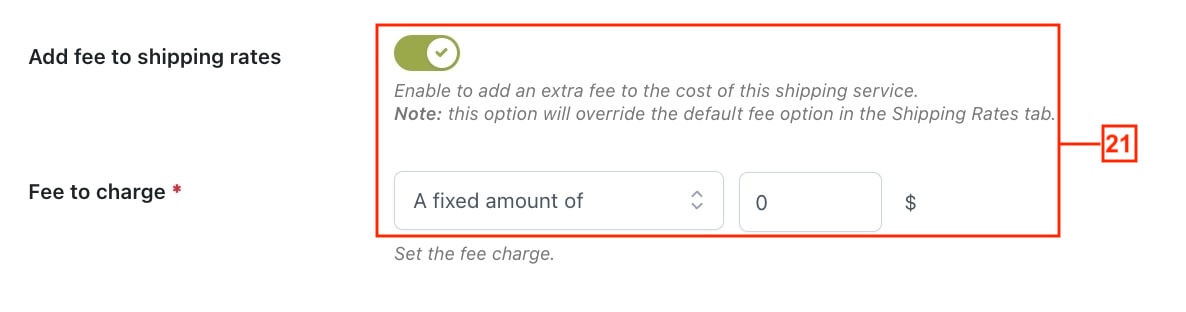
Choose if you want to charge an extra fee (21) to the shipping services selected.
Some examples of different rules you can create:
A generic fee: add a fee of 5$ to all services and for all shipping zones, without setting any conditions. This way, the system will always charge an extra fee of 5$, regardless of the shipping service used to ship the orders.
Hide a shipping service if the user is purchasing products of the “Furniture” category: select all shipping zones, select the service, and add a condition to “Hide” the service if the product category is “Furniture”.
Hide a shipping service for customers located in the EU, regardless of the products they purchase: select the correct shipping zone, select the shipping service, and add a condition to “Hide” the service that applies to ALL product categories.
Shipping tracking allows your customers to track the status of the orders shipping. In the related tab you can:
Enable the Auto Tracking feature (22) to automatically track shipping updates from Shippo and send notices to your customers about the current status of their shipments. To activate this option you have to copy the code (23) and paste it into your Shippo account (Settings > API > Webhooks).
Choose which Shipping statuses to notify your customers about (24): for any status selected, the customer will get an email with an update about the shipping (25).
Choose in which shipping status you want to set the related order as “Completed” (26).
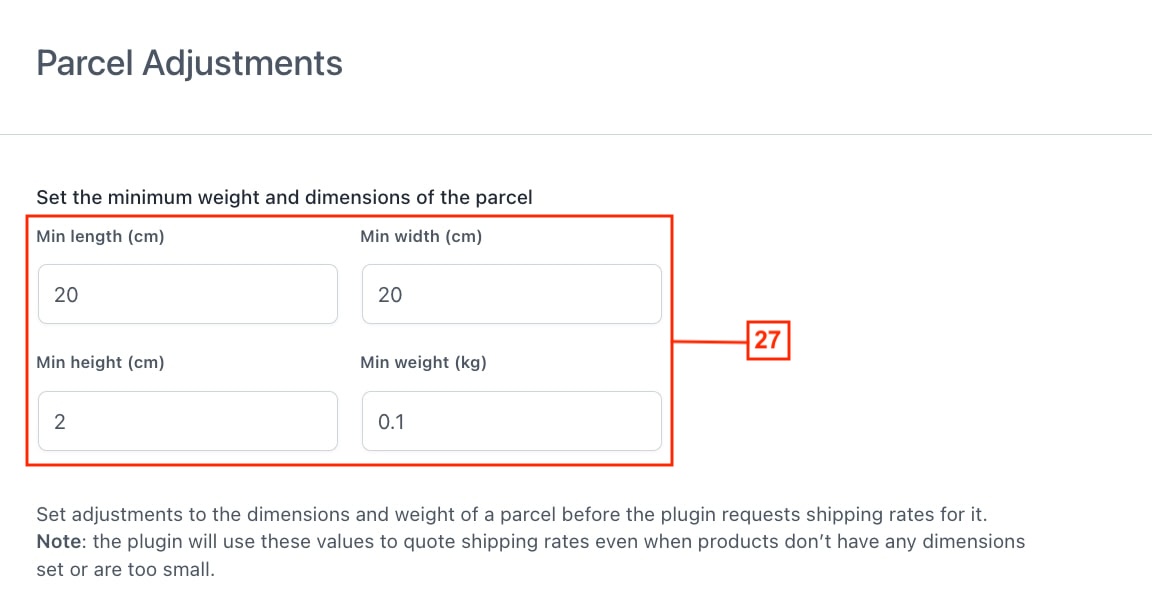
In the Parcel Packing > Parcel Adjustments tab you can set the default weight and measurements for parcels (27). These values are required to quote the shipping rates and will be applied by default to products without weight or dimensions set.
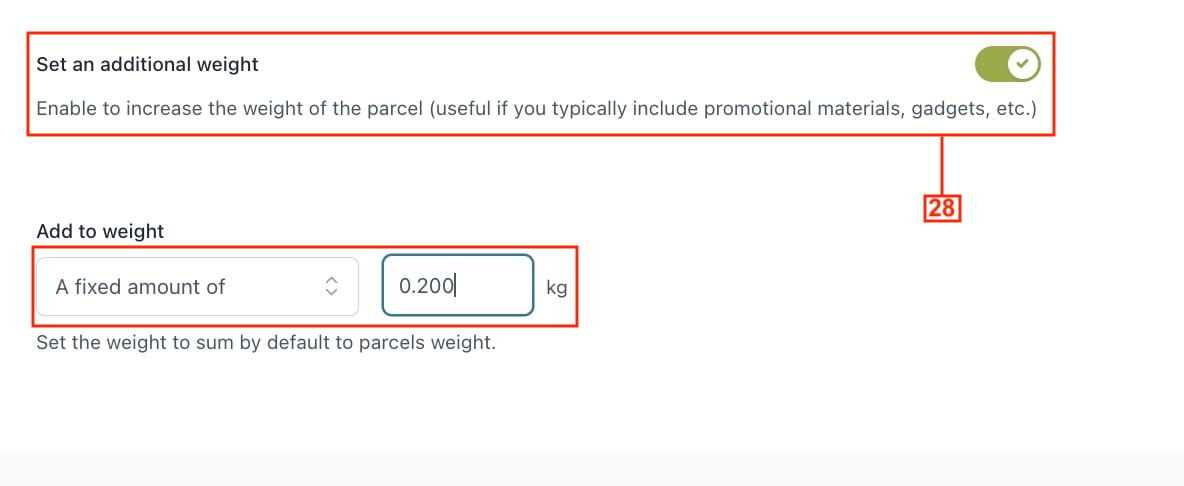
You can also set an additional weight (in % or fixed amount) to add to all your parcels (28). This is useful if you include some gadgets, flyers, instructions, promotional materials, etc., in all your parcels.
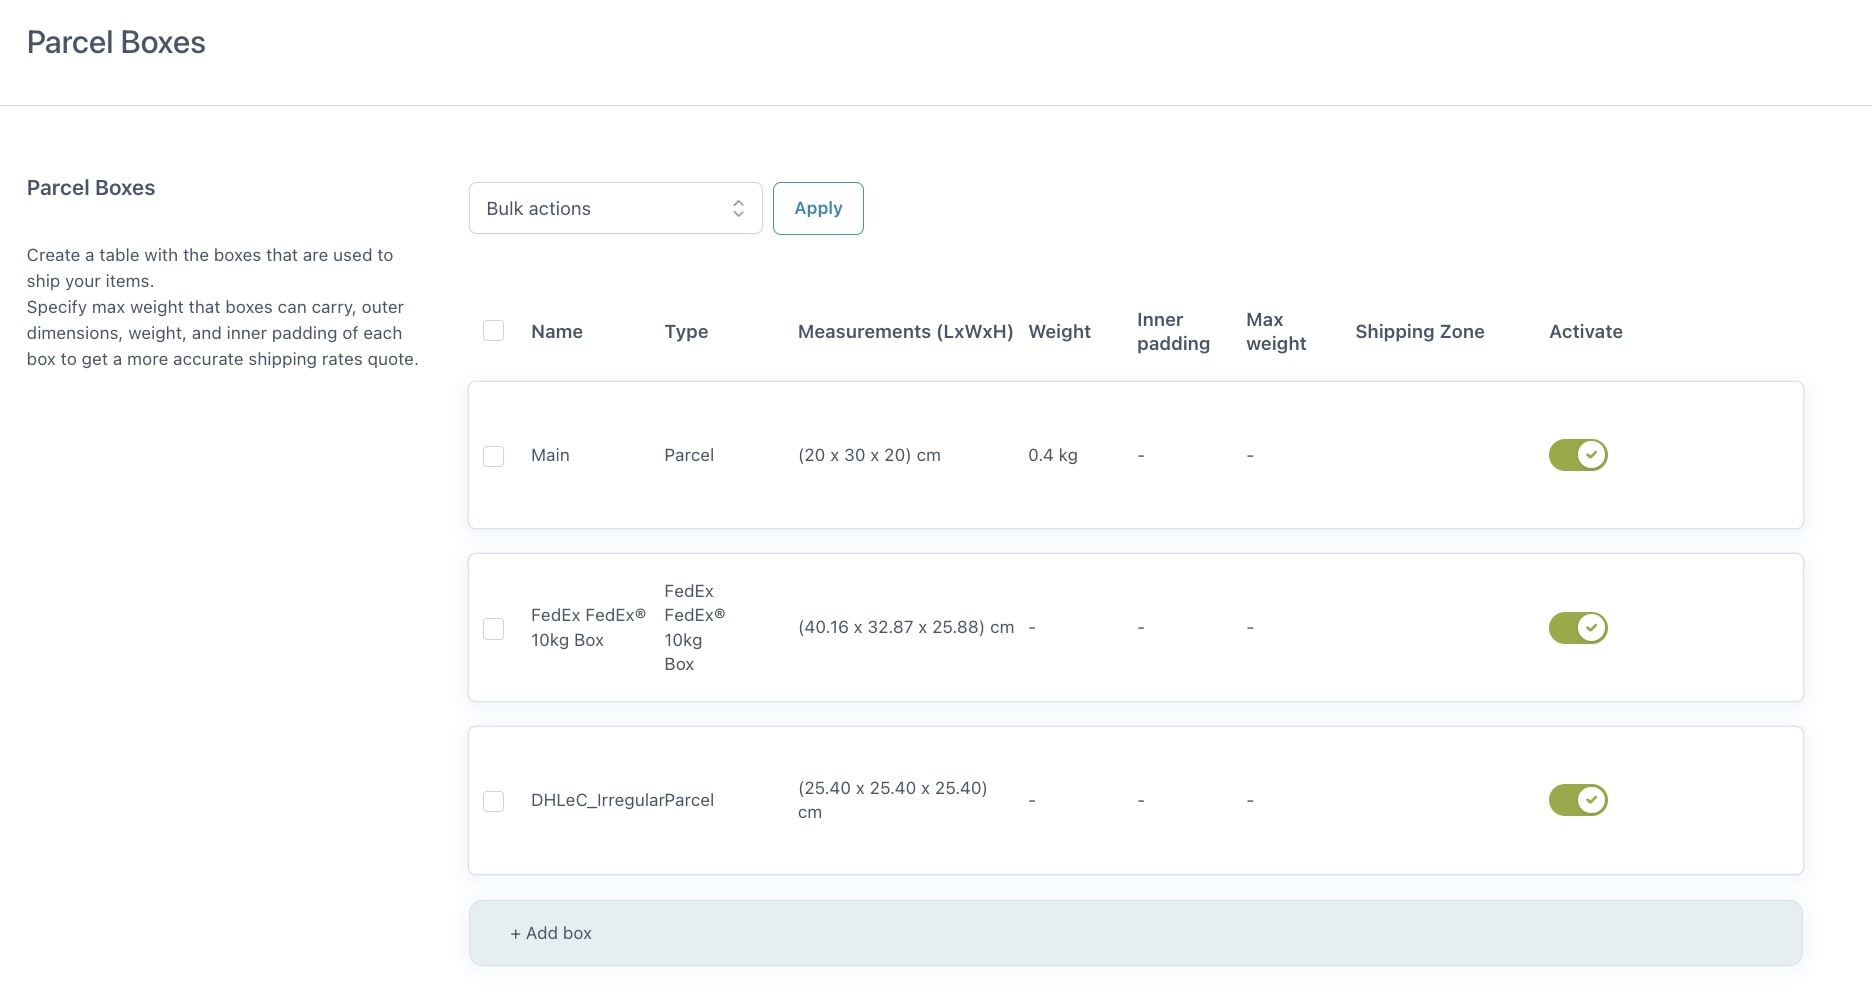
In the Parcel Packing > Parcel Boxes tab you can populate the table with the boxes you will use to ship your items.
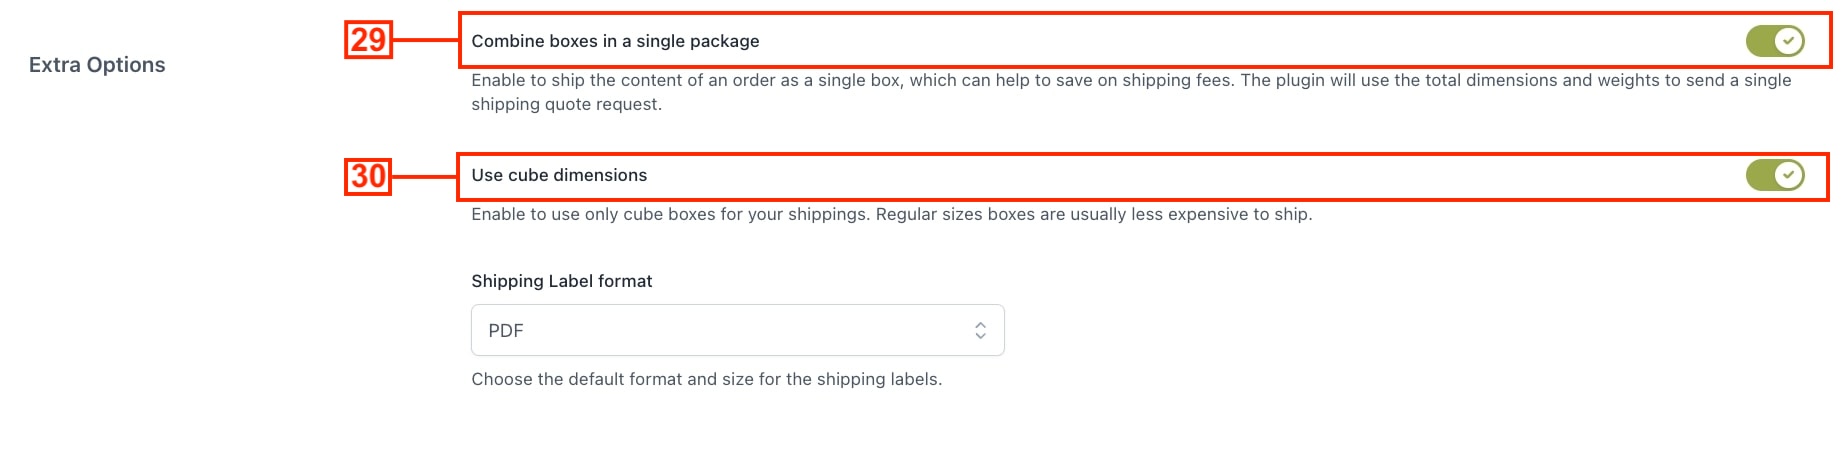
In the Extra Options section, you can enable an option to combine all boxes of an order in a single shipping (29). By default, the plugin sends a separate quote request for each box used to pack all the items in the cart, and then it sums up all the returned rates.
By enabling this option the plugin will put all the boxes needed to fit all the items in the order, on top of each other, and then it will use the total dimensions and weight of this pile to send a single shipping quote request.
If you choose to combine boxes in a single shipping, we suggest enabling the second option, “Use cube dimensions” (30), because boxes with irregular sizes are usually more expensive to ship. The plugin will calculate the volume of a box as L x W x H, and then it will use this value to calculate the dimensions of the box with the sides of an equal length like L = W = H.
In the Parcel Packing > Postage Options tab you can enter the default info about your shipments (31). This info will be used in customs declarations as a description of the content of your shipments. You can override this info for each order.
The tariff number is required by some carriers for international shipments. You can find your tariff number here and, if you sell different products in your store, you should set the correct tariff number on each product.