To enable the popup for your Terms and Conditions on the Checkout page, go to YITH > Terms and Conditions Popup > Settings and enable the option Enable Terms & Conditions Popup.

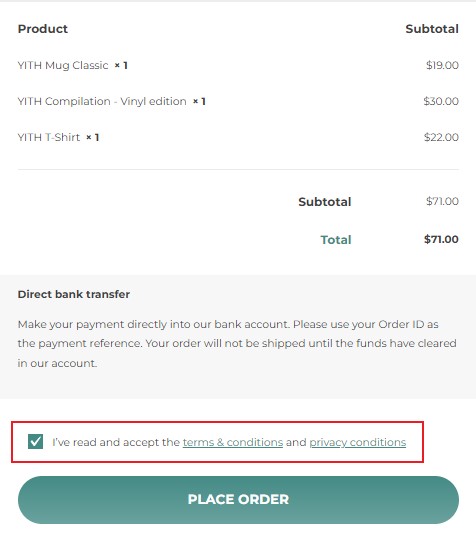
To enable the popup for your Terms and Conditions on the Checkout page, go to YITH > Terms and Conditions Popup > Settings and enable the option Enable Terms & Conditions Popup.
Popup Options
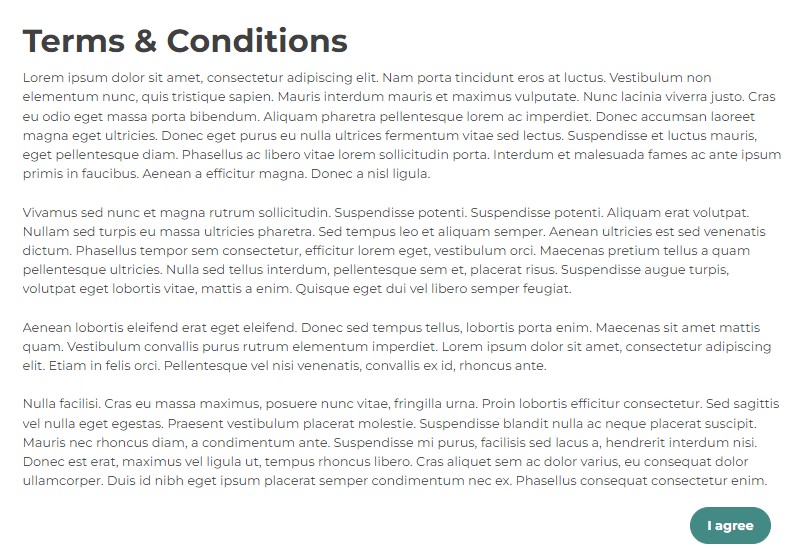
In Settings > Popup options, you can find the options to set the Popup width and the height.

Here, you can also enable a title for the Popup and the “I agree” button.

When enabled, users will have to tick the “I agree” box before proceeding with the checkout.
You also have the option to change the text (for example, “I accept”).
This button will show in the footer of your popup.
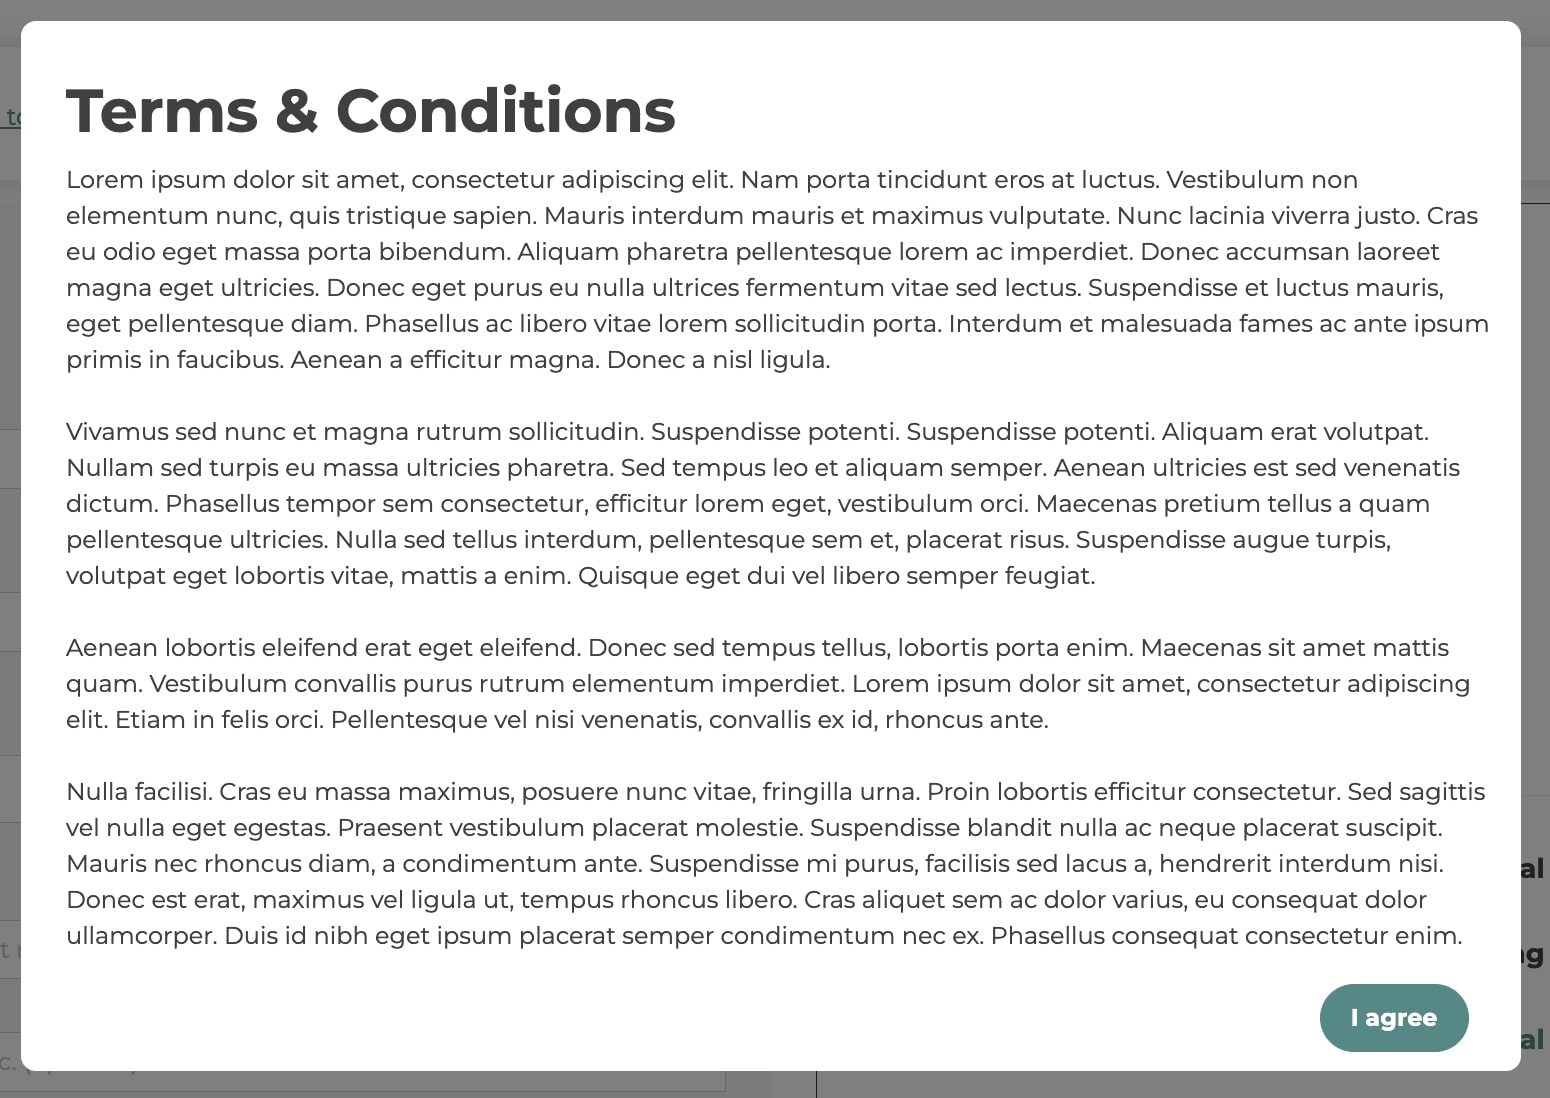
Finally, you will find the “Scroll till the end of the document to accept” option.

By enabling this option, users must scroll through the popup until the end to accept terms and conditions.
You can enter a custom text for the error message shown when users attempt to accept your Terms and Conditions without scrolling the popup.
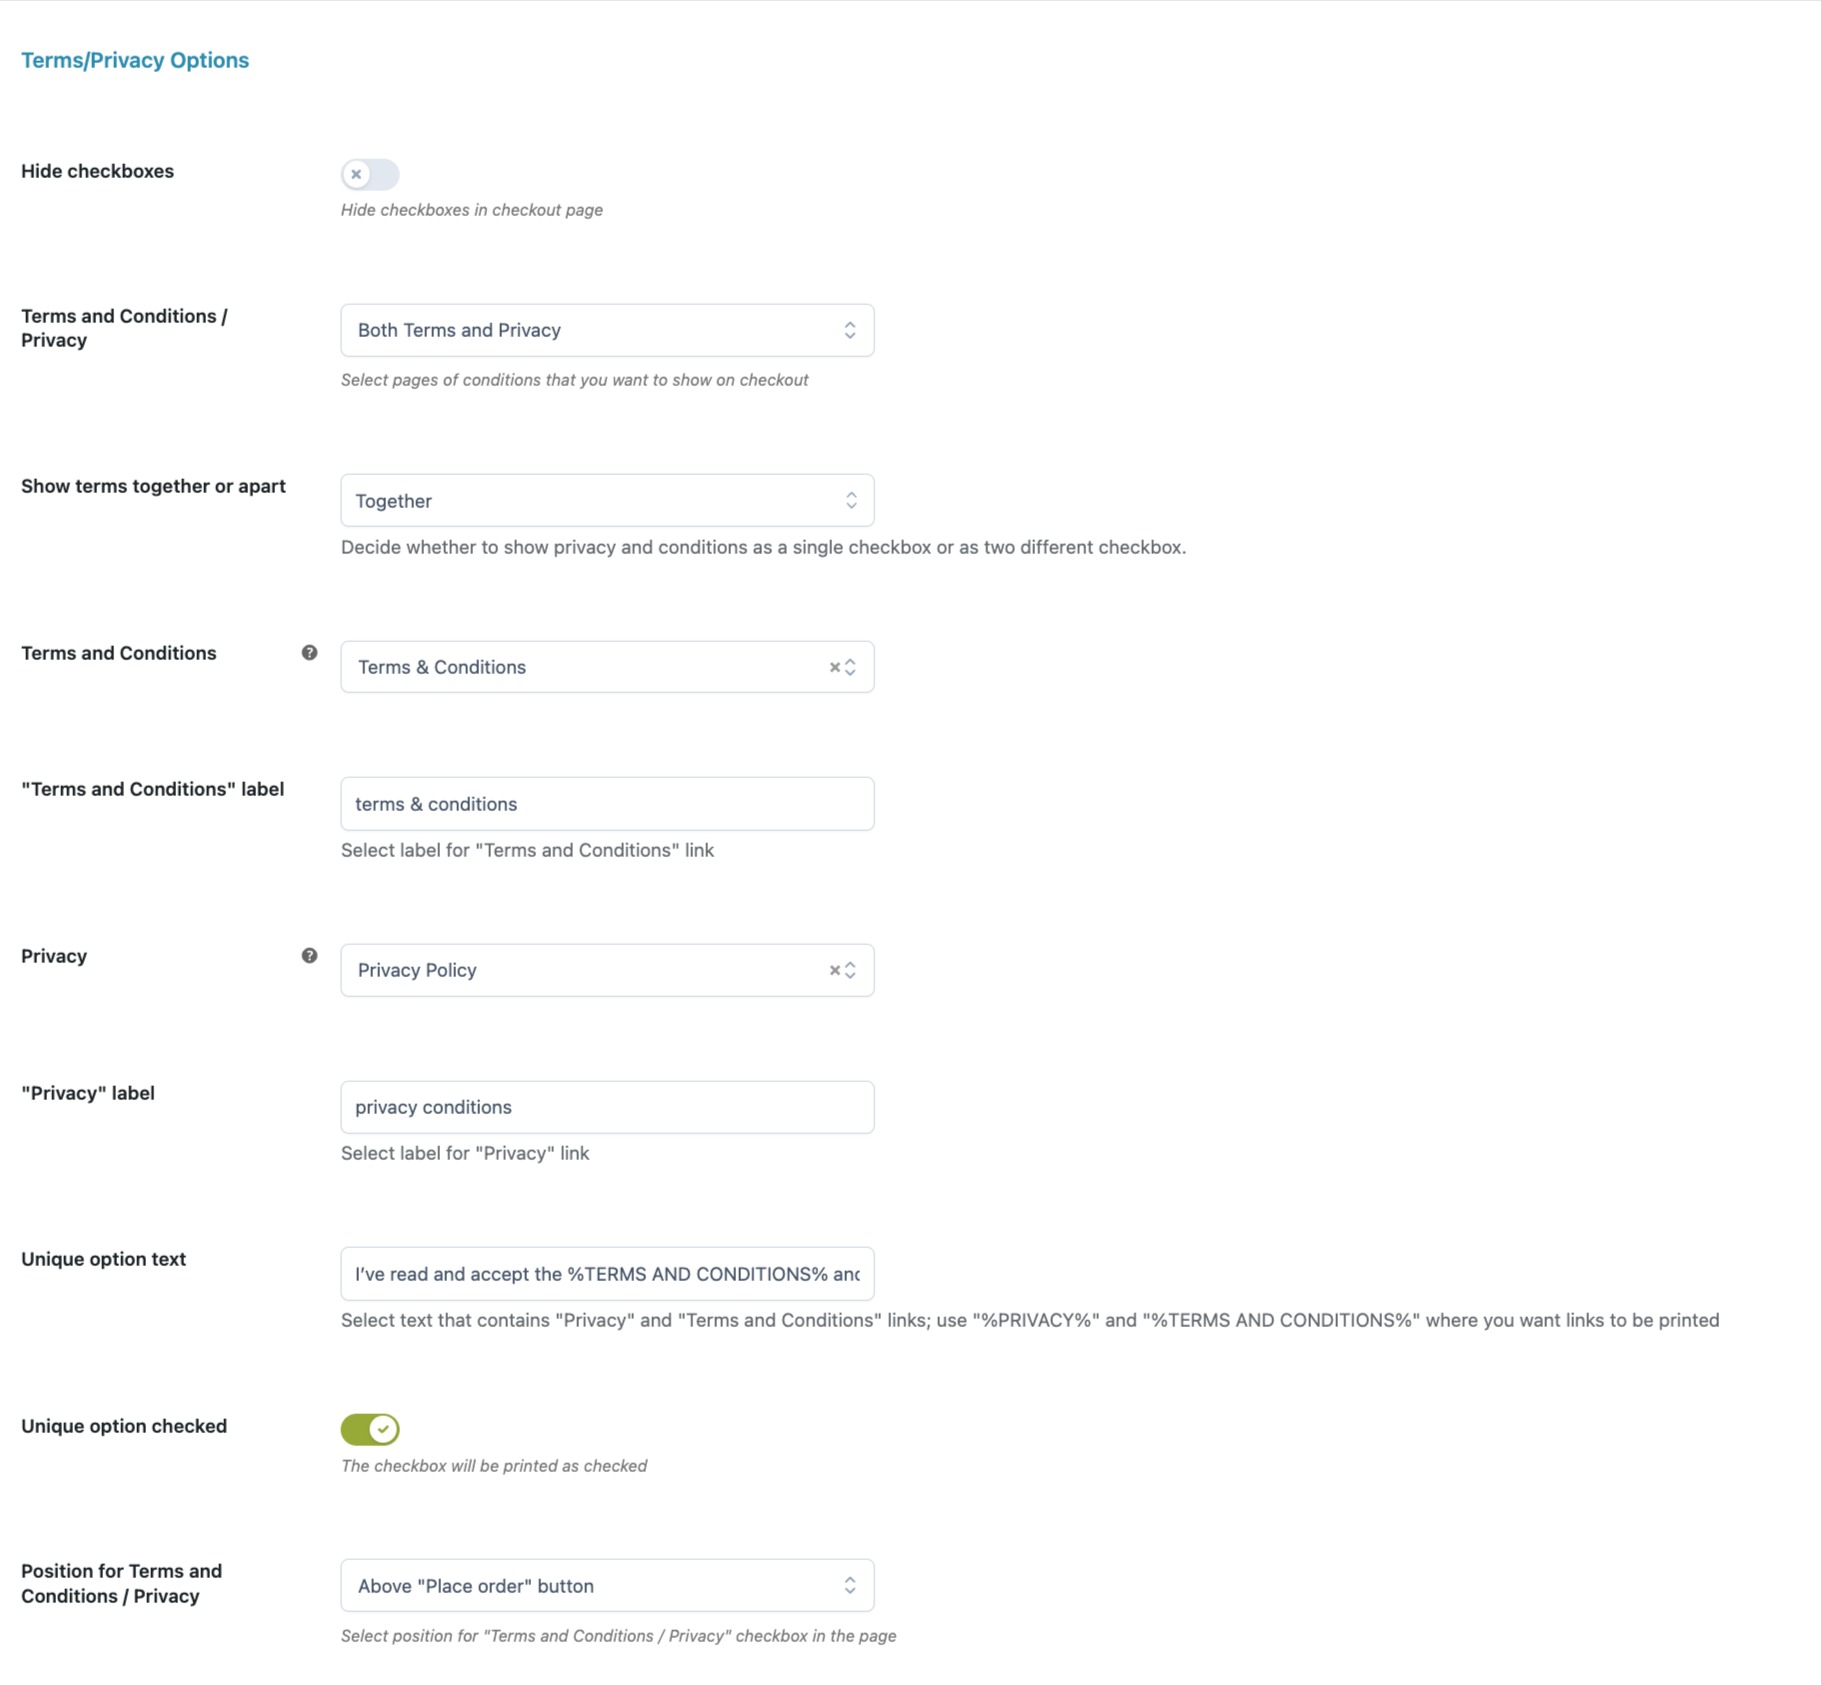
In Settings > Terms and Privacy options, you can find the following settings:
In the tab Layout, you will find all options for the layout of the Terms and Conditions Popup:


In “I Agree” Button Layout, you will find the settings of the I Agree button in the Terms and Conditions Popup.
By selecting Custom, a set of options will show and you will be able to customize the button colors as you prefer.