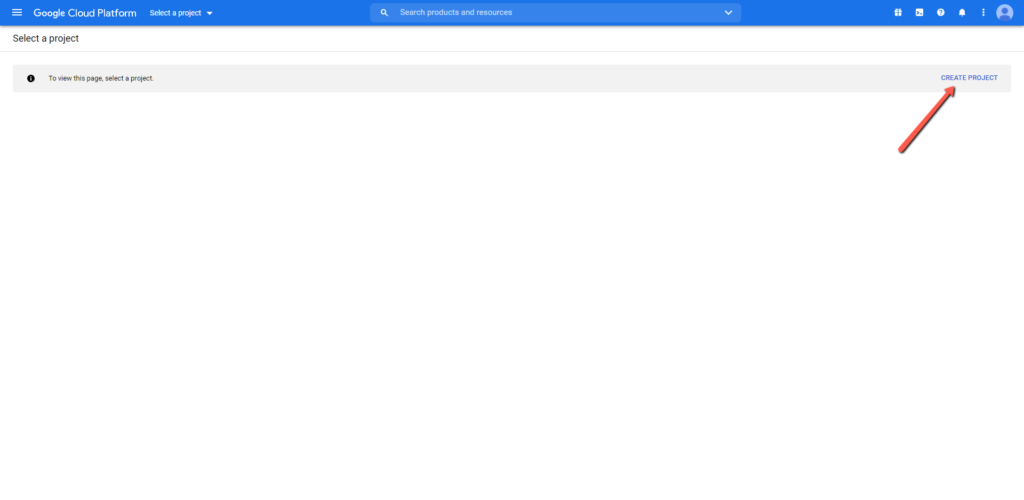
1. Visit the following page: https://console.cloud.google.com/projectselector2
2. Click on Create Project.
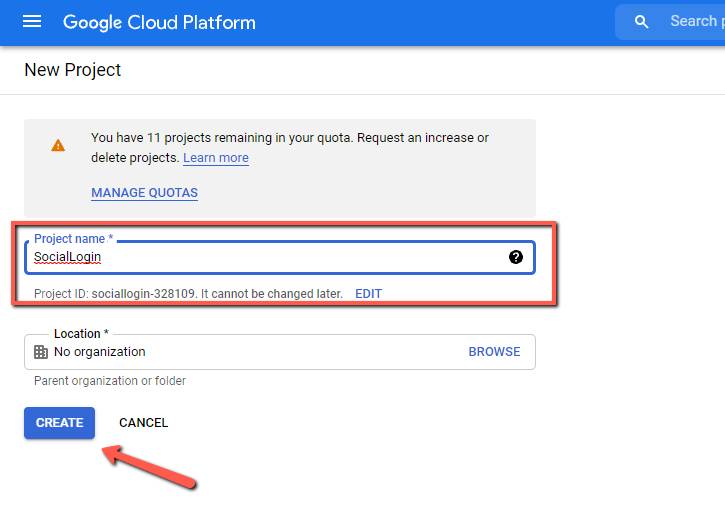
3. Give a name to the project and click on “Create”.
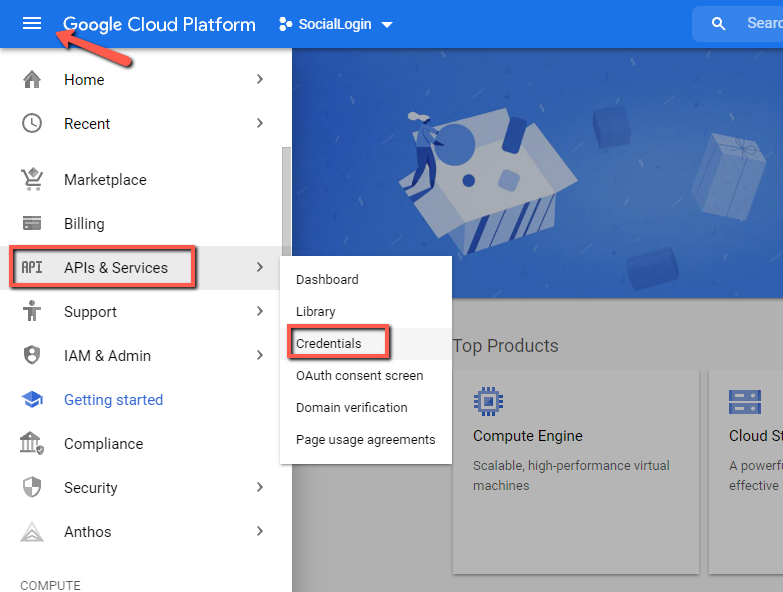
4. Click on the hamburger menu on the left, then, on “APIs & Services” and finally on “Credentials”.
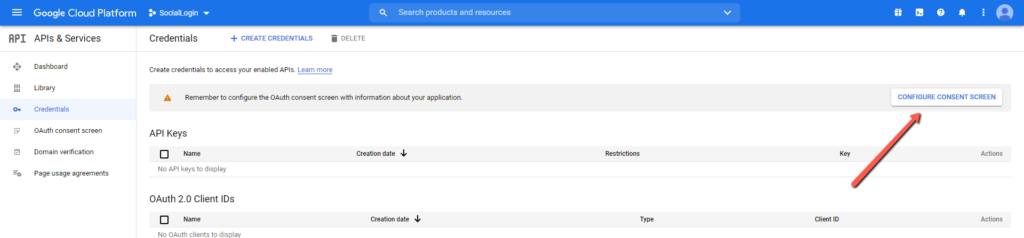
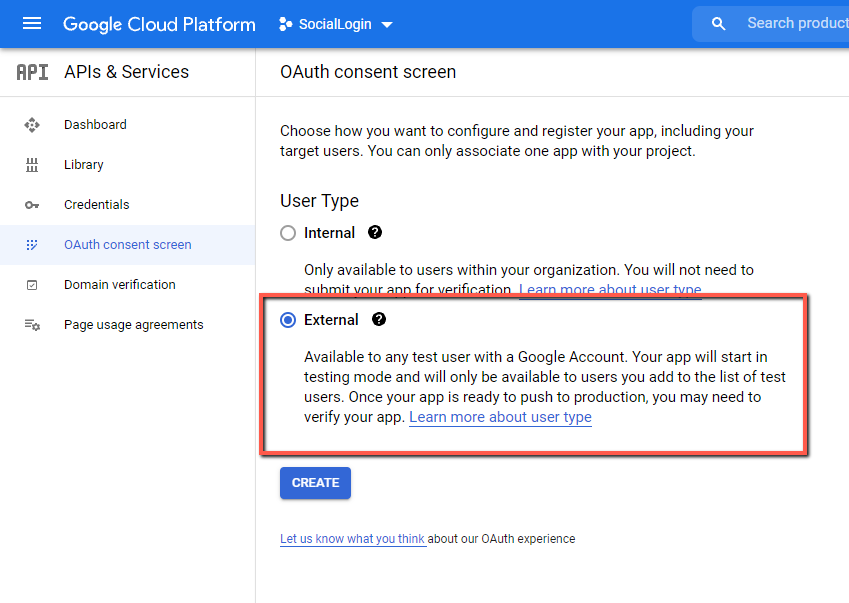
5. Click on “Configure Consent Screen”.
6. Choose “External” and click on “Create”.
7. In the page that will show up, fill all the required fields and click on “Save and Continue”.
8. In the screen that will appear click on “Add or Remove scopes”.
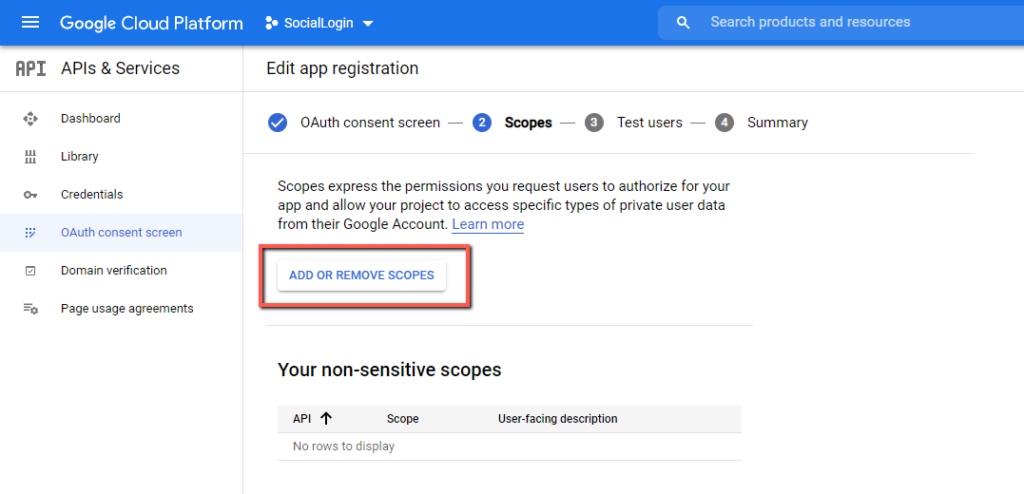
9. From the list only pick the following items:
…/auth/userinfo.email
…/auth/userinfo.profile
Click on the “Update” button at the bottom of the popup and then on “Save and continue” button.

10. Click “Save and continue” button also in the next step.
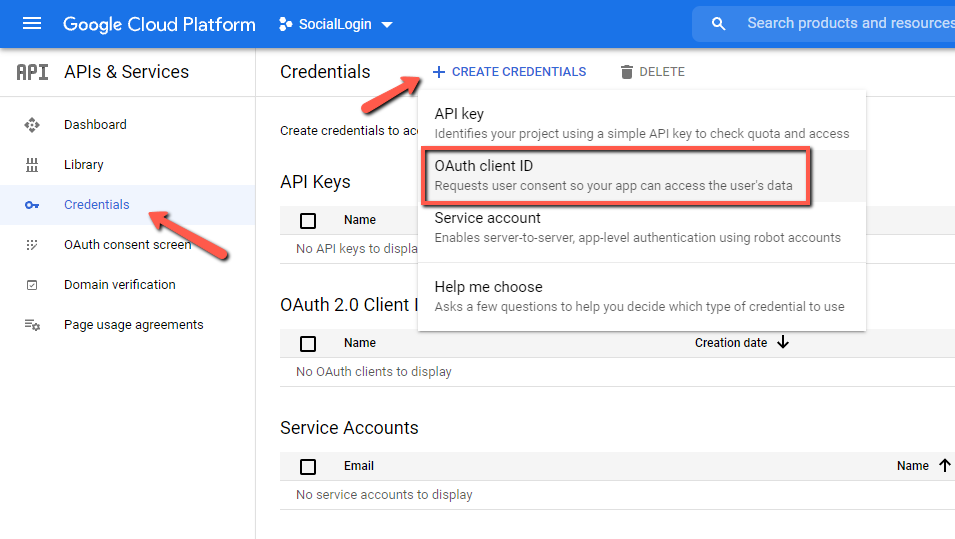
11. Click on “Credentials”, then on “Create Credentials” and finally on “OAuth Client ID”.
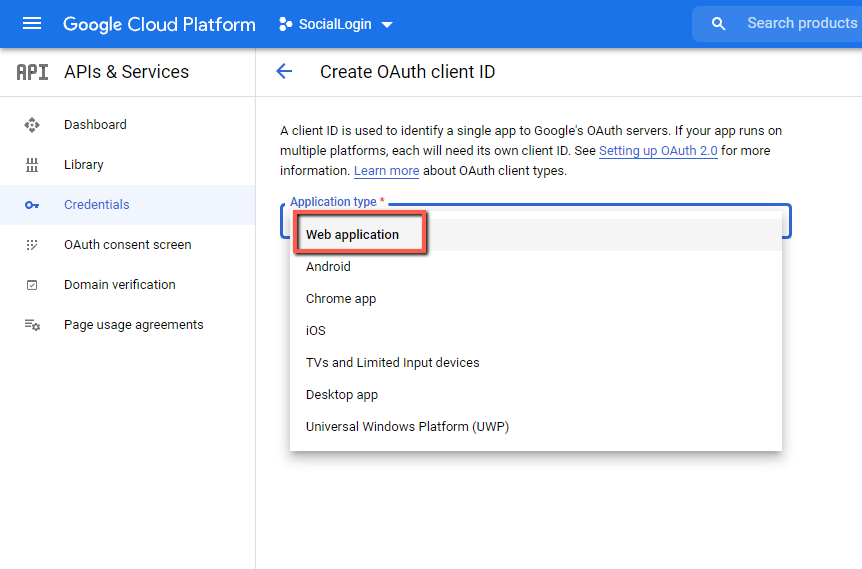
12. Choose “Web Application”.
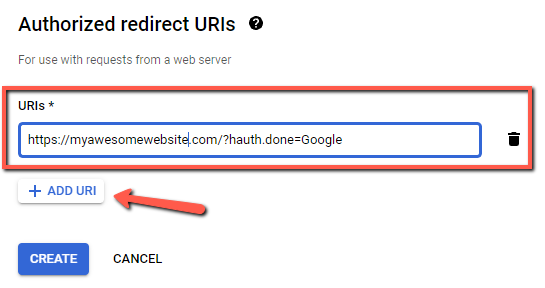
13. Click on “Add URI” and paste the URL that you can find in the Google tab in the plugin settings. Then, click on “Create” button.
14. A popup will appear with the keys that you will have to copy and paste into the Google tab in the plugin settings.