View Product Page

Content and template options

You can start configuring the reminder email that will be sent to customers from the tab Email settings.

Email subject and body

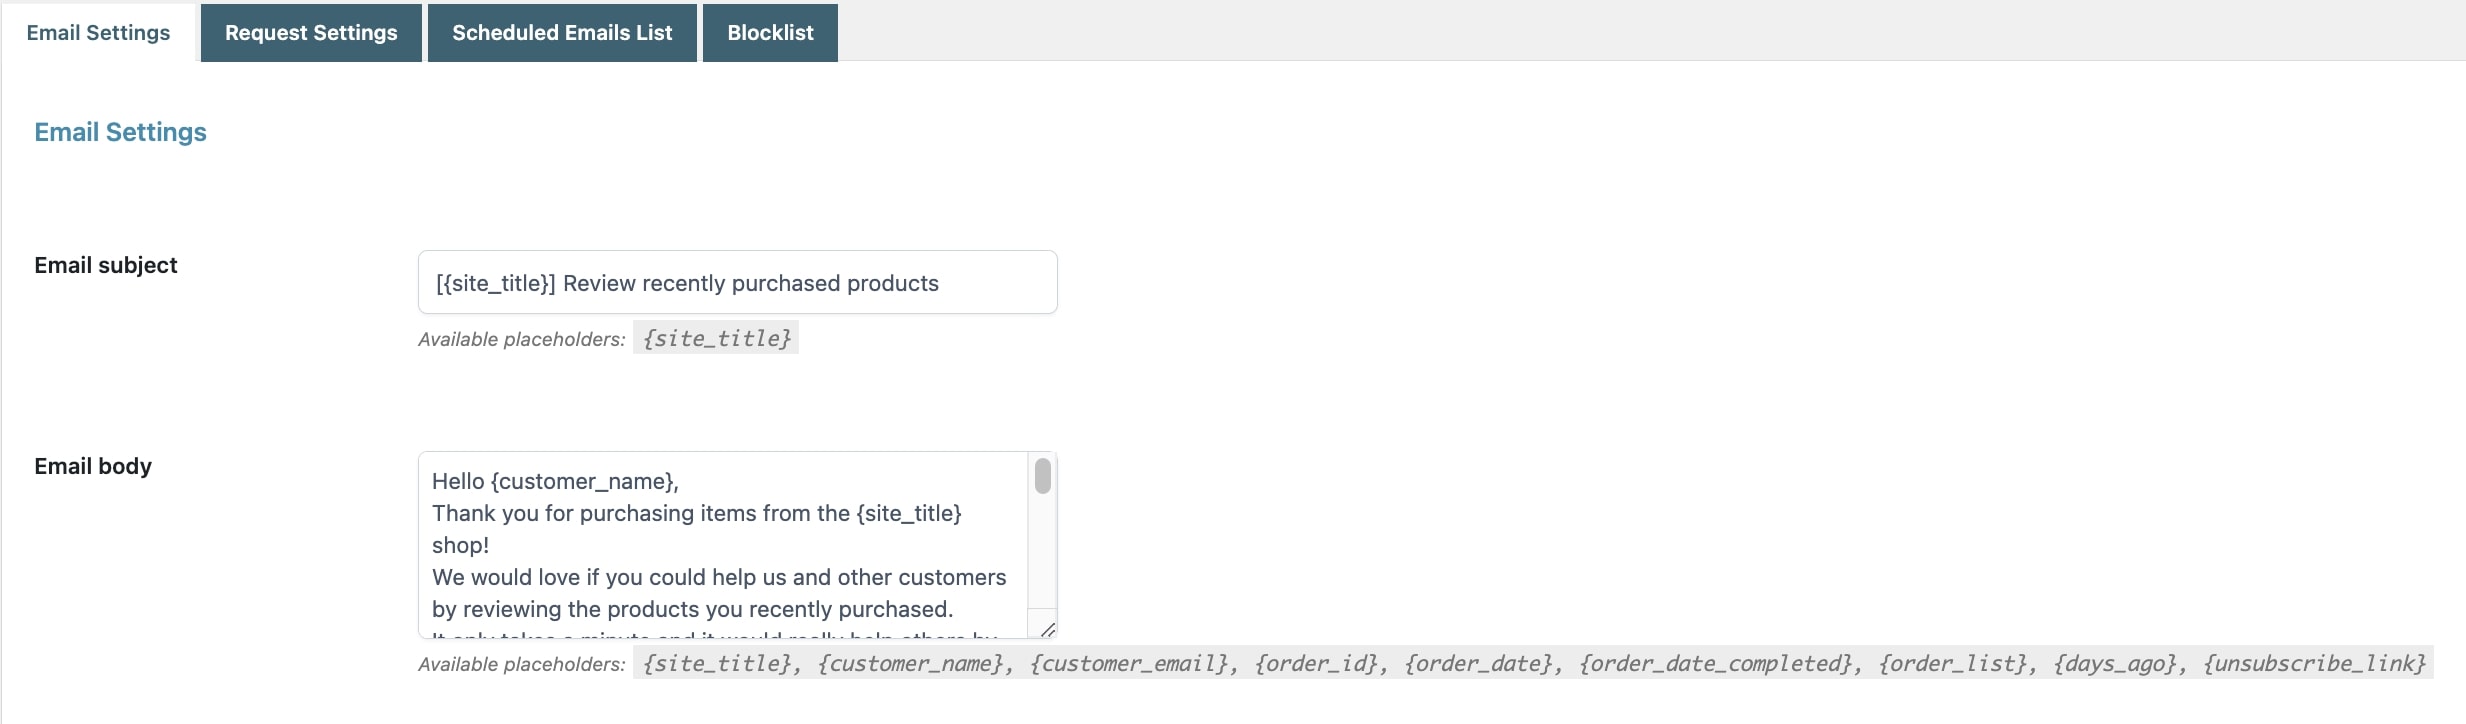
Here, you can define the email subject and enter the text for the body through the dedicated options. To dynamically add information, you can use the following placeholders:

  • {customer_name}: the customer’s name
  • {customer_email}: the customer’s email
  • {site_title}: the title of the site
  • {order_id} : the order ID
  • {order_date}: the date and the time of the order
  • {order_date_completed}: the date on which the order is completed
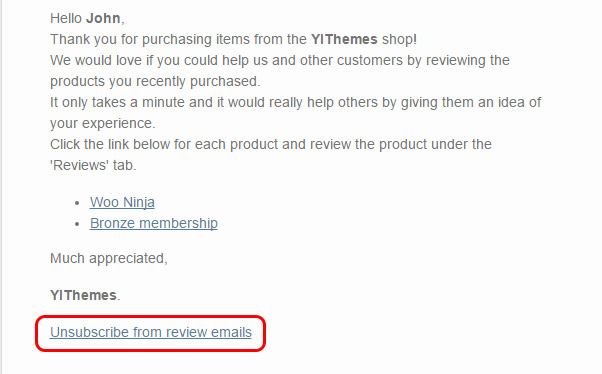
  • {order_list}: the list of the purchased products that still have to be reviewed. This parameter must be added inside the email text in order to keep its meaning and functionality.
  • {days_ago}: the number of days that passed between the purchase and the dispatching of the email.
  • {unsubscribe_link}: the link to let customers unsubscribe from receiving emails.

You can choose the email type from:

  • Plain text
  • HTML
  • Multipart
Email type

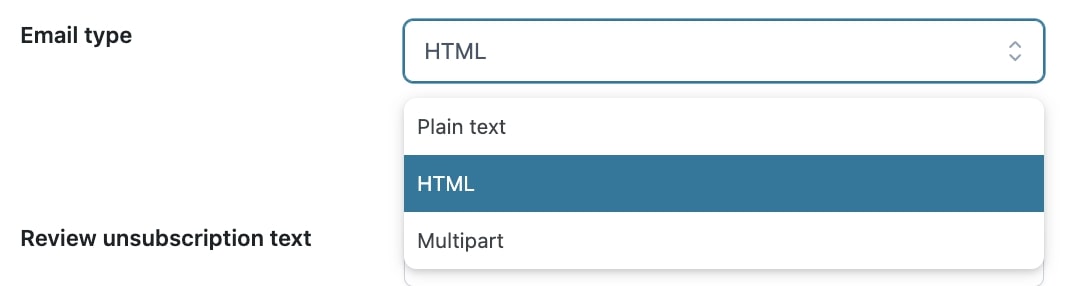
You can also customize the text of the unsubscription link shown in the email. Through this link, customers will have the possibility to unsubscribe from the reminder emails.

Unsubscribe link text

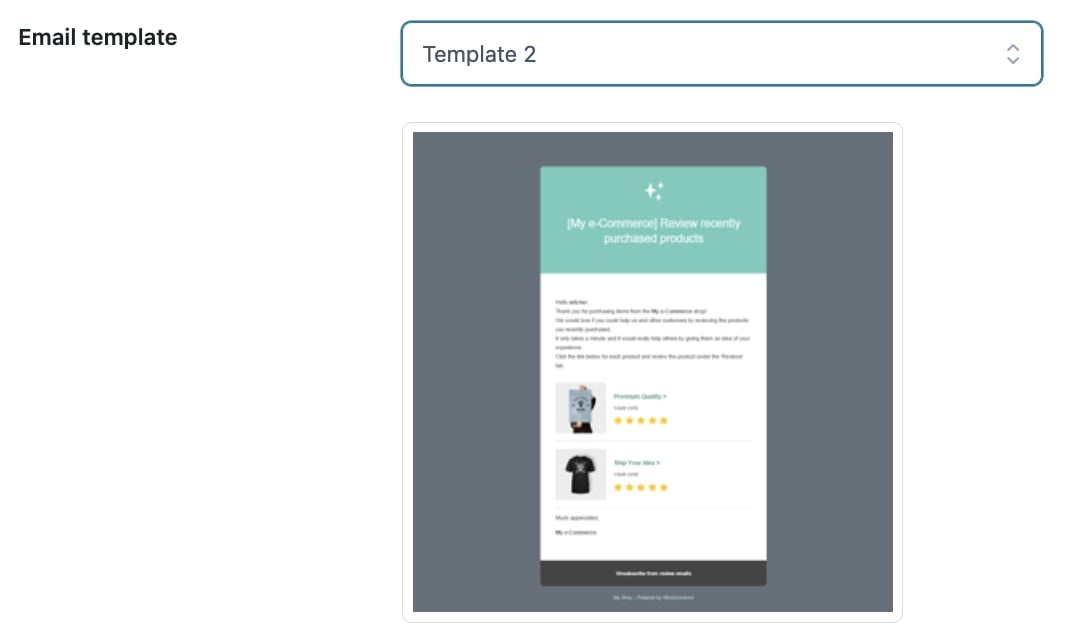
In addition to the standard WooCommerce email template, the plugin includes other three styles.

Email templates

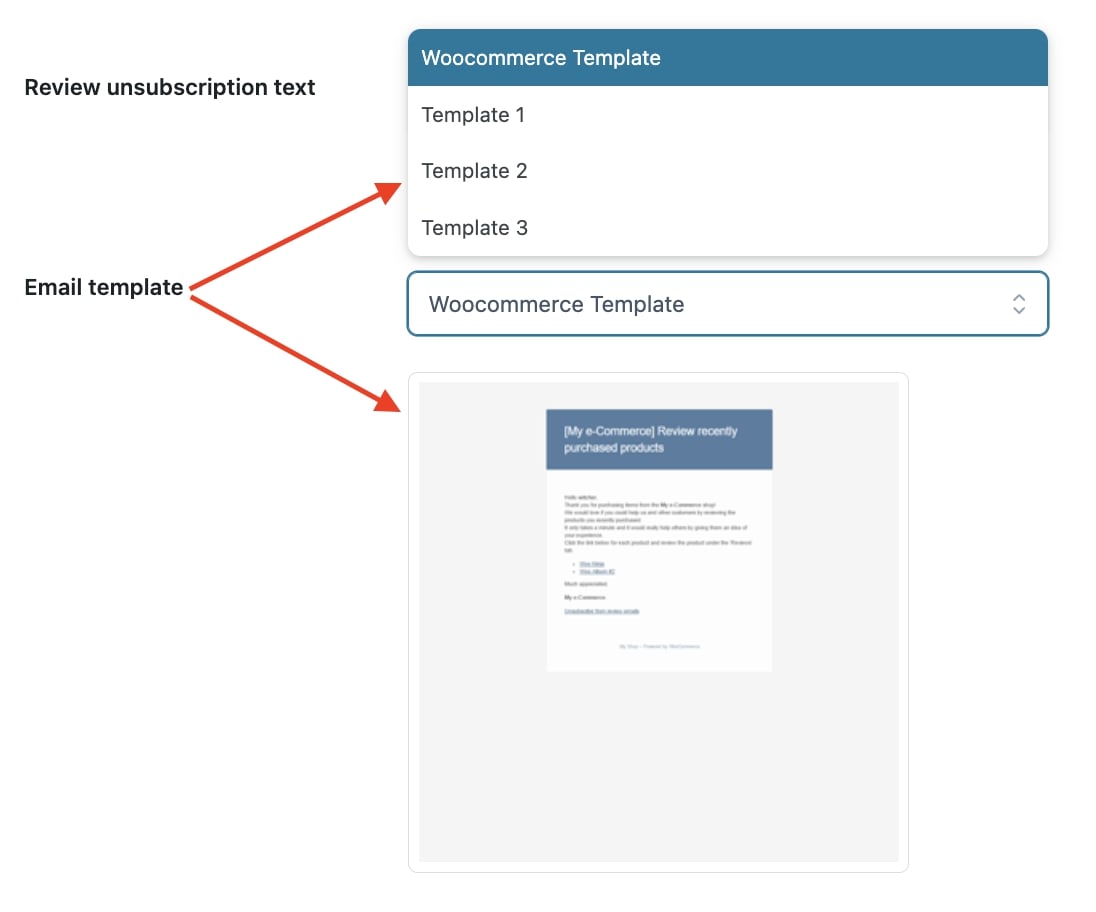
When selecting the template, you’ll get a preview in the dedicated box.

Template preview

Set destination

To choose the page to redirect users after clicking on the link for each product included in the email, go to Email settings and select one of the following options:

Set links destination
  • Product page
  • Default WooCommerce Reviews tab
  • Custom Anchor

When selecting Default WooCommerce Reviews tab, you can optionally set the HTML ID of the comments form to automatically scroll the page to it when clicking on the link. You can also enter a value to adjust the scrolling offset.

Comment form options

When selecting Custom Anchor, an additional field will show where you can enter the HTML ID of the comment tabs that will define the custom anchor.

Custom anchor

Finally, by enabling the option Login from email link, registered users will be redirected to the login page through the link included in the email to then be able to review the product.

Login from email link

Google Analytics

Through the option Add Google Analytics to email links that you find in Email settings, you can track the emails generated and sent to customers to invite them to review the products in your shop.
Before inserting the requested parameters to create your “campaign”, ensure to specify the monitoring code of Google Analytics in your site. Only in this case, the inserted parameters will be effective.

Google Analytics

For further information about the correct field settings, we suggest you consult official documentation of Google Analytics.

Mandrill settings

The option Enable Mandrill allows you to manage email sending with Mandrill. After enabling it, you can enter the API Key that you can find in your account.

Enable Mandrill

To use Mandrill, it’s required to have a MailChimp account.

Actions on order

Despite the email-sending system being automated, by accessing the Orders page you can manually intervene, performing one of the following actions using the dedicated buttons you find on the right of the page:

  • send a new reminder
  • schedule reminder
  • delete the email in order for it to be removed from the next planned scheduling.
Actions on order

Send a new reminder

If you want to send a new reminder email to the customer, just click on Send a new reminder and a popup will open. Here, you will be able to send the email right away or schedule the sending for a new date.

Send a new reminder

Schedule reminder

If you need to schedule email sending for orders for which no email was sent or those placed before starting to use the plugin, or in case you want to force the sending before the order is set to Completed, you can take advantage of the Schedule reminder option. By clicking on the button, a popup will open and you will be able to send the email right away or schedule the sending for a specific date.

Actions on orders

Delete a review reminder email

If for any reason, you want to cancel a scheduled email sending, you can easily do it by clicking on Delete and confirming the action from the popup.

Delete reminder sending

Bulk actions

These actions may also be performed massively, directly from the summary page. Select orders and choose the action you wish to perform from the drop-down menu of WordPress bulk actions.

Bulk actions

Request settings

Consent checkbox

By default, emails are sent to all the users who purchased products in your shop.
Yet, you can decide to send the emails only to those users who gave their consent during the checkout process.

You need to enable the option Don’t email me checkbox in the Request settings tab and enter the text for the checkbox label.

Don't email me checkbox

The checkbox will show on the Checkout page.

Checkbox on Checkout page

About users refusing to give their consent, their email addresses will be automatically added to the blocklist. In this way, they won’t receive any email to encourage them to review the products they have purchased.

Days to elapse

By default, emails are sent after 7 days from the change of order status to “Completed”. However, you can define the number of days after which the emails will be sent through the option Days to elapse.

Days to elapse

Changing this value WILL NOT re-schedule emails previously scheduled. If you want to reschedule them according to the new value, make sure to enable the Reschedule emails options.

Reschedule email options

Request reviews for

You can ask your customers to review all the products included in the order or only some of them by selecting the related option in Request a review for.

Request reviews options

By choosing the option Specific products, you will need to set the number of products to be included in the email among those available in the order. You can then choose the products from several solutions:

Products to review
  • First products(s) bought: the first products added;
  • Last products(s) bought: the last products added;
  • Products with highest number of items bought: the products with the highest quantity in the order;
  • Products with lowest number of items bought: the products with the lowest quantity in the order;
  • Products with highest number of reviews: the most reviewed products;
  • Products with lowest number of reviews: the least reviewed products;
  • Products with highest price: the most expensive products;
  • Products with lowest price: the cheapest products;
  • Products with highest total value: the most expensive group of products in the order;
  • Products with lowest total value: the cheapest group of products in the order;
  • Random: a random selection.

Advanced Tools

In the Request Settings section of the plugin, there are  5 options available to let you schedule emails for your previous orders and have better management of the Scheduled Email List.
Let’s analyze them:
Advanced tools

  • Show in Orders page: by enabling this option, the plugin will add a Review Reminder column to the WooCommerce Orders page where you will be able to manage email sending/scheduling as described here.
  • Bulk Schedule: by using the Bulk schedule button, you will be able to schedule email sending for all of the orders which generally won’t provide email scheduling.
    This option can be useful if you want to ask for reviews about orders that were placed before you started using YITH WooCommerce Review Reminder.
  • Bulk Unscheduled: this option allows unscheduling all pending emails from the Scheduled Emails List. It is useful in case you apply the Bulk Schedule by mistake or if you decided not to use the plugin for a while and avoid any bulk sending when reactivating it.
  • Clear sent emails from Schedule List: by clicking on the related button, you will clear all the emails sent from the Scheduled Emails List.
    This option can be used to help you reduce the weight of your database.
  • Clear cancelled emails from Schedule List: by clicking on the related button, you will clear all the emails canceled from the Scheduled Emails List.
    This option can be used to help you reduce the weight of your database.


Scheduled email list

In the section Scheduled emails list, you can find the list of reminder emails that have been scheduled. Here, you can see all the emails sent, on hold, and canceled. A counter will show the exact number of emails for every single status so that their management will be easier.

Scheduled emails list

Within the same section, you can find an option to cancel scheduled emails with a bulk action. This option is useful in case you have massively scheduled emails also for old orders previously placed.

Bulk-cancel scheduled emails

Blocklist

In the tab Blocklist, you will find the complete list of all the users who requested not to receive emails asking to review the products of your shop.

Blocklist

The users can deny consent to receive the Review Reminder emails. In this case, they will be automatically added to the Blocklist in two different ways:

  • by clicking on the related link they find in one of the emails to encourage them to review

Unsubscribe link

Checkbox on checkout page

You can also add a new user to this list manually by entering the email address you want to block and clicking on the Add email button.

Add user to blocklist