View Product Page

Content and template options

You can start configuring the reminder email that will be sent to customers from the tab Email settings.

Email subject and body

Here, you can define the email subject and enter the text for the body through the dedicated options. To dynamically add information, you can use the following placeholders:

  • {customer_name}: the customer’s name
  • {customer_email}: the customer’s email
  • {site_title}: the title of the site
  • {order_id} : the order ID
  • {order_date}: the date and the time of the order
  • {order_date_completed}: the date on which the order is completed
  • {order_list}: the list of the purchased products that still have to be reviewed. This parameter must be added inside the email text in order to keep its meaning and functionality.
  • {days_ago}: the number of days that passed between the purchase and the dispatching of the email.
  • {unsubscribe_link}: the link to let customers unsubscribe from receiving emails.

You can choose the email type from:

  • Plain text
  • HTML
  • Multipart
Email type

You can also customize the text of the unsubscription link shown in the email. Through this link, customers will have the possibility to unsubscribe from the reminder emails.

Unsubscribe link text

In addition to the standard WooCommerce email template, the plugin includes other three styles.

Email templates

When selecting the template, you’ll get a preview in the dedicated box.
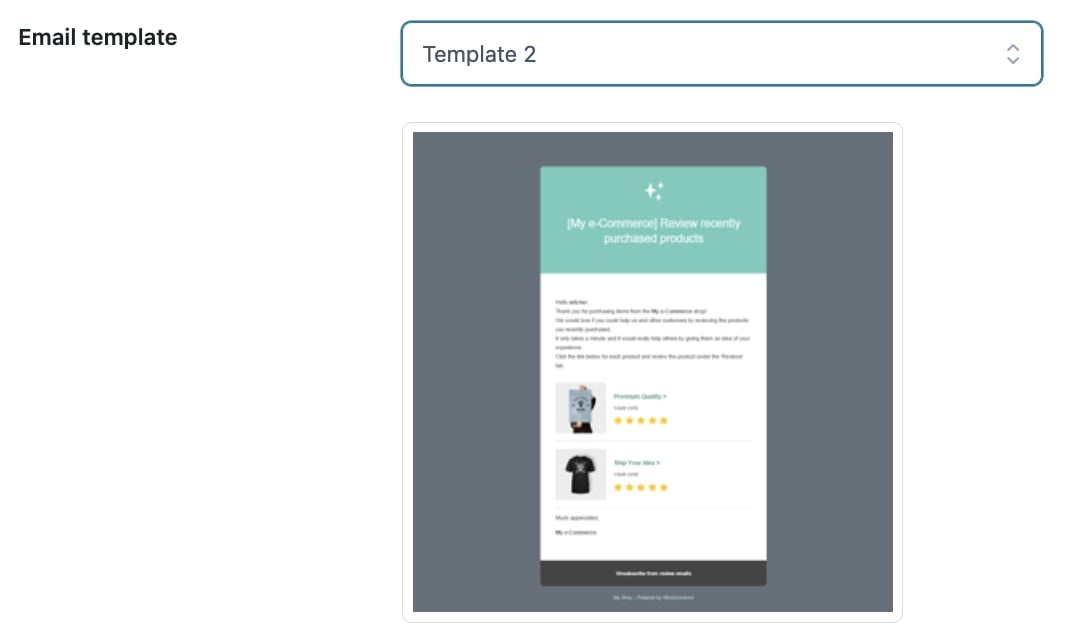
Template preview

Set destination

To choose the page to redirect users after clicking on the link for each product included in the email, go to Email settings and select one of the following options:

Set links destination
  • Product page
  • Default WooCommerce Reviews tab
  • Custom Anchor

When selecting Default WooCommerce Reviews tab, you can optionally set the HTML ID of the comments form to automatically scroll the page to it when clicking on the link. You can also enter a value to adjust the scrolling offset.

Comment form options

When selecting Custom Anchor, an additional field will show where you can enter the HTML ID of the comment tabs that will define the custom anchor.

Custom anchor

Finally, by enabling the option Login from email link, registered users will be redirected to the login page through the link included in the email to then be able to review the product.

Login from email link

Google Analytics

Through the option Add Google Analytics to email links that you find in Email settings, you can track the emails generated and sent to customers to invite them to review the products in your shop.
Before inserting the requested parameters to create your “campaign”, ensure to specify the monitoring code of Google Analytics in your site. Only in this case, the inserted parameters will be effective.

Google Analytics

For further information about the correct field settings, we suggest you consult official documentation of Google Analytics.

Mandrill settings

The option Enable Mandrill allows you to manage email sending with Mandrill. After enabling it, you can enter the API Key that you can find in your account.

Enable Mandrill

To use Mandrill, it’s required to have a MailChimp account.

Actions on order

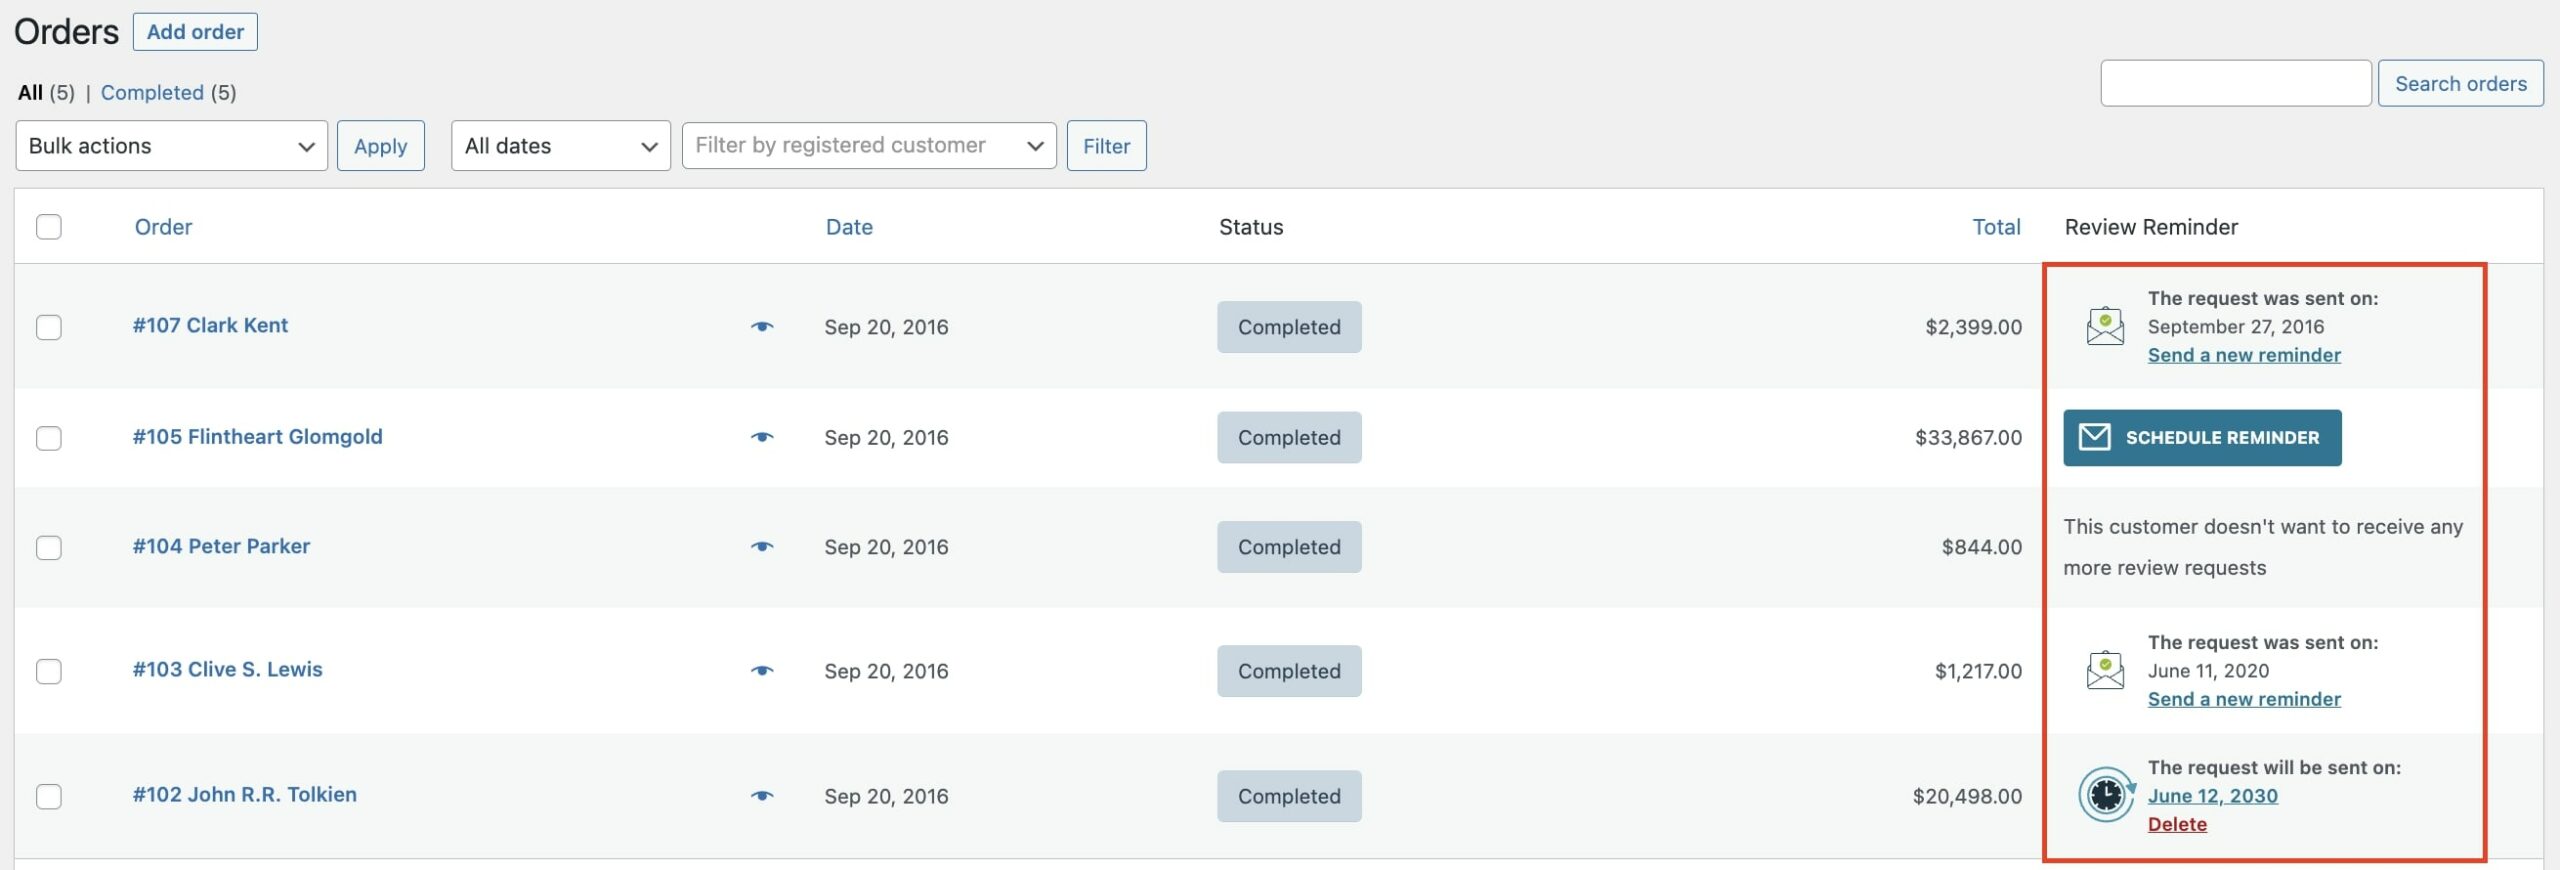
Despite the email-sending system being automated, by accessing the Orders page you can manually intervene, performing one of the following actions using the dedicated buttons you find on the right of the page:

  • send a new reminder
  • schedule reminder
  • delete the email in order for it to be removed from the next planned scheduling.
Actions on order

Send a new reminder

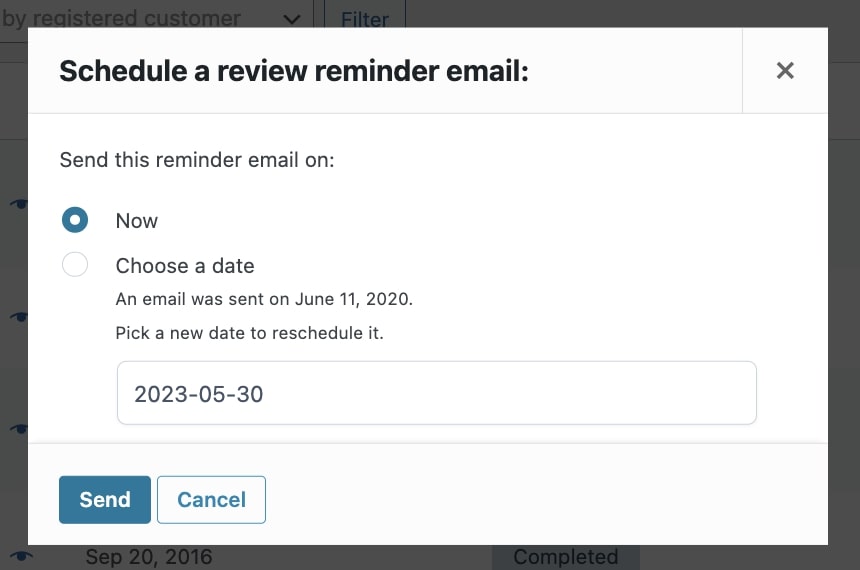
If you want to send a new reminder email to the customer, just click on Send a new reminder and a popup will open. Here, you will be able to send the email right away or schedule the sending for a new date.

Send a new reminder

Schedule reminder

If you need to schedule email sending for orders for which no email was sent or those placed before starting to use the plugin, or in case you want to force the sending before the order is set to Completed, you can take advantage of the Schedule reminder option. By clicking on the button, a popup will open and you will be able to send the email right away or schedule the sending for a specific date.

Actions on orders

Delete a review reminder email

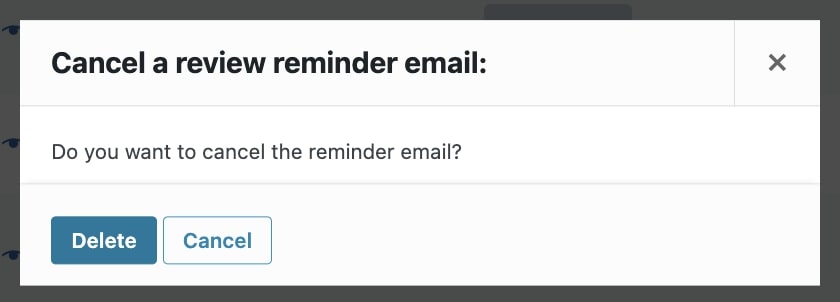
If for any reason, you want to cancel a scheduled email sending, you can easily do it by clicking on Delete and confirming the action from the popup.

Delete reminder sending

Bulk actions

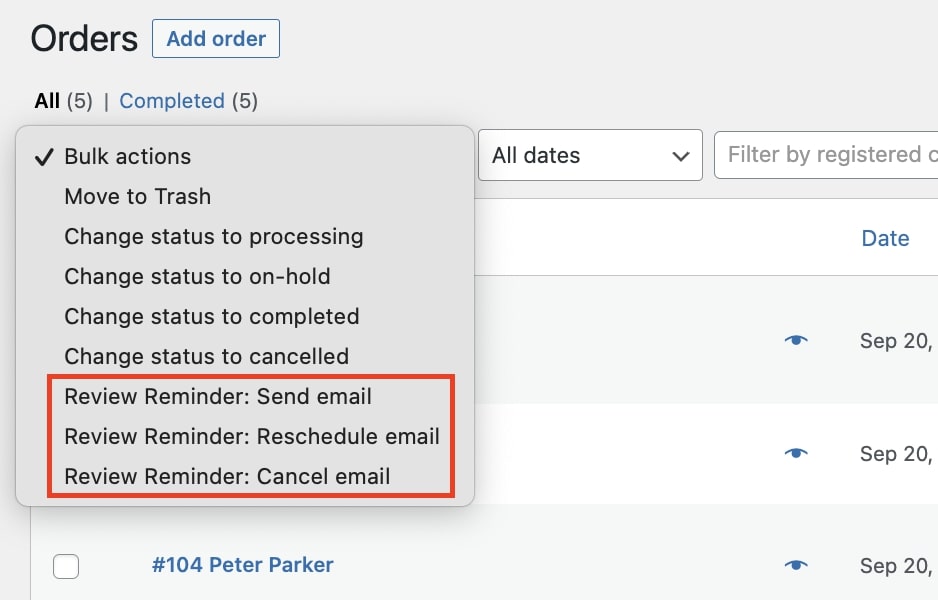
These actions may also be performed massively, directly from the summary page. Select orders and choose the action you wish to perform from the drop-down menu of WordPress bulk actions.

Bulk actions