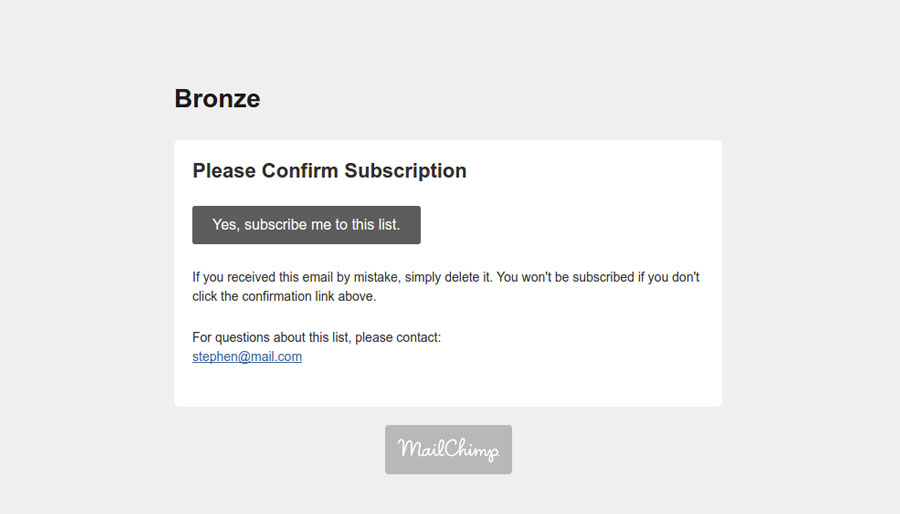
If the “Double Opt-in” option available in the Checkout tab is enabled, an email will be sent to the user who has completed the order on your shop. The subscription to the MailChimp list occurs only if the users give their consent by the specific button available in the email.
To add the registration form to your site pages, you can use the shortcode and/or widget. Widget and shortcode have two different forms that must be configured in the plugin’s dedicated tabs (Shortcode and Widget).
Shortcode
Widget
To insert the Mailchimp registration form through shortcode, add [yith_wcmc_subscription_form] to the site page.
The configuration options concerning the forms associated to the widget and shortcode are the same as the checkout registration form. Therefore we suggest you follow the instructions already analyzed on this page.
Interest groups
An essential note about the interest groups associated to the list (when available). The plugin gives you the possibility to choose an action when the users register through the widget or shortcode:
if the user makes a request for registration, they can be automatically inserted in one or more interest groups
the user can choose the interest group to which they want to register
Registration form fields
By default, the registration form has only the email field. However, it is possible to add an unlimited number of fields. You can insert all the fields you have configured in the “List fields and *|MERGE|* tags” MailChimp section.
Shortcode attributes
In case you needed to use the attributes of the shortcode, here you find the whole list available for you.
title => (string) ‘form title’
submit_label => (string) ‘submit botton label’
email_type => (html/text) ‘preferential email type for the user’
The plugin gives you the possibility to export directly from your store a set of users for your MailChimp list. You can automatically export to your MailChimp account or into a CSV file manually.
Let’s analyze each option in detail to understand how they work.
MailChimp list: MailChimp list to which you want to export the list of users coming from your store;
Email type: type of email generated by MailChimp that will be sent to every user imported from your store;
Double Opt-in: each user will receive a notification email, in which they will confirm their subscription to the newsletter;
Update existing: if users are already registered to the MailChimp list, their profiles will be updated;
Users set: users of your shop that you want to export to the specified MailChimp list. You can choose among three different possibilities:
all users
all users registered to your store
only specific users that you add manually
you can filter users by product, category, tag of the purchased products or order completion date.
If you have exported the list of user list in CSV format, we suggest you follow the Mailchimp guidelines in order to import in the correct way.
With the Store integrations option, you can now register all orders performed on your store to MailChimp. You can create campaigns targeted based on customer purchasing preferences.
When you connect your store, you basically tell the system that from the next purchase on, it should register orders within the customer.
After you connect your store, a sync option will appear, if you want all your previous users and customers to be registered in Mailchimp.
This process will cycle the orders registered in your store, and send them to MailChimp, this way you’ll have all your customers and orders in there.
You can stop the synchronizing process at any time, you will see the sync status in the message below the button.
You can sync again at any time by clicking on the ‘Sync again’ button and the process will be repeated.
Apart from the sync process, the store integration just interacts with the default subscription process. So, when the customers purchase and accept to be registered to MailChimp, their mail is registered, as well as their current order.
With the store integration enabled, the plugin registers your customers data that you can then use to create custom campaigns in your MailChimp account.
Registered data are:
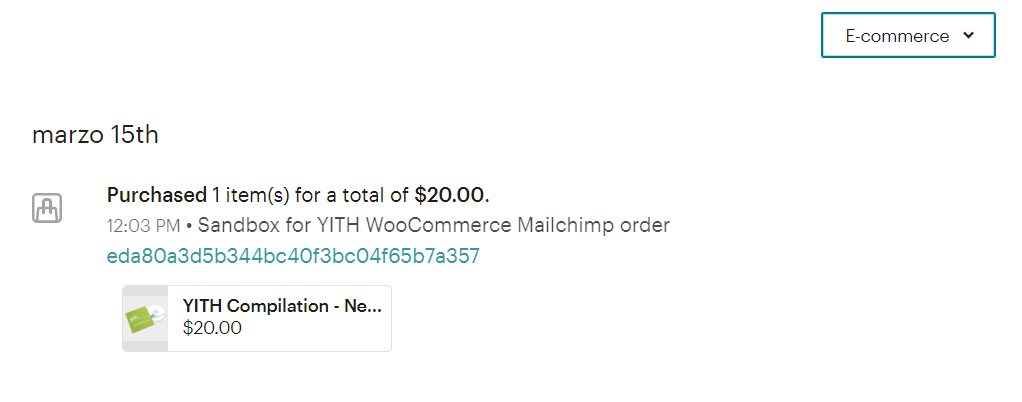
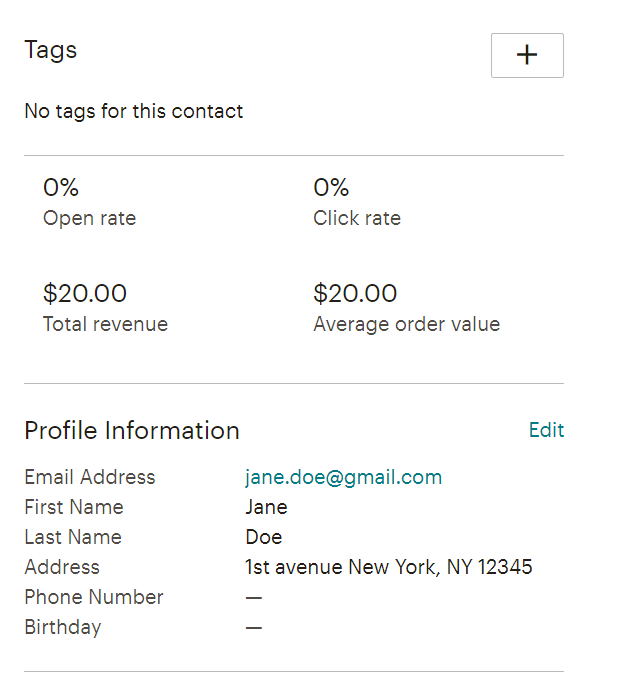
Orders: this information allows the creation of campaigns for first-time customers (number of orders placed), best customers (Spent) and similar features;
Products and product variations: this information allows the creation of follow-up campaigns and segments your customers based on what they’ve purchased;
Coupons: this keeps track of coupon codes used in your customers’ orders;
Carts: this records the cart contents (items, price, etc.) of logged-in users and can be used for recover-abandoned-cart campaigns and similar.
Below, you will find a couple of examples with regard to the possibilities ‘store integration’ offers.
Available options in MailChimp for connected stores:
E-commerce activity for a subscriber:
E-commerce revenue for a subscriber:
Available options for campaigns, related to the store integration:
Abandoned cart email, first-time customers, reward your best customers, retarget site visitors, order notifications, follow up on purchase, win back lapsed customers, postcard
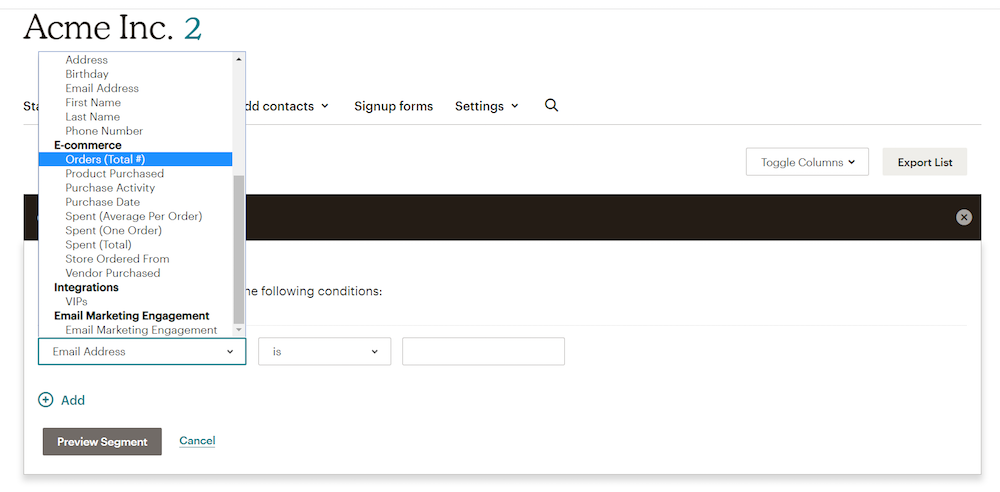
Available options for segmenting related to the store integration:
The plugin is ready to use with the block editor. When you add a new post or page, you will be able to find our YITH shortcodes and widgets. With a simple click, they will be added to your page.