View Product Page

Creation of attributes

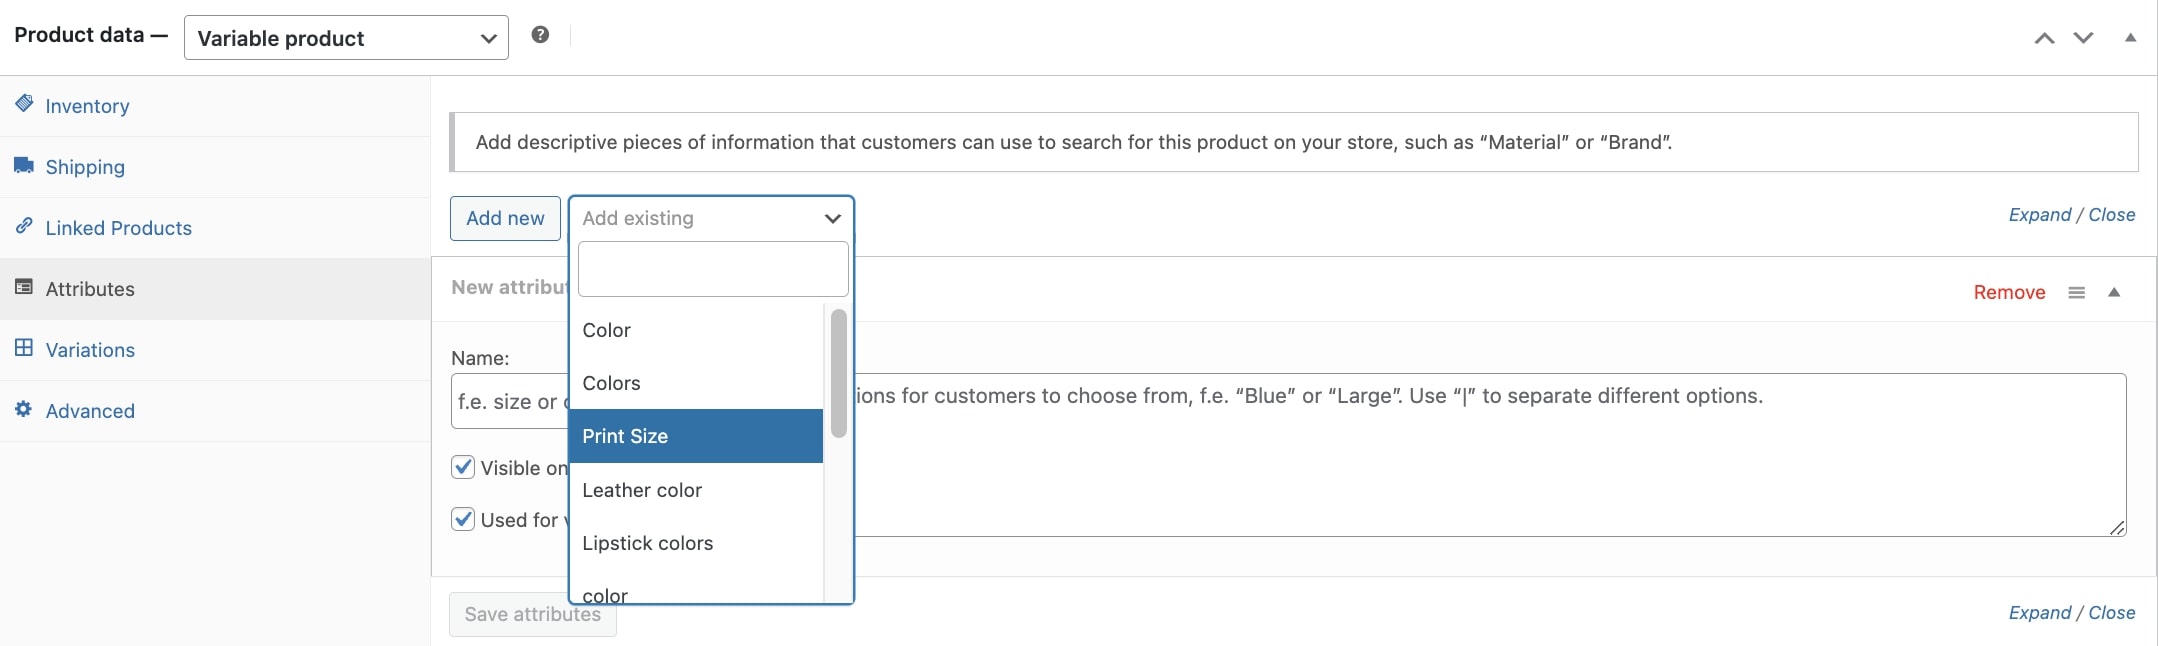
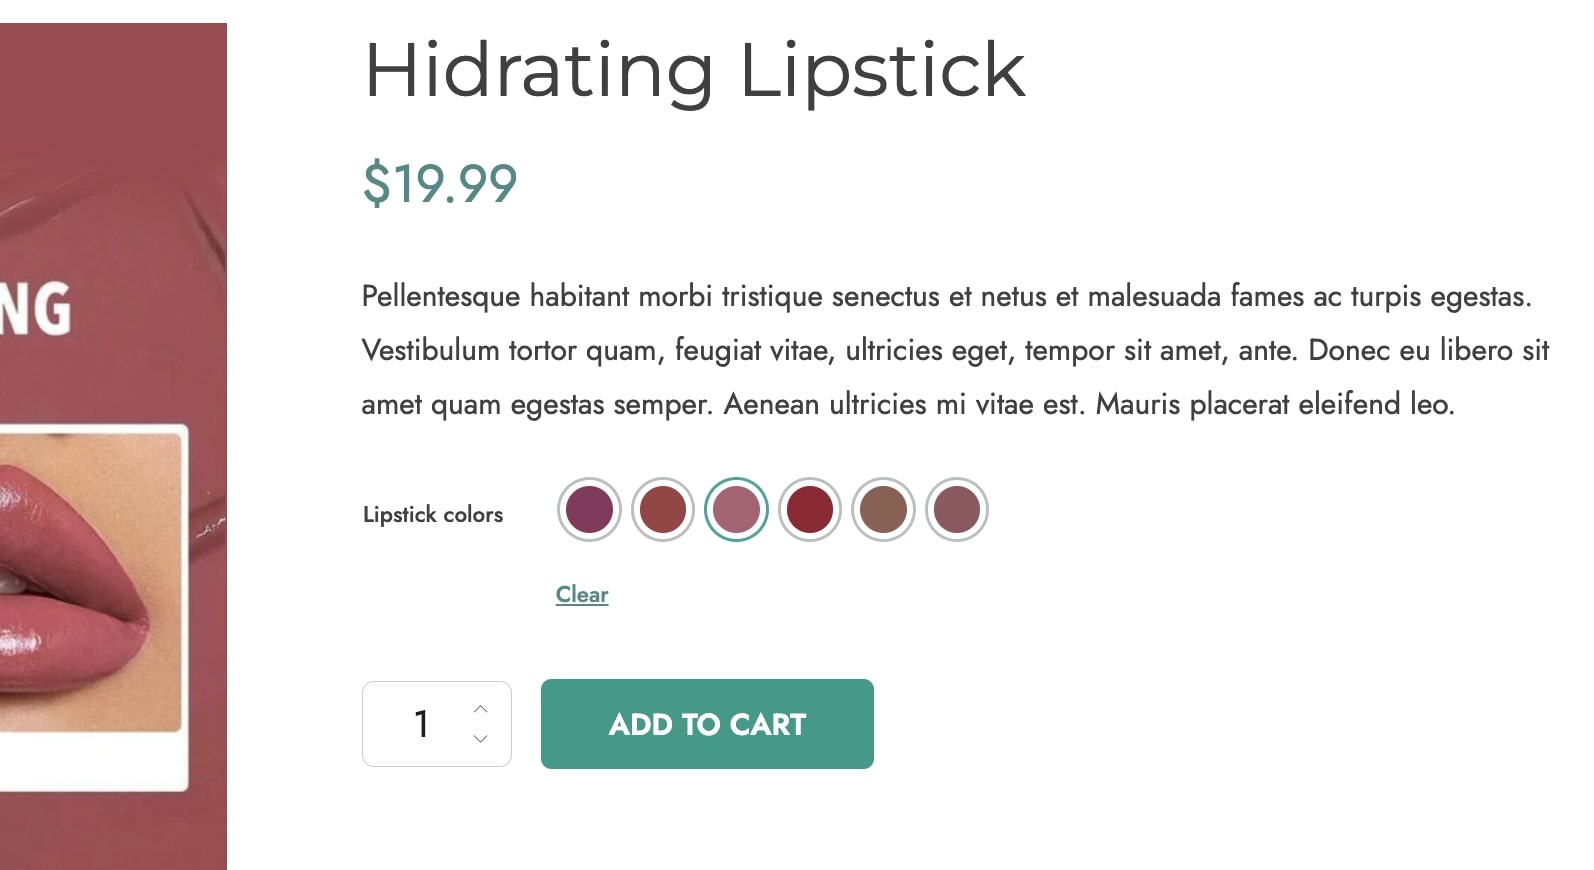
To start creating custom attributes for your product variations, go to WooCommerce > Products > Attributes.

Product attributes

Now, you can configure the following fields:

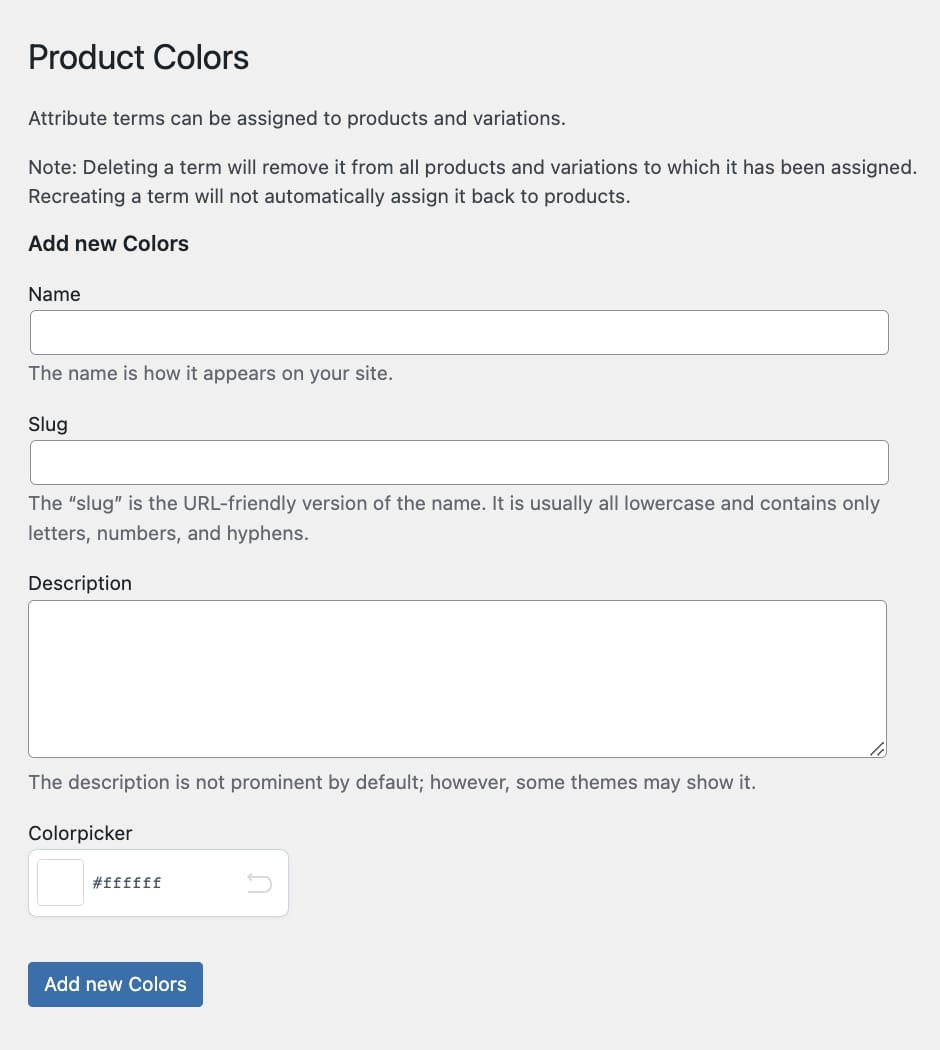
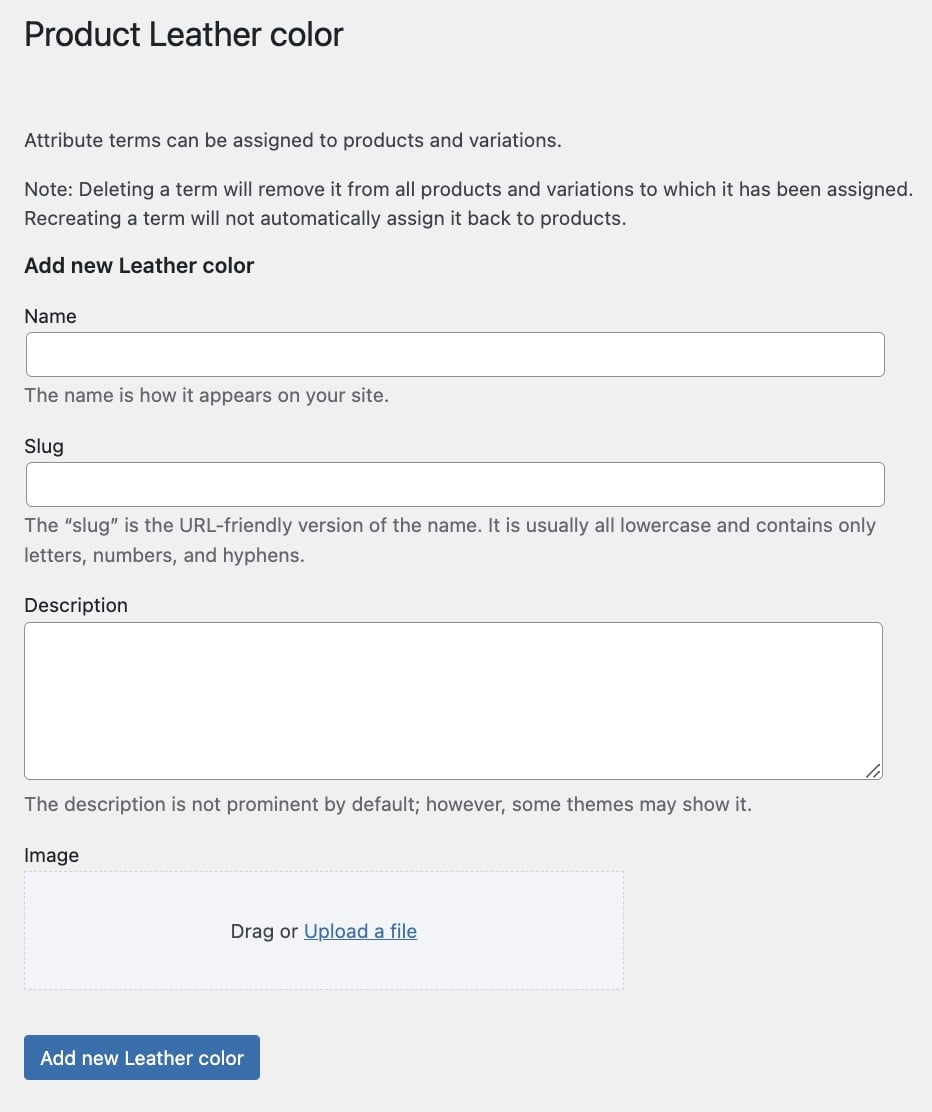
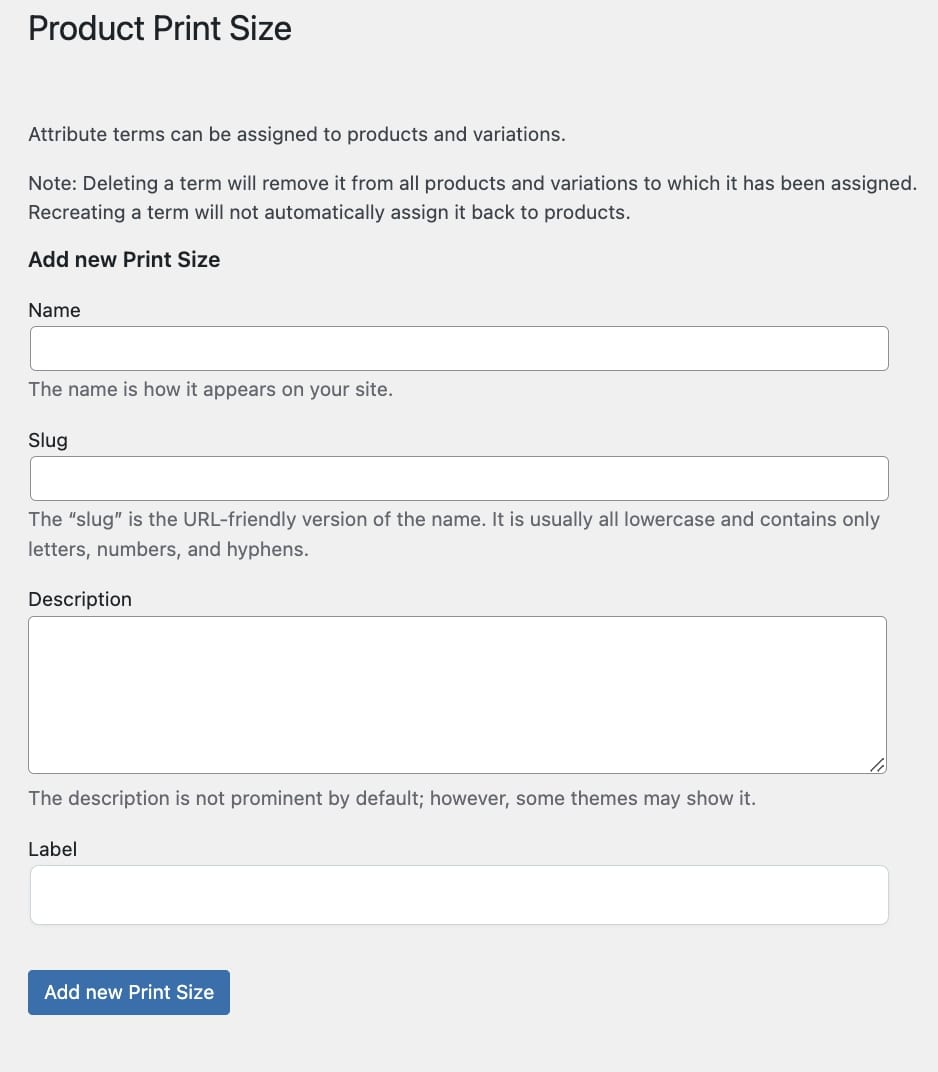
  • Name: enter the name for the attribute that will show on the frontend;
  • Slug: enter the slug for the attribute (max number of characters: 28);
  • Enable Archives: enable this option if you want the attribute to have product archives in your store;
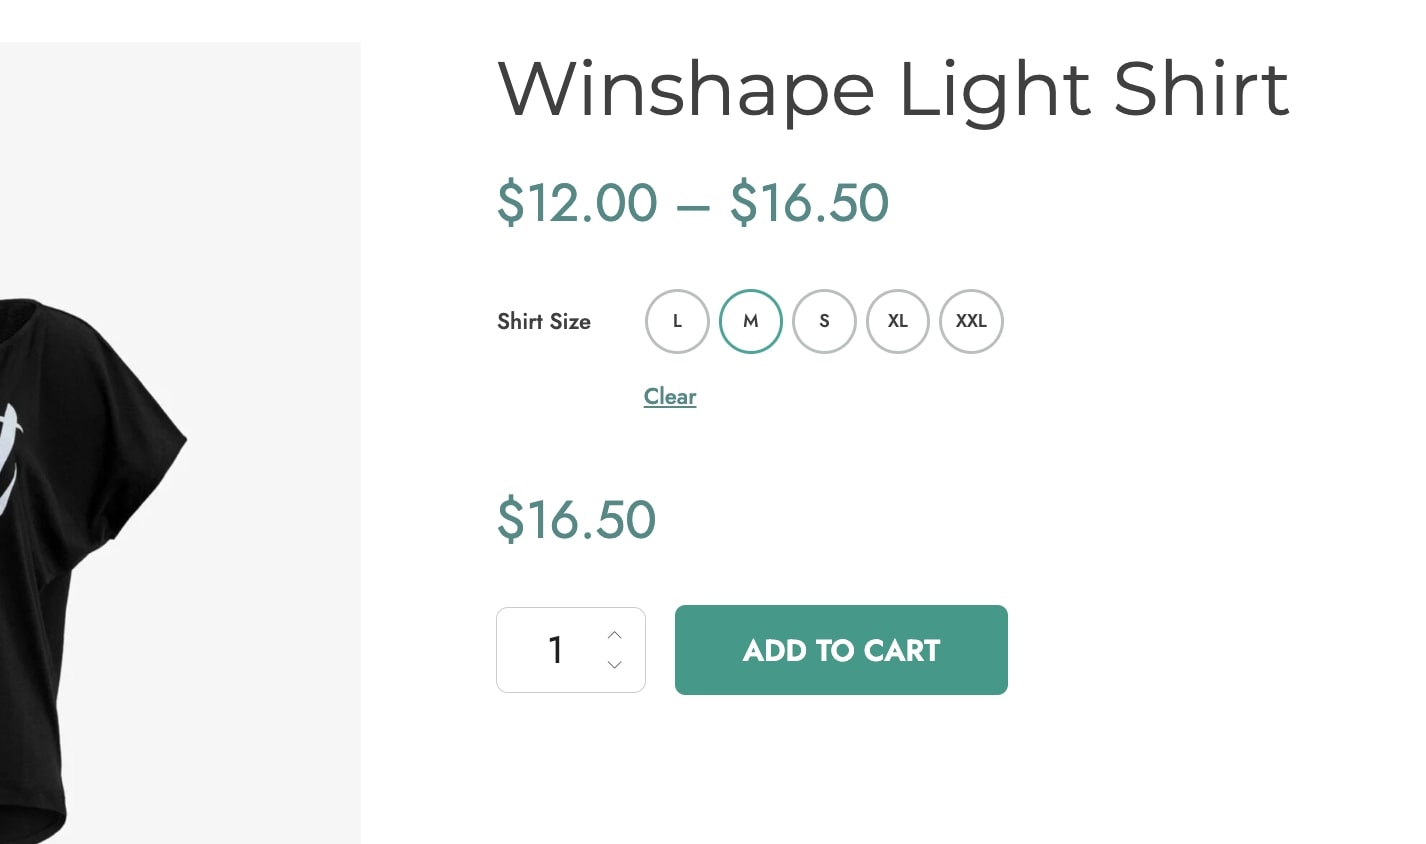
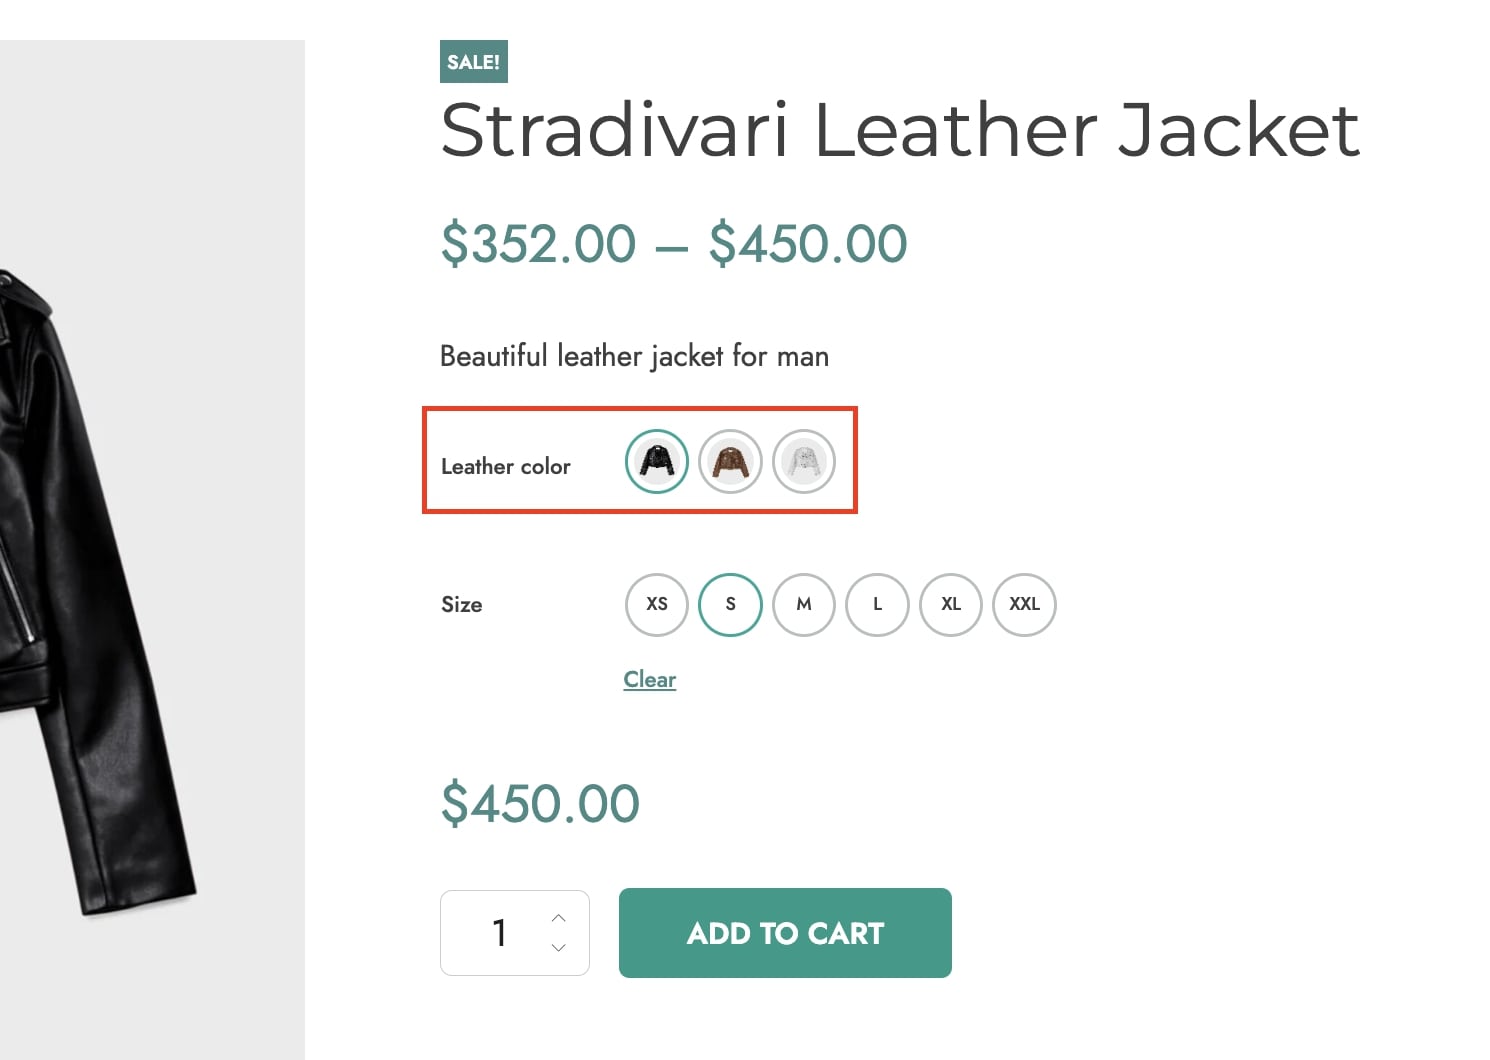
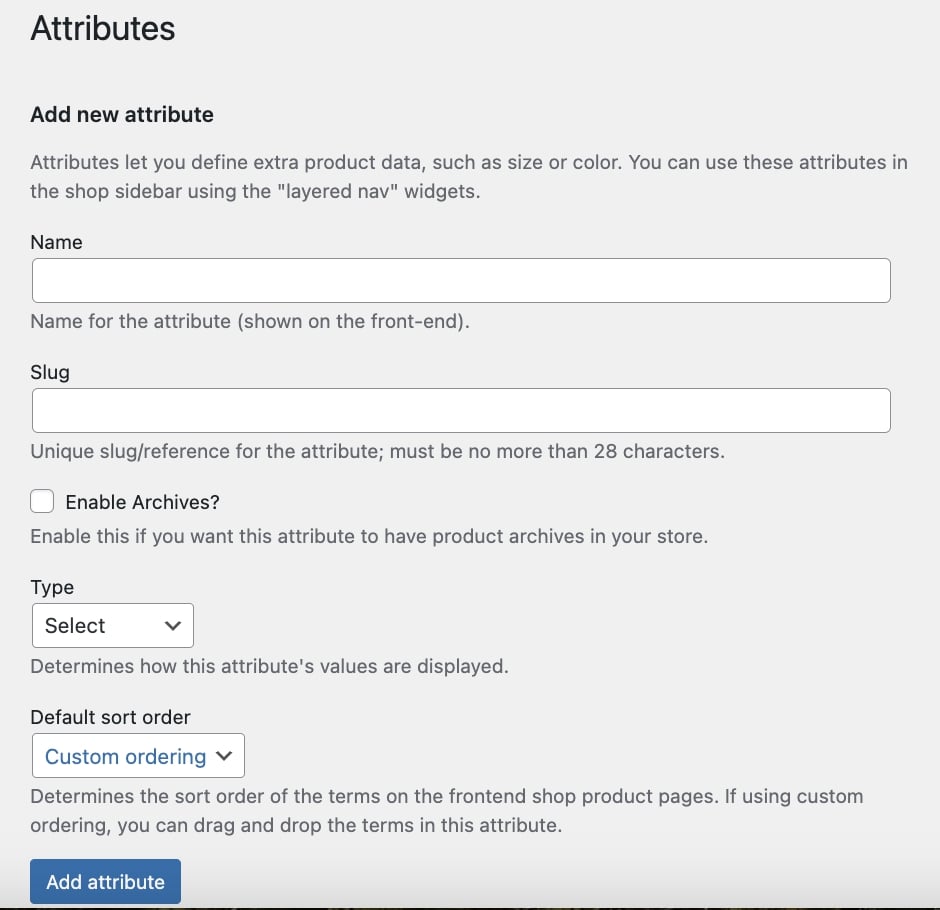
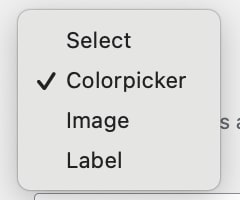
  • Type: attribute type. In addition to the standard WooCommerce select, the plugin adds the following attribute types: Colorpicker, Image, and Label;
Attribute types
  • Default sort order: select the sort order of the terms on the frontend;
  • Description: enter the attribute description.
Attribute example

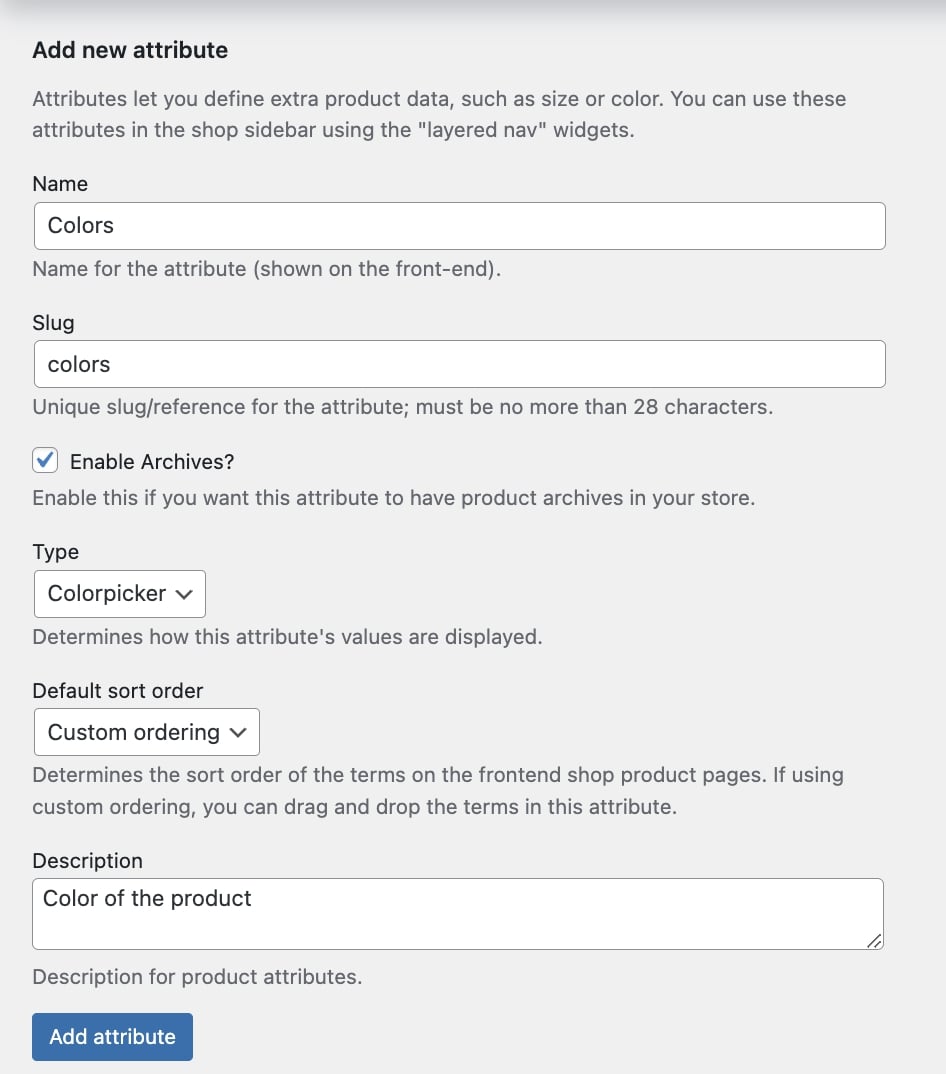
To save the attribute, click on the button Add attribute.

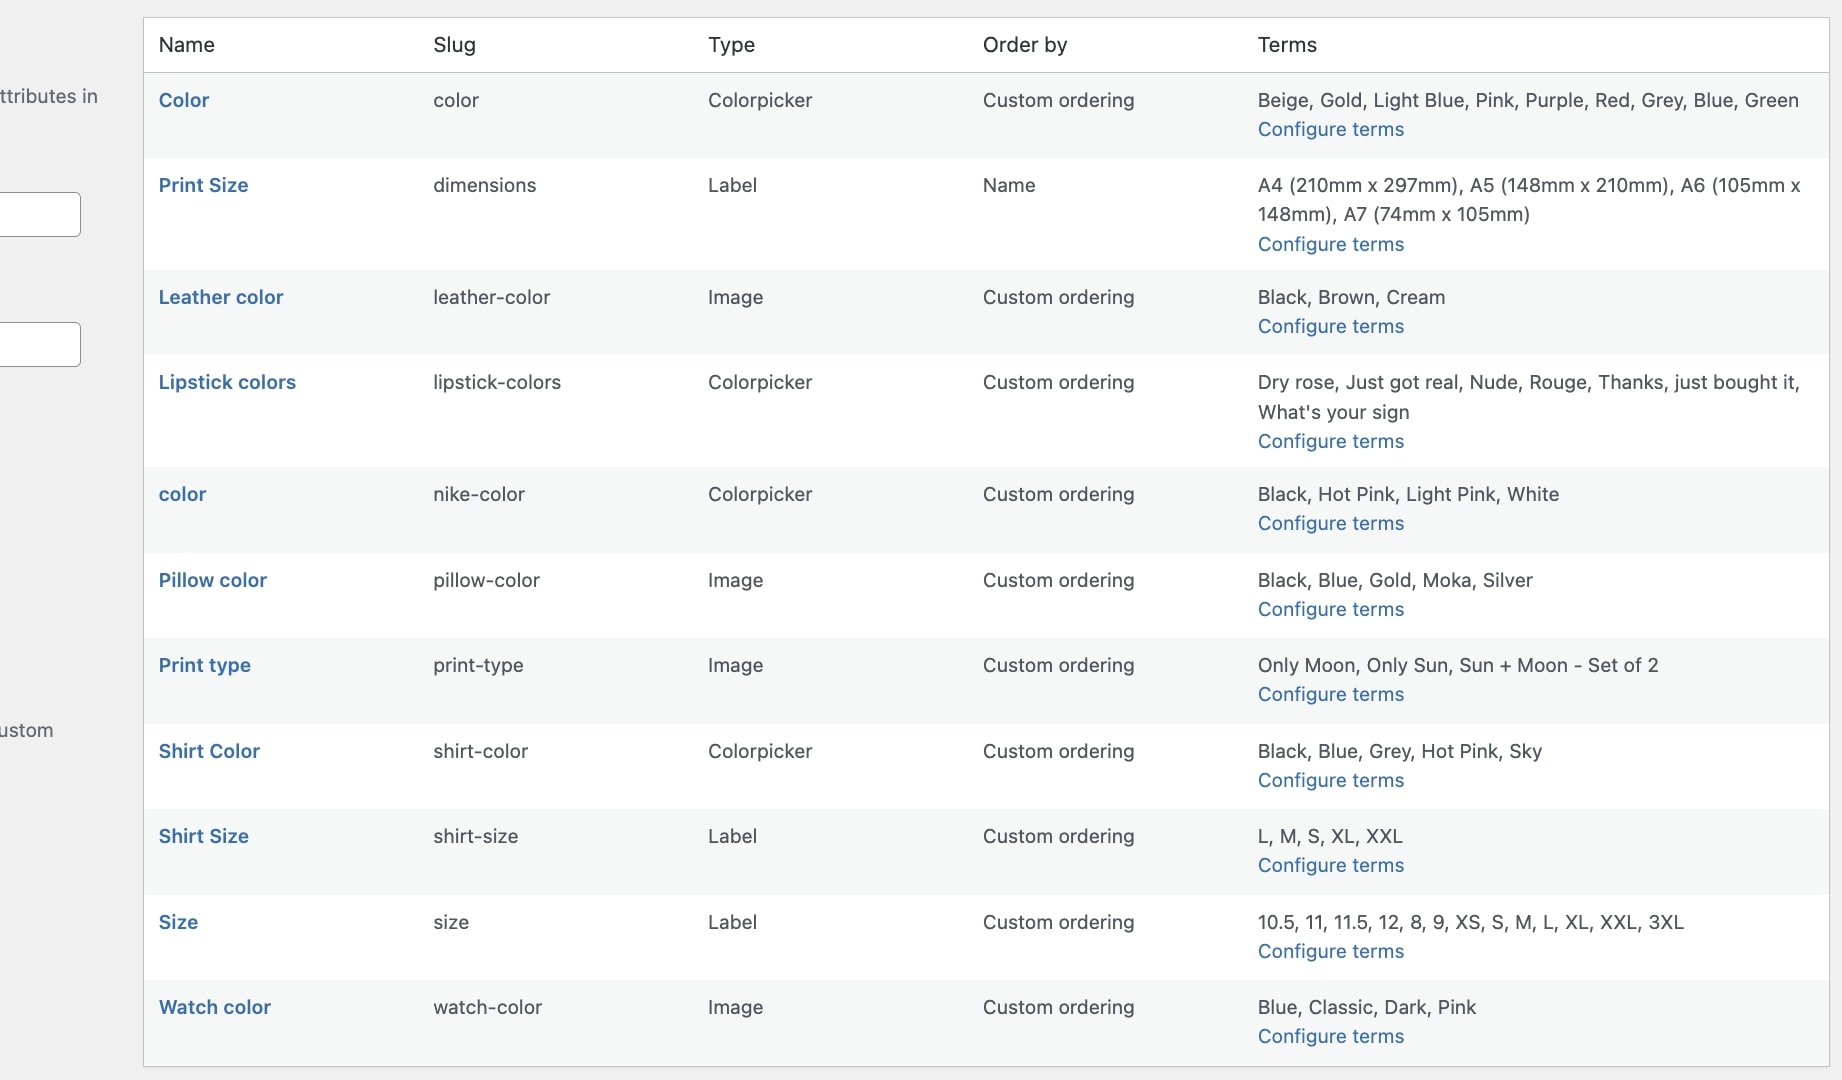
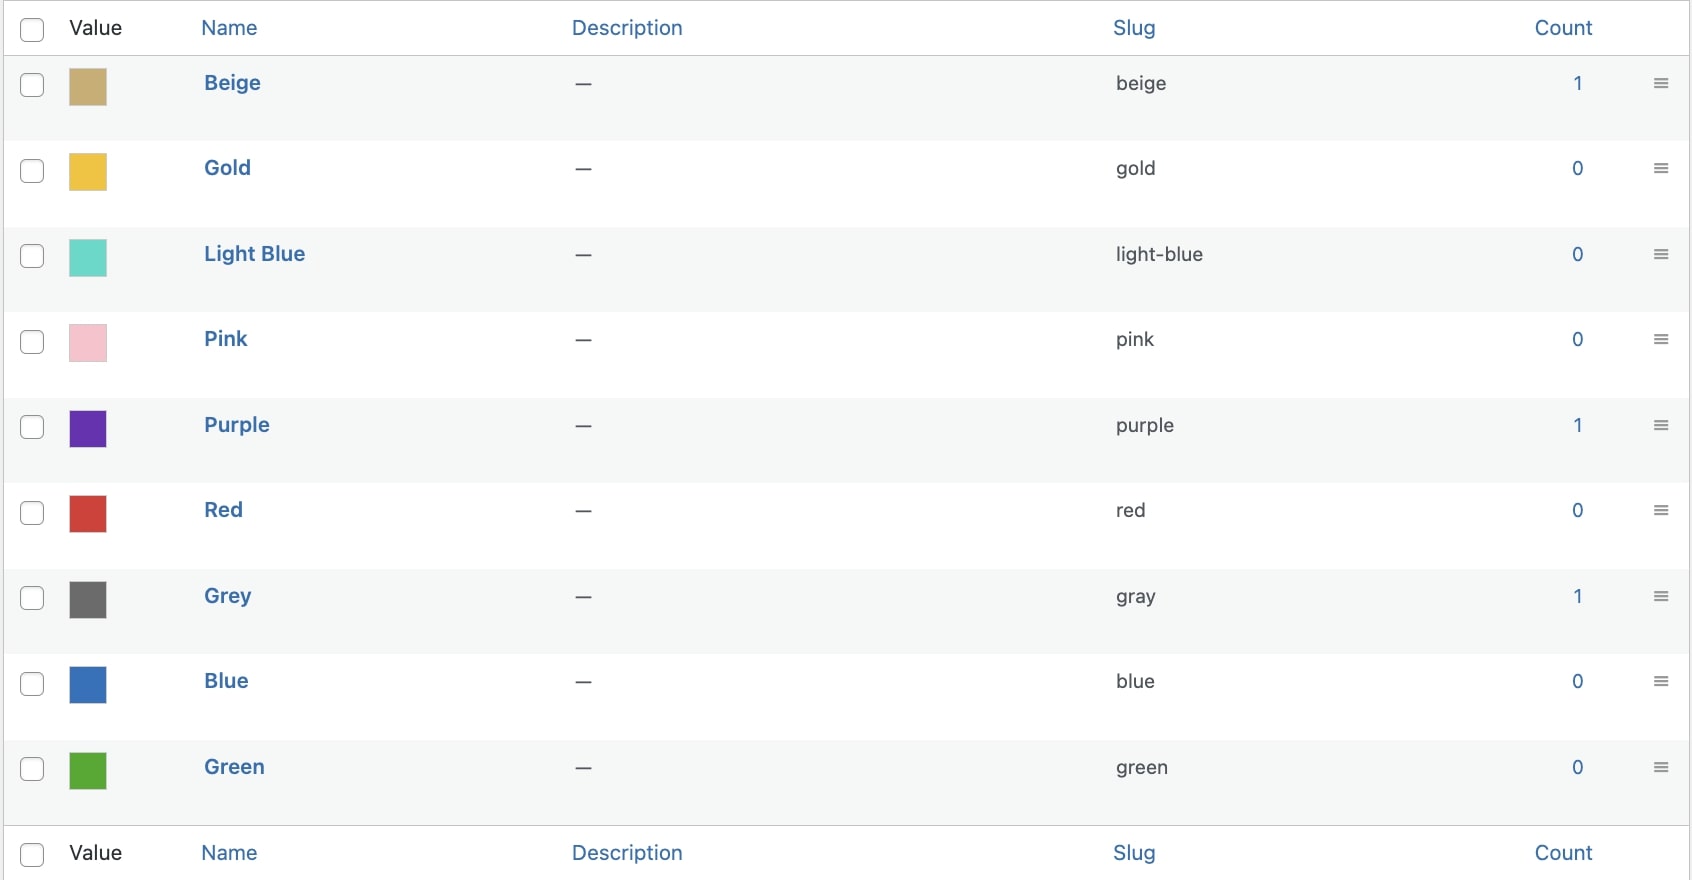
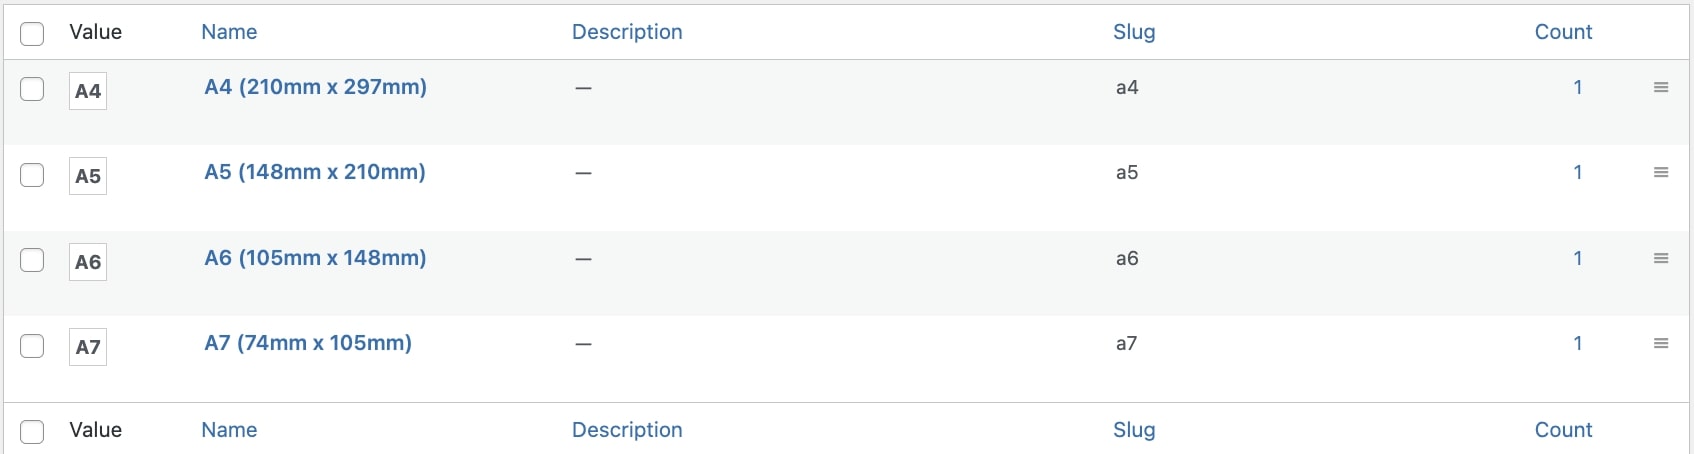
All the created attributes will now show in the table on the right side of the page.

Attributes table

Configuration of terms

After creating your attributes, you will need to add their terms which can be done by clicking on Configure terms.

Configure terms

Based on the attribute type (Colorpicker, Image, or Label), you will find a different set of options to add the terms for your product variations.

Colorpicker

Colorpicker options
  • Name: enter the name that defines the color and will show on the frontend;
  • Slug: enter the slug for the attribute variation;
  • Description: enter a description that defines the attribute variation, shown in the front end;
  • Colorpicker: choose the color of the attribute variation.

After configuring and adding the terms, you’ll get a view like in the image below.

Terms

Image

Image terms
  • Name: enter the name that defines the image and will show on the frontend;
  • Slug: enter the slug for the attribute variation;
  • Description: enter a description that defines the attribute variation, shown in the front end;
  • Image: drag or upload the image that you want to use for the attribute variation.

After configuring and adding the terms, you’ll get a view like in the image below.

Image terms

Label

Label terms

  • Name: enter the name that defines the image and will show on the frontend;
  • Slug: enter the slug for the attribute variation;
  • Description: enter a description that defines the attribute variation, shown in the front end;
  • Label: enter the label that defines the attribute variation.

After configuring and adding the terms, you’ll get a view like in the image below.

Label terms

Add attributes to the product

You can add attributes to the product just like for any other attribute belonging to WooCommerce types. Select the attribute and click on Add.

Add attributes

Now select the terms you want to use for the product variations, enable the option Used for variations and click on Save attributes.

Add terms

Attribute types

New attribute types that the plugin allows to use, in addition to WooCommerce standard ones, are colorpicker, image and label. Showing these types of attributes on your products will offer users the possibility to have a nice view of the options available and will help them make the right choice for their needs. Let’s see some examples for each type.

Colorpicker

Colorpicker example

To set up color attribute terms for your product variations, please refer to this page.

Label

Label example

To set up label attribute terms for your product variations, please refer to this page.

Image

Image example

To set up image attribute terms for your product variations, please refer to this page.