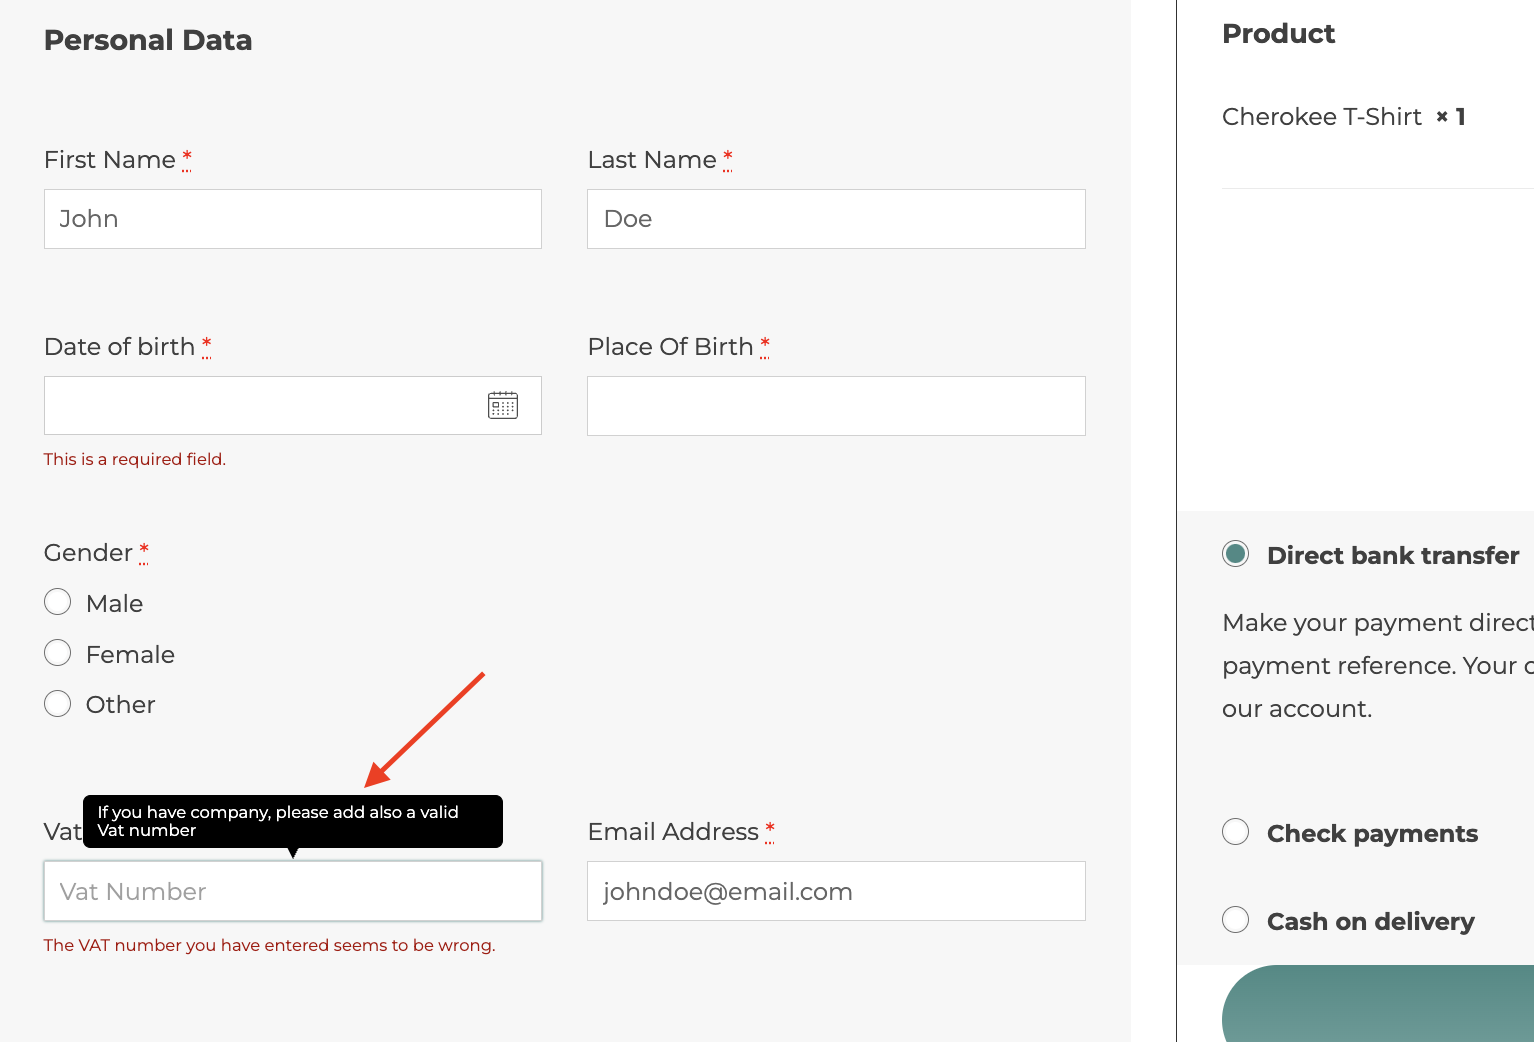
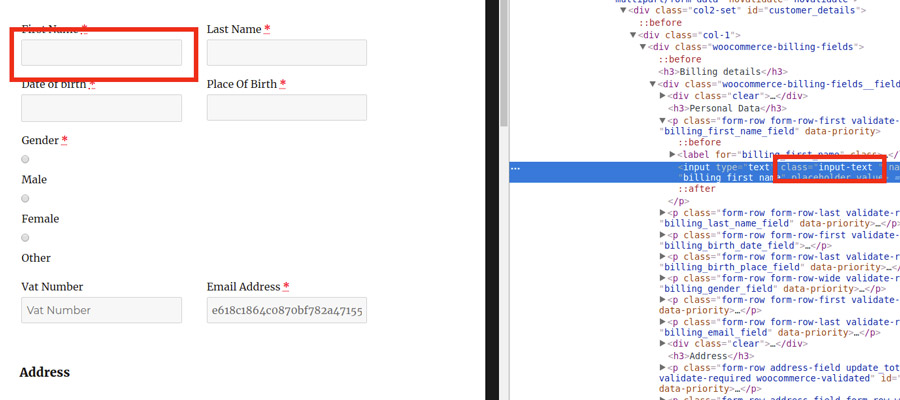
The plugin allows you to enable validation in JS for the fields provided in the checkout form.
If you enable the “JS Validation” options available in Settings > General options, customers who leave a required field blank will receive a dynamic notification informing them to insert the mandatory data.
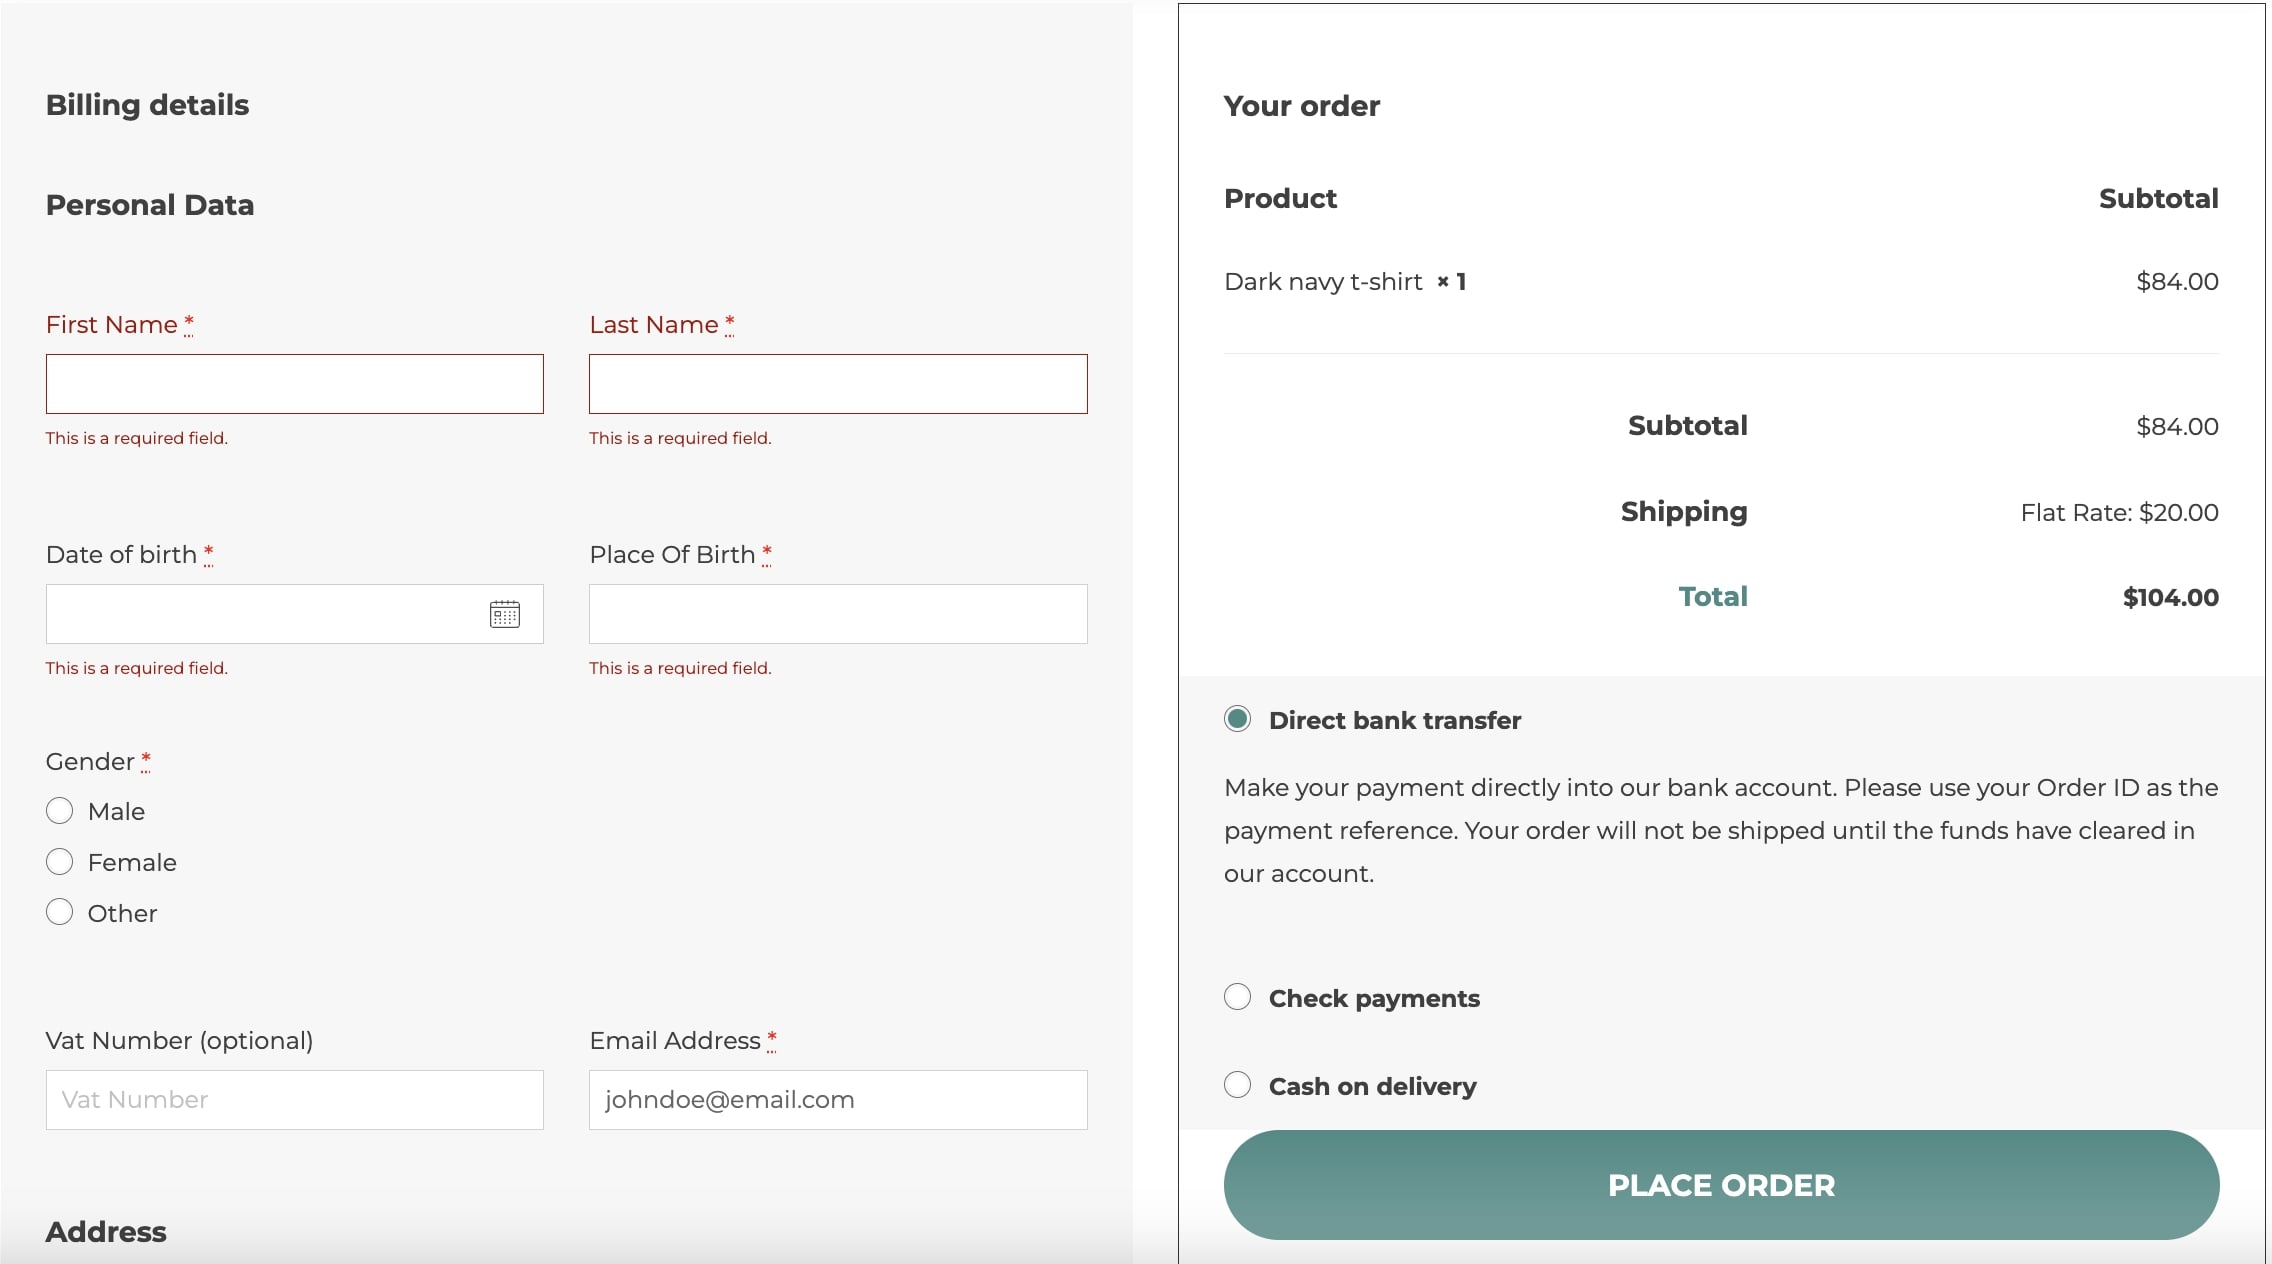
By setting the VAT number as a required field, the validation will automatically identify the required VAT number based on the country picked by the customer.
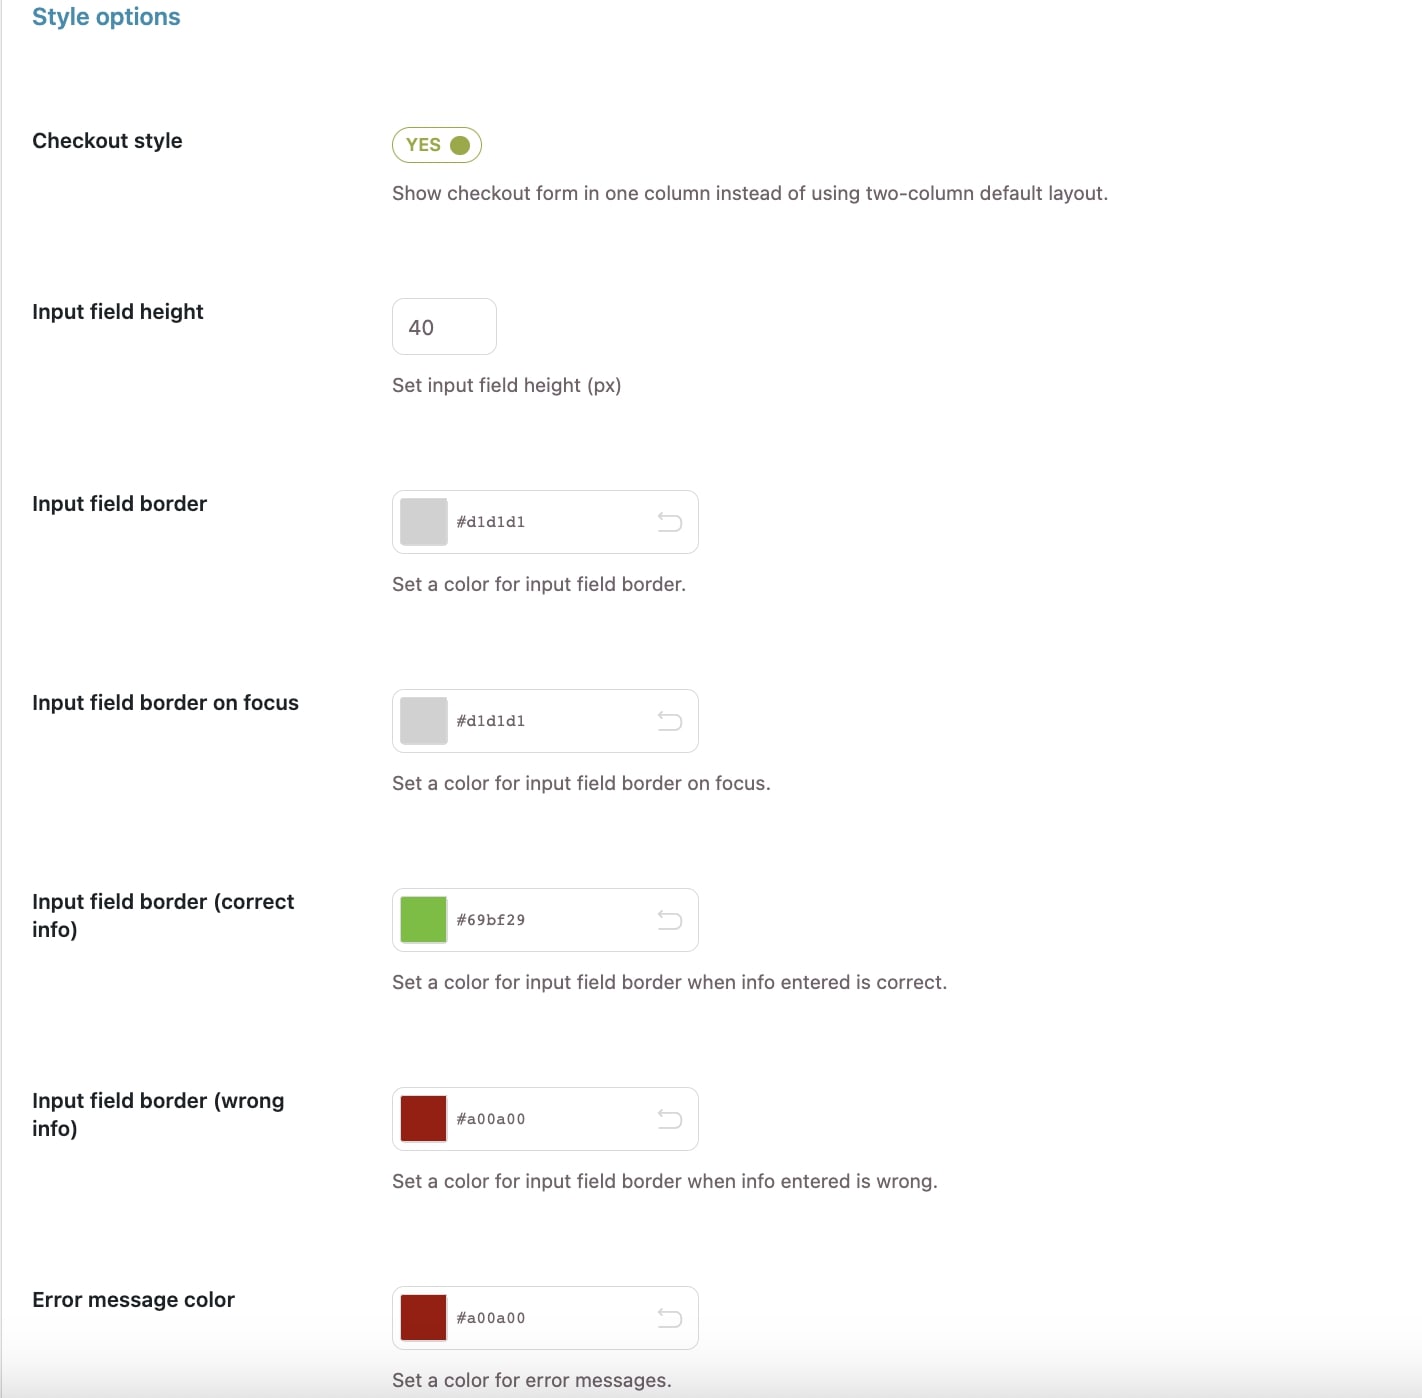
To customize the style of the checkout fields, including options to dynamically change the frame color of required fields according to correct or wrong data entry, go to YITH Checkout Manager > Settings > Style options.
Through the Checkout style option, you can choose whether to arrange the checkout in a single column or two columns (as set by default on WooCommerce).
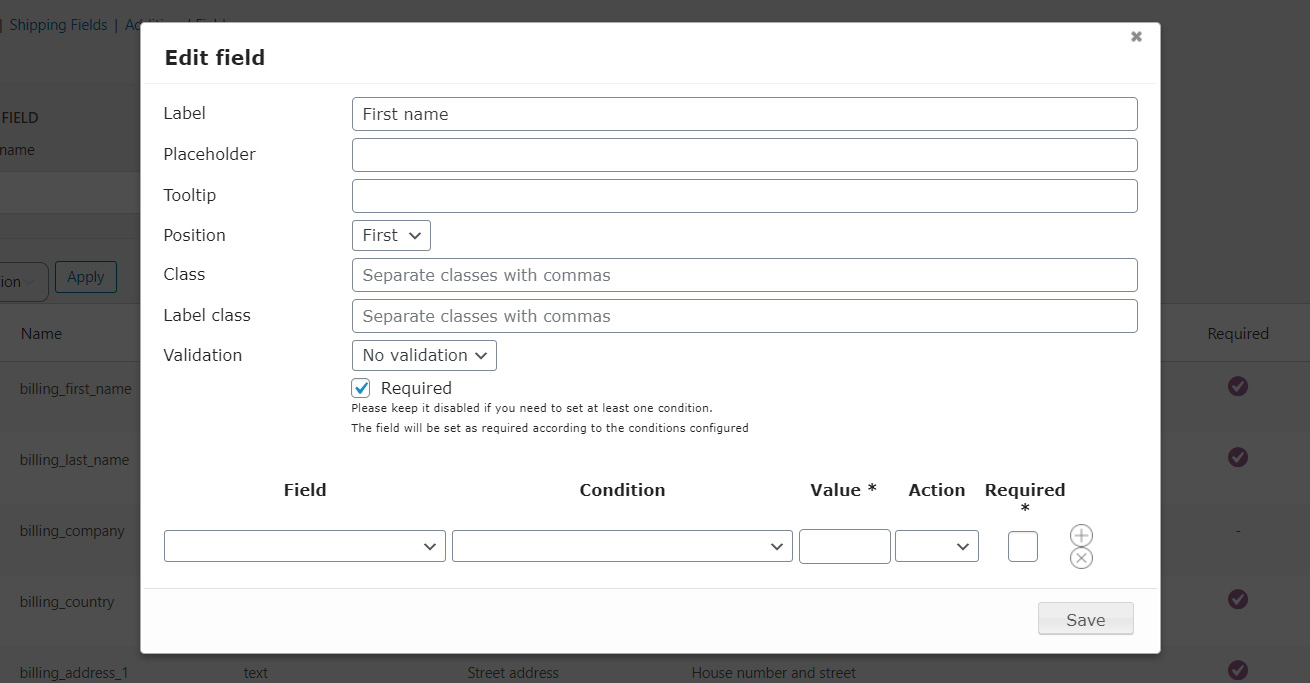
The default WooCommerce fields cannot be deleted but only disabled. You can still edit them by clicking on the “Edit” button that you will find in each field.
In this form, you will find:
“Label” – Choose the title related to a specific field.
“Placeholder” – Choose the text shown to customers within the field.
“Tooltip” – (This field only shows if you have chosen to “Enable Tooltip” in the “Settings” page). Choose the text that will be displayed in the field tooltip.
“Position” – Choose the position of the field based on the line in which it’s inserted. “First” to set it on the left, “Last” to set it on the right, and “Wide” if you want it to take up the whole line space.
“Class” – Allows you to set graphical CSS rules related to the field.
“Label Class” – Allows you to set graphical CSS rules related to the label.
“Validation” – Choose whether the field requires any kind of validation since it may require information such as phone number, VAT, country, email, or zip code.
At the bottom of this panel you will find two checkboxes:
“Required” – Set field as required.
“Clear Row” – For the fields to work correctly, when a field is entered as First (in Position) and followed by the Last field, this second field needs to have the Clear Row option checked.
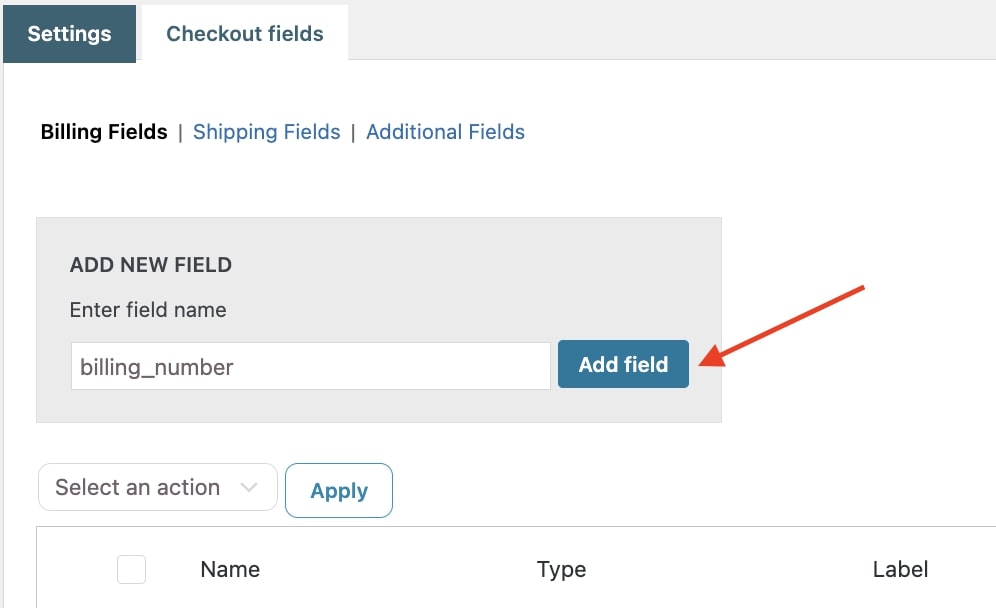
On the same page, you will also find the option to create new fields by entering the name and clicking on Add Field.
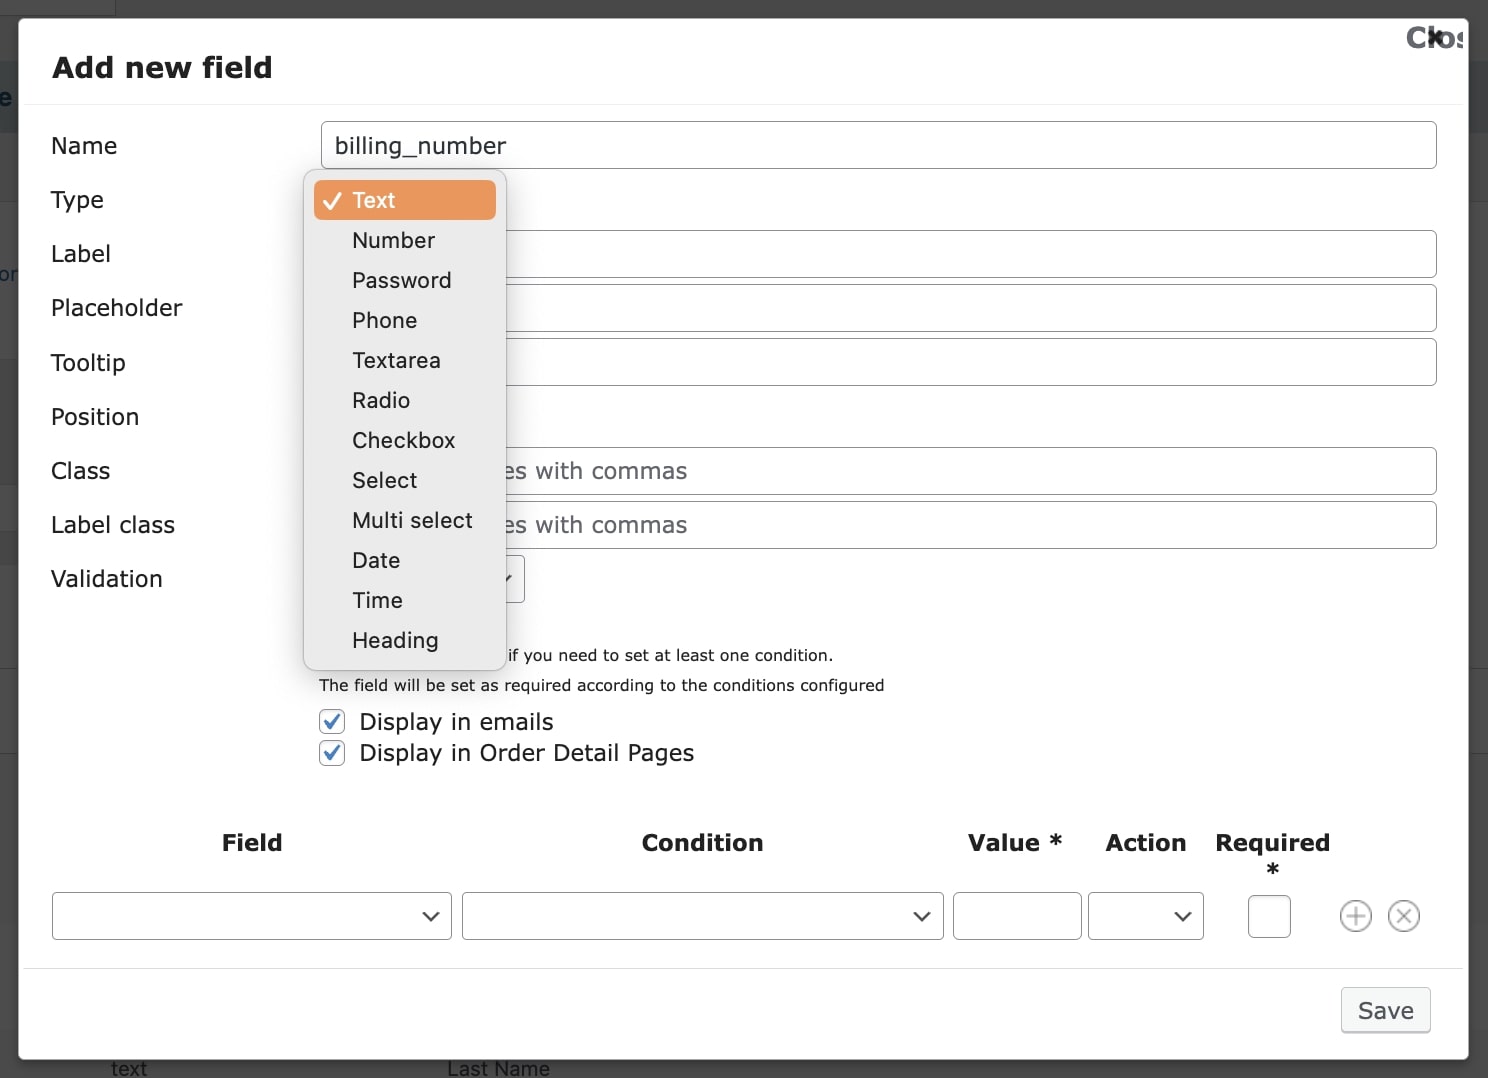
The newly created form will have the same features as the editing form, with a few extra fields:
“Type” – Allows you to choose the type of the field you are going to create: text, number, password, phone, textarea, radio button, checkbox, select (dropdown), multi-select, date, time, and heading.
“Display in emails” – Choose whether to display the field you are creating in the order email or not.
“Display in Order detail pages” – Choose whether to display the field you are creating on the summary page or not.
Do you want to show the checkout fields with conditional logic? And so, make sure that only if a condition is met, a specific field will appear? Or that a specific field in shown only if one or more specific products are in the cart? Now, you can!
Whenever you set up a new field, you will be able to set up if it has to be linked to any other field in the checkout and what has been selected in it.
How to?
You can simply set up this in the field that will be shown or hidden conditionally, in the last section:
Here, you can set the following options:
Field: select the field that will work as a condition. As a condition you can also check the cart contents, so select either Products in cart or one of the existing checkout fields.
Condition: select the condition for the field to show. You can select one among the following:
Is set
Is empty
Value is
Value is not
All selected products in cart
At least one selected product in cart
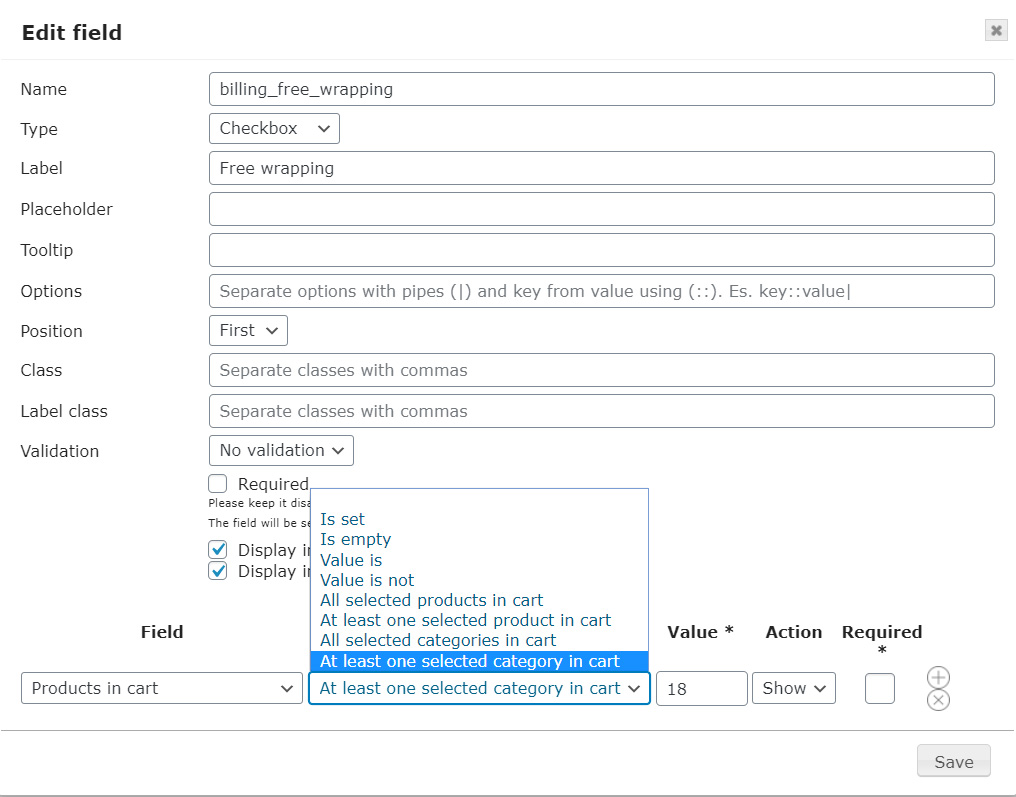
All selected categories in cart
At least one selected category in cart
Value: enter the value of the field to trigger the conditional behavior. Please note that if the condition regards products or categories, you should enter here the product/category IDs separated by commas.
Action: choose whether to show or hide the current field if the condition is fulfilled.
Required: check if the current field has to be set as Required only if the condition is fulfilled. Make sure the default Required value (above) is not checked, otherwise, this setting will not take effect.
More conditions: you can set up more than one condition for the same field. Simply click on the + (plus) sign to add more or on the X to remove some.
Let’s give a couple of examples to show how to set up a conditional field.
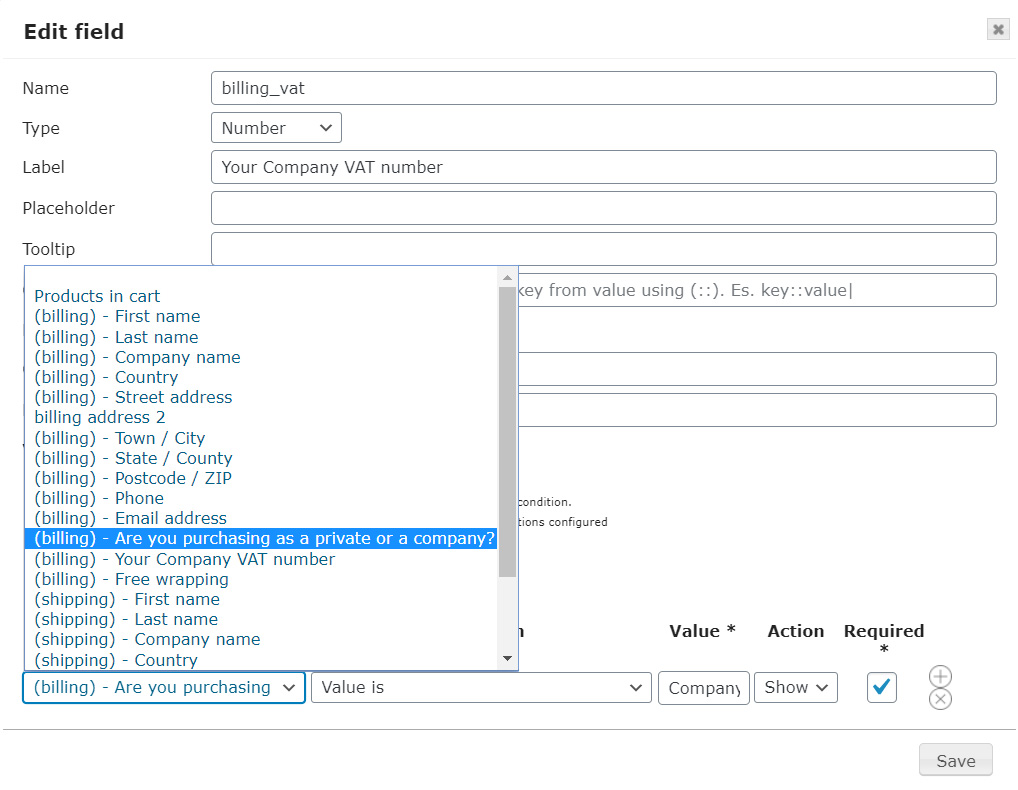
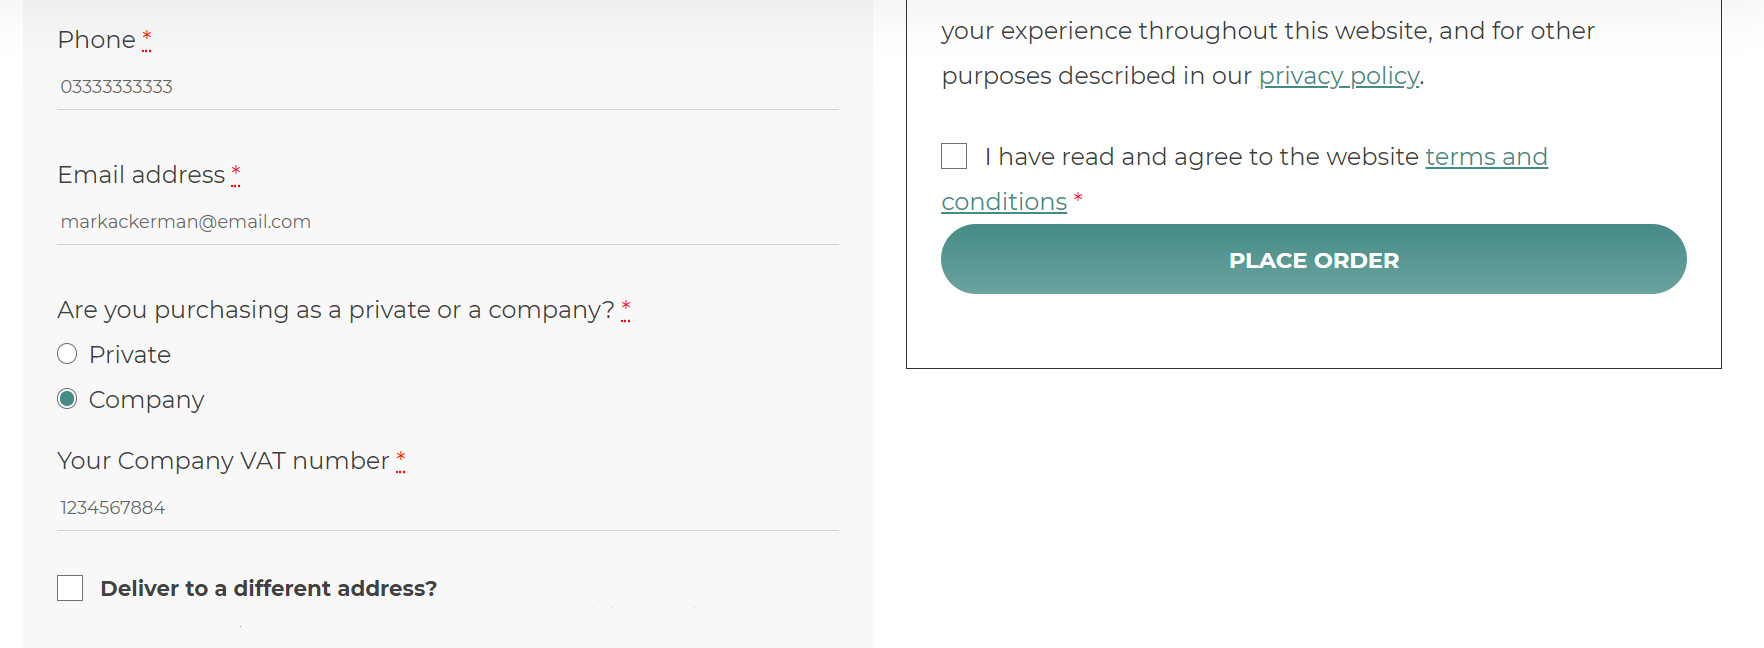
Example 1. Required VAT for Company billing
You want to let users choose between Private and Company billing. Only if they choose Company, you will show a required VAT field, otherwise, the field won’t show.
How to set it up?
Go to YITH > Checkout Manager > Checkout fields and create a radio-button field where your customers can choose if they are Private or Company and save.
Then, create another field where the user can enter the VAT number. This field has to appear only if Company has been selected first. So, configure it like this:
Field: select the above-created field: Are you purchasing as a private or company?
Condition: Value is
Value: Company
Action: show
Required: checked
Example 2. Products in cart
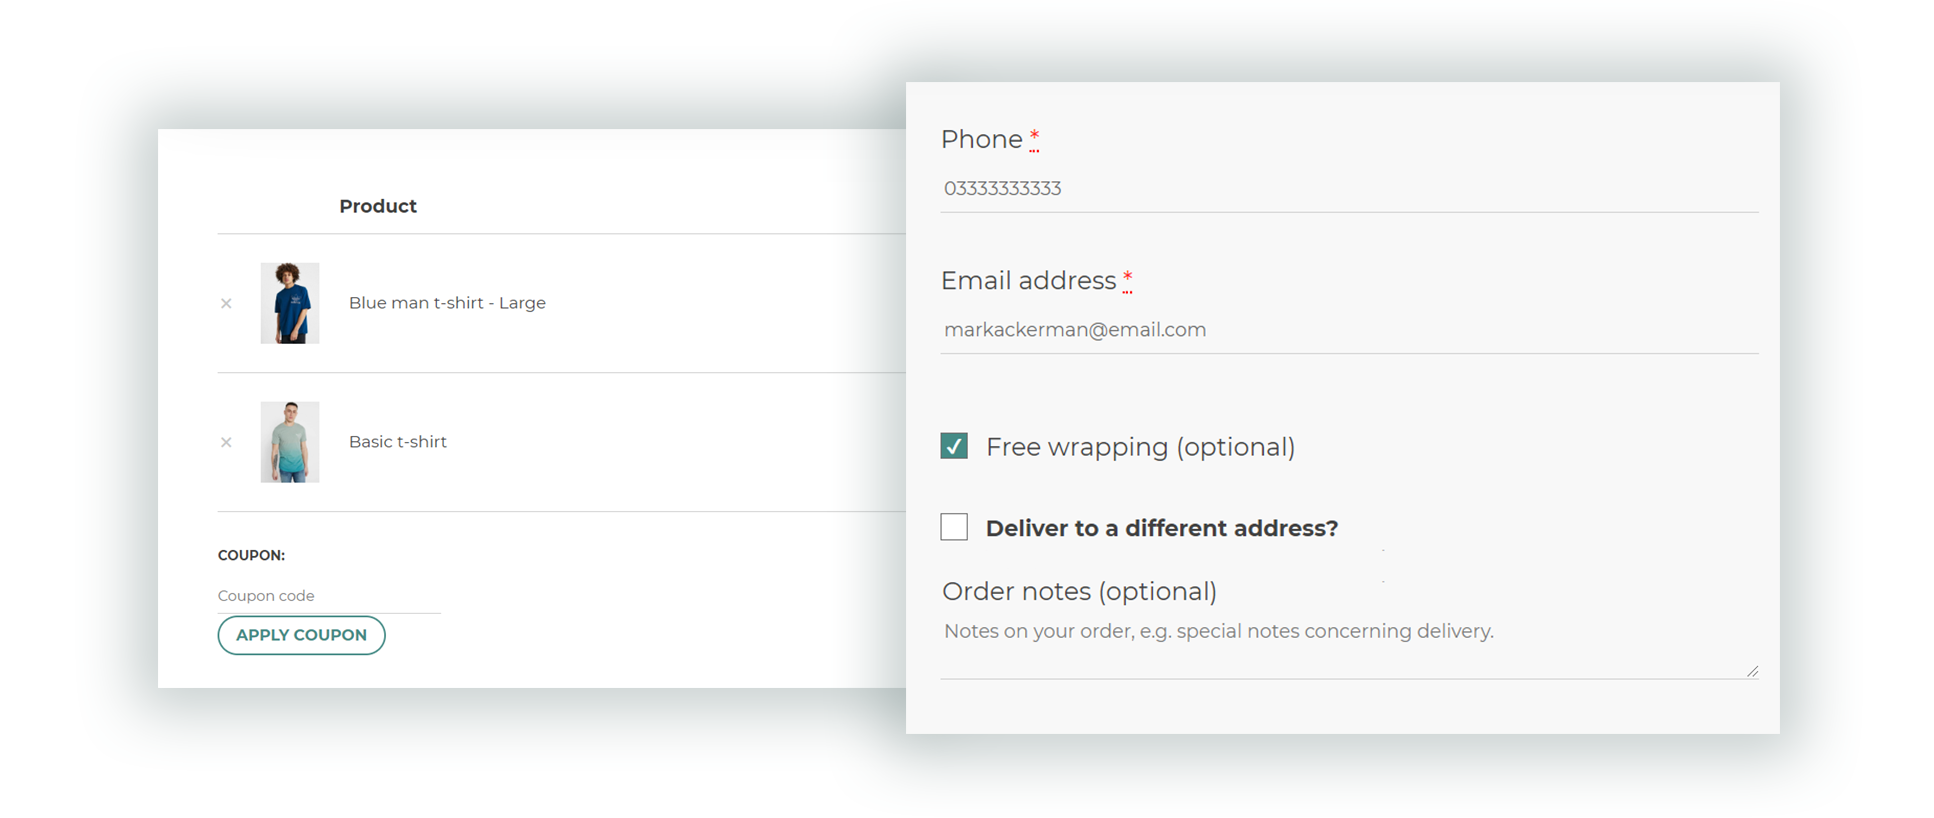
You might want to offer free wrapping for products belonging to a specific category only, which can be optionally checked by the user in checkout.
To do that, you can configure the condition like this:
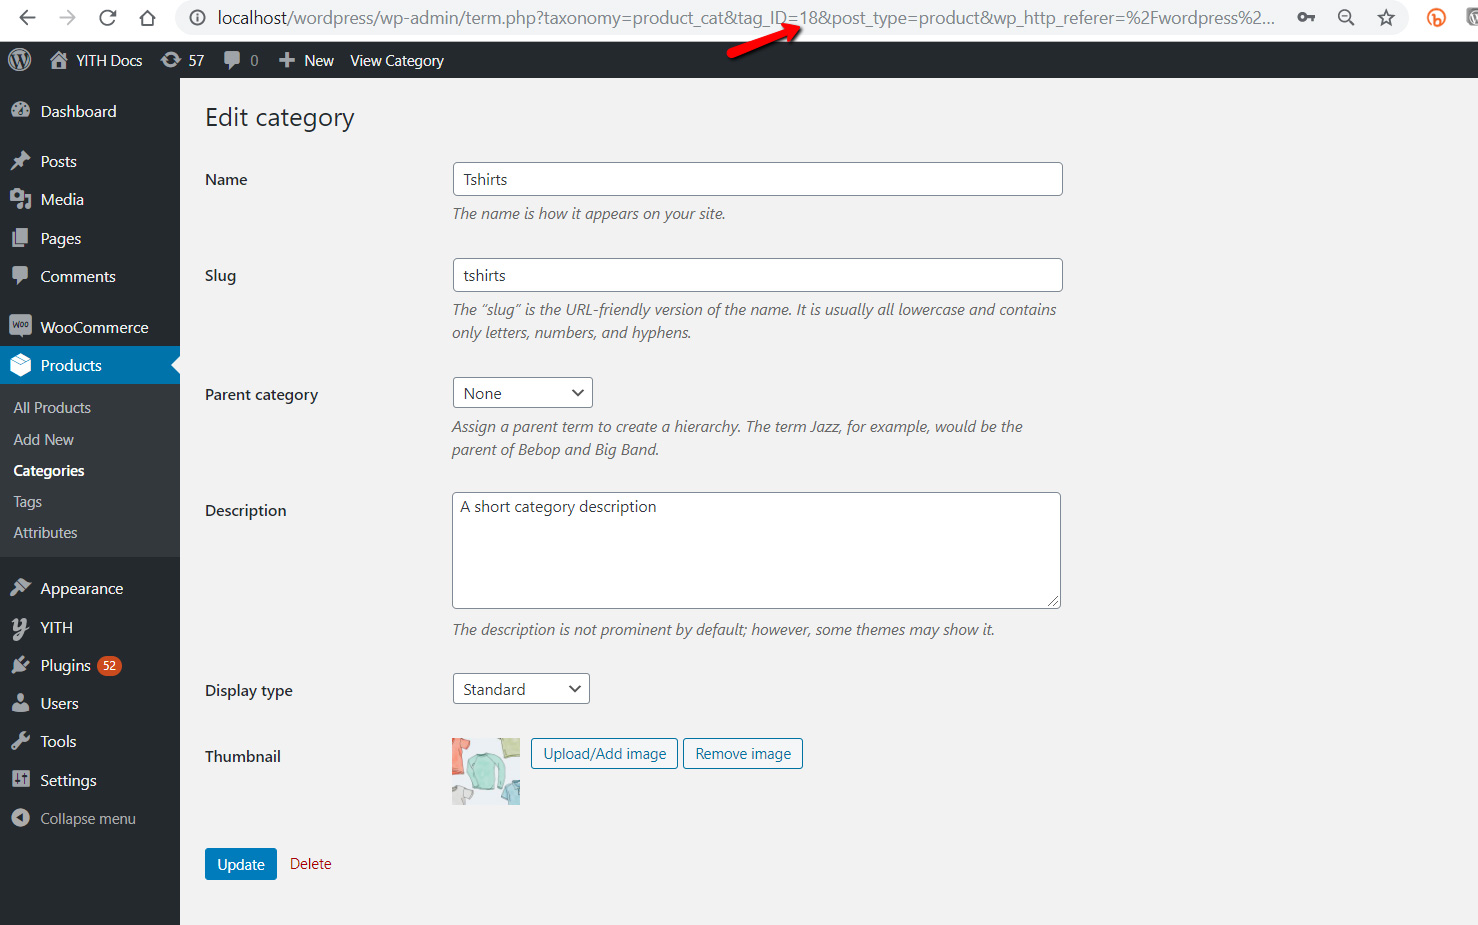
Where Value is the category ID (T-shirts category ID is 18)
YITH WooCommerce MailChimp you can manage email marketing campaigns for your e-commerce in a few simple gestures and take advantage of the store integration to make sure your follow-up campaigns are targeted based on your customers’ purchases.
The integration with YITH Checkout Manager allows recording information related to checkout fields that have been added or edited through YITH Checkout Manager for a perfect integration of your store features.
Just install and activate both of them to make sure that the integration can work: no other action is required from your side.
YITH WooCommerce Multi Vendor allows you to turn your store into a multistore where vendors manage their own product and earn a commission on every sale.
Thanks to this integration, the custom fields created with YITH Checkout Manager will show in vendors’ suborders too.
Just install and activate both of them to make sure that the integration can work: no other action is required from your side.
For further information about YITH Multi Vendor settings, please refer to the official documentation.
The combination with YITH WooCommerce Checkout Manager allows you to also edit the fields (VAT and SSN) that the PDF invoice plugin adds to the checkout.
Just make sure you have enabled and activated both plugins to make the integration work. No other action from your side is required.
To read more about the settings of YITH PDF Invoices, please, refer to the official documentation.