From the Inquiry Forms tab > Form to show, you will be able to set up the inquiry form.
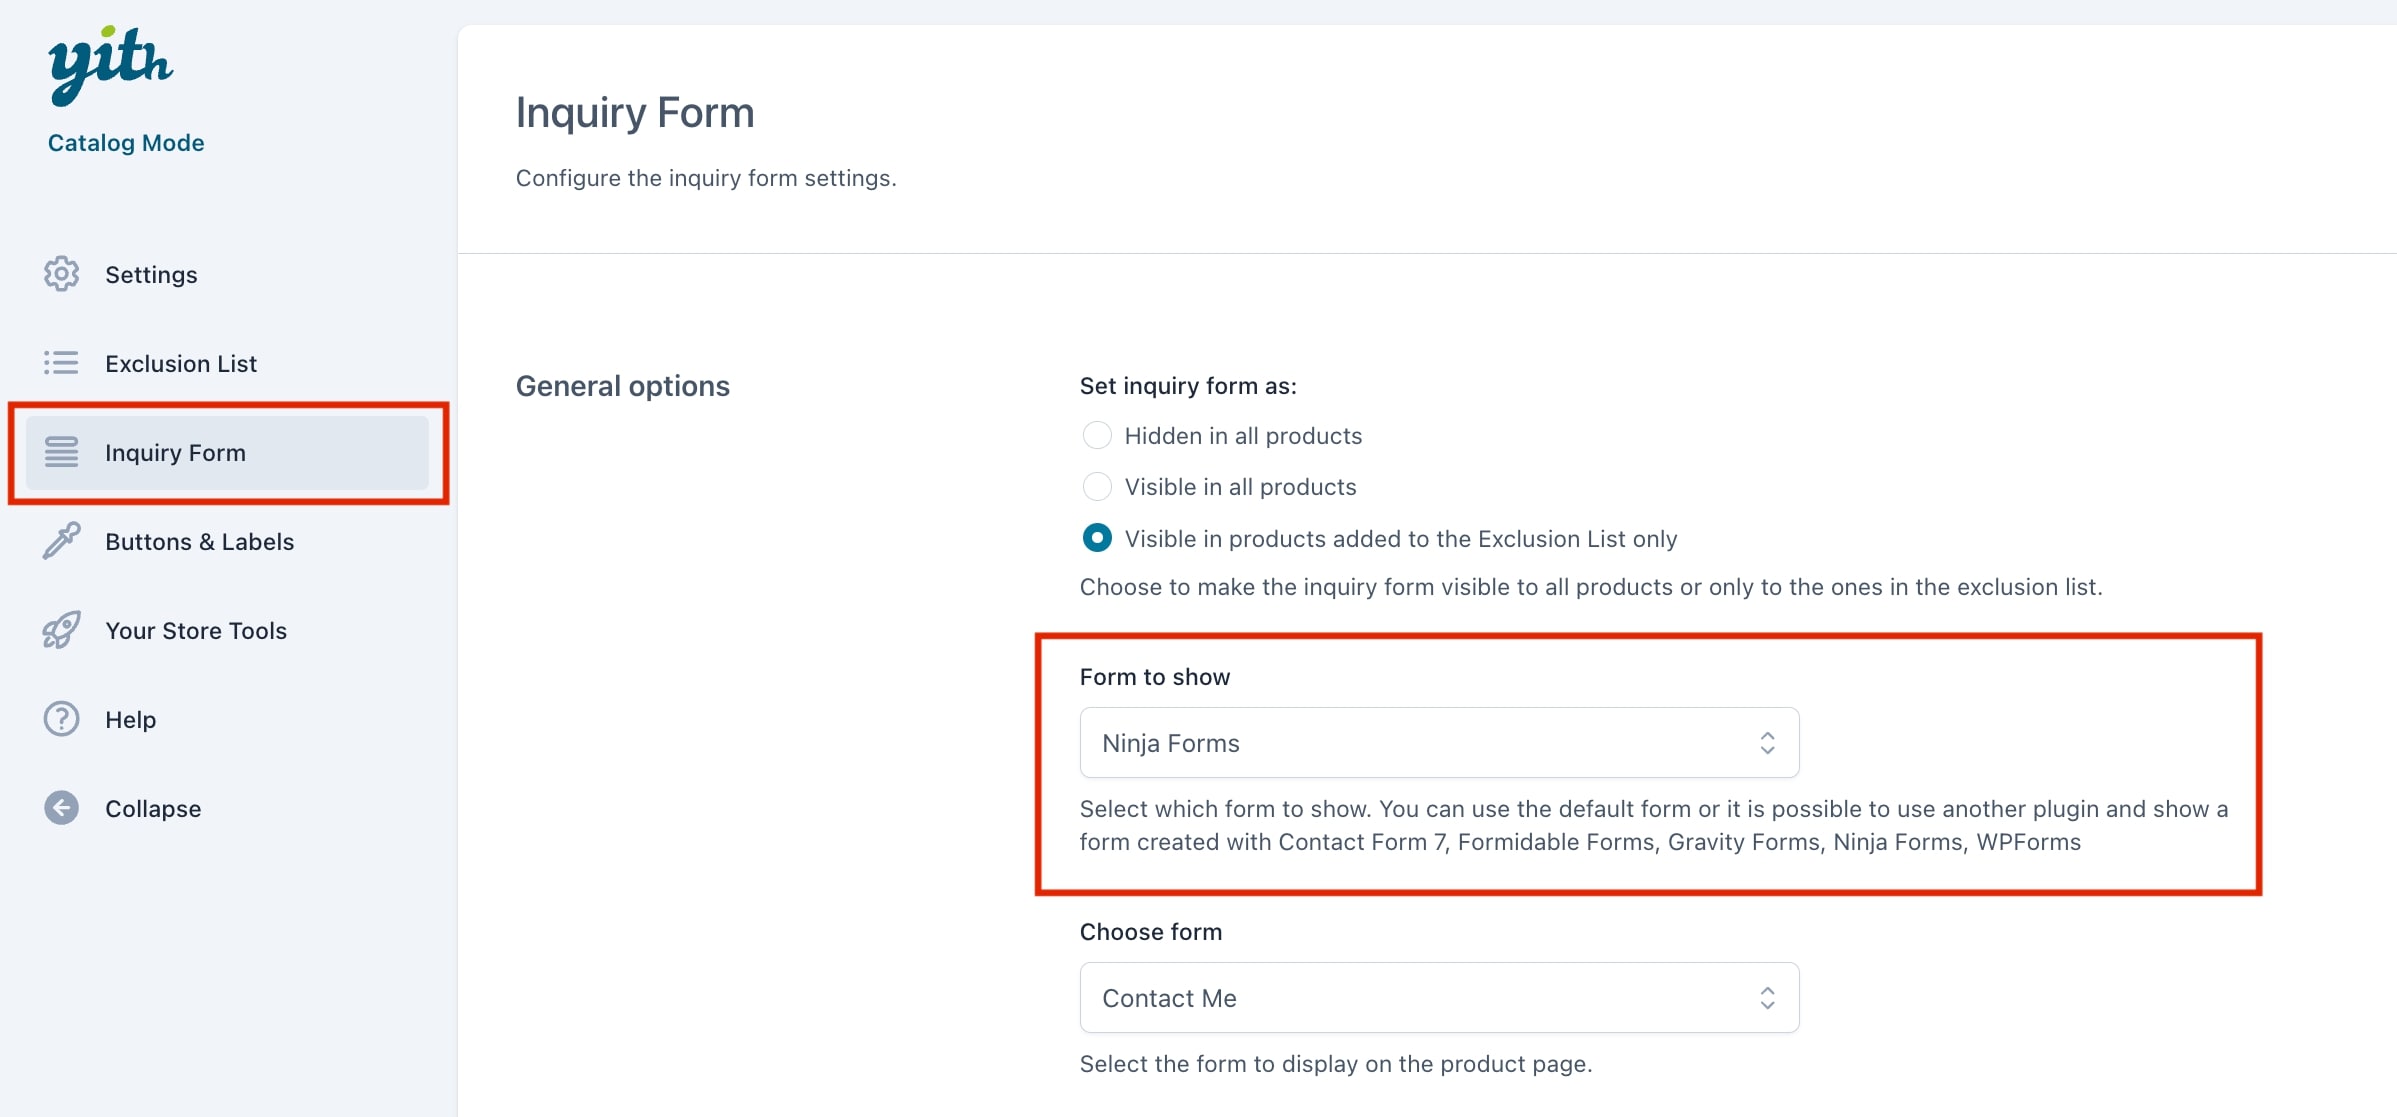
The plugin includes a default form, but supports also some third-party external plugins. Here’s the full list and specific settings, if necessary.
- Default form > this is included in the plugin, please, see below for the settings.
- Contact form 7
- Gravity forms
- WP forms
- Ninja Forms > see below for specific configuration.
- Formidable forms > see below for specific configuration.
Default form
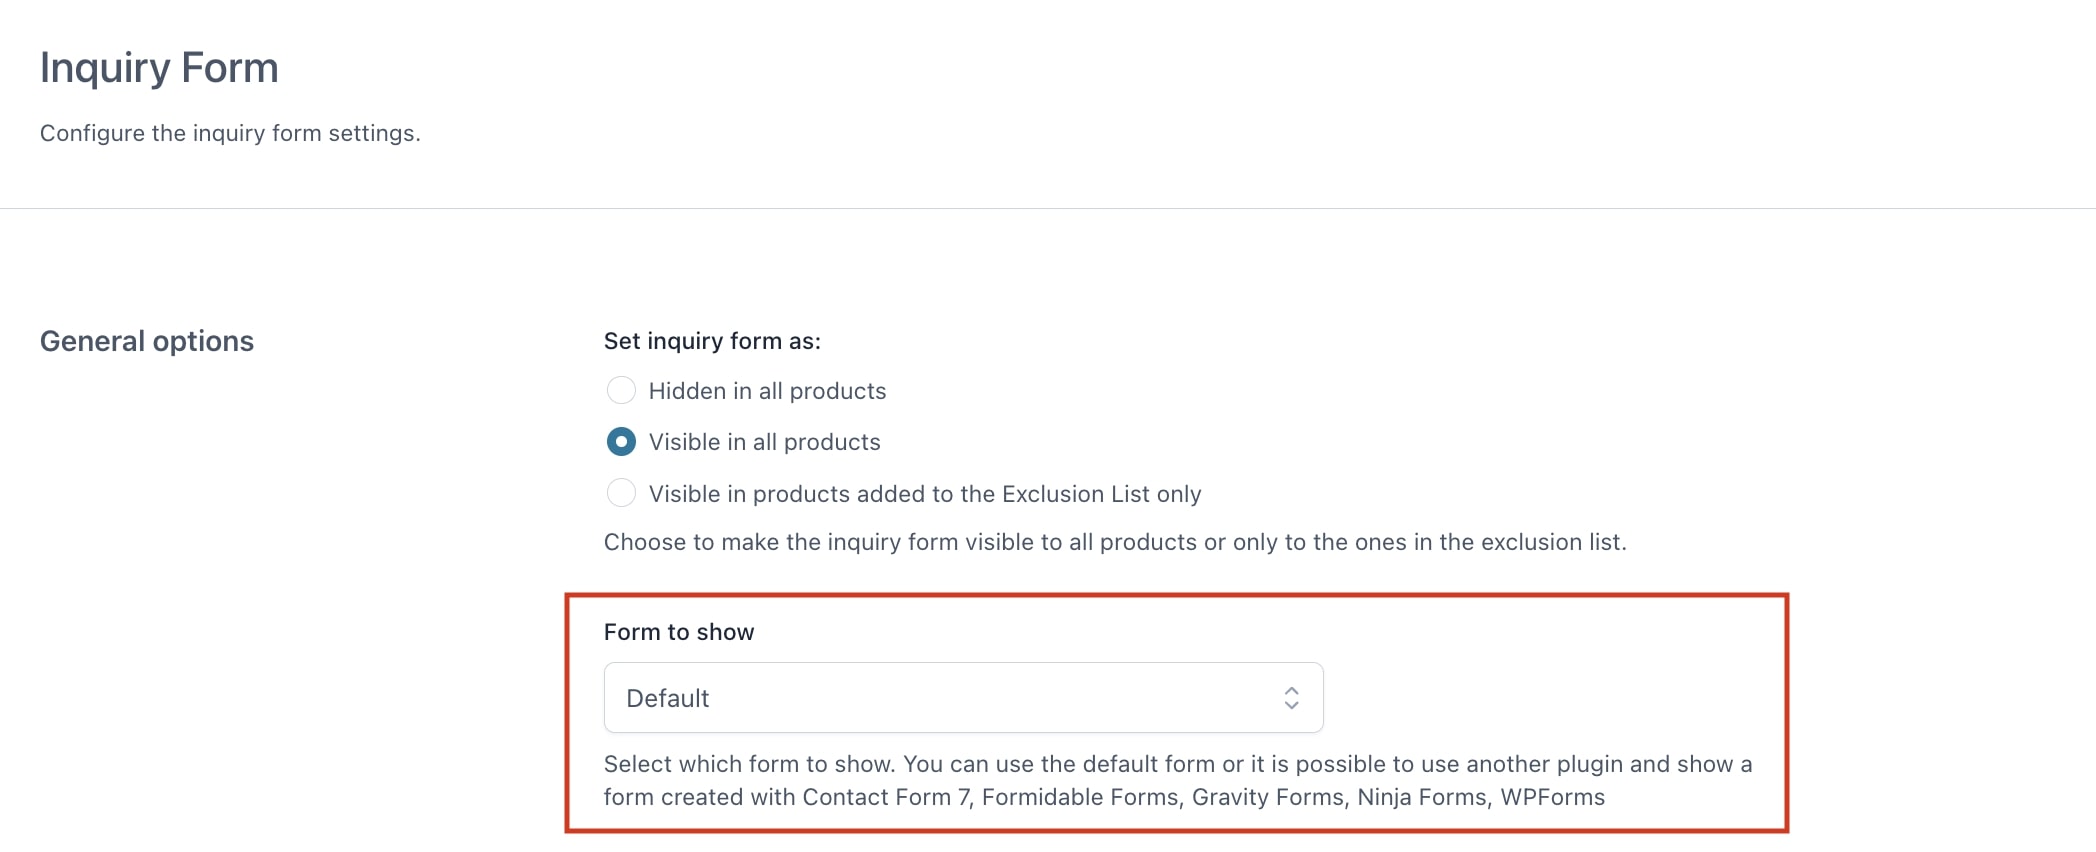
If you want to show the default form on your products and allow users to send you an inquiry, go to the General options section in the Inquiry Form tab and select Default form in Form to show.
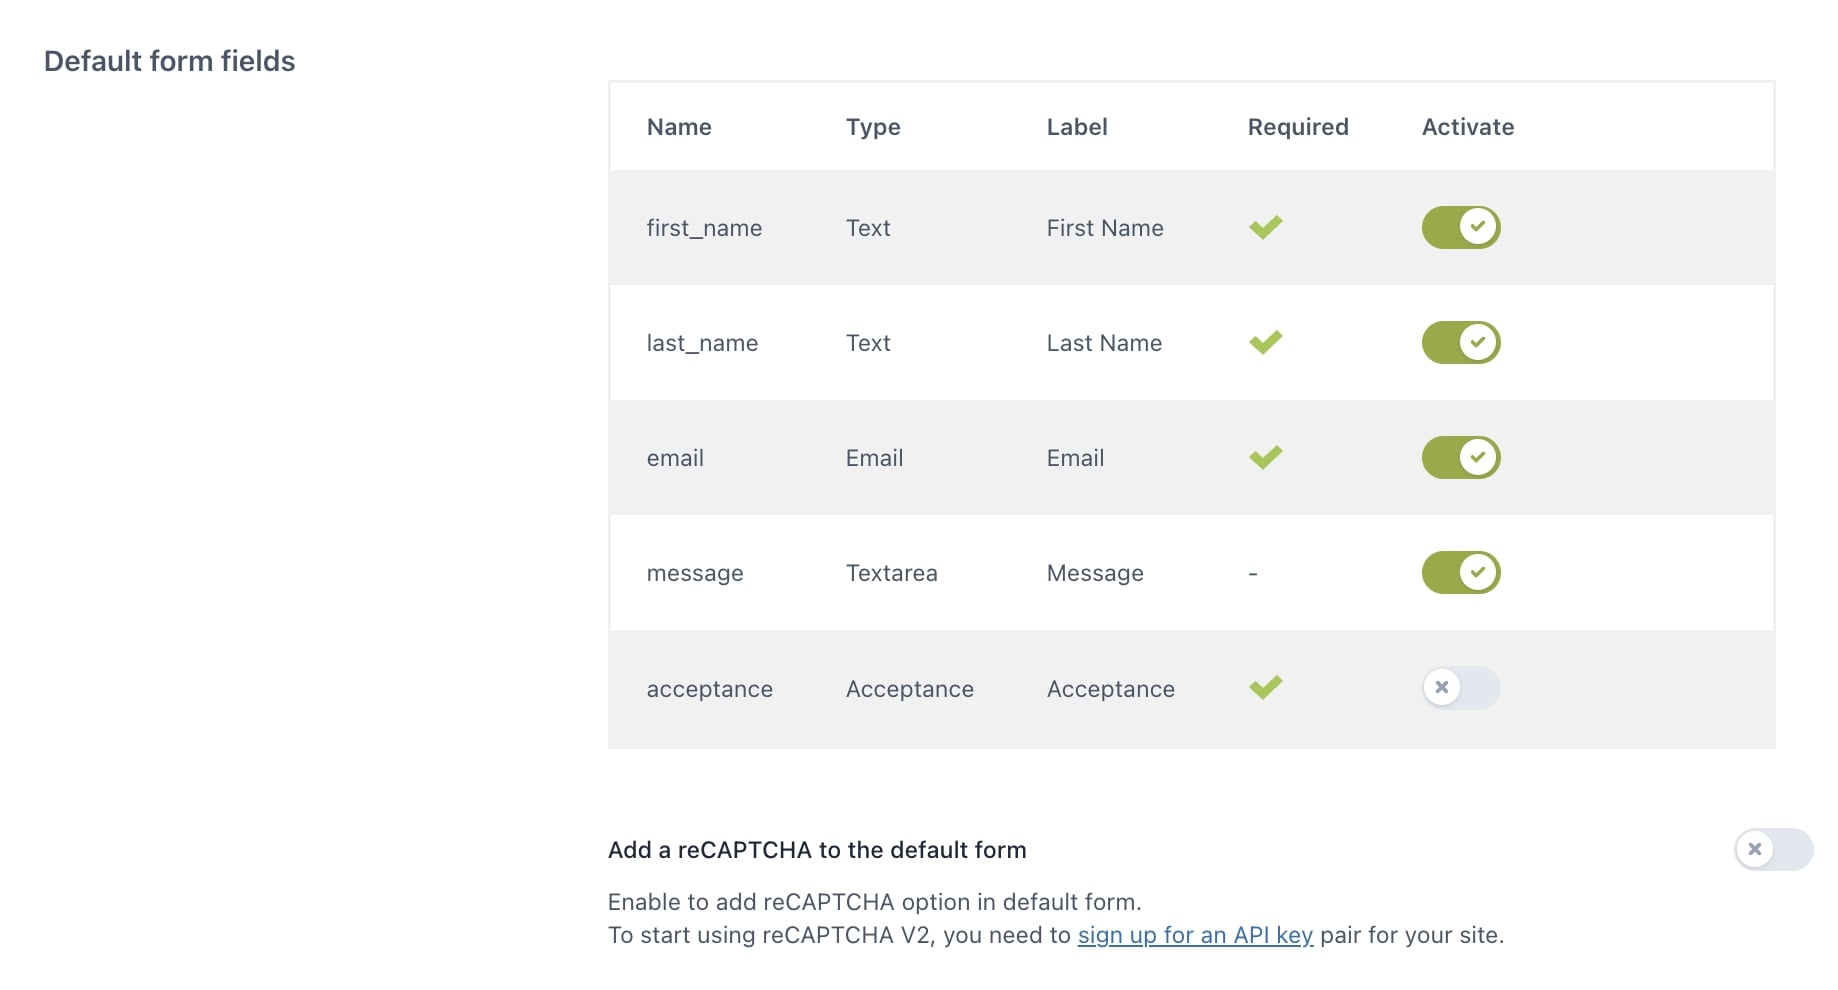
In the next section, Default form fields, you will be able to manage all the fields shown in the form. The fields available are first name, last name, email, message, acceptance.
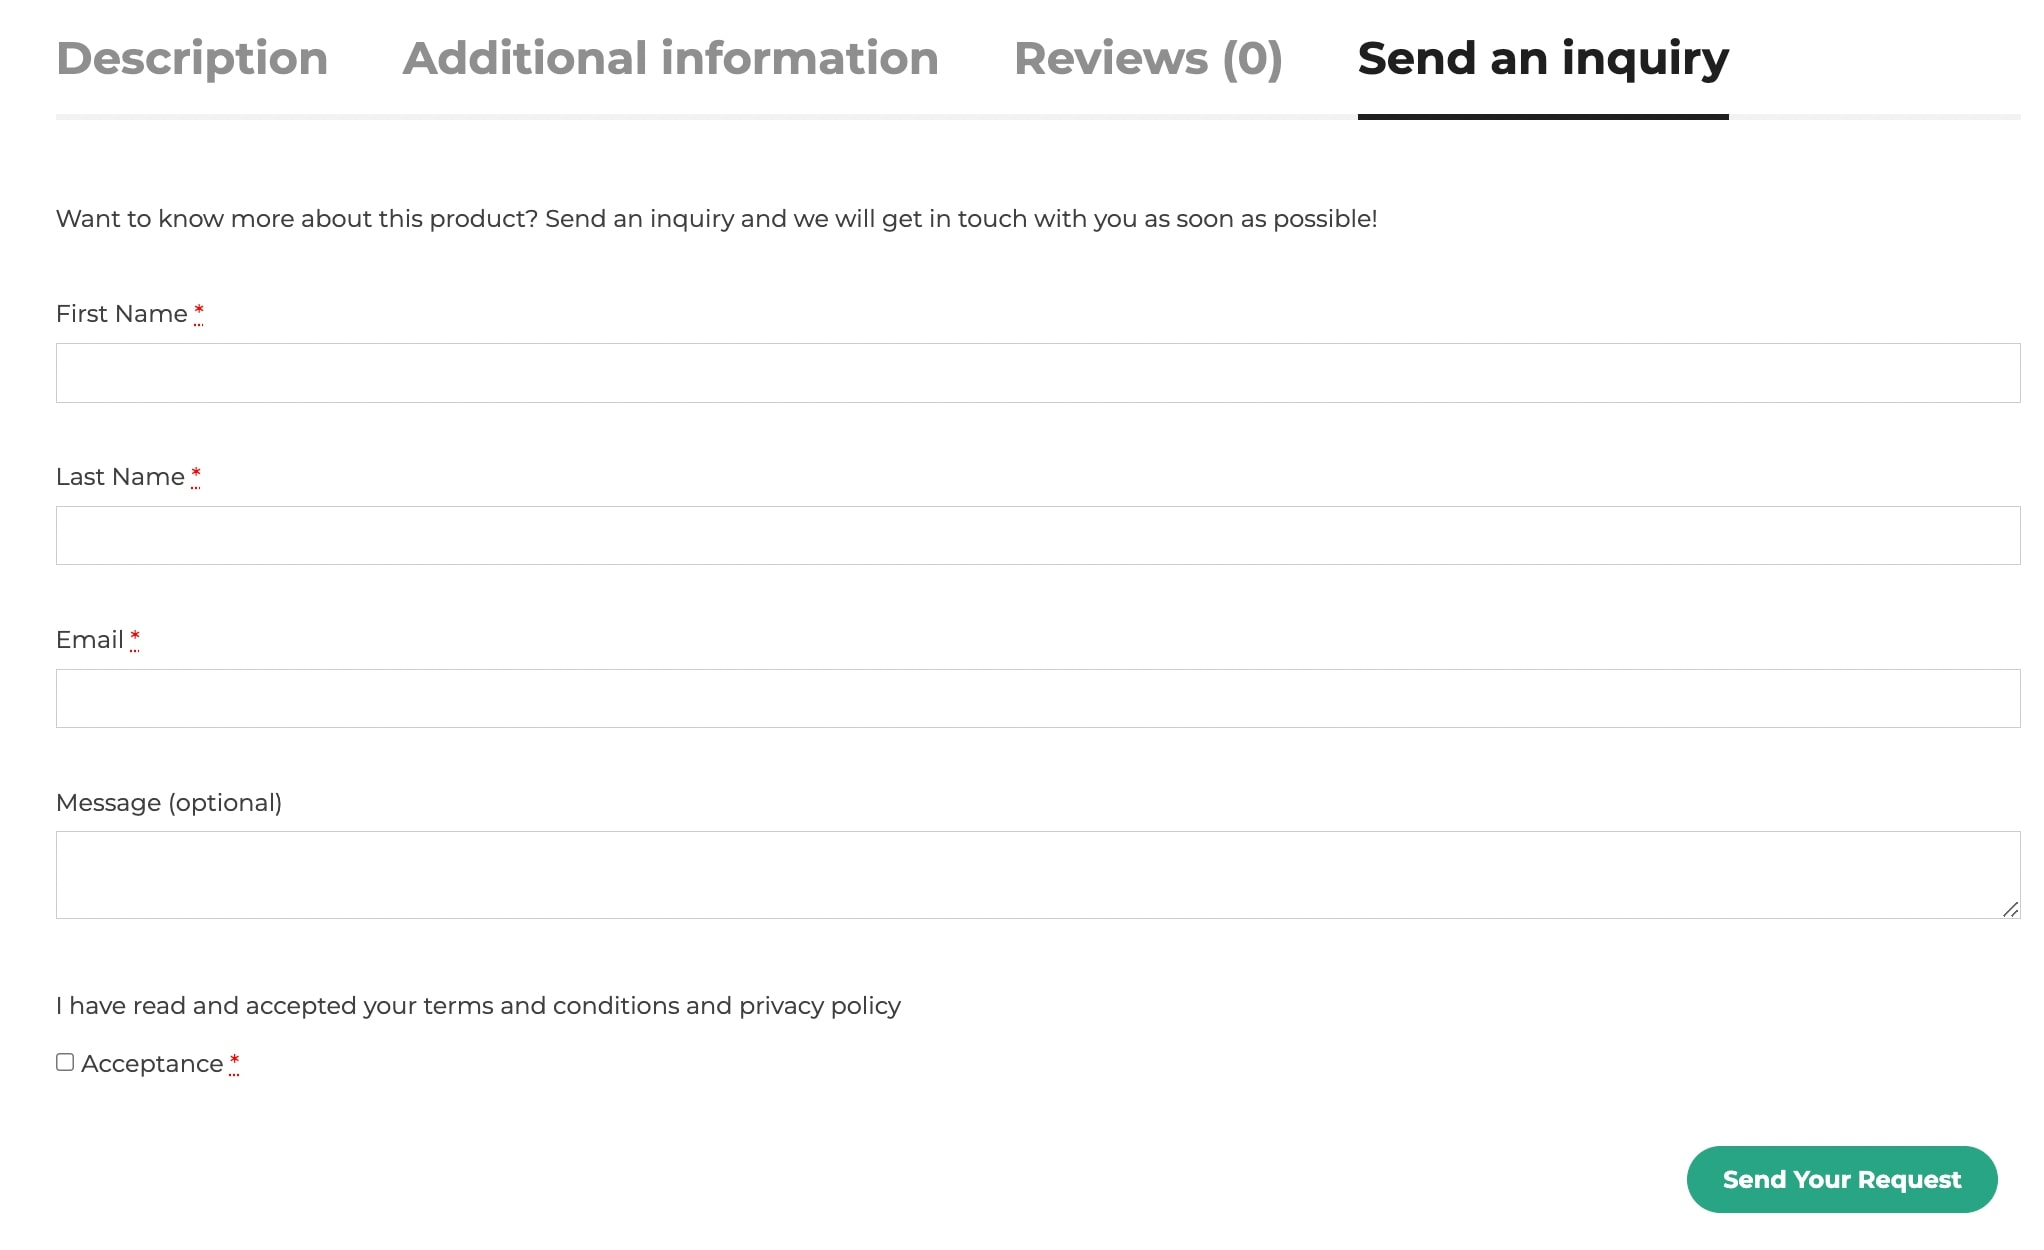
This is how it would look like in the frontend:
You can activate/deactivate the fields through the related button and edit the available options: Name, Type (Text, Email, Textarea, Acceptance), Class, Label, Label Class, Placeholder, Position (First, Last, Wide), Required (YES/NO).

Note: It is not possible to add new fields to the form. You can only edit and manage the existing fields.
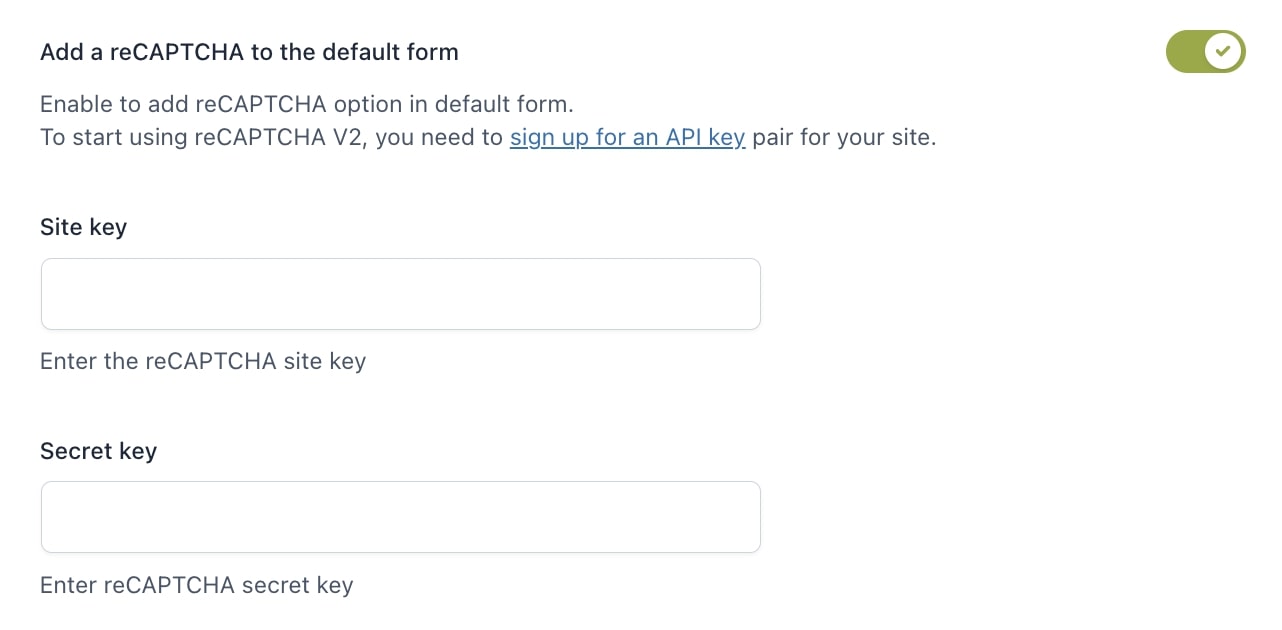
If you want to use the reCAPTCHA in the default form, you must enable the option Add a reCAPTCHA to the default form then insert the site key and secret key in the respective fields.
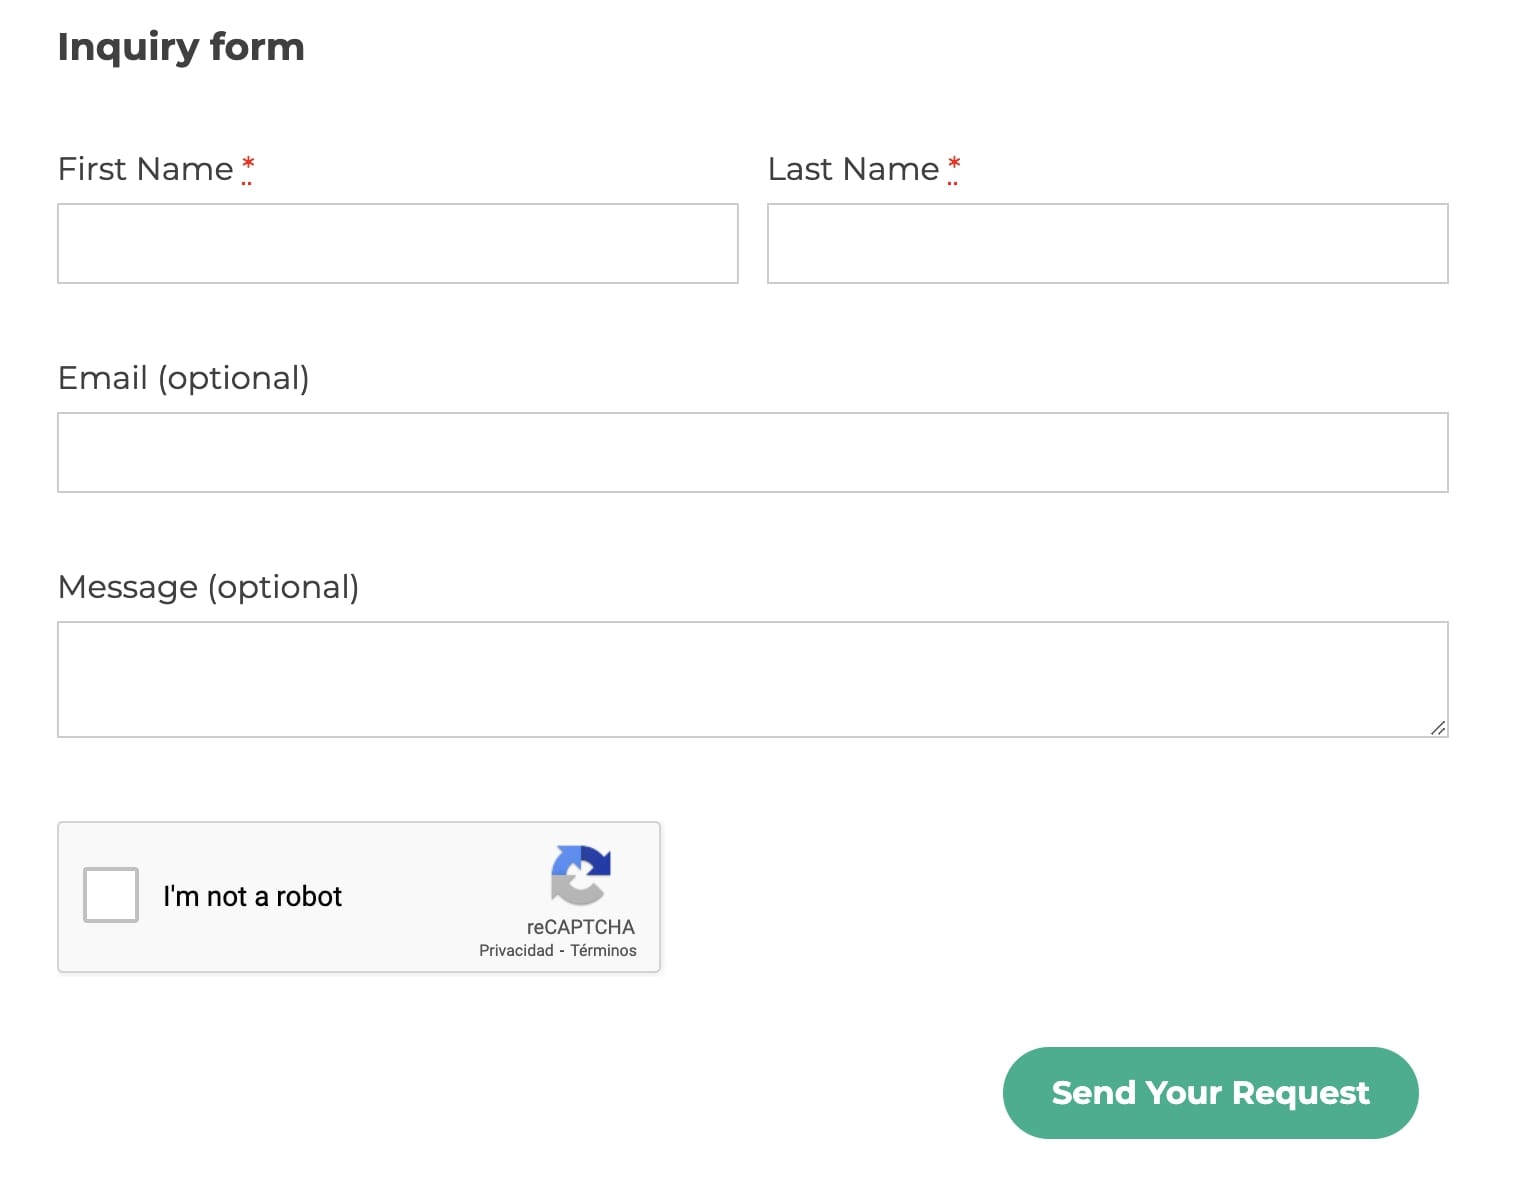
This is how the form would look like in the frontend with the reCAPTCHA enabled:
Ninja Forms
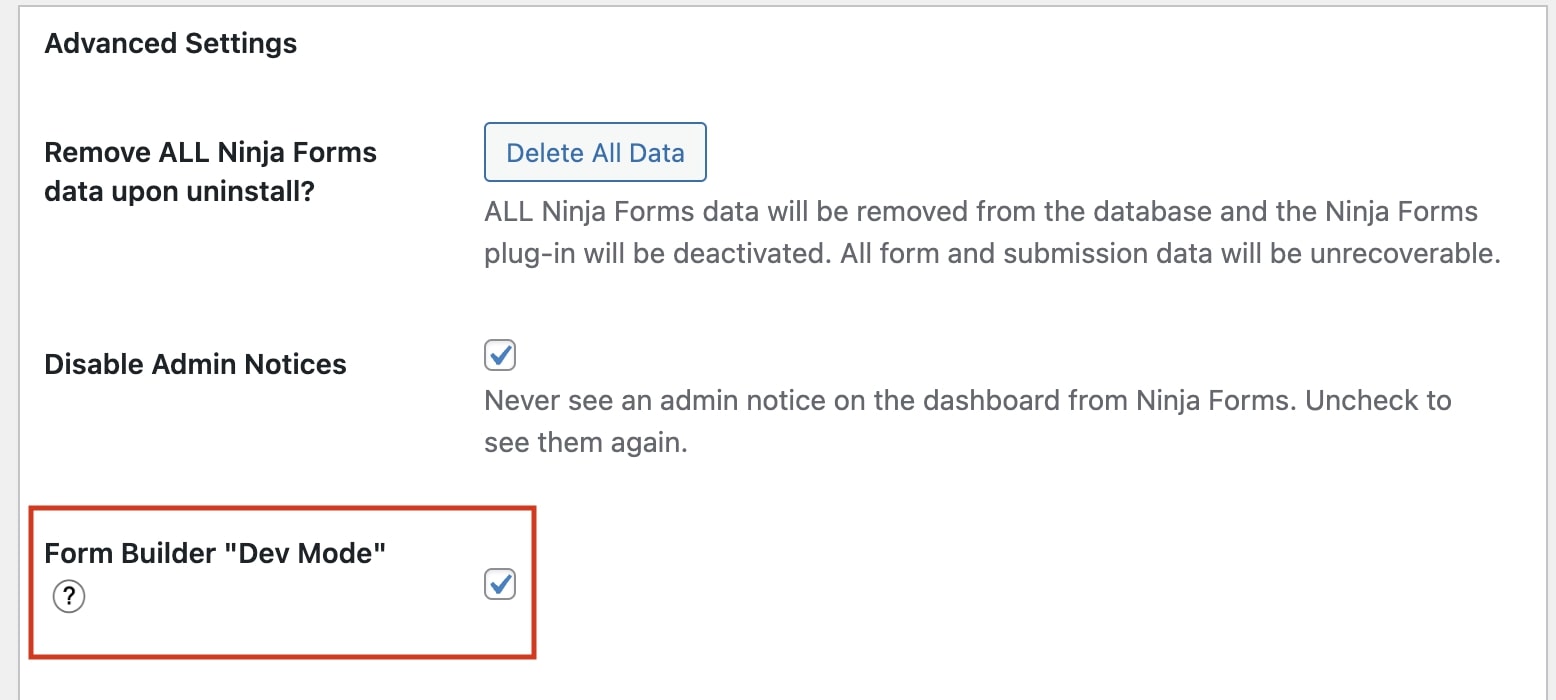
From Ninja Forms > Settings, enable “Developer mode”:
Then, when you create a new form, add a hidden field with the following details:

Add the following placeholder {ywctm-product-id} in the email that you want to create. This will show the link to the product page.
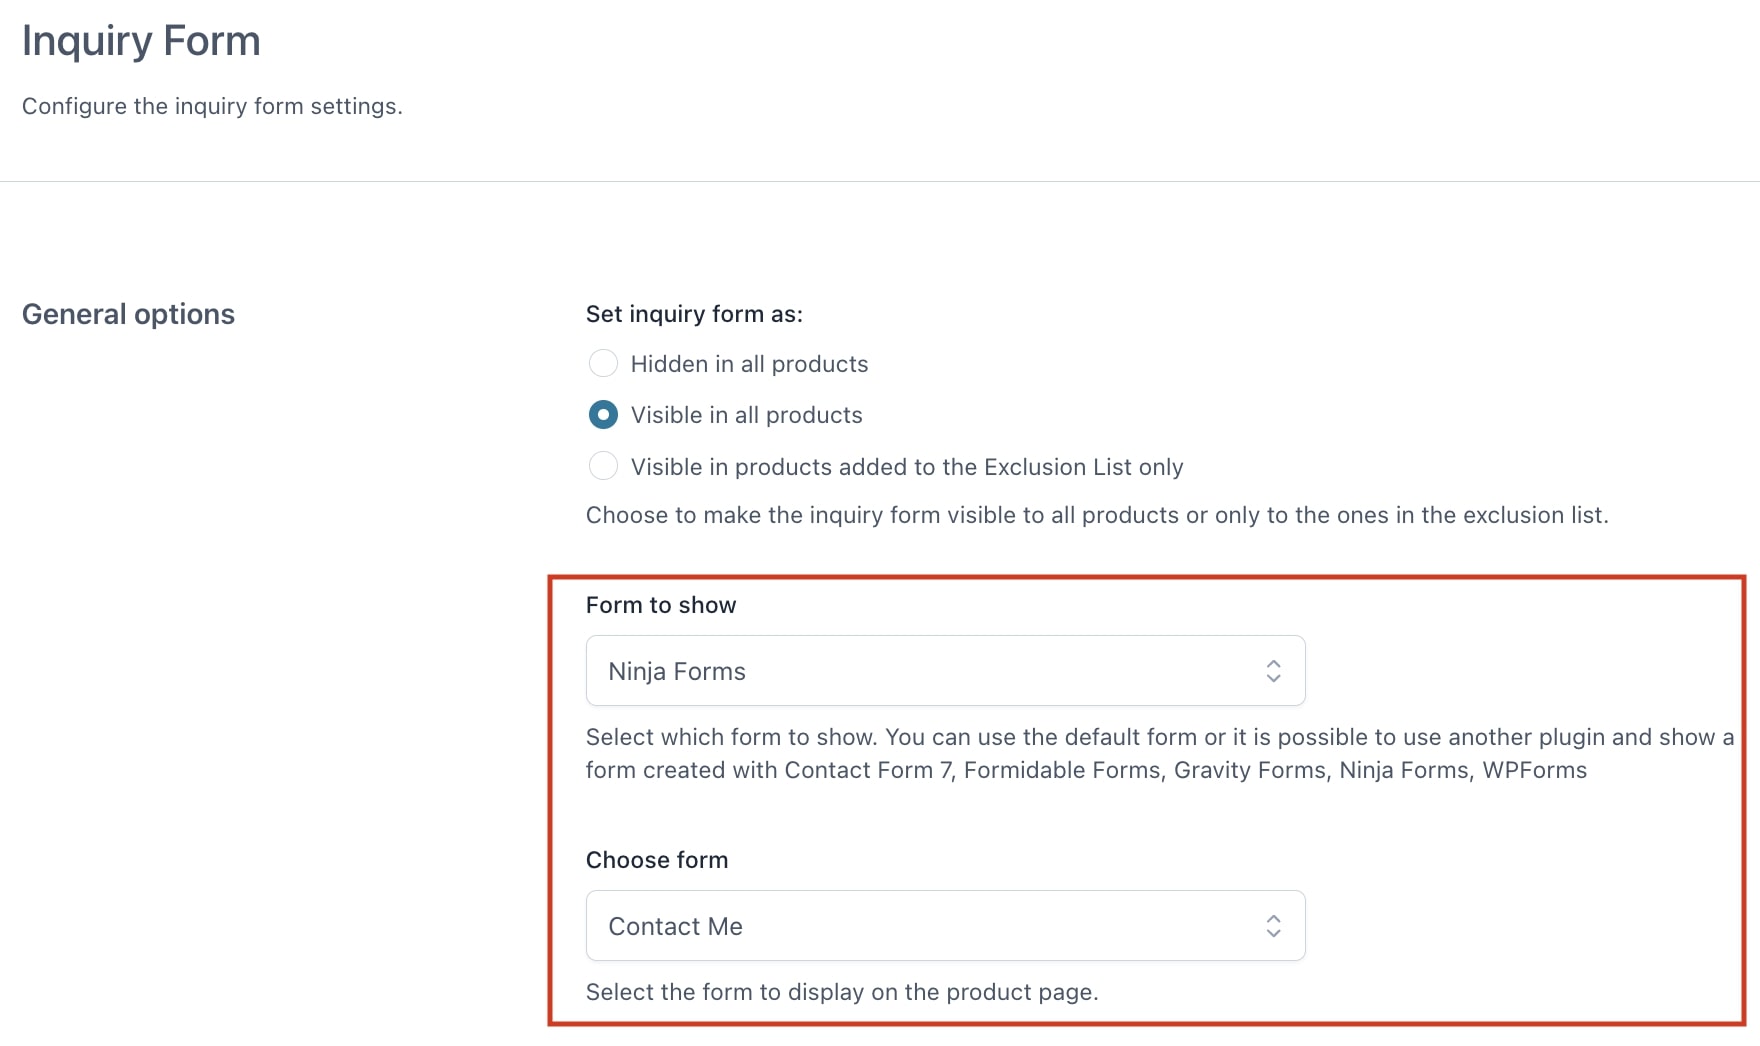
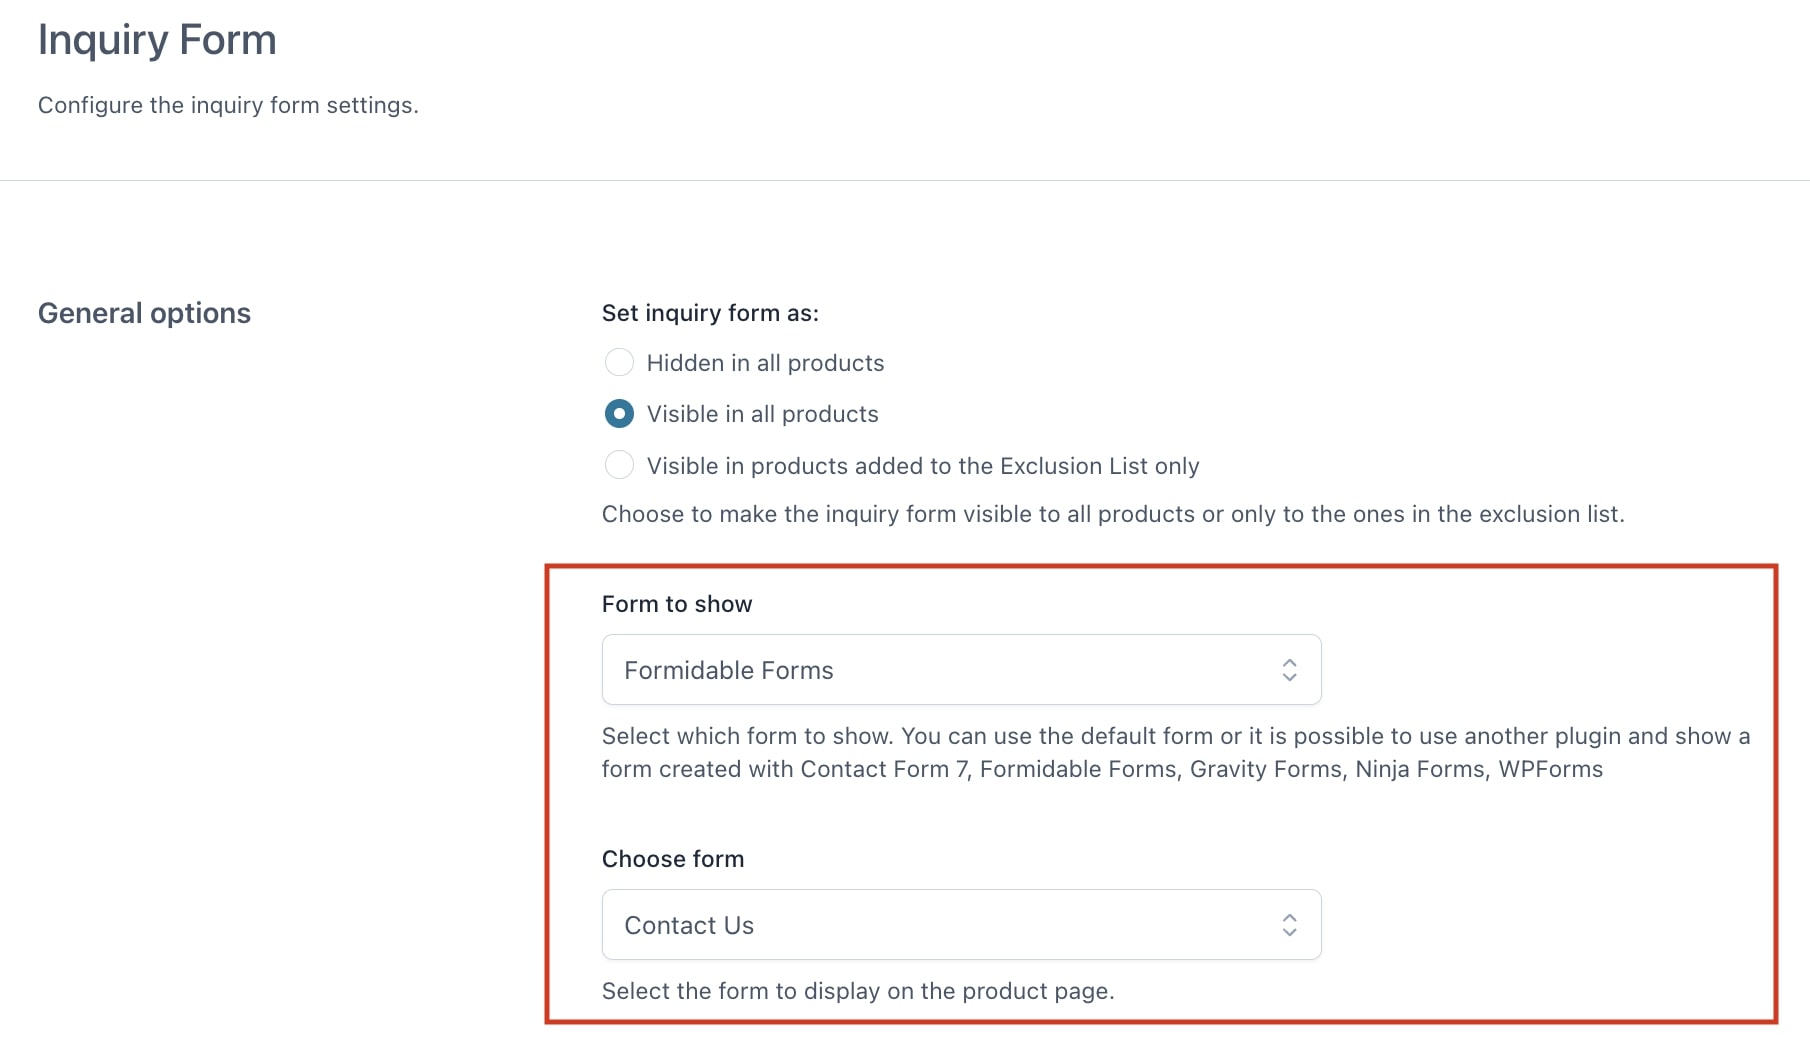
In YITH Catalog Mode > Inquiry Form > General options you will be able to add the form you have created.
Formidable Forms
Create the form based on your needs from Formidable forms settings.
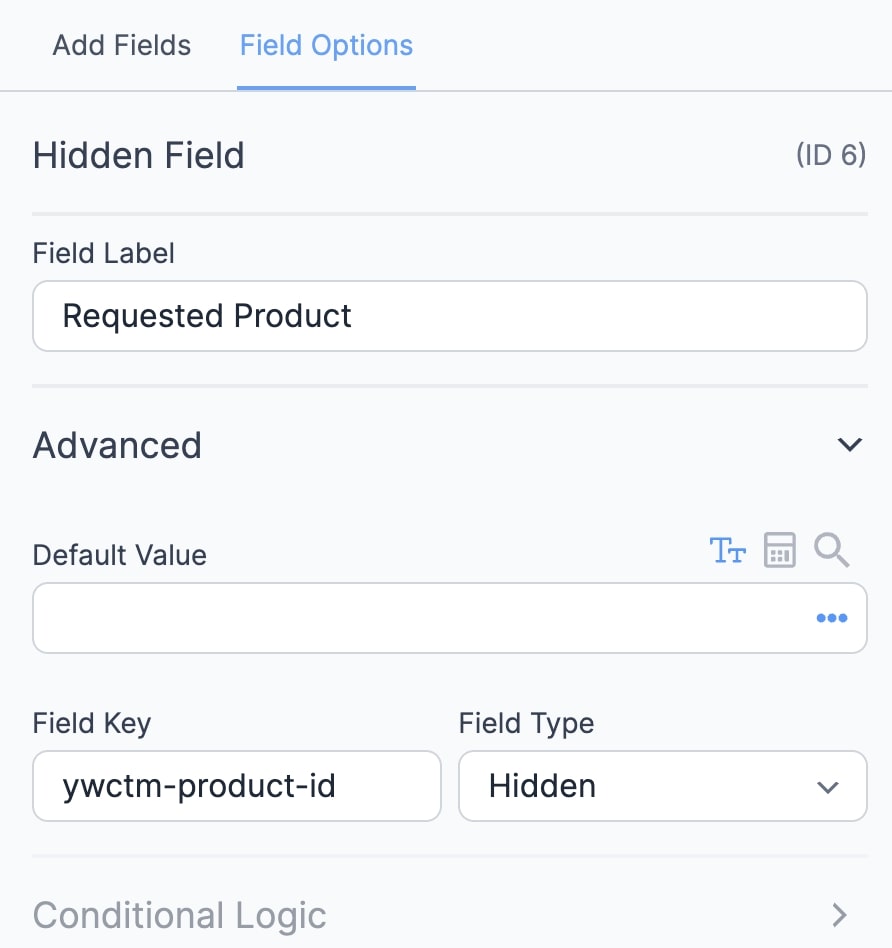
From Build section, make sure you add an extra hidden field with the following ywctm-product-id in Advanced > Field key as shown below:
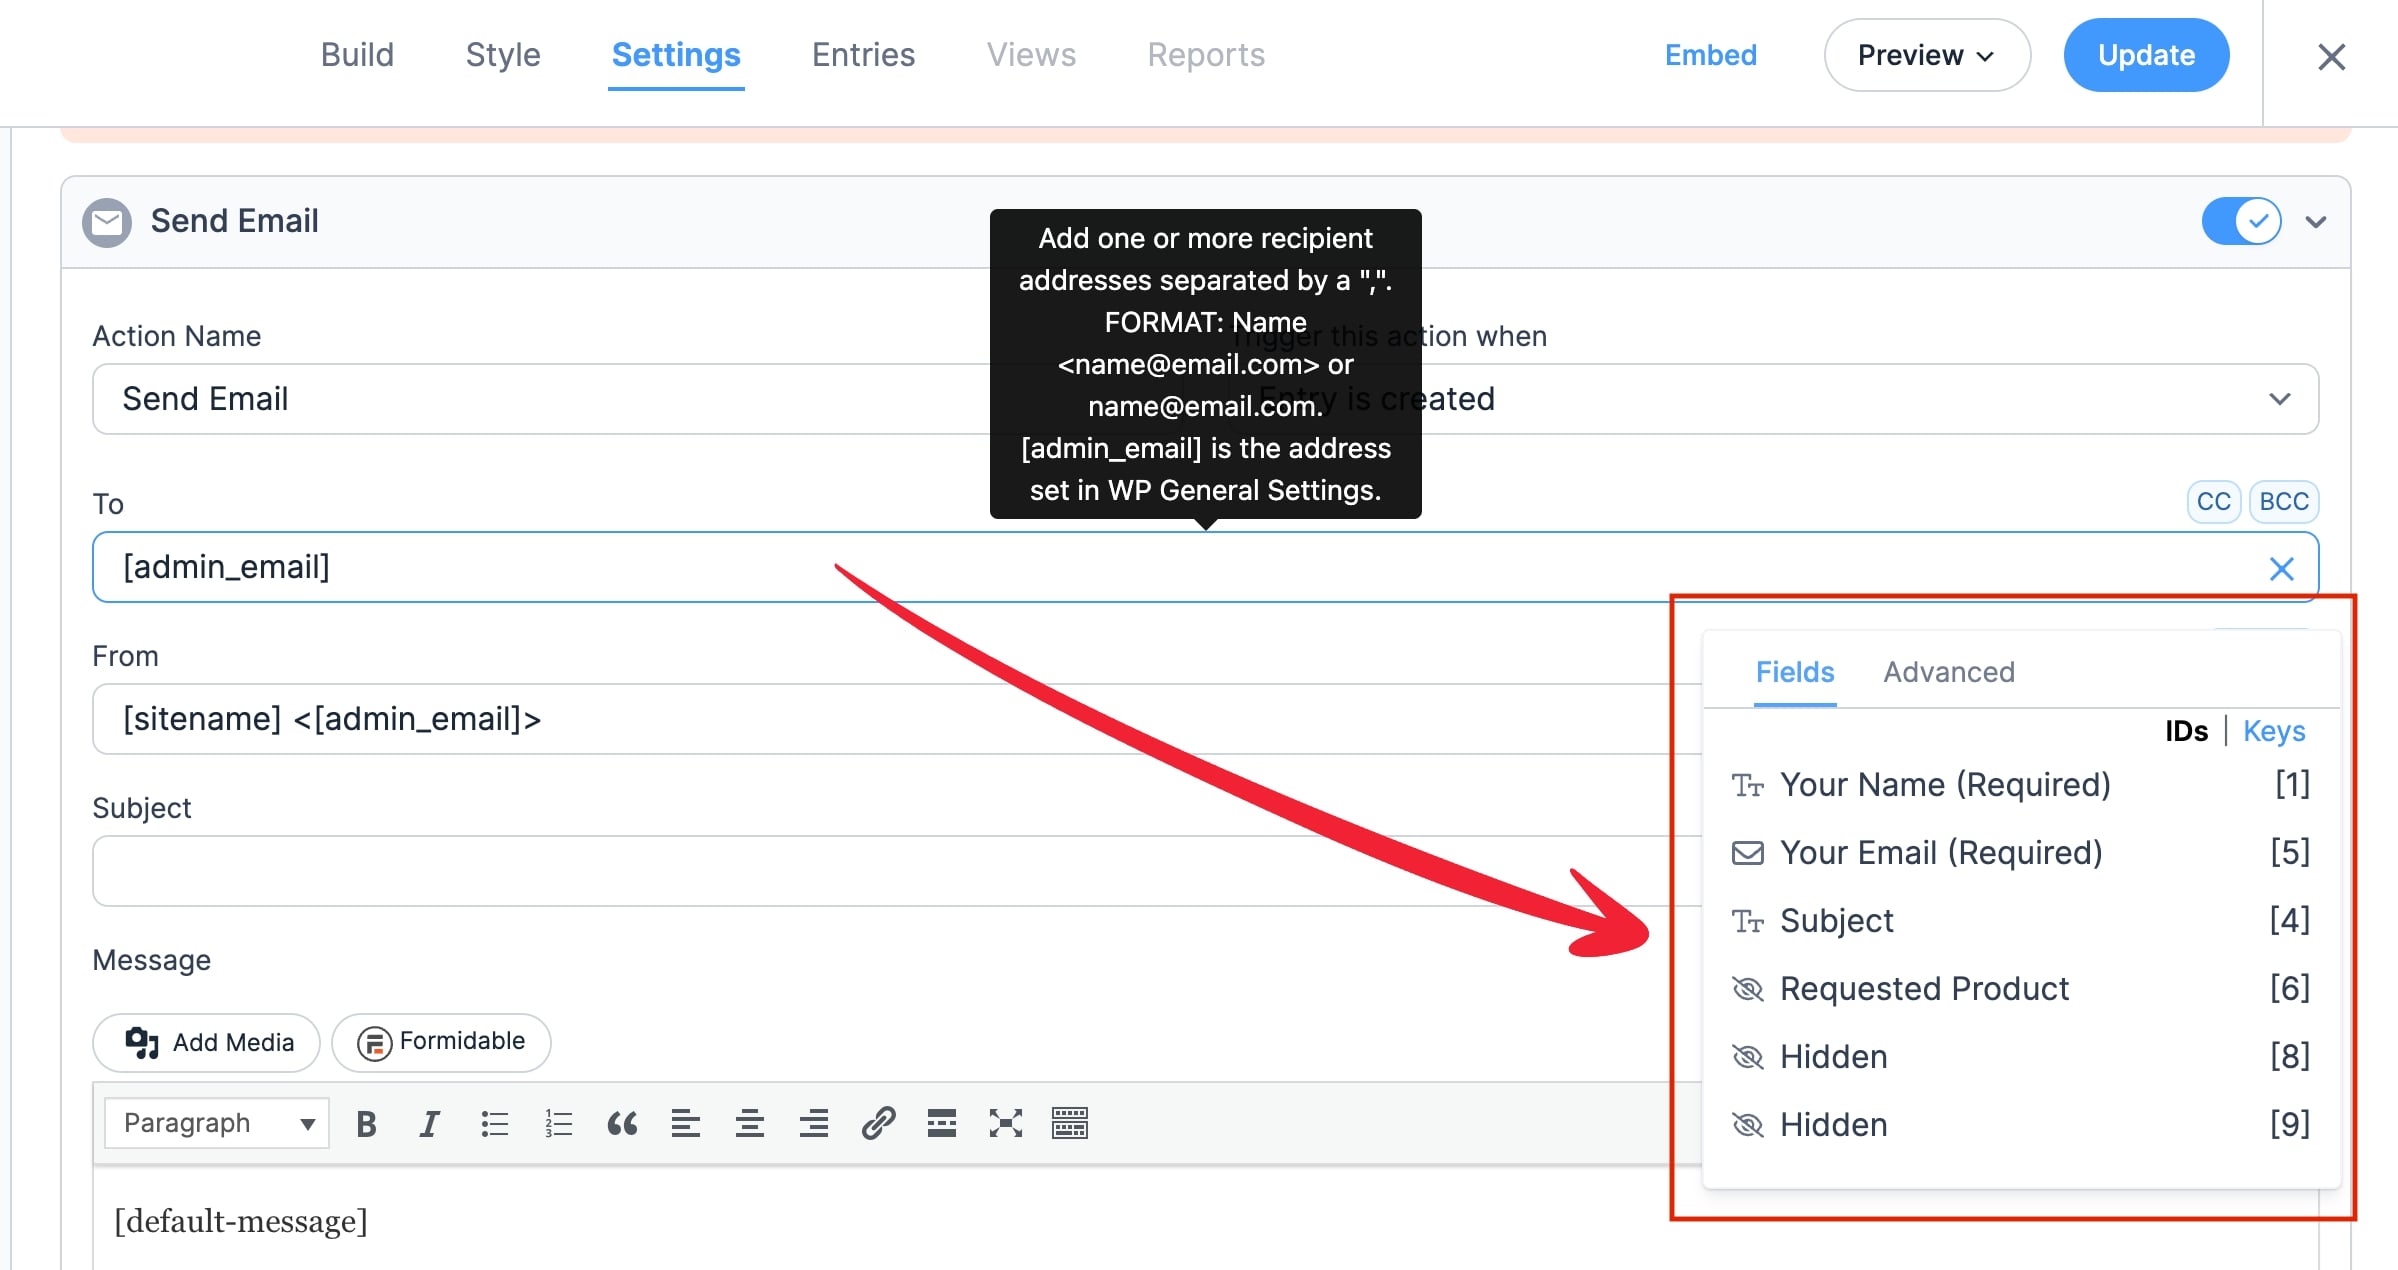
In section Settings > Action & Notifications, in the email body, make sure you include the shortcode [default-message] to add all fields automatically. Alternatively, you can add them one by one using the field-related shortcode created:
In YITH Catalog Mode > Inquiry form > General options you will be able to add the form you have created.
If you want to manage the position, text and color options of the form in the Product page, please, refer to the Form options here.