Do you want to close your online shop during the holidays and make sure your customers have contact you before being able to submit an order?
You’re on the right page then, we will cover this quick setup in this guide.
Step 1 — Users settings
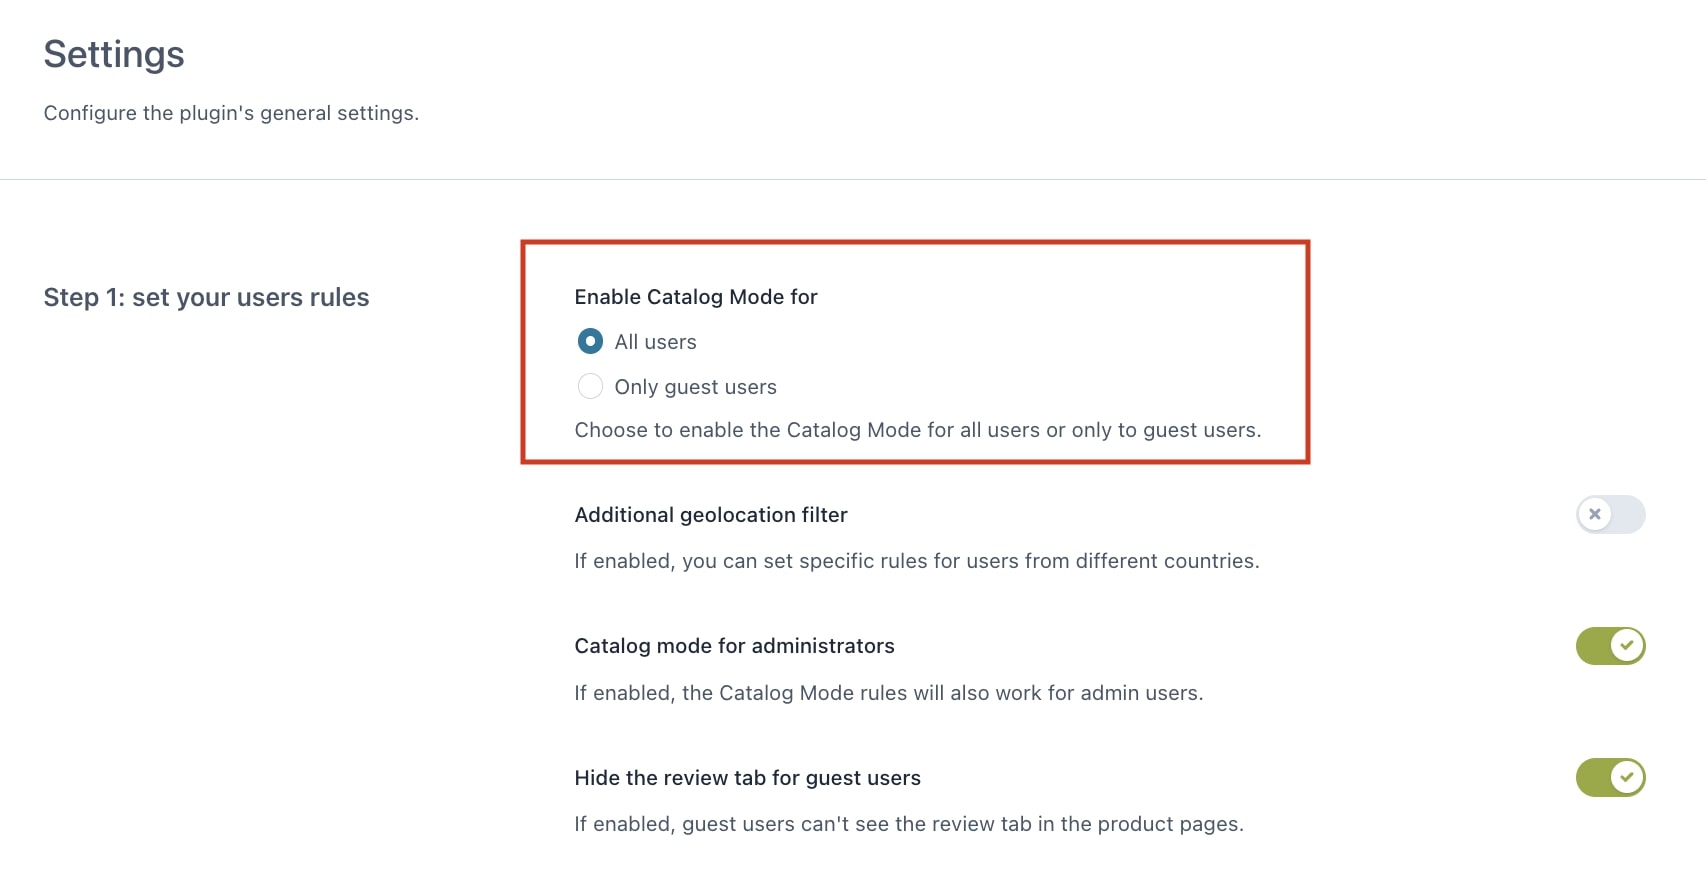
First of all, we want to make sure that what we are going to set up applies to ALL users. So, go to YITH Catalog Mode > Settings > Step 1: set your user rules and select All users.
Step 2 — Disable shop on specific dates
Then, we can enable the catalog mode and select the dates.
Scroll down on the Settings panel, and make sure you turn ON the Disable shop option (1) and Disable shop during this date range, then select a date range (2).
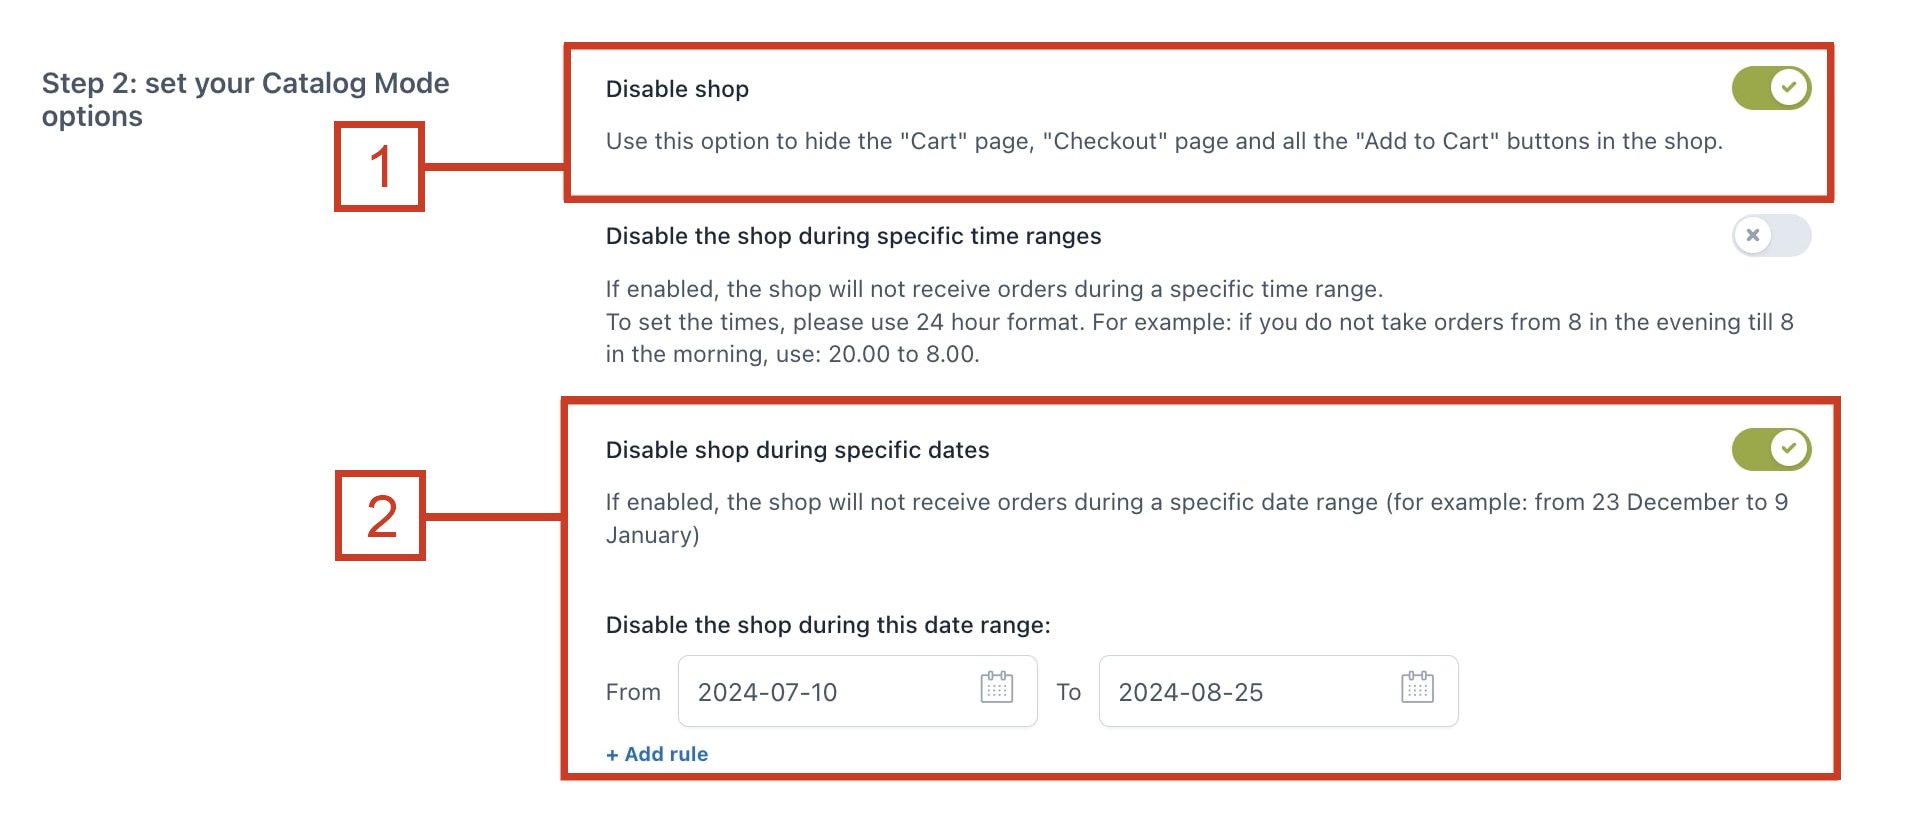
In this case, we have disabled it from July 10th to August 25th, so the Catalog mode options will rule only during this specific date range.
Step 3 — Configure the inquiry form
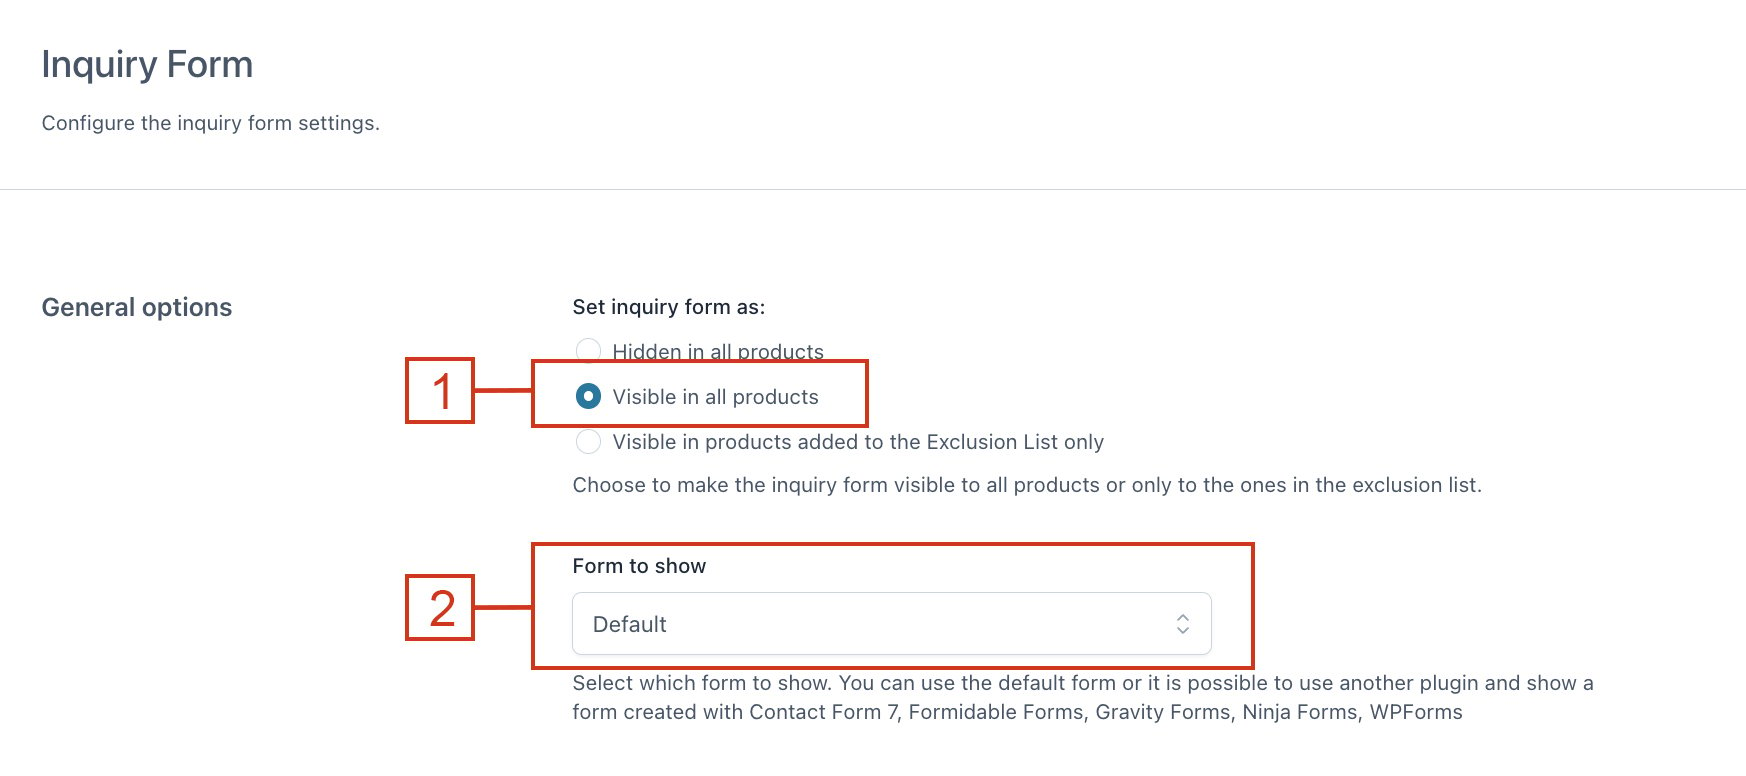
Now we want to use the Default built-in form and make sure that it appears on all products.
Go to the Inquiry form tab and select the following options.
(1) Make sure it is visible on all products.
(2) Default is selected
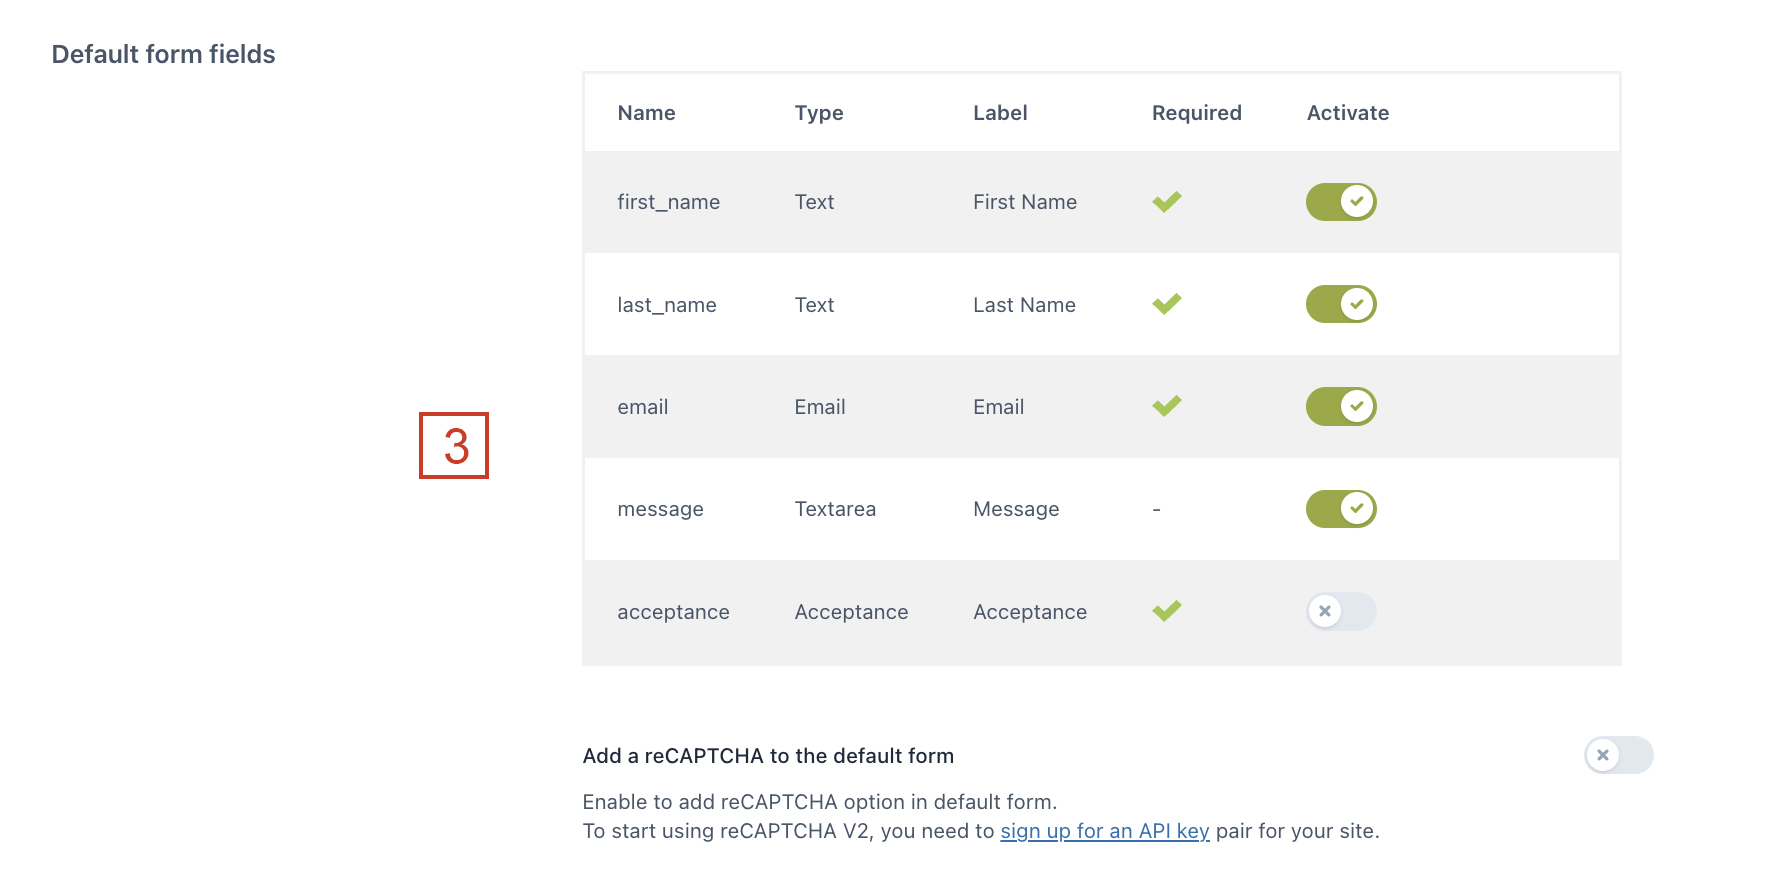
(3) Create the fields for your inquiry form:
Then, select where you want the form to appear on the product page. We want it to appear in the Short description area (4), after the add to cart (5) and in a toggle (6), so the customer has to click on the button to open the form.
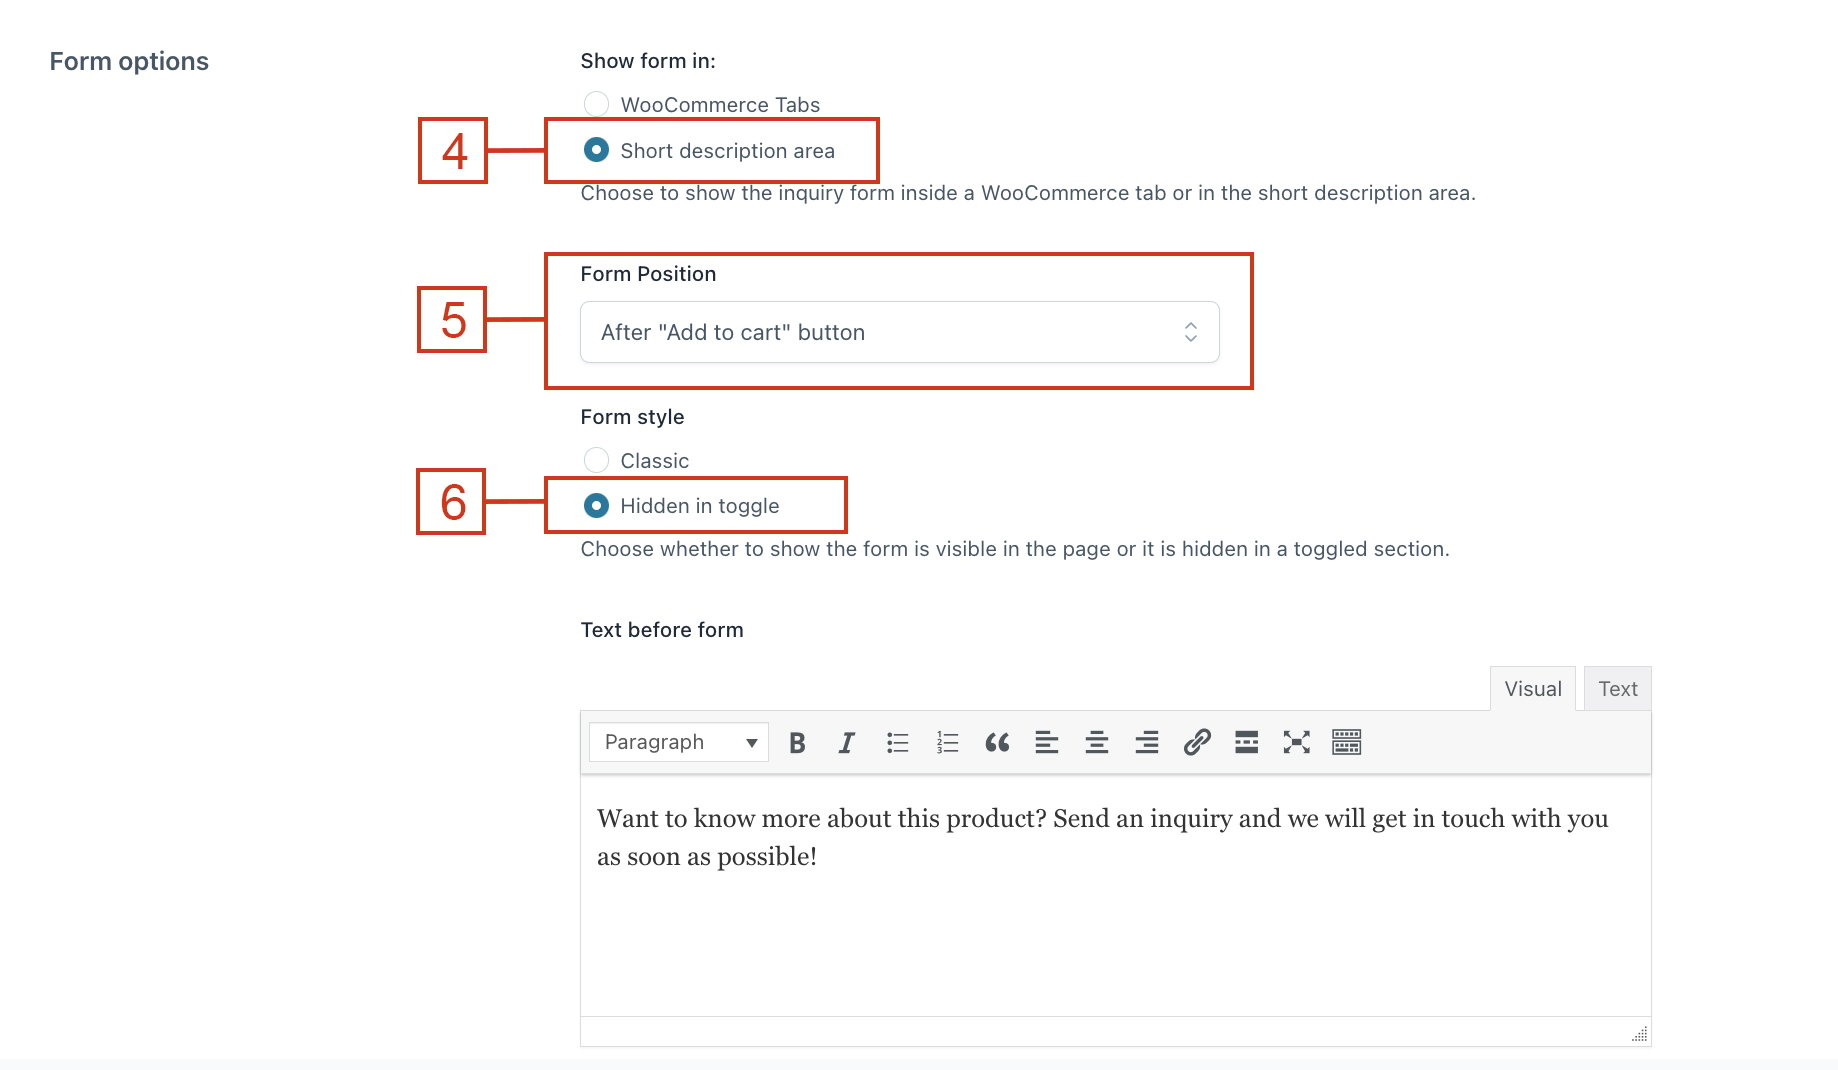
Then save.
Step 3 — Create a custom message box
Now, we have to create a custom message box that will replace the “Add to cart” and price on the product page.
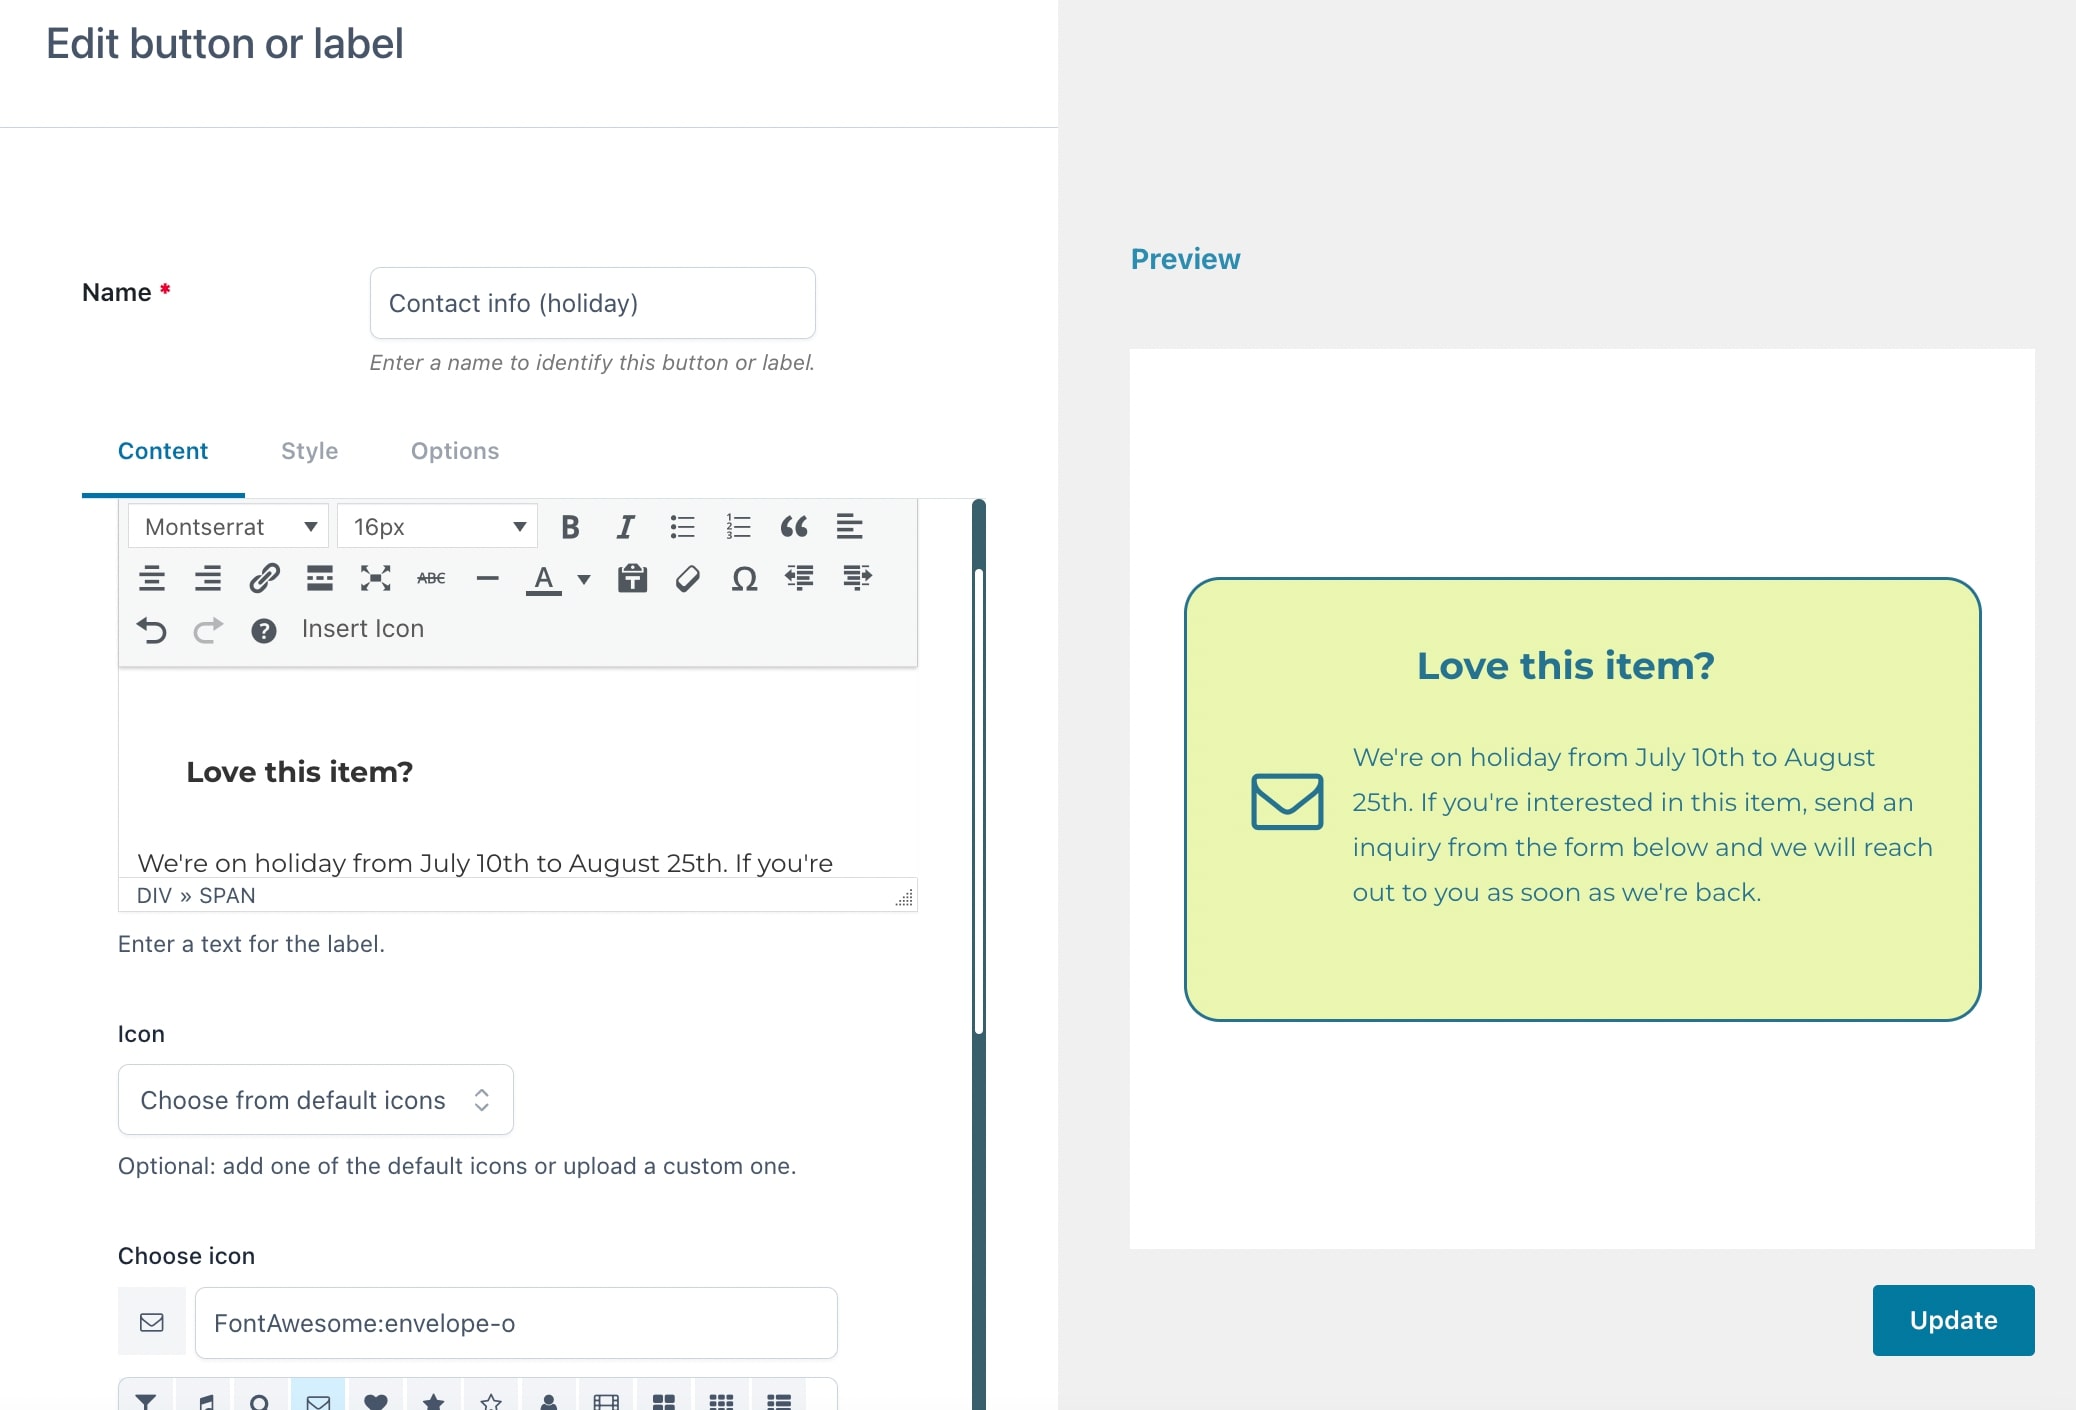
So, let’s go to the Buttons and Labels tab and click on Create new button or label.
In the Content section, add the text:
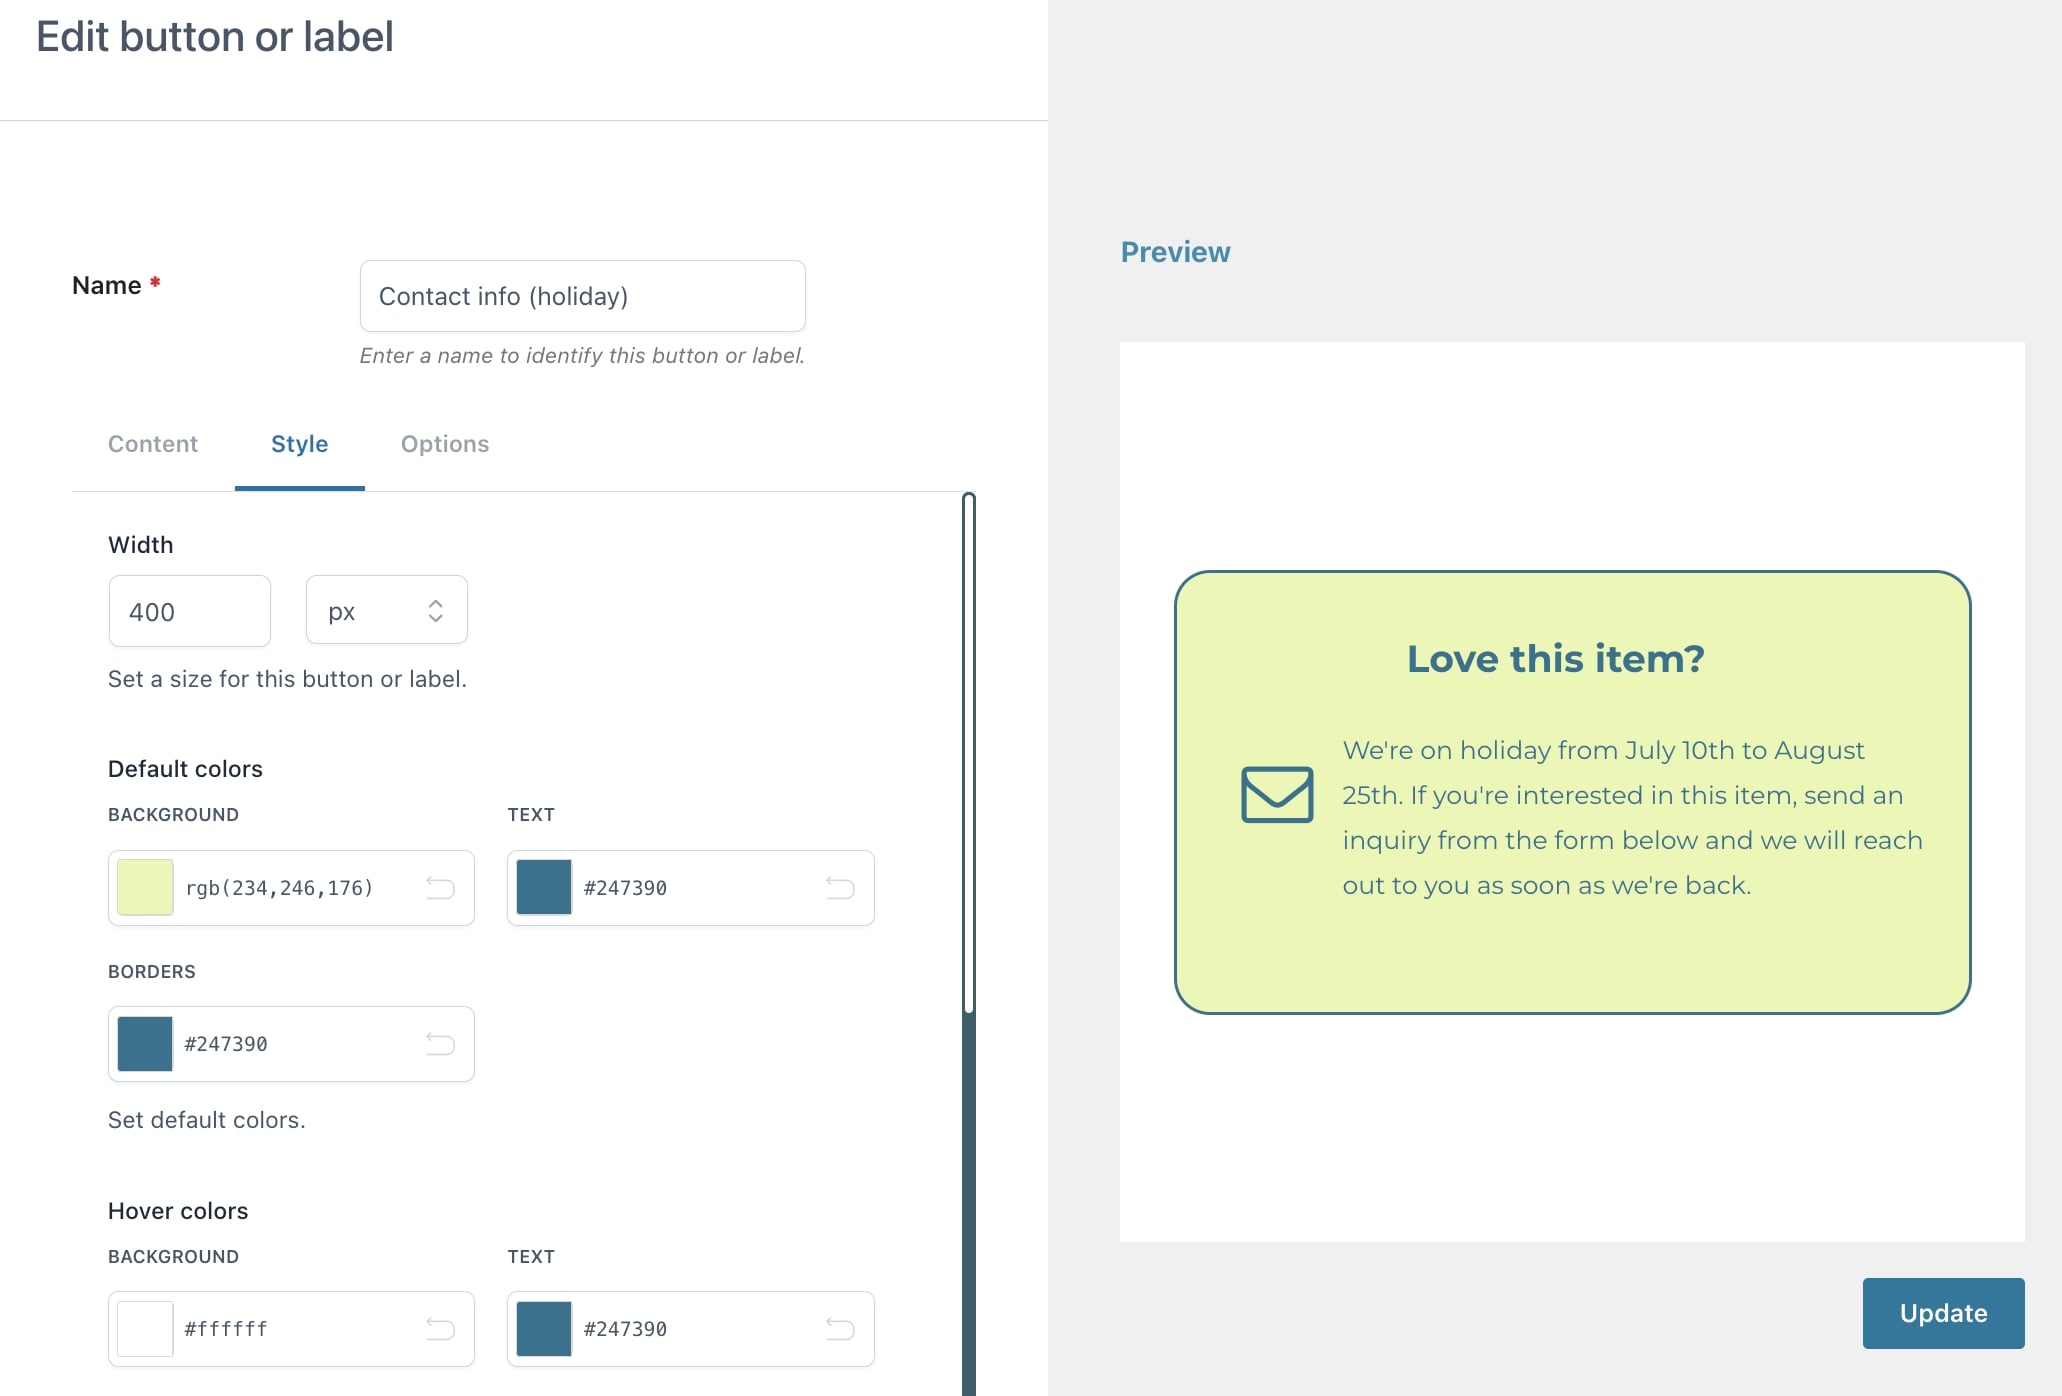
Then, customize the Style options as you prefer:
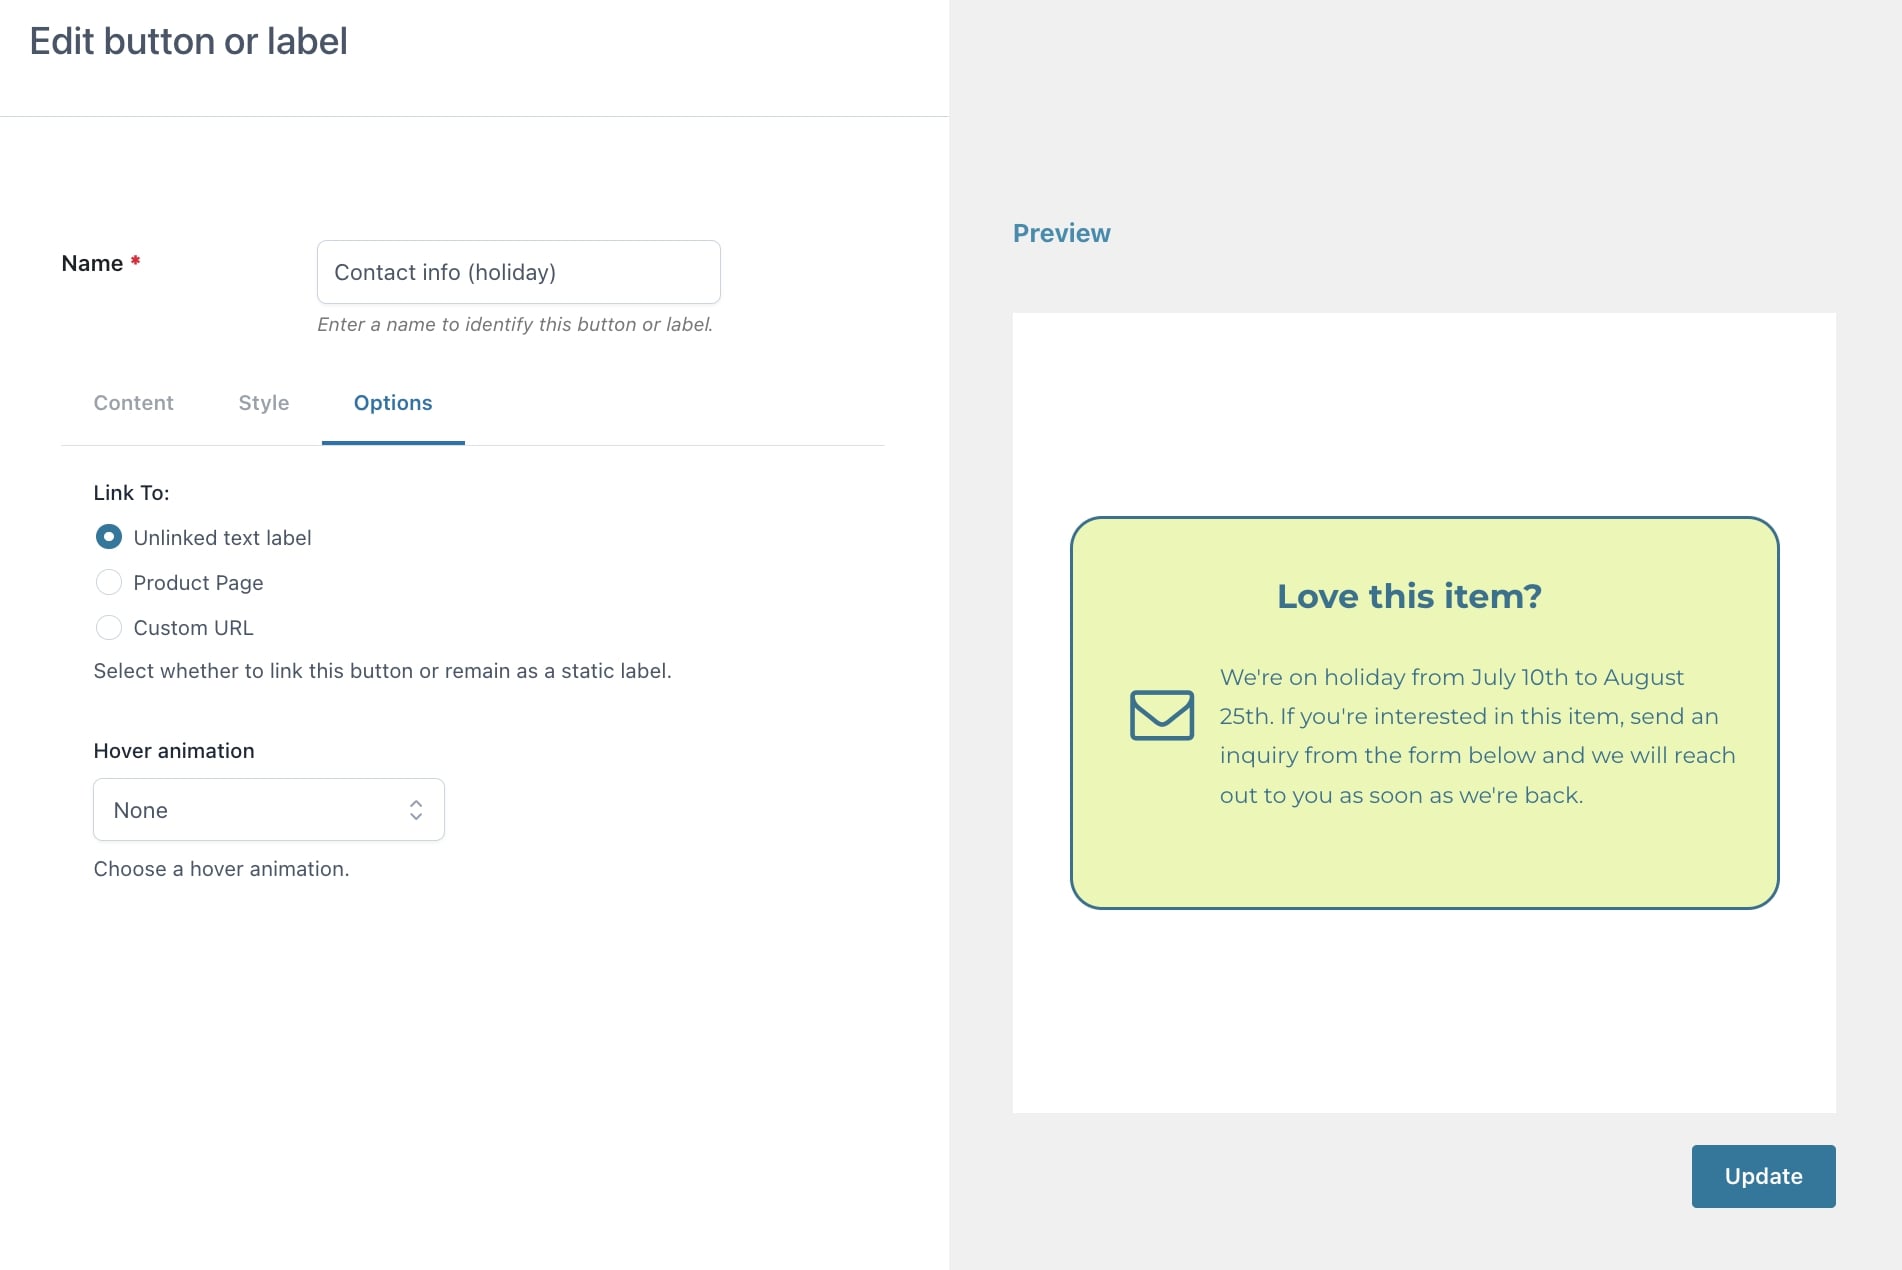
Lastly, from the Options section, select “Unlinked text label” since we don’t want to link our button to any product page or custom url:
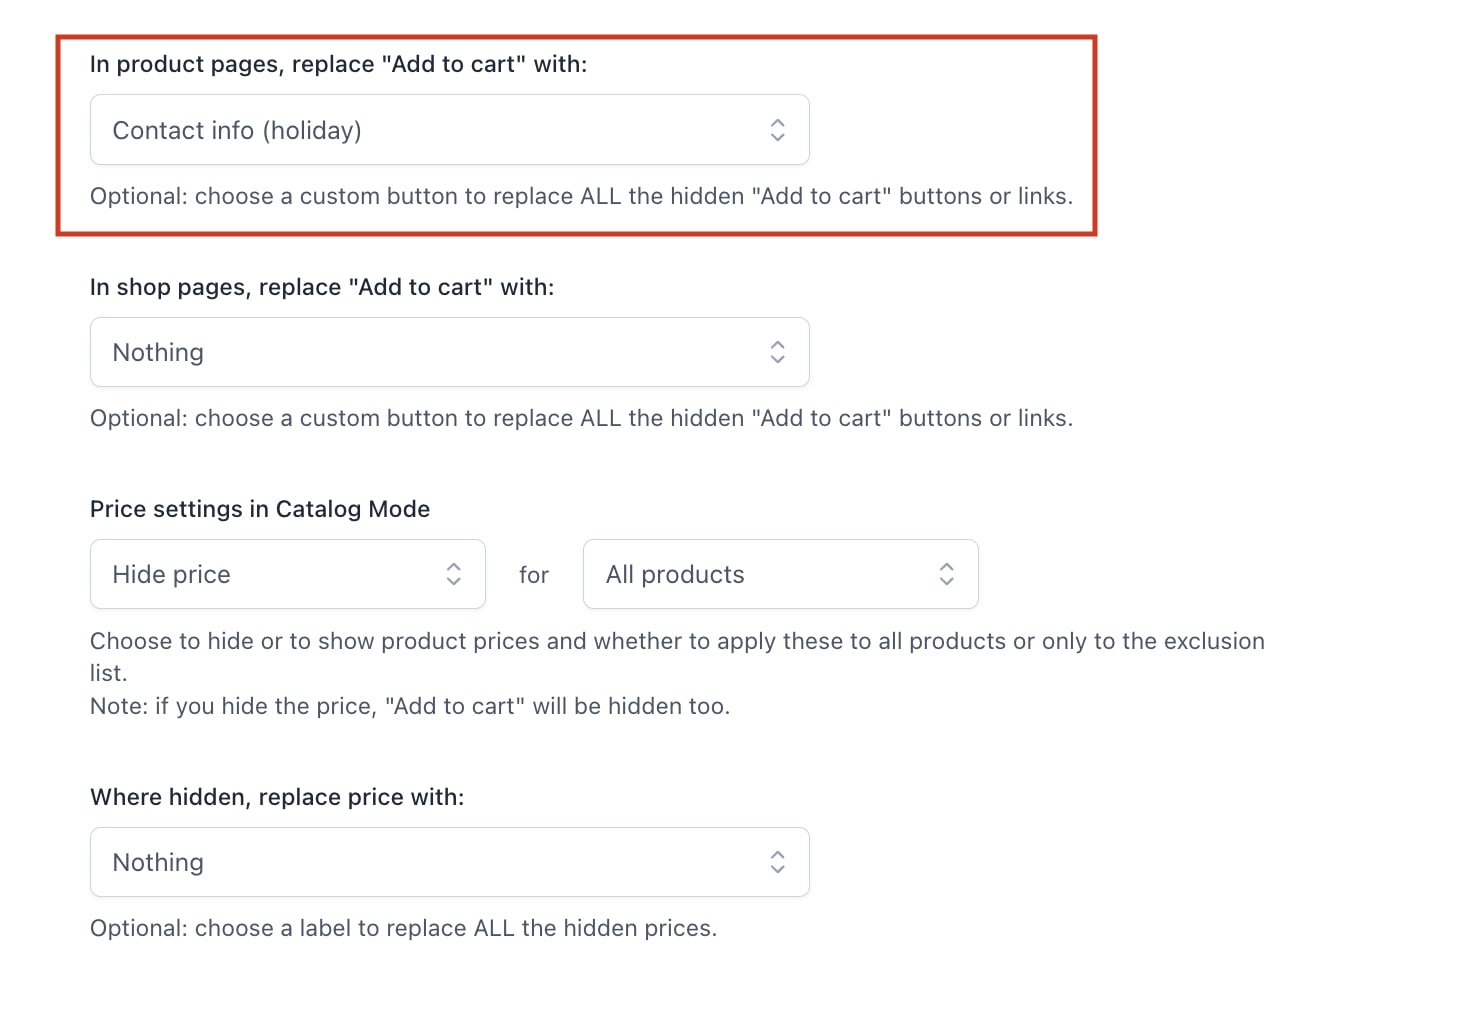
Step 4 — Associate buttons
Now that our custom button has been created, we can go back to the Settings page > Step 2: set your Catalog Mode options and associate it in the option below:
Save the options and we’re done!
In the frontend, this is what users would see on all products during the holiday dates we selected: