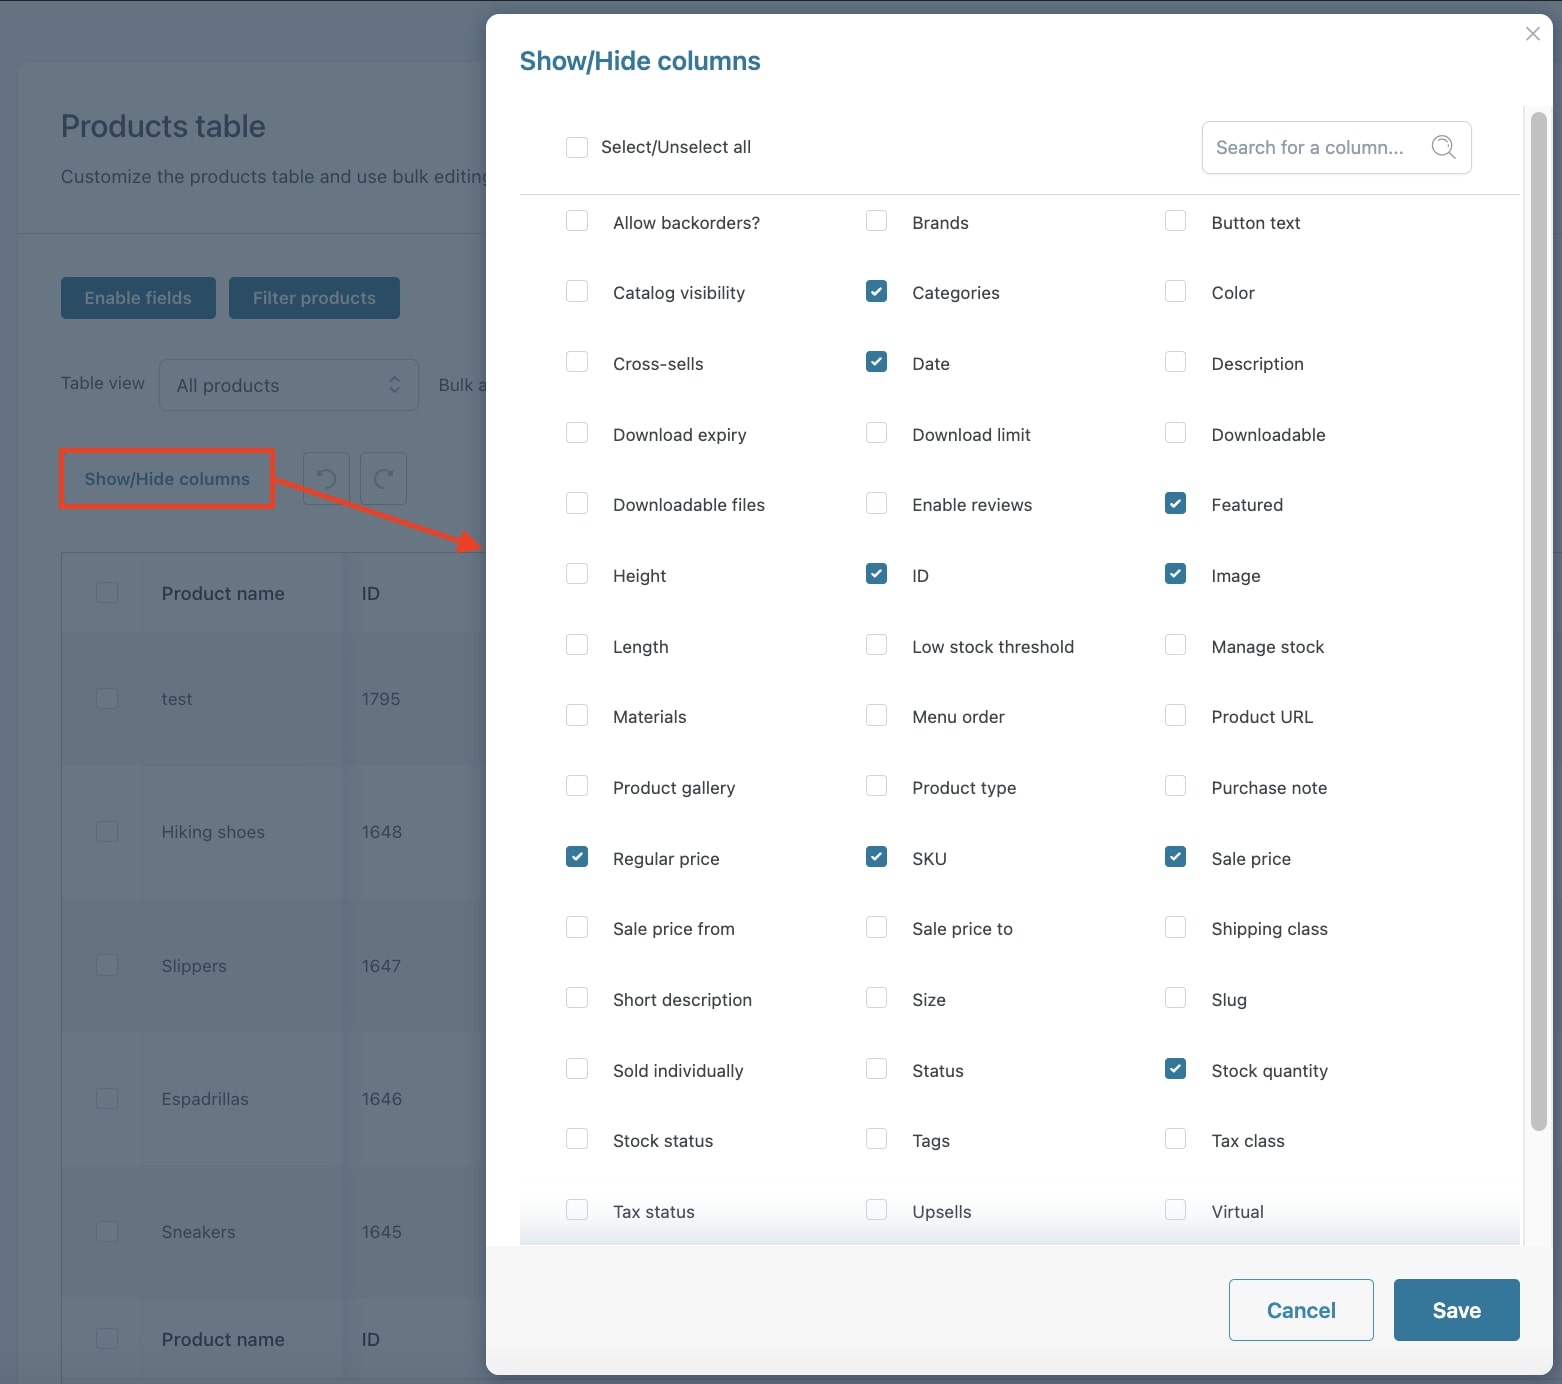
To create a table through which bulk editing your product info easily and quickly, start by selecting the fields you need to edit. Go to YITH > Bulk Product Editing > Products table and click on the Enable fields button.
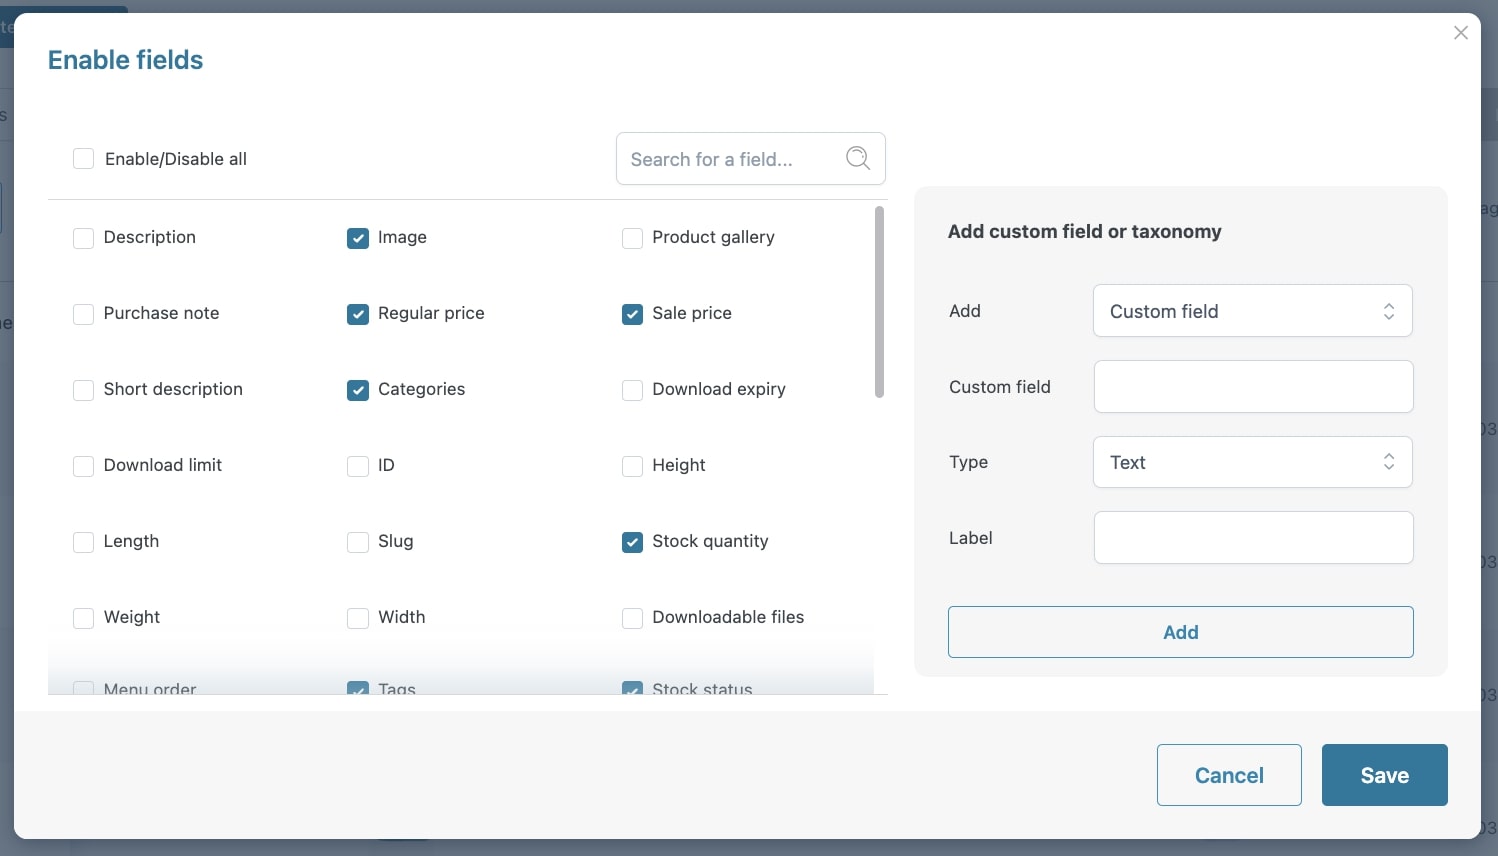
A modal will now open where you will find all the fields that can be bulk-edited. You can enable or disable them all or only specific ones…
…or use the search box to quickly find and enable fields linked to specific product info. In the example below, we want to bulk edit regular and on-sale prices. We type price in the search box and the returned results are related to all the editable product price fields.
After enabling the fields, click on Save. The selected product info will now show in the Products table section.
From the Enable fields modal, you can also add custom taxonomies and custom fields that will be then used for bulk editing.
Custom taxonomies
To add your custom taxonomies to the fields available to be bulk edited, you must first select Taxonomy in the entry Add. Now all the available taxonomies will show in the Taxonomy dropdown. Select one and click on the Add button. Repeat for every custom taxonomy you want to add.
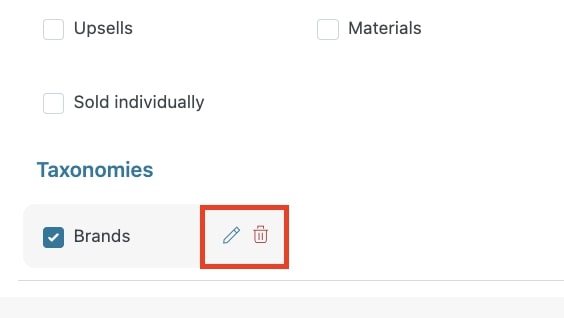
After adding it/them, this is how it/they will show in the modal.
You can now edit or delete each taxonomy directly from the modal. By clicking on the pencil icon, you will be able to select another custom taxonomy among the ones available.
Enable or disable the fields and click on Save.
Custom fields
To add custom fields to be bulk edited, you must first select Custom field in the entry Add and then enter the custom field ID. Now select the custom field type by choosing from Priceor Text and optionally enter a label. Click on the Add button and repeat for every custom field you want to add.
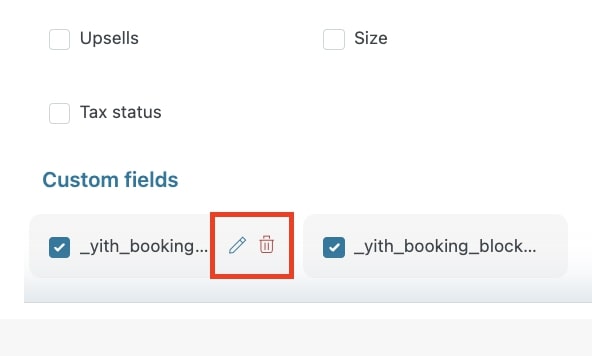
After adding it/them, this is how it/they will show in the modal.
You can now edit or delete each taxonomy directly from the modal. By clicking on the pencil icon, you will be able to select another custom taxonomy among the ones available.
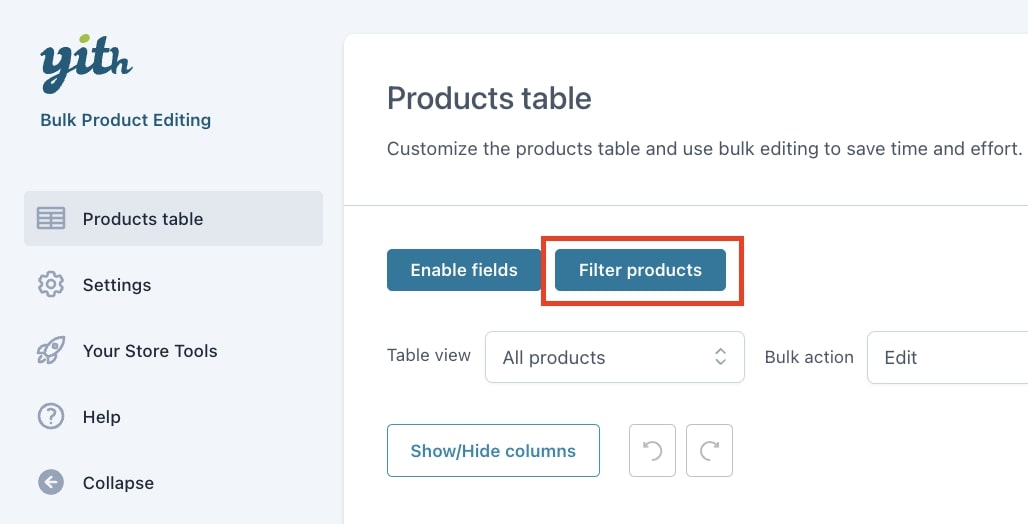
By default, the table shows all the products of your shop, but you can filter them and create unlimited custom views to choose the products to show in the table. This can be useful if you want to show only products matching specific conditions for easier and quicker bulk editing. Let’s learn how to do it.
Click on the button Filter products.
Set the filters based on the bulk editing you need to apply. Here you can choose from:
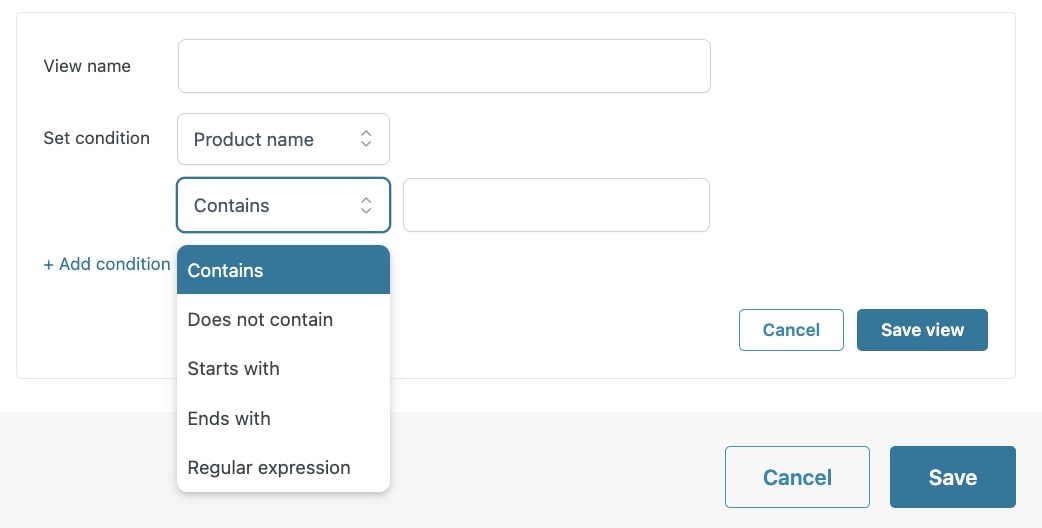
product name: insert a value after selecting one of the following options: Contains, Does not contain, Starts with, Ends with, or Regular expression.
description: insert a value after selecting one of the following options: Contains, Does not contain, Starts with, Ends with, or Regular expression.
SKU: insert a value after selecting one of the following options: Contains, Does not contain, Starts with, Ends with, or Regular expression.
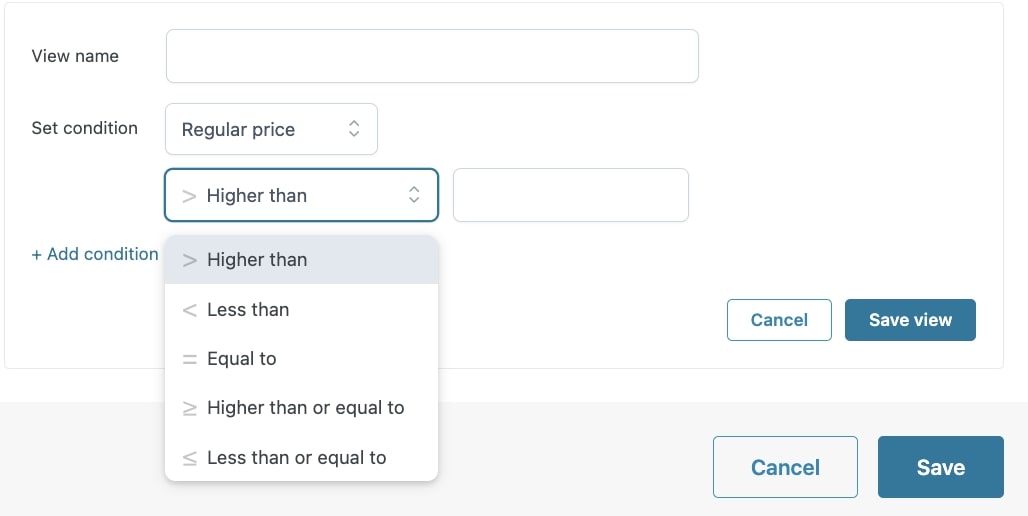
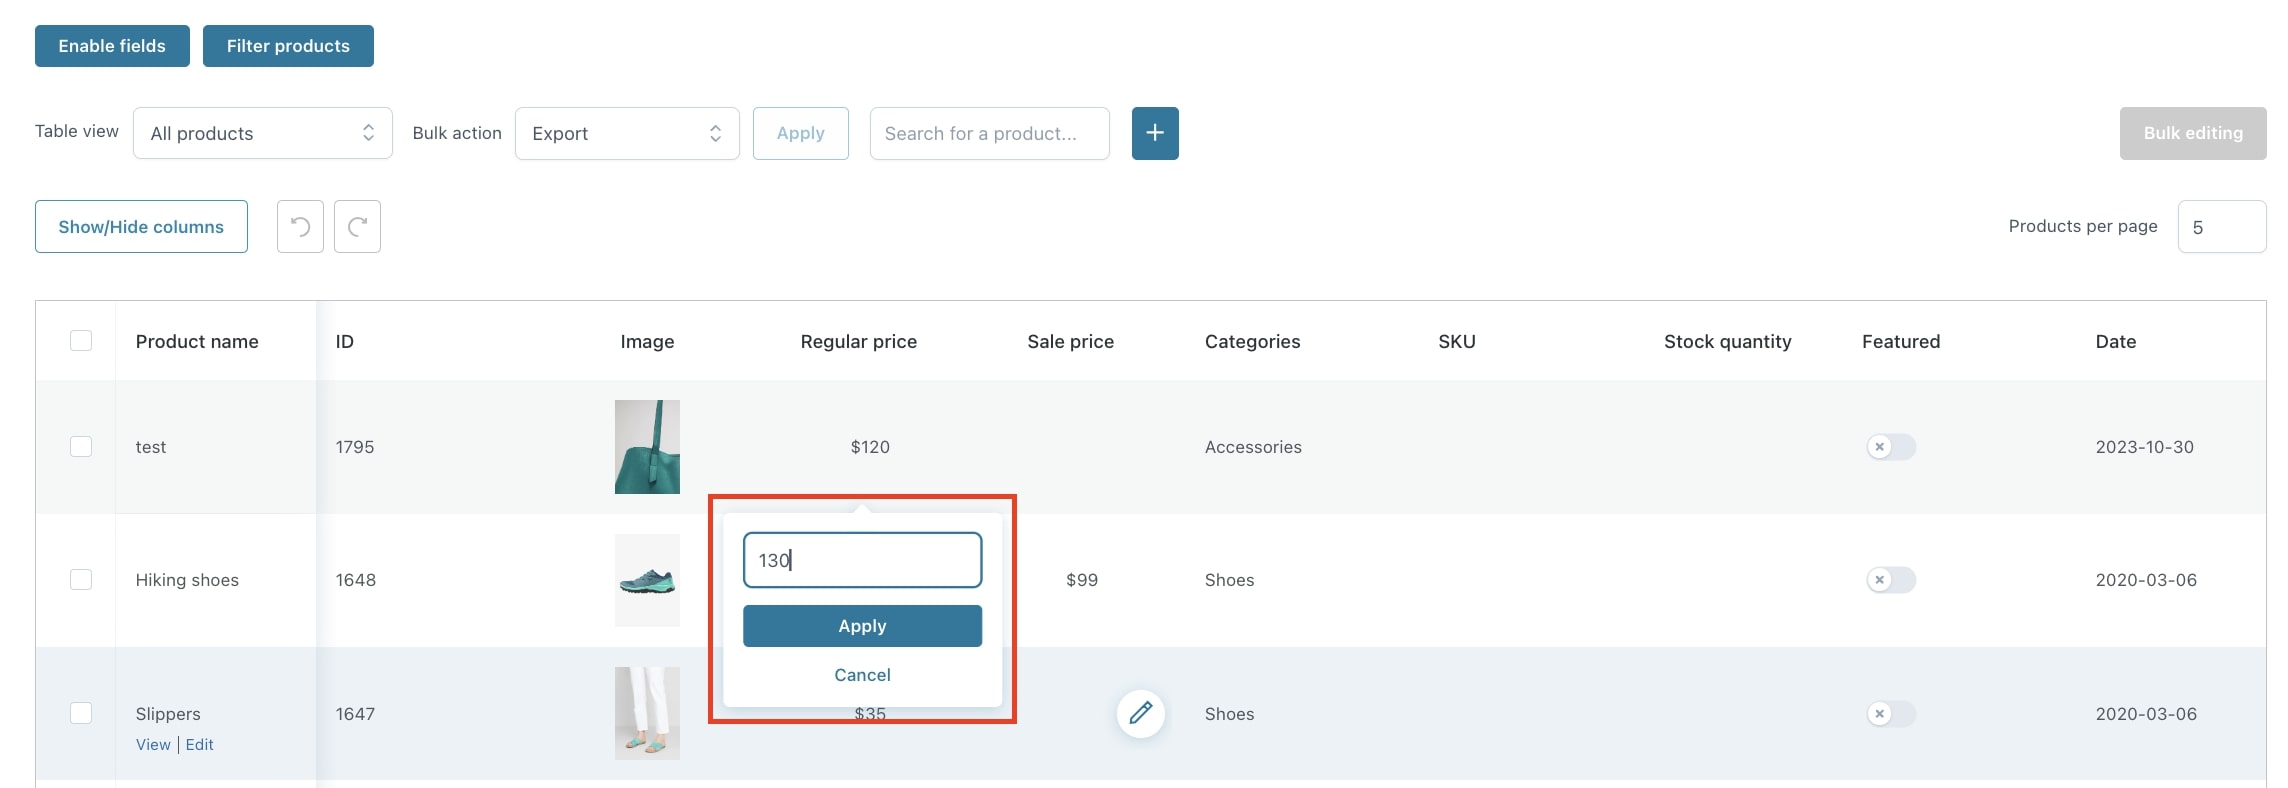
regular price: insert a value after selecting one of the following options: Higher than, Less than, Equal to, Higher than or equal to, Less than or equal to.
sale price: insert a value after selecting one of the following options: Higher than, Less than, Equal to, Higher than or equal to, Less than or equal to.
height: insert a value after selecting one of the following options: Higher than, Less than, Equal to, Higher than or equal to, Less than or equal to.
width: insert a value after selecting one of the following options: Higher than, Less than, Equal to, Higher than or equal to, Less than or equal to.
length: insert a value after selecting one of the following options: Higher than, Less than, Equal to, Higher than or equal to, Less than or equal to.
weight: insert a value after selecting one of the following options: Higher than, Less than, Equal to, Higher than or equal to, Less than or equal to.
stock quantity: insert a value after selecting one of the following options: Higher than, Less than, Equal to, Higher than or equal to, Less than or equal to.
stock status: select one of the following options: In stock, Out of stock, On backorder.
categories: search categories after selecting one of the following options: Is, Is not.
tags: search tags after selecting one of the following options: Is, Is not.
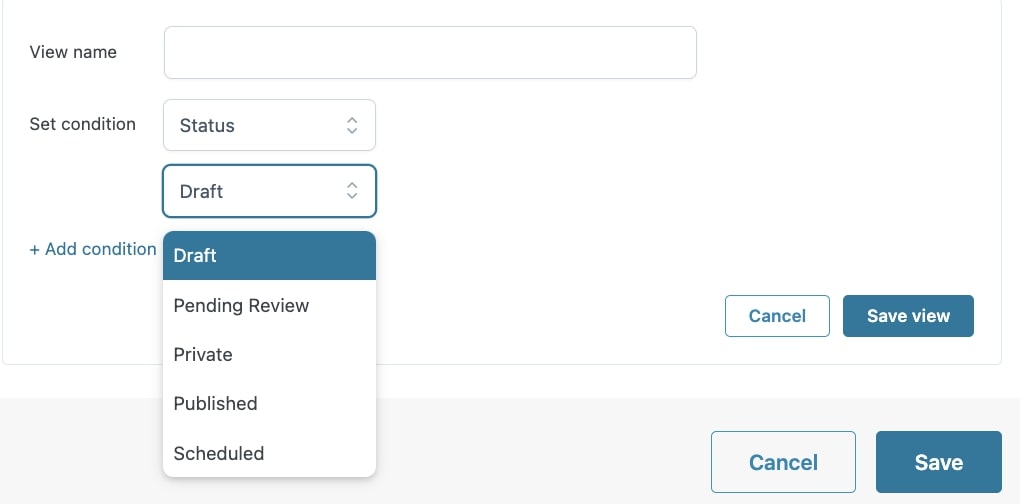
status: select one of the following options: Draft, Pending review, Private, Published, Scheduled.
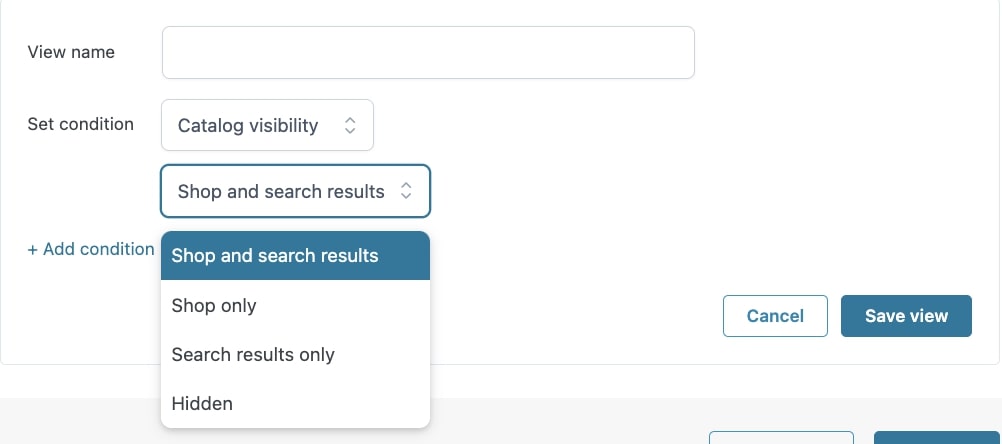
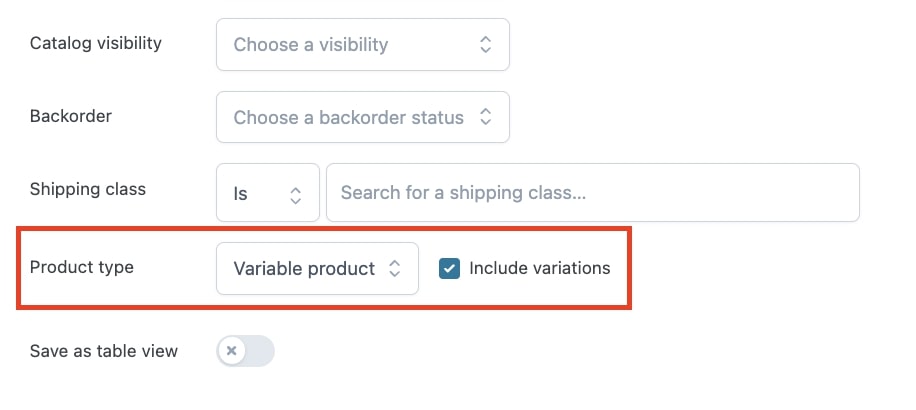
catalog visibility: select one of the following options: Shop and search results, Shop only, Search results only, Hidden.
backorder: select one of the following options: Do not allow, Allow, but notify customer, Allow.
shipping class: select is/is not and search the shipping class configured on your website.
product type: select one of the following options: All product types, Simple product, Variable product, Variation. By choosing Variable products, you can decide whether to include product variations by enabling/disabling the related checkbox.
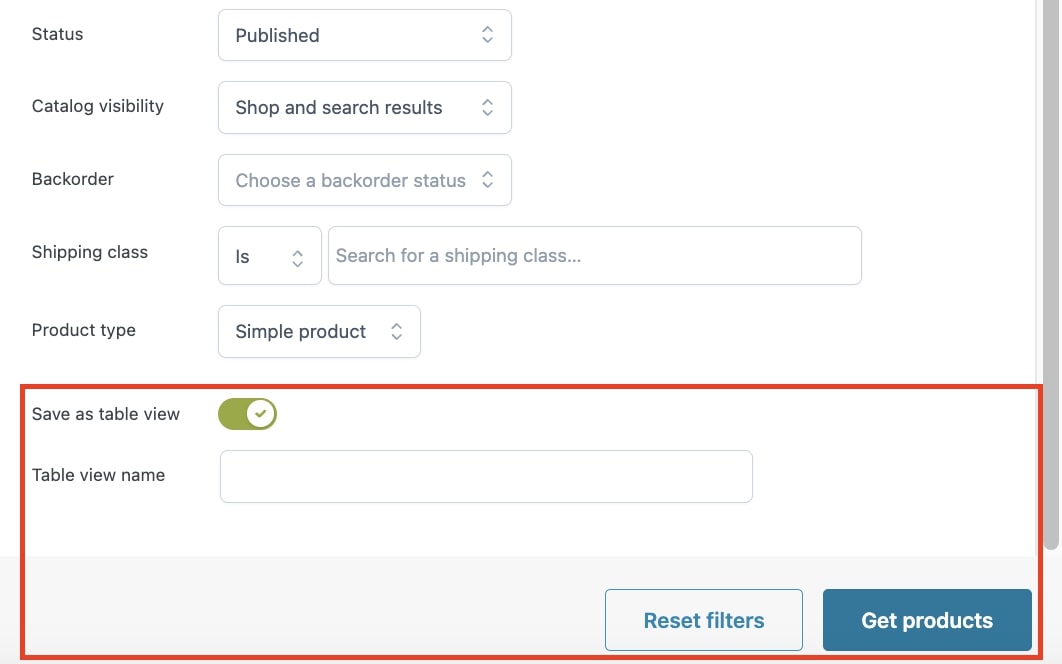
Now, after setting up your filters, you will be able to:
Save as table view: by enabling this option, the configured filters will be included in a view. This can be useful for bulk editing you often apply.
Table view name: enter a name to define the view to easily find it in the table view dropdown.
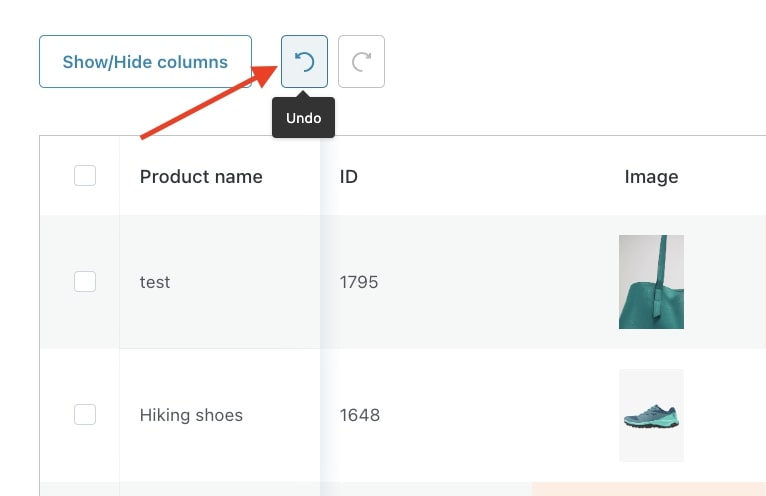
Reset filters: click on this button if you need to reset the configured filter.
Get products: by clicking on this button, the products will show in the Products table according to the configured filters.
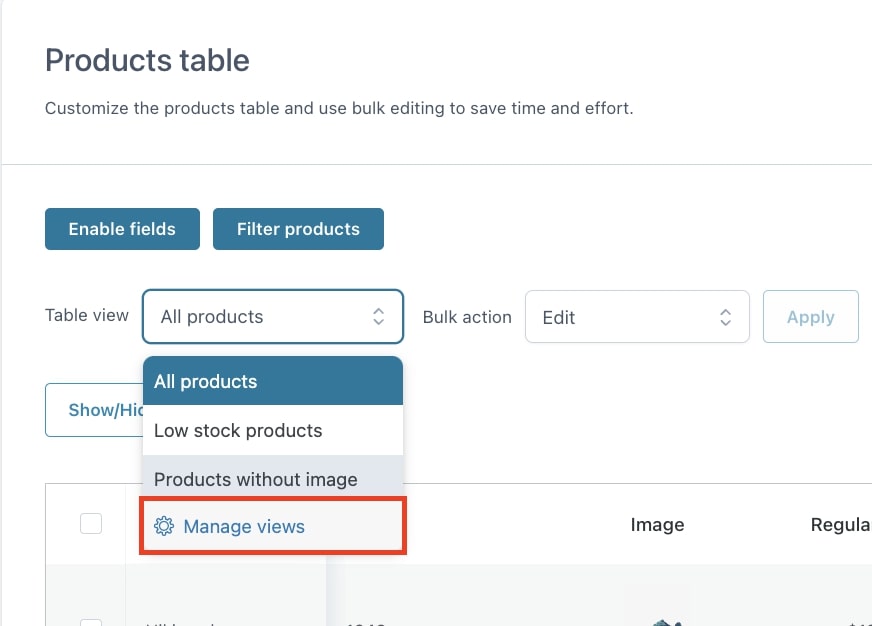
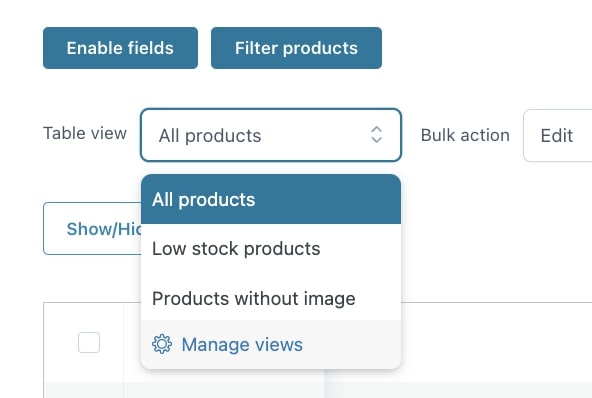
To create your table views, go to the Products table section and select Manage views in the Table view option.
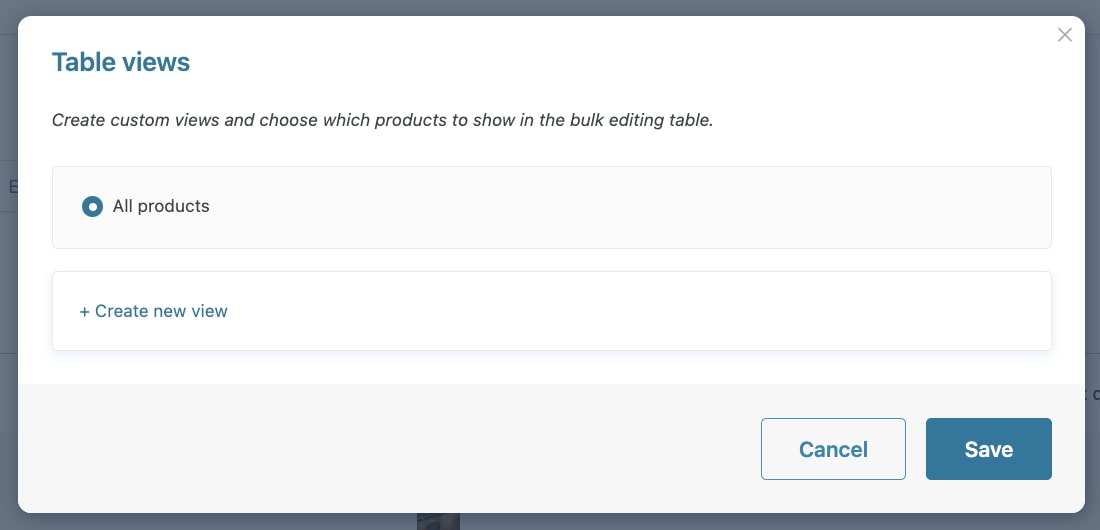
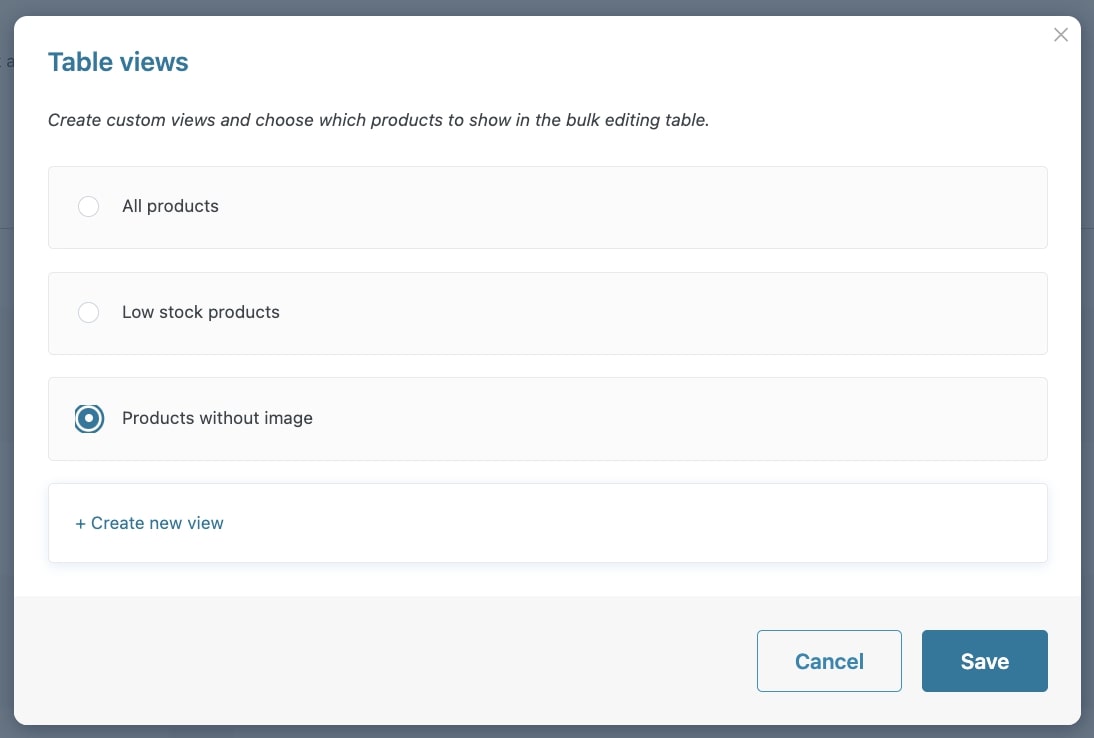
A modal will open. Now click on + Create new view.
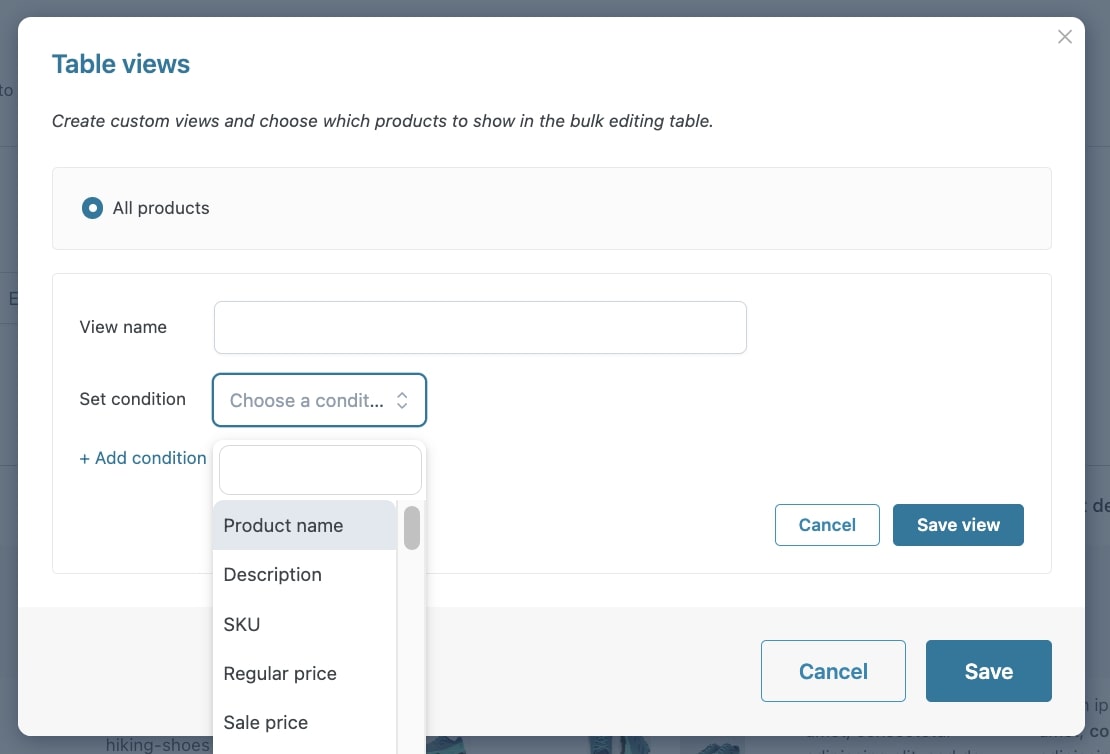
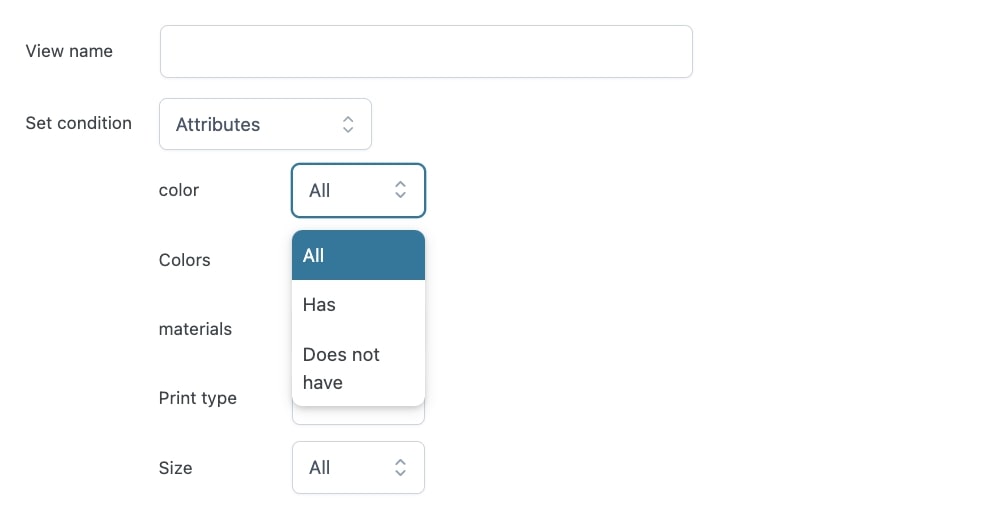
You can start building your custom views to show products in the bulk editing table by configuring the following options:
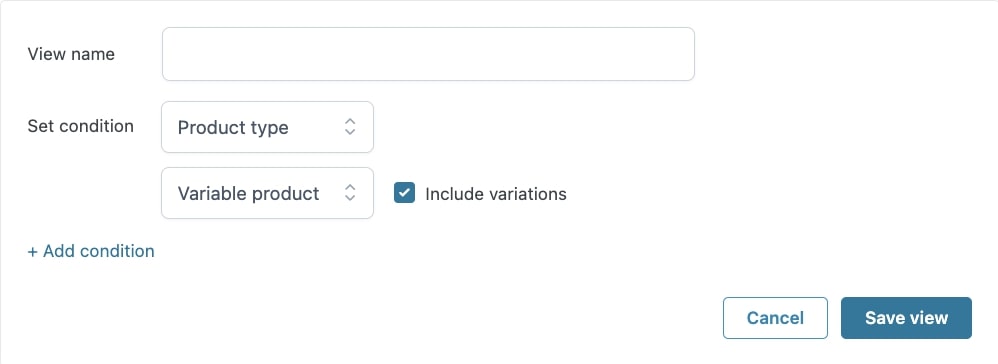
View name: enter a name to define the view;
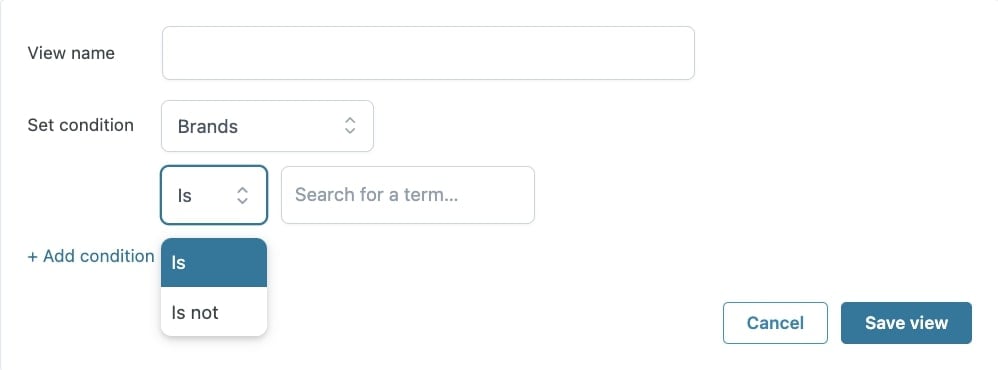
+ Add condition: select the condition to filter products that will show in the table by choosing from product name, description, SKU, regular price, sale price, stock quantity, weight, height, width, length, stock status, status, catalog visibility, backorders, shipping class, product type, on sale, image, featured, virtual, downloadable, tax status, tax class, categories, tags, and attributes.
For Product name, Description, and SKU, you can insert a value after selecting one of the following options: Contains, Does not contain, Starts with, Ends with, or Regular expression.
For Regular price, Sale price, Stock quantity, Weight, Height, Width, and Length, you can insert a value after selecting one of the following options: Higher than, Less than, Equal to, Higher than or equal to, Less than or equal to.
For Stock status, you can select one of the following options: In stock, Out of stock, On backorder.
For Status, you can select one of the following options: Draft, Pending review, Private, Published, Scheduled.
For Catalog visibility, you can select one of the following options: Shop and search results, Shop only, Search results only, Hidden.
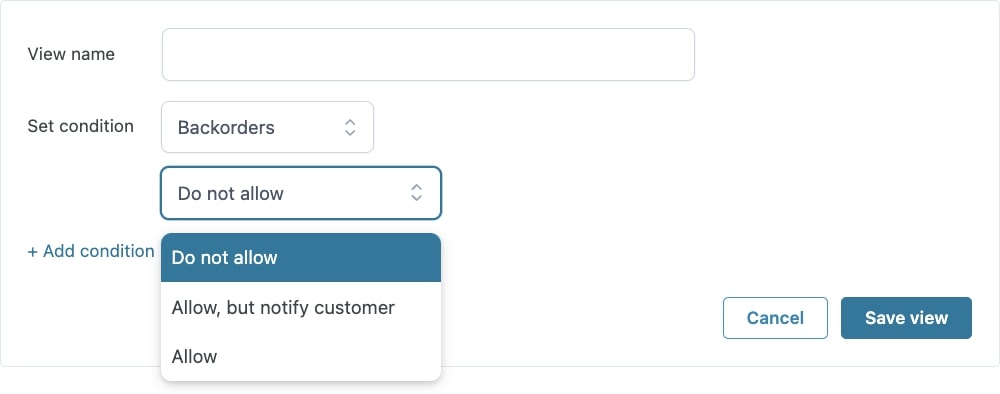
For Backorders, you can select one of the following options: Do not allow, Allow, but notify customer, Allow.
For Shipping class, you can search and select the shipping class configured in your website.
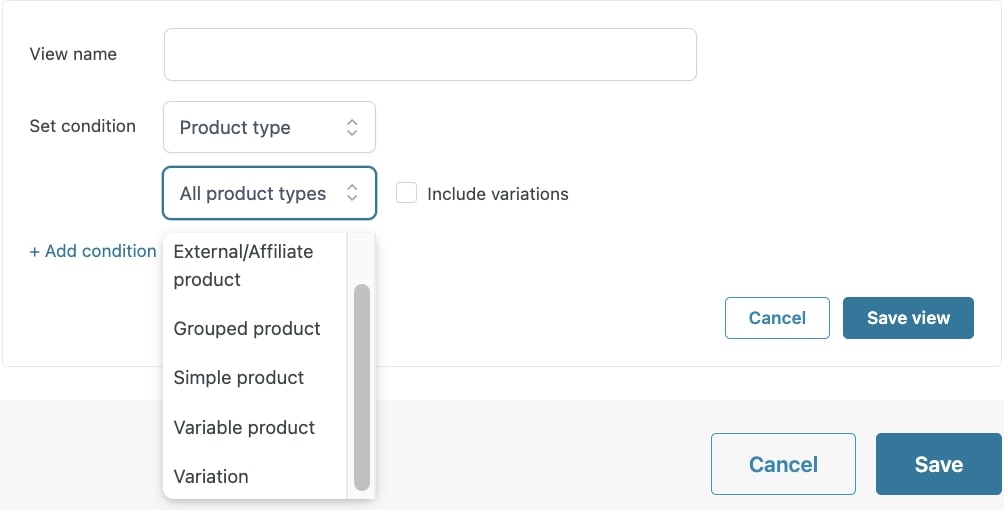
For Product type, you can select one of the following options: Simple product, Variable product, Variation. By choosing Variable products, you can decide whether to include product variations by enabling/disabling the related checkbox.
For Tax status, you can select one of the following options: Taxable, Shipping only, or None.
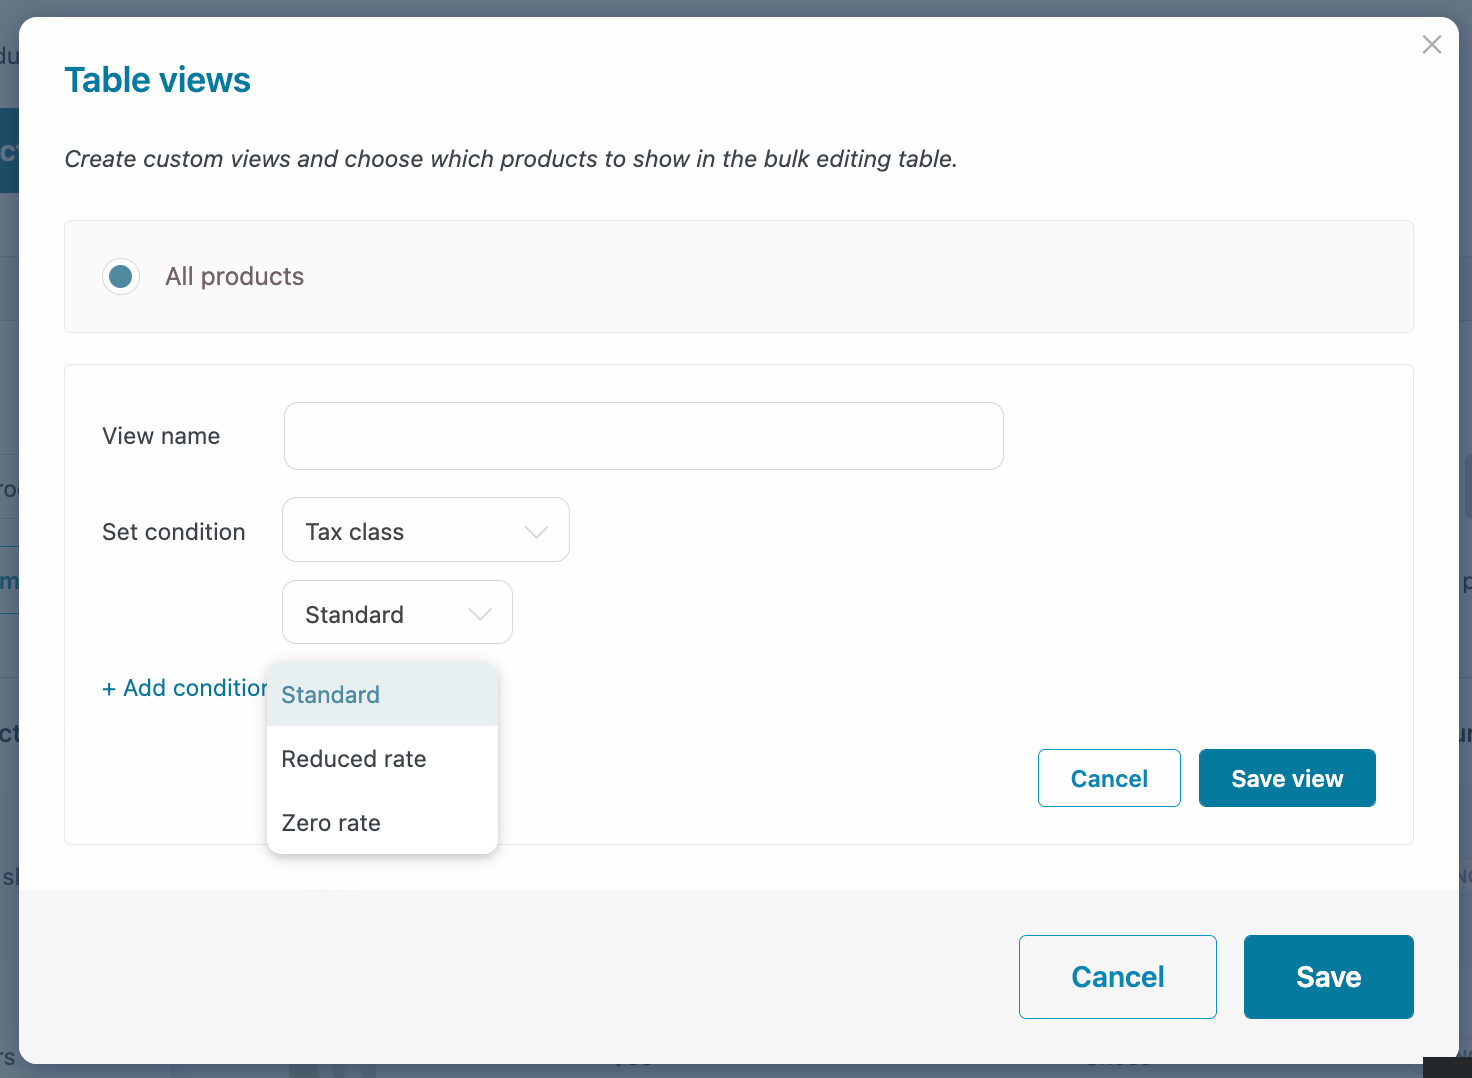
For Tax class, you can select one of the following options: Standard, Reduced rate, or Zero rate.
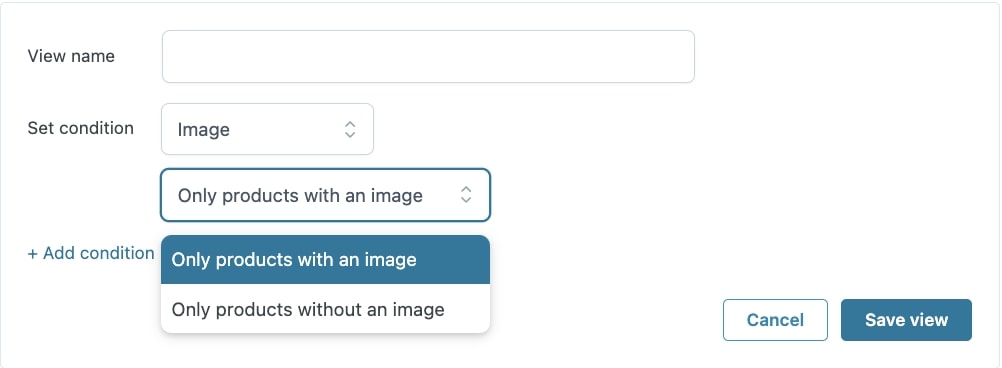
For On sale, Image, Featured, Virtual, and Downloadable, you can select options like Only products with an image, Only products without an image, Only virtual products, Only non-virtual products, etc.
For Categories and Tags, you can search categories and tags after selecting one of the following options: Is, Is not.
For Attributes, for each attribute available in your products, you can select one of the following options: Has, Does not have.
For Taxonomies, you can search for a term after selecting one of the following options: Is, Is not.
For Custom fields, you can select one of the following options: Contains, Does not contain, Starts with, Ends with, Regular expression (if text type) or Higher than, Less than, Equal to, Higher than or equal to, Less than or equal to (if price type).
For every view, you can set as many conditions as you want. After creating your custom view, click on Save. All the views created will show in the Table view list to be selected for your bulk product editing…
…and in the Table views modal where you will be able to edit, duplicate and delete them.
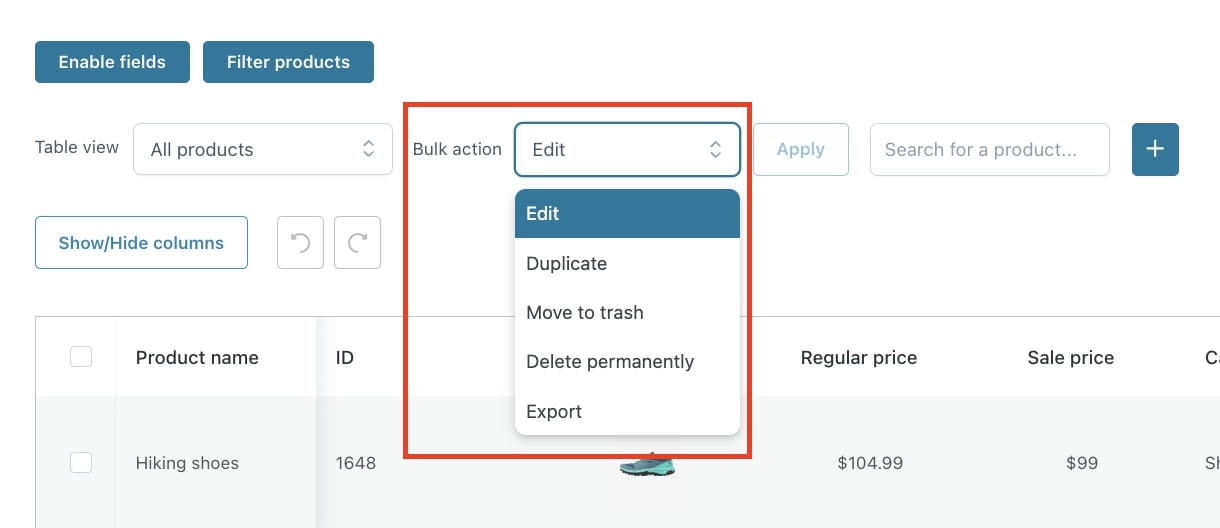
In the Products table section, after selecting one of the created views and one or more products in the table, you can apply some bulk actions to edit, duplicate, move to trash, delete permanently, and export your products.
Select the action to apply and click on the button Apply.
Edit: by selecting this action, the bulk product editing modal will open. Here you will be able to edit all the enabled fields of the view chosen ;
Duplicate: by selecting this action, the selected products will be duplicated and added to the products table;
Move to trash: by selecting this action, the selected products will be moved to trash;
Delete permanently: by selecting this action, the selected products will be permanently deleted. To apply this action, you will be asked for confirmation.
Export: by selecting this action, you can export the products of the selected view into a CSV file.
Search product
To quickly search for a product or further filter products of the selected view, you can use the dedicated search field by entering the name or the SKU of the product.
Add new products
If you need to quickly create new products, you can just click on the button + (Add new product).
Now, you can start creating the product from the modal by setting the following options:
Product name: enter the name of the product;
Product image: upload an image for the product;
Description: use the built-in editor to add the product description;
Short description: use the built-in editor to add the product short description;
Regular price: enter a value to define the regular price for the product;
Sale price: enter a value to define the discounted price for the product;
Schedule: choose the dates to schedule the discounted price in the fields from and to;
Categories: select the categories you want to assign to the product;
Status: choose the status of the product from Draft, Pending Review, Private, or Published.
Now click on Save to save the created product
Products created through the modal will be added both to the plugin products table and WooCommerce > Products.
By default, the product table shows variable products without single variations. So, if you need to apply any changes to specific product variations, both singularly or with bulk product editing, you need to manage them through the Product type option by checking the Include variations checkbox either when creating a view as described here or when setting the filters.
Filter products
Table views
In this way, every product variation will show separately in the table and you will be able to apply your changes.
To select only some specific product variations, make sure you select the Product type and Variation when setting the condition.
Filter products
Table view
The price of variable products depends on the prices of their variations; therefore to change a variable product price, you need to change its variation prices.