View Product Page

Configure environment

Once installed and activated the plugin, you can start configuring it on your e-commerce shop.

Go to YITH Plugins > PayPal Express Checkout to open the settings page.

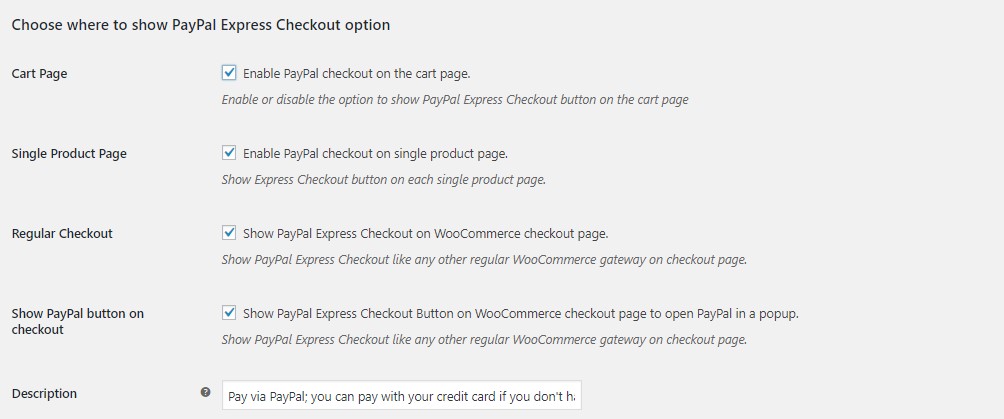
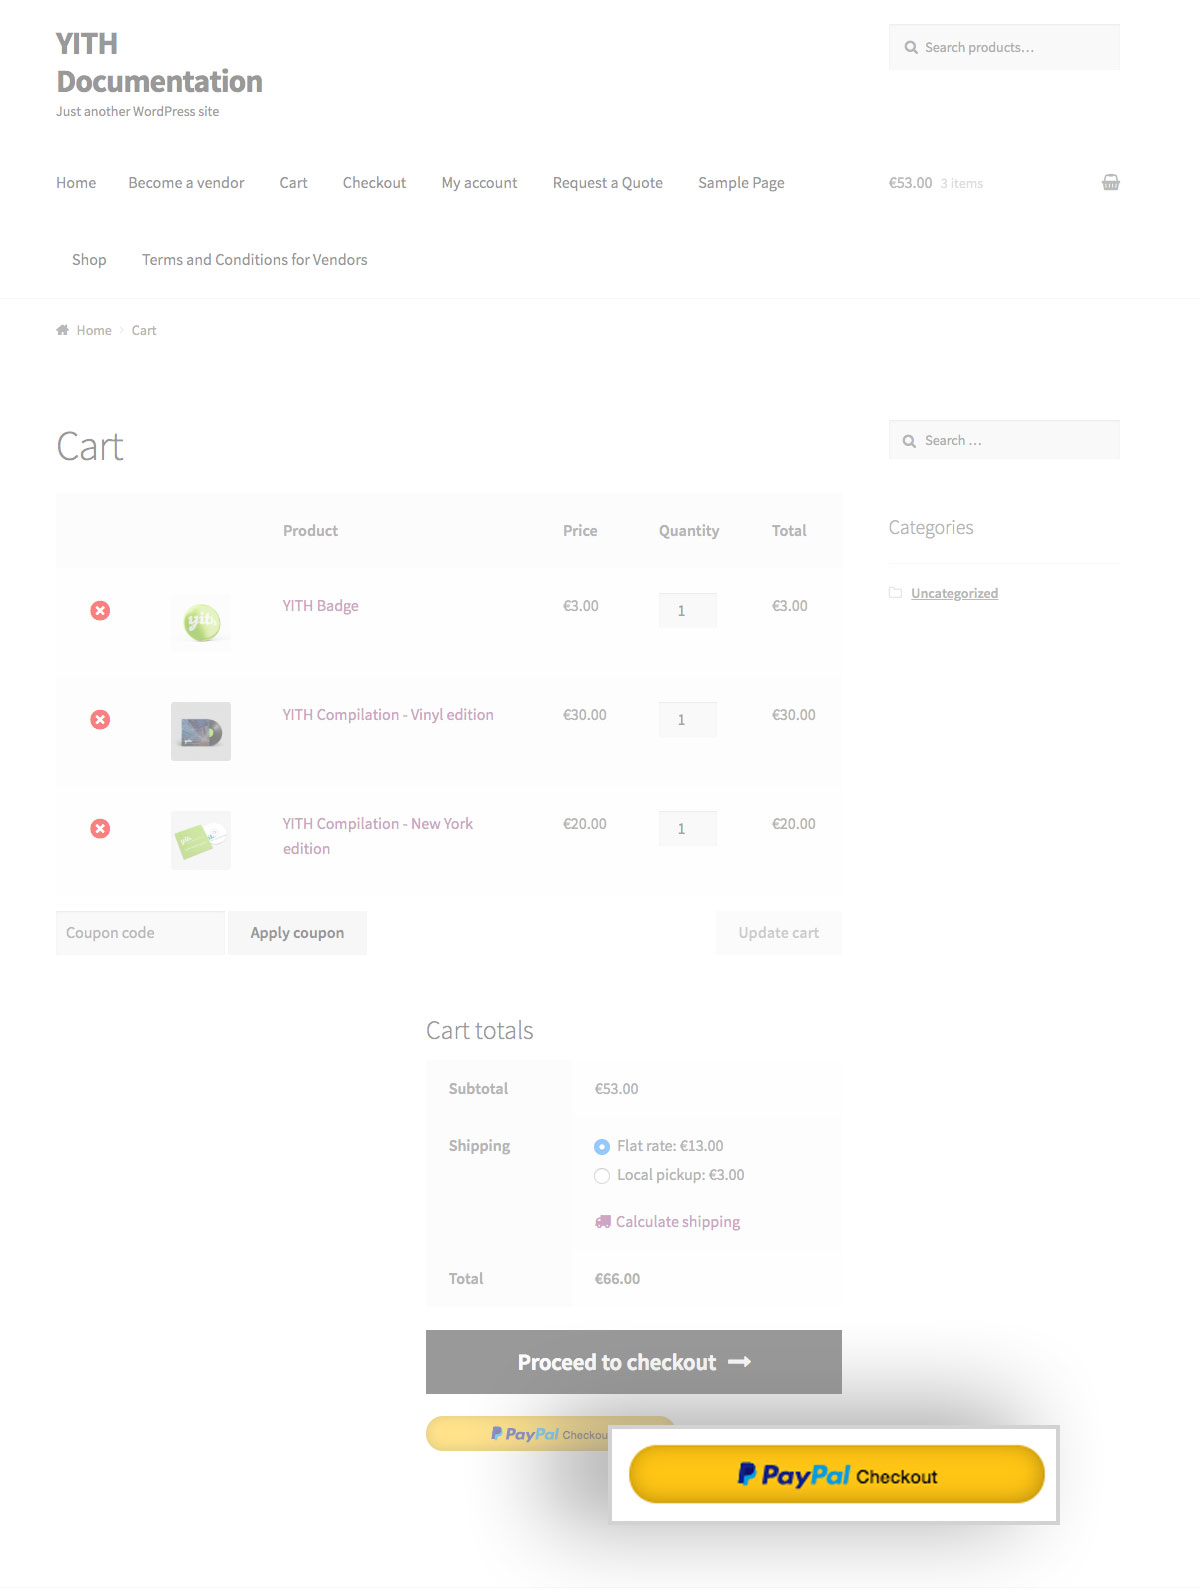
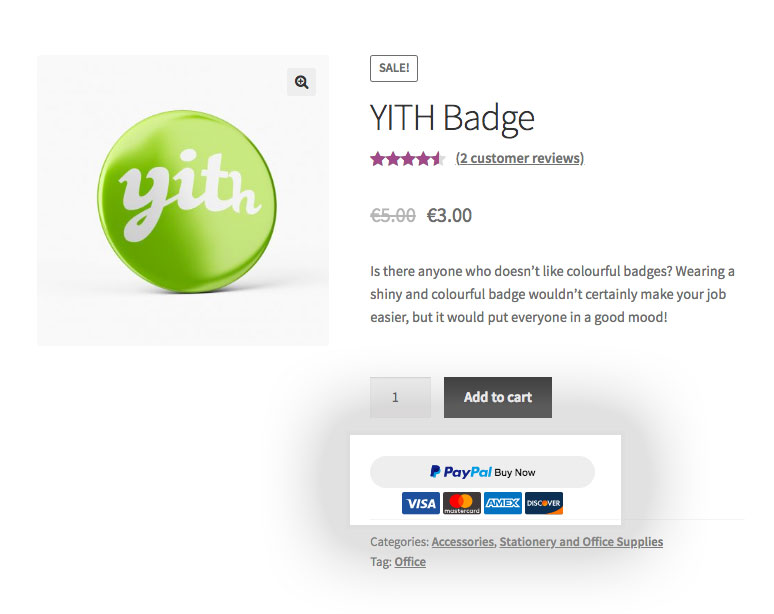
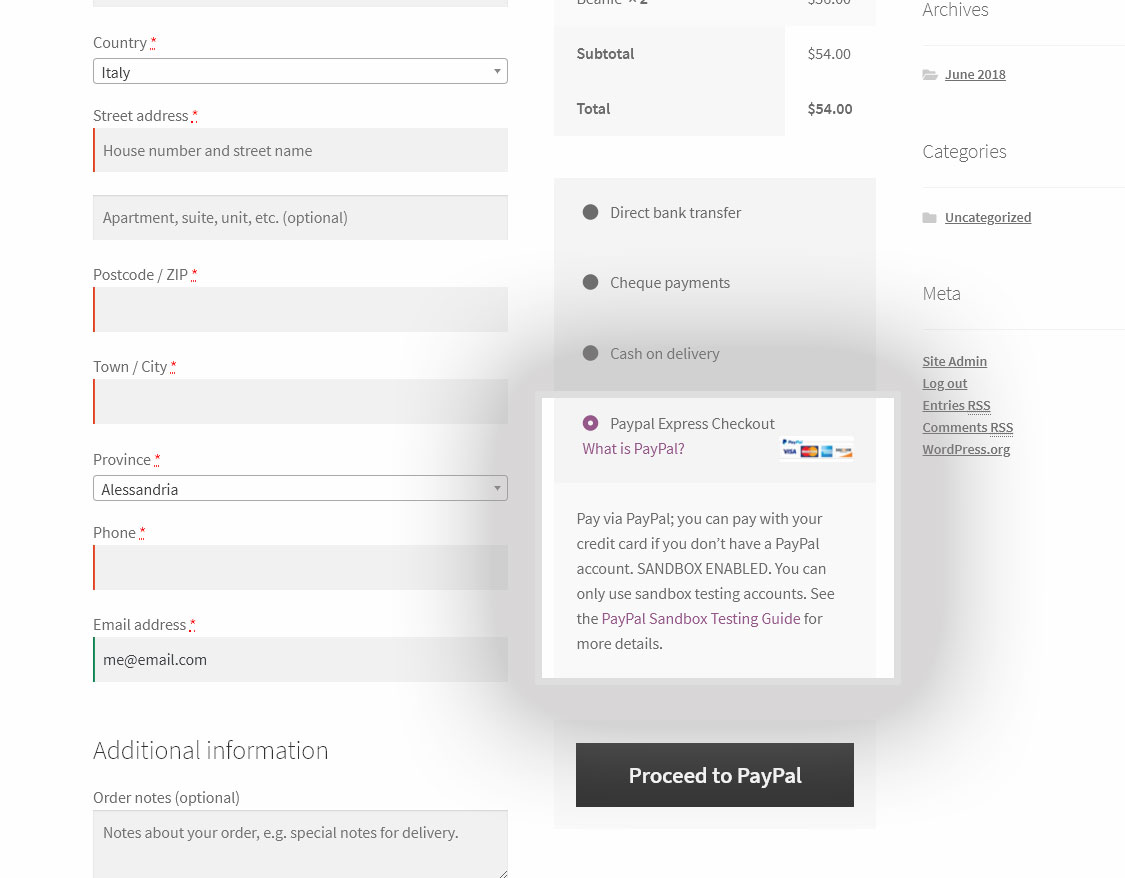
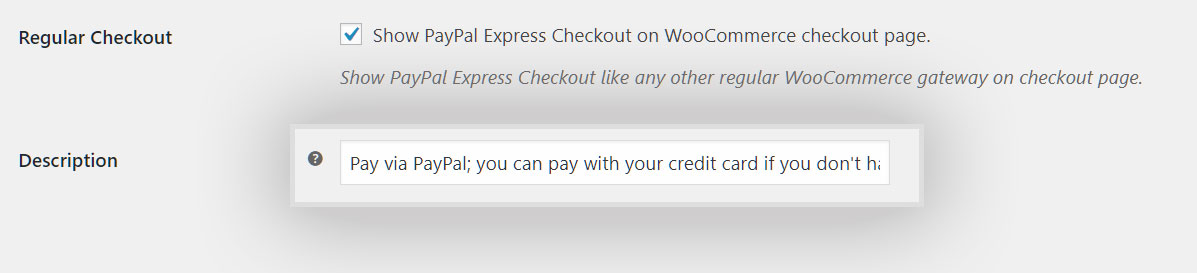
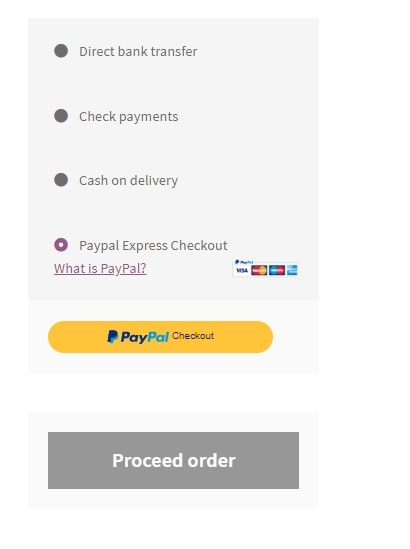
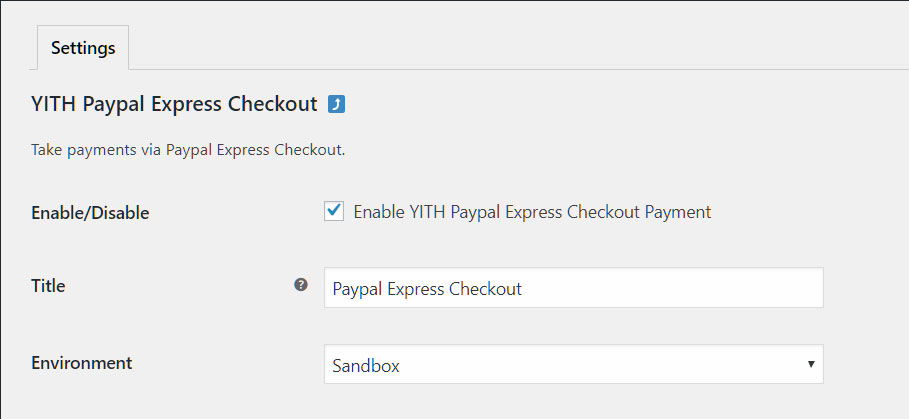
Click on the option called Enable YITH Paypal Express Checkout Payment to enable this PayPal Checkout among your shop available payment gateways.

Enable payment method

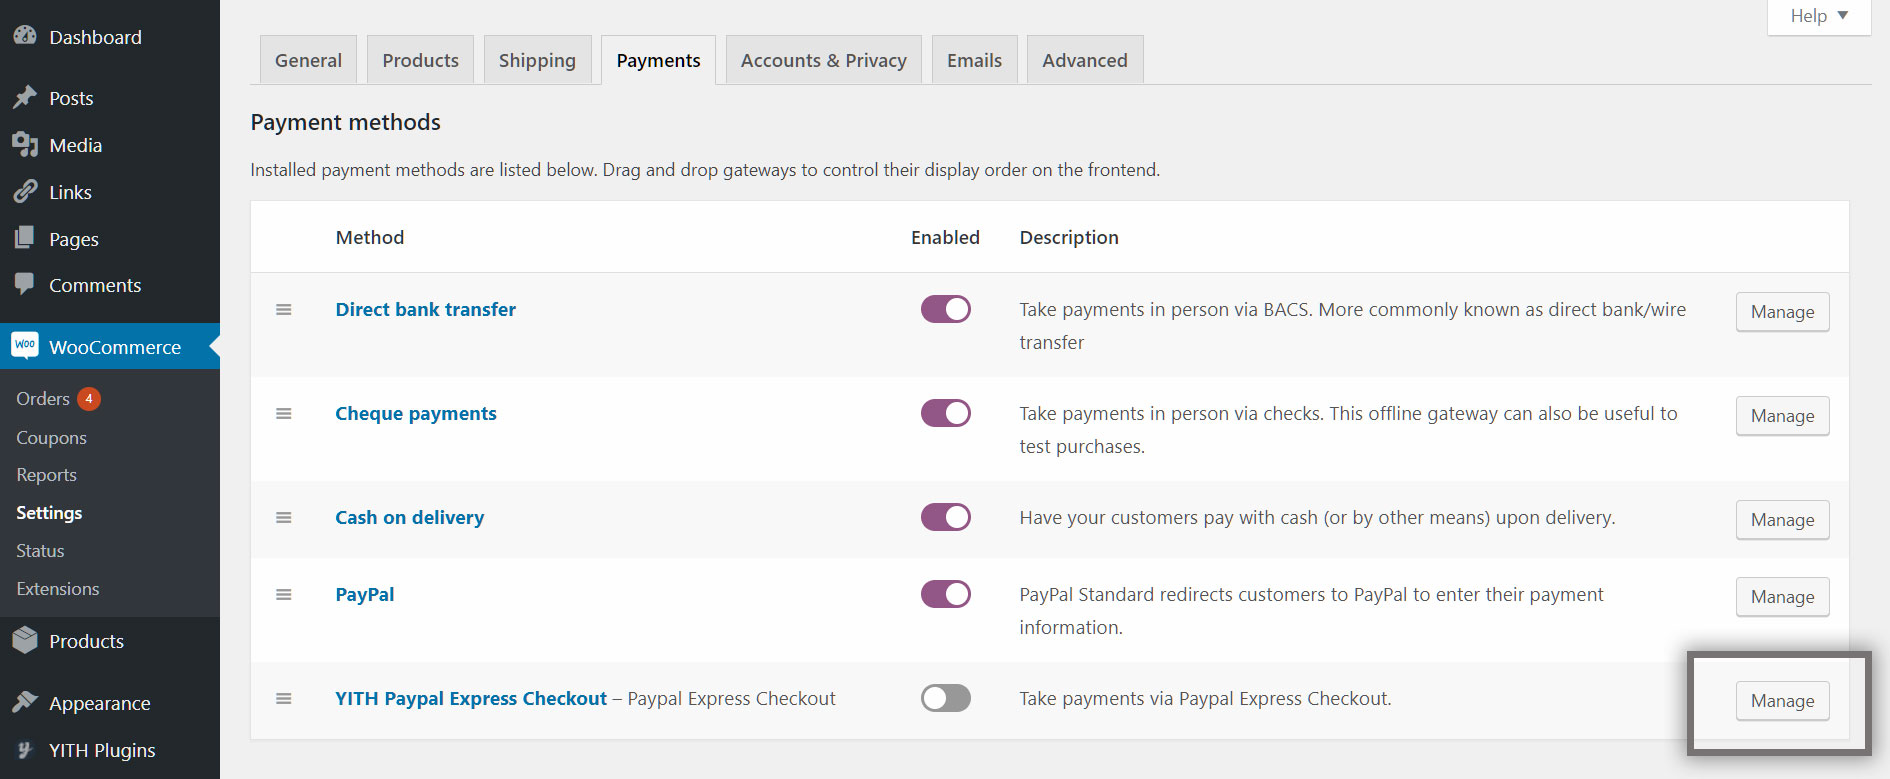
You can enable this gateway also on WooCommerce > Settings > Payments and click on the toggle button next to YITH PayPal Express Checkout. Click, then, on Manage to go on with the gateway configuration settings.

Enable in WooCommerce

Go to the settings

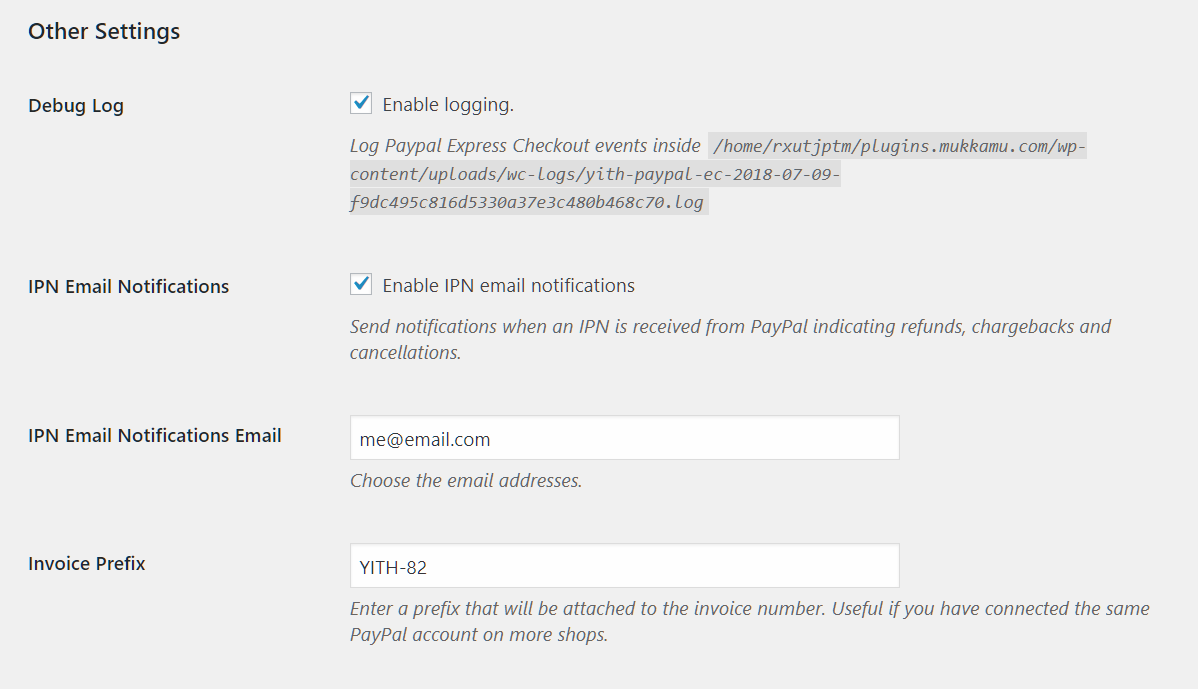
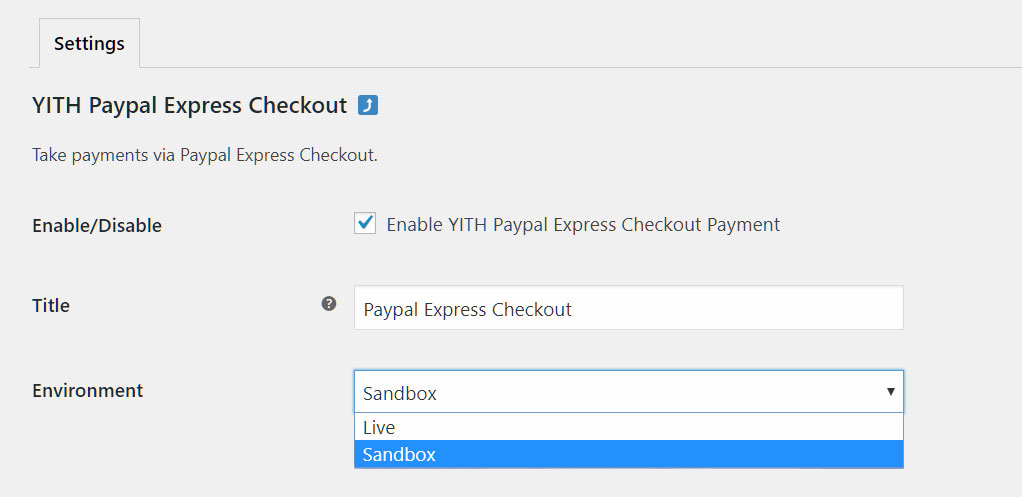
If this is the first time you install this payment gateway and if you want to make some tests first, we suggest you enable the Sandbox option.

Sandbox option

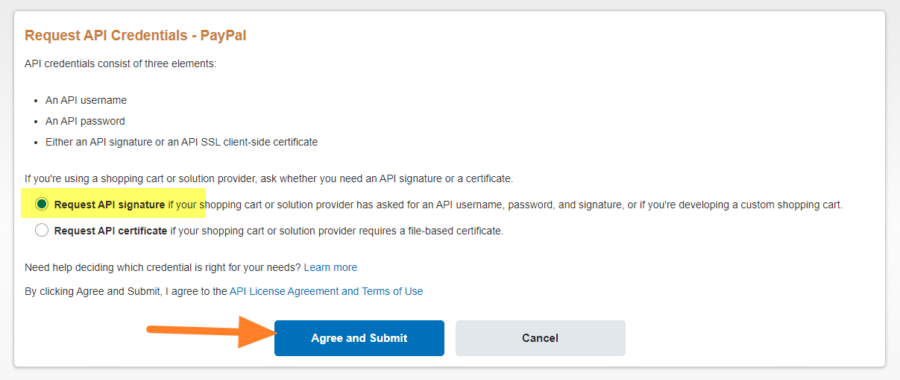
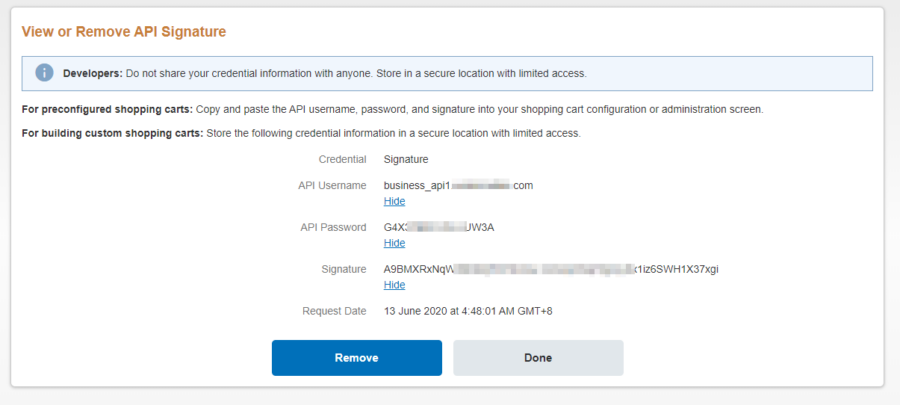
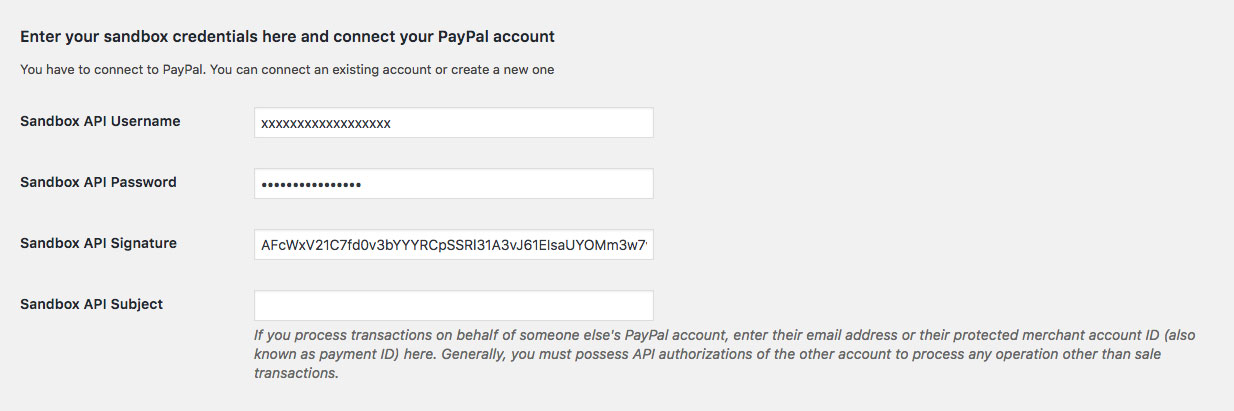
Make sure you’ve first created and enabled a PayPal sandbox account and then enter your Sandbox API Username, Password, Signature and Subject (if available). Please, refer to this page for any further detail about how to create a sandbox account.

Sandbox fields

If you prefer configuring the plugin with a live PayPal account (and so enable real transactions), make sure you select Live mode and enter the Live API credentials. Please, refer to this page for any further detail about how to create a live account.

Live fields

How to obtain PayPal API credentials

1. Log in to PayPal.

2. Navigate to the following:

Settings > Account Settings > Website payments under Products and Services > Click the Update link under API Access.

Paypal API credentials

3. Under Custom checkout experience section, click on Manage API credentials link under NVP/SOAP API integration (Classic) option:

Manage API credentials

If you haven’t set it up before, you will be asked the following:

Request API signature

Choose Request API signature and click the Agree and Submit button.

On the next page, copy the API Username, Password, and Signature generated. Click the Done button if you’re done.

API signature

You will have to remove existing credentials if you want to generate a new one. We, however, do not recommend removing this if you have existing integrations that use the credentials.

We highly recommend that you keep your API credentials safe for future reference.

Button settings

Button position

If you scroll down the settings page, you will find a section to configure the button that lets your users checkout quickly using PayPal Express Checkout service.

You will find four checkboxes. You can enable one, two, three or all of them at the same time.

  • Enable PayPal checkout on the cart page: check this option if you want the button to appear on Cart page, so that your users can skip the checkout step and pay directly through PayPal checkout.

Button on product page

  • Enable PayPal checkout on single product page: check this option to let your customers choose PayPal Express Checkout mode right on the product page. Please, note that if they’ve added any other items to the cart, this button will only allow them to buy the single product they are viewing. This allows them to buy the product immediately without risking to buy other items they haven’t reviewed yet.
    Please, note: if users choose to buy it immediately and complete the checkout successfully, their cart will be emptied, even if they had added any different items before. If they do not complete the checkout, they will be able to find all the items they had already added to the cart and go on with the shopping.

Button on product page with acceptance marks

  • Show PayPal Express Checkout on WooCommerce checkout page: this option allows you to show Express Checkout option on the standard WooCommerce checkout page among the other payment methods available.

PayPal Express on checkout page

Feel free to change the text of the gateway description from this page, to make the checkout process as clear as possible to your users.

Description

  • Show PayPal Express Checkout button on WooCommerce checkout page: this option allows showing PayPal Express Checkout like any other regular WooCommerce gateway on the checkout page. Clicking the button, PayPal will open in a popup.

Button appearance

The following section allows you to configure the graphical appearance of the button to make your users check out via PayPal Express Checkout, and the layouts are the ones officially provided by PayPal, so your users will immediately able to recognize PayPal logo and style.

  • Button Label: pick the text that has to be displayed on PayPal button among the ones made available by PayPal. You can show simple text as well as PayPal logo.Button label
  • Show the funding icons: choose whether to show the acceptance marks with credit card logos accepted by PayPal. This acceptance varies dynamically based on the country you’ve set up in your PayPal account.
    Acceptance marks
  • Button size: choose among a fixed size or a responsive option.Button size
  • Button style: choose between a rounded or square outline.Button layout
  • Button colour: choose among the different colours PayPal brand offers to make it fit your shop appearance.Button colour

Here are a few exaples of the possible combinations. Choose the layout that you prefer!

Button styles

Customize PayPal checkout

After the button customization options, you will find a section named Custom Checkout. Here you can customize the way PayPal checkout will look like in the popup and brand it.

Custom checkout

Brand name: you can first enter your store or brand name.

Logo image: upload your logo into your website Media section and then copy and paste the link into this box. Make sure the image is 190×60 pixel, otherwise the logo proportions will be altered.

Header image: upload your custom header into your website Media section and then copy and paste the image link into this box. Make sure the header image is 750×90 pixel, so it will not be altered. Please, note also that if you set up both a logo and a header image, only the logo will be shown.

Here is an example of how your logo or header might look like in PayPal checkout popup.

Your logo in PayPal popup

Header in PayPal popup

Checkout style: there’s another important option in this section. You can choose between Login or Billing.

Billing popup

If you choose Login, your customers have to log into their PayPal account before they can proceed to the checkout.

If you set Billing, your customers can choose to check out as guests, without having or using a PayPal account. They can pay via credit card and no PayPal account is required.

Popup di PayPal - Login


Billing popup

Please, note: if you are using also YITH WooCommerce Subscription and your users add a subscription-based product to the cart, they will be forced either to log in or to create a PayPal account. This step is required to ensure that the next recurring payment can go through.

If they have a subscription-based product in the cart, they will be shown a message like this:

Subscription products

PayPal fee

The service offered by PayPal isn’t free for merchants and businesses that choose to use it will be charged a fee per transaction.

The plugin automatically adds an entry to the order details where the PayPal fee will show.

PayPal fee

Other settings

If you keep scrolling down the plugin settings page, you will find a section called Other settings. Here you can enable the following options:

Other settings

Debug log: this is generally useful for technicians and developers. Enable this option to get additional technical details about your PayPal payments when there are any issues with them.

IPN Email Notifications: enable this option if you want to receive an email notification any time a refund, a chargeback or a cancellation is processed from a customer PayPal account concerning orders of your store.

IPN Email Notifcations Email: enter here the email address where you want to receive the IPN notifications, it might be the admin’s or any other email address to be sure you’re always up to date about what happens in your store.

Invoice Prefix: enter here a prefix that will be attached to all payments coming from this shop to the associated PayPal account. This will help a lot especially if you are using the same PayPal account in more than one store. You will be able to track transactions coming to your account univocally.

You will find the prefix in the transaction details on your PayPal account. It will look like this:
Transaction details

Instant and authorize payment options

In the final section of the plugin settings, you will find two options that can turn really useful.

The first one, Payment Action, allows you to choose between Authorize or Sale mode.

If you choose Authorize mode, the transaction will be authorized during the checkout, but the transaction will only be processed when another action on the order is needed. This can be useful if you need that your orders do not go immediately to complete status, but if they have to be processed first, shipping prepared or similar.

If you choose Sale mode, on the other hand, the transaction will be processed immediately, even if your order might take longer to be processed.

Capture or authorize

The second important option under Payments section allows forcing immediate payments during checkout. If the payment can be immediately processed, it will go through, if it doesn’t work it will fail and the users will be immediately informed about the status.

This option will be particularly useful to stop all complaints coming from users whose payments are processed through PayPal e-check without their being aware of it.

If you have experienced many issues like this, enable this option and you’ll forget about unwanted e-check orders!

Payments

When you have got the YITH WooCommerce Subscription plugin enabled, another option appears in the ‘payments’ section of the settings.

If your PayPal account does not support the ‘Reference Transaction’, you will need to disable this option. This way you can disable the EC Payment of YITH Subscription Products.

reference transactions

YITH Subscription

YITH Express Checkout for WooCommerce works has been already integrated with YITH WooCommerce Subscription plugin, in order to let you receive recurring payments with instant processing through PayPal Express Checkout.

Thanks to the options offered by PayPal Express Checkout, you can also edit the subscription details after it has been started, which can turn useful in countless situations.

Edit subscription details

You will be able to edit the following subscripton information:

Recurring period: you can change the duration of the billing cycle and change it to a given number of days, weeks, months or years.

Start date: you can change the start date of the subscription. A note in the subscription details will keep track of this action. You will see a note with the following text: The start date has been changed from xx/xx/xxxx to xx/xx/xxxx.

Payment due date: change here the date of the next payment. The customer will automatically be charged on the new date you’ve set. A note in the subscription details will keep track of this action.

Expired date: you can change here the subscription expiry date here. Remove the date if you want the subscription to NEVER expire.
Please, note that if the subscription is already expired, changing the expiry date here will not re-activate the subscription, you will have to change it from the subscription Actions box on the right. Read more about this here.

You will also be able to edit the price of the recurring fee:

Integration with YITH Subscription