In this post, we’ll explore how to create a pricing rule for an online clothing store that serves both retail customers and wholesalers. The goal is to offer one fixed price to regular customers and provide a special discounted price to wholesale buyers on all products (except for a specific category).
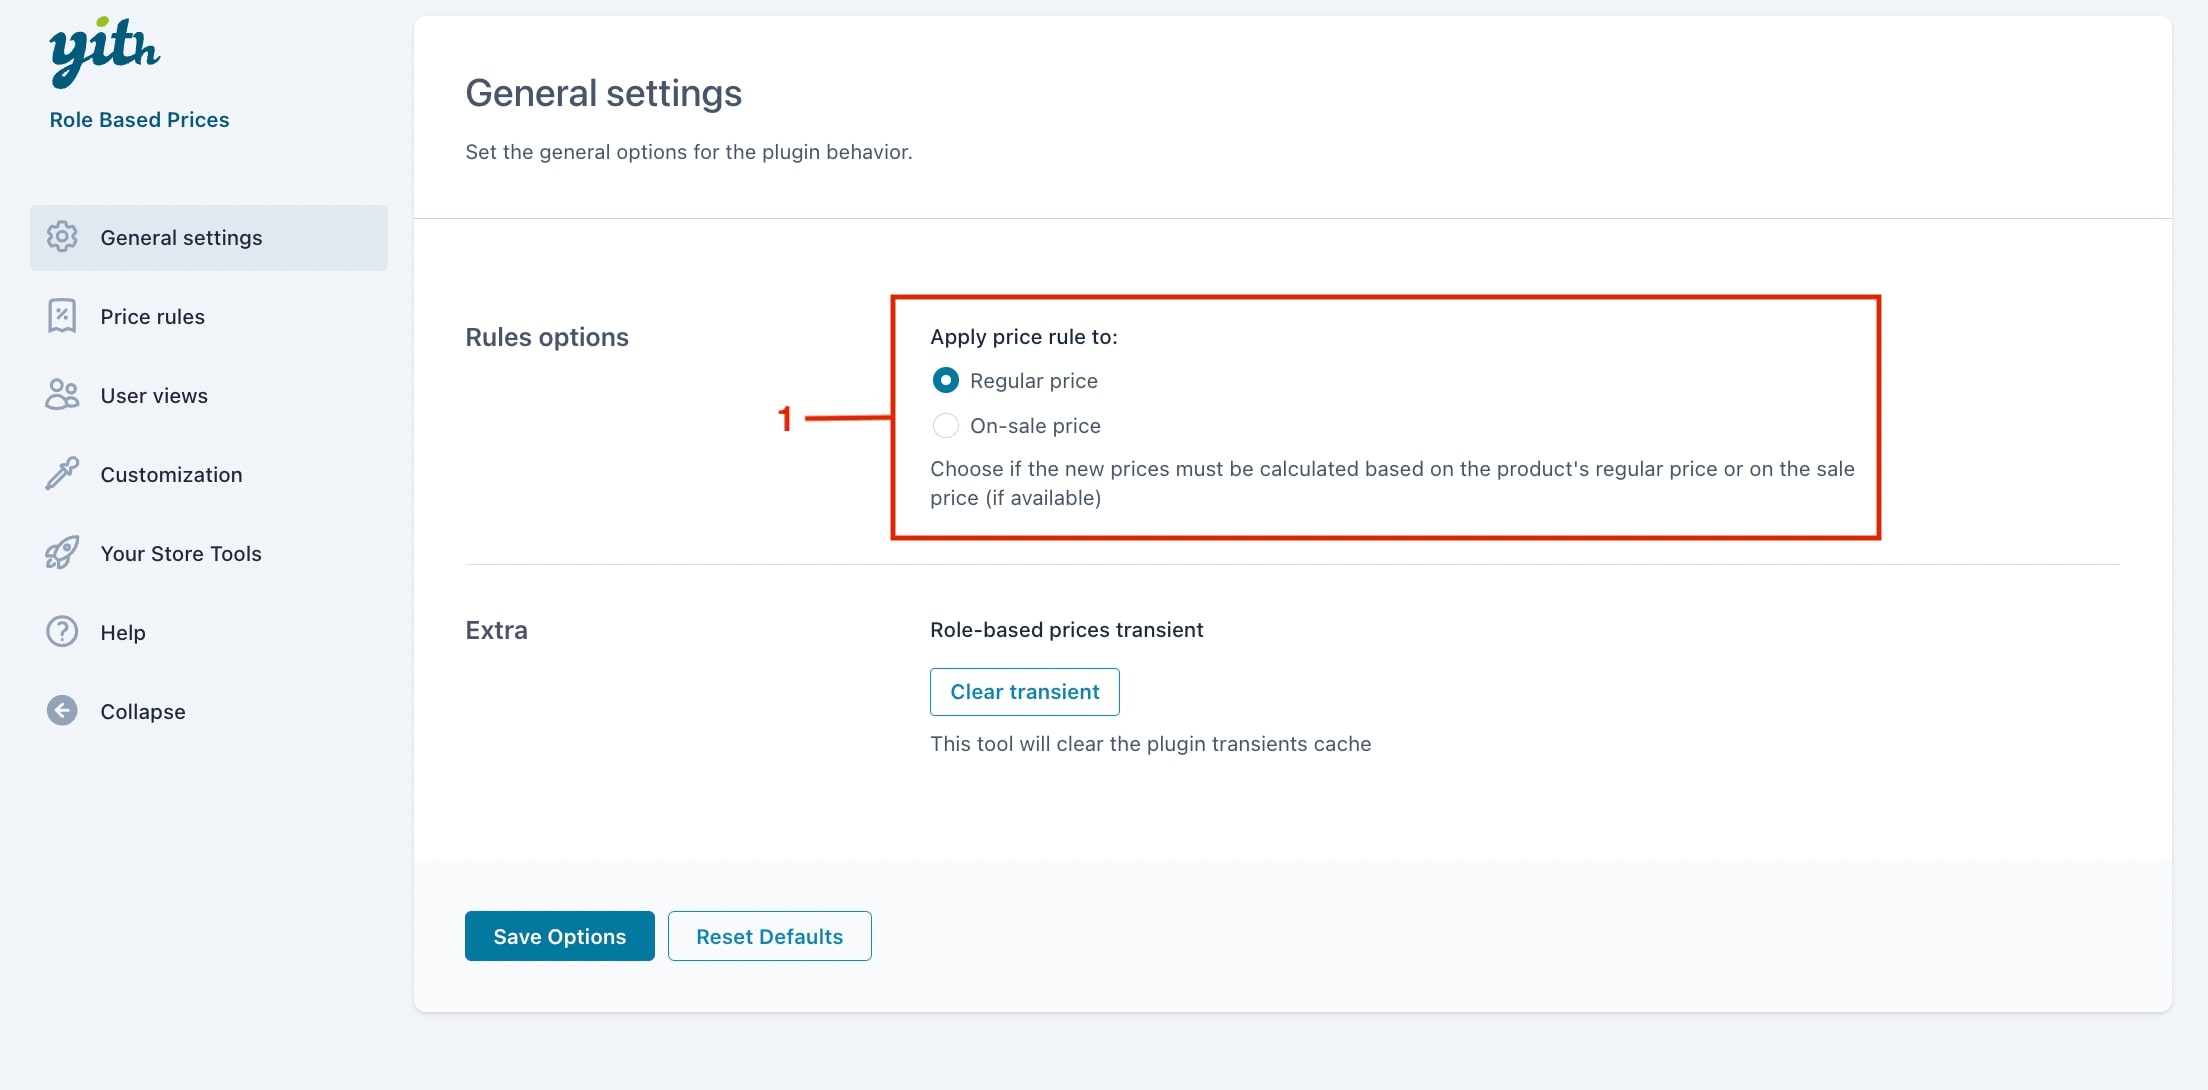
Step 1 — Rule options
Let’s start by setting up the Rule options. Go to the General settings tab and decide if you want the price rules to be calculated based on the regular price or the on-sale price (1):
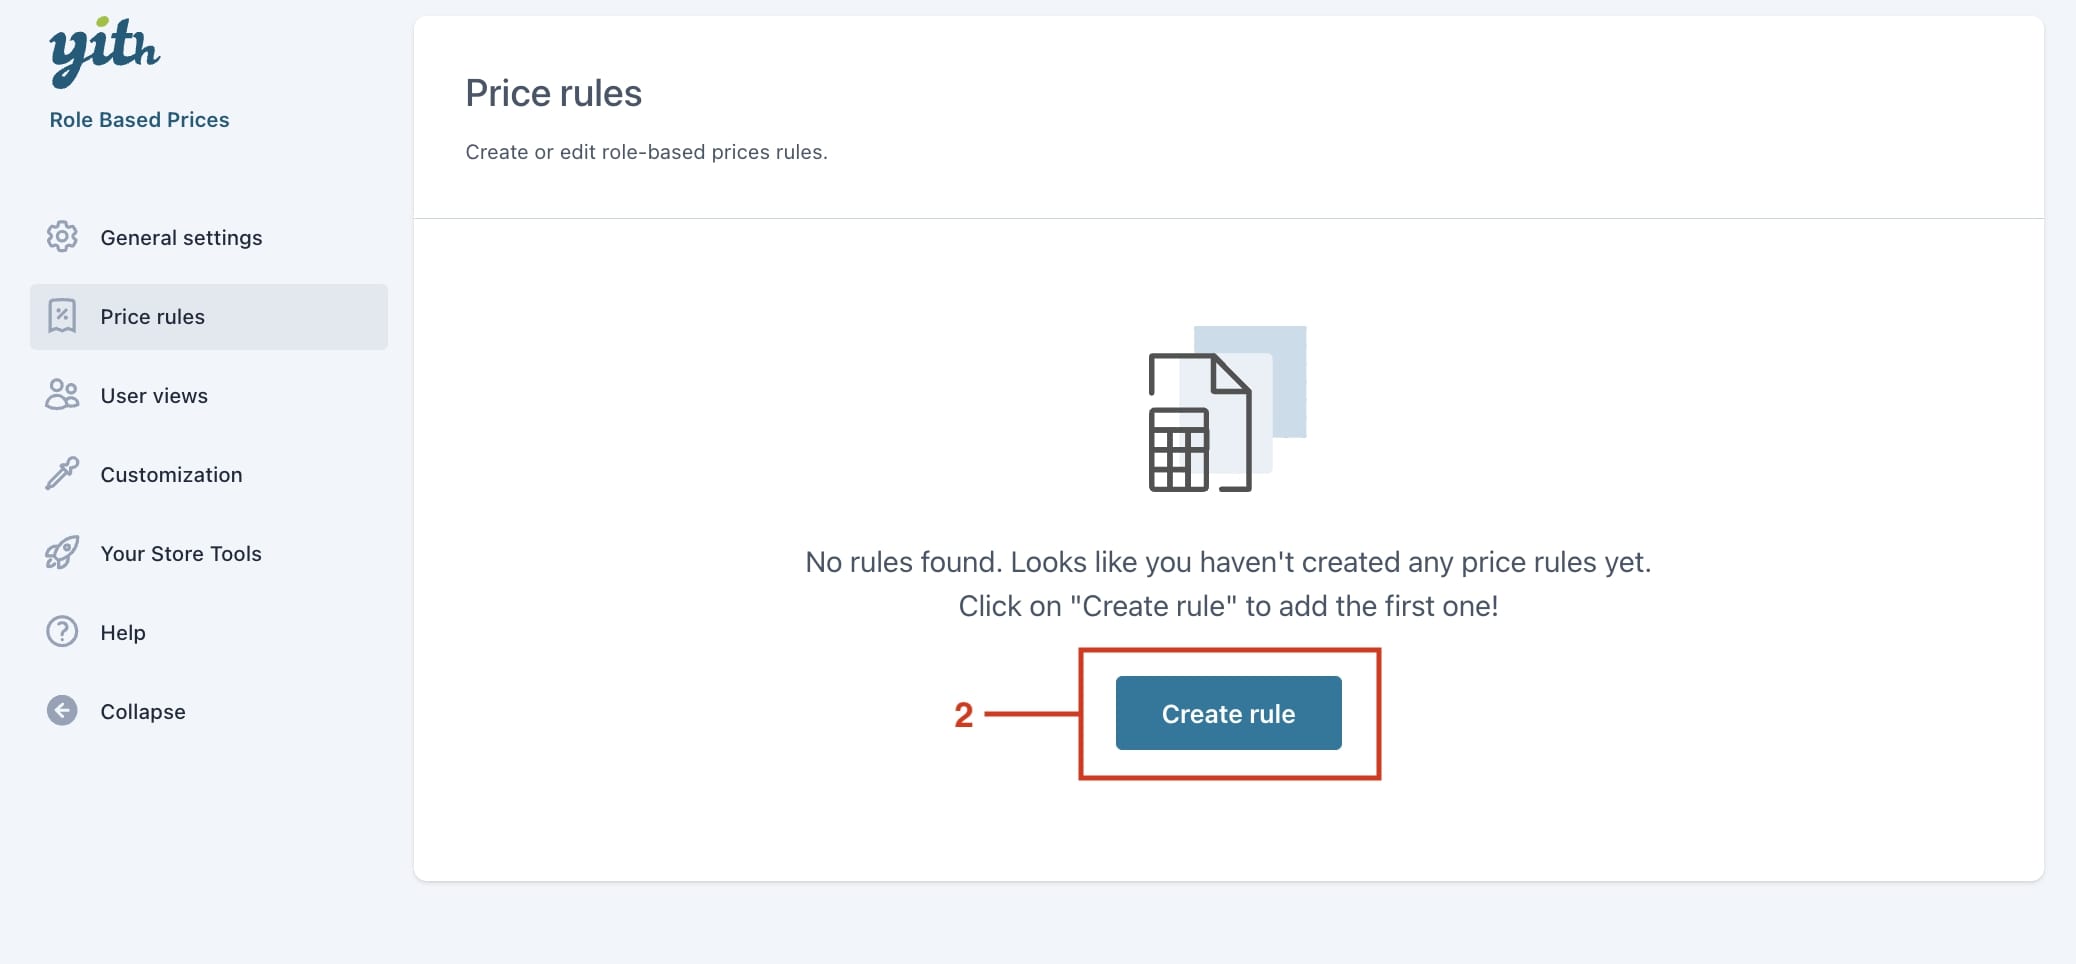
Step 2 — Price rules
Now we can move onto creating our role-based prices rule. To start, go to the Price rules tab and click on “Create rule” button (2)
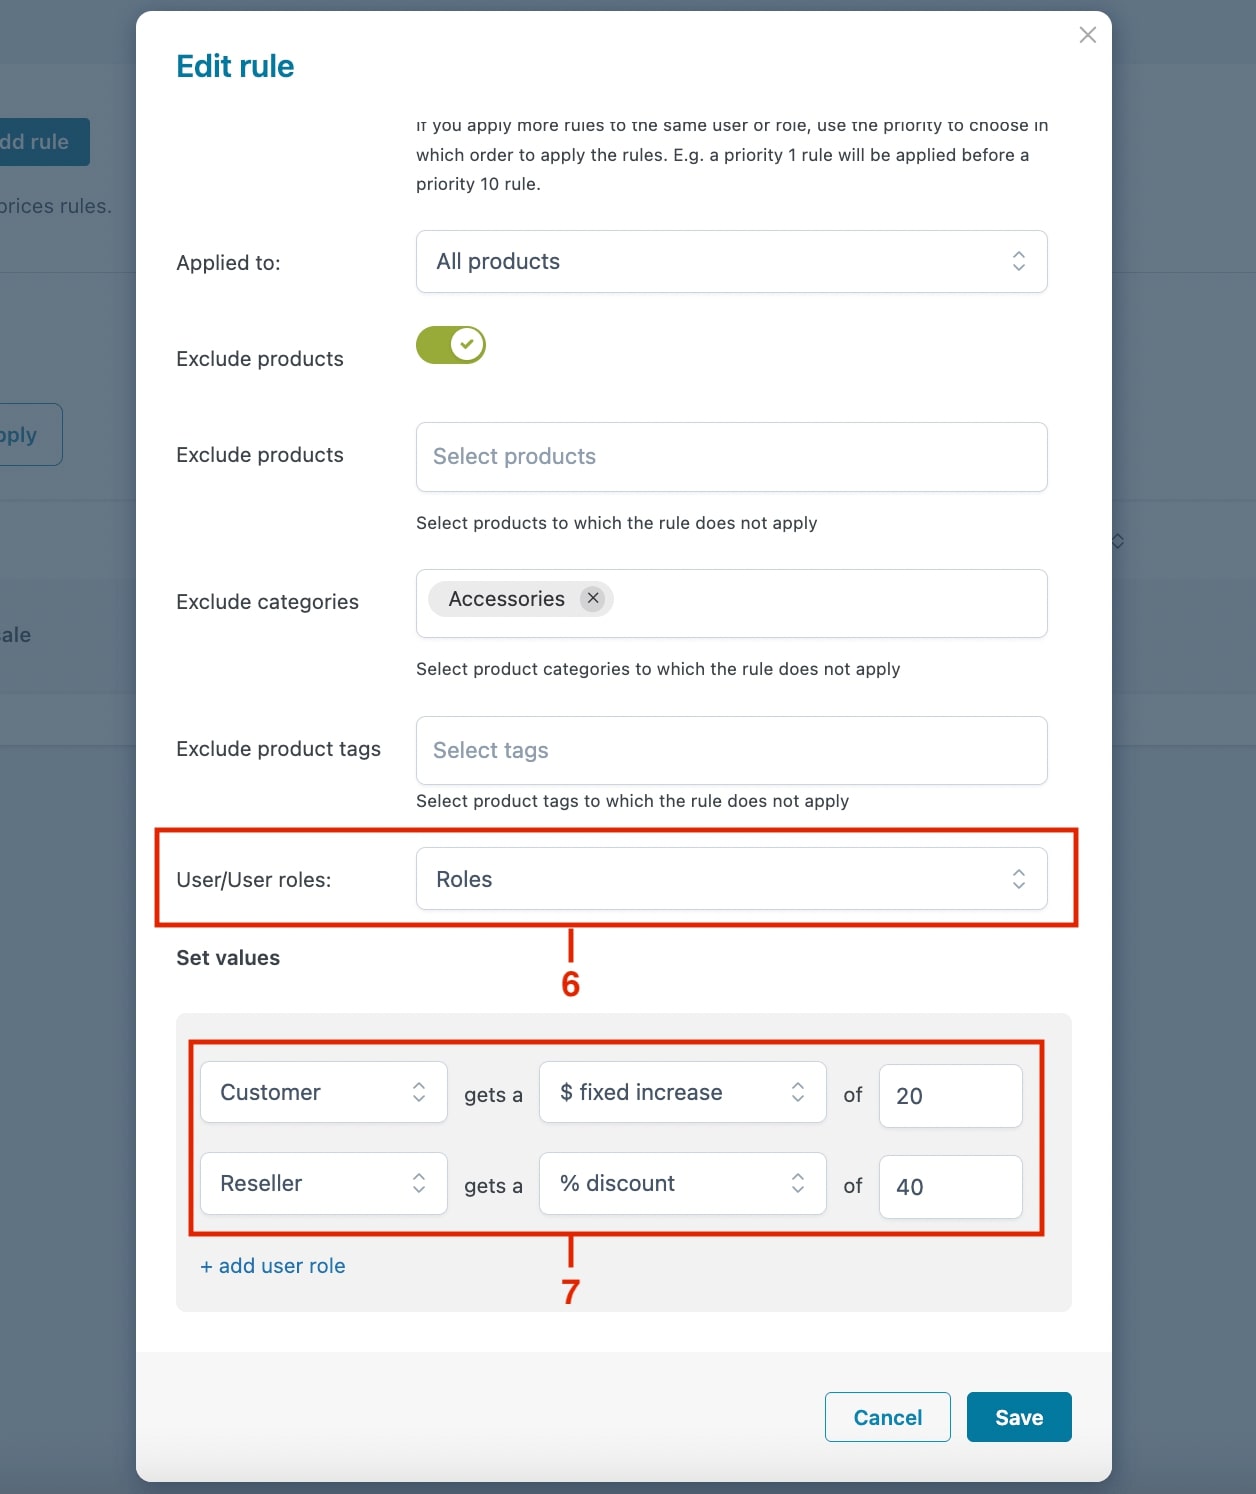
Then, set a name to identify your rule (3). Next, select if you want this price rule to apply to All products or Specific products. We decide to apply it to All products (4) but we want to exclude a specific product category, Accessories. So, enable the option “Exclude products” and select the category (5).
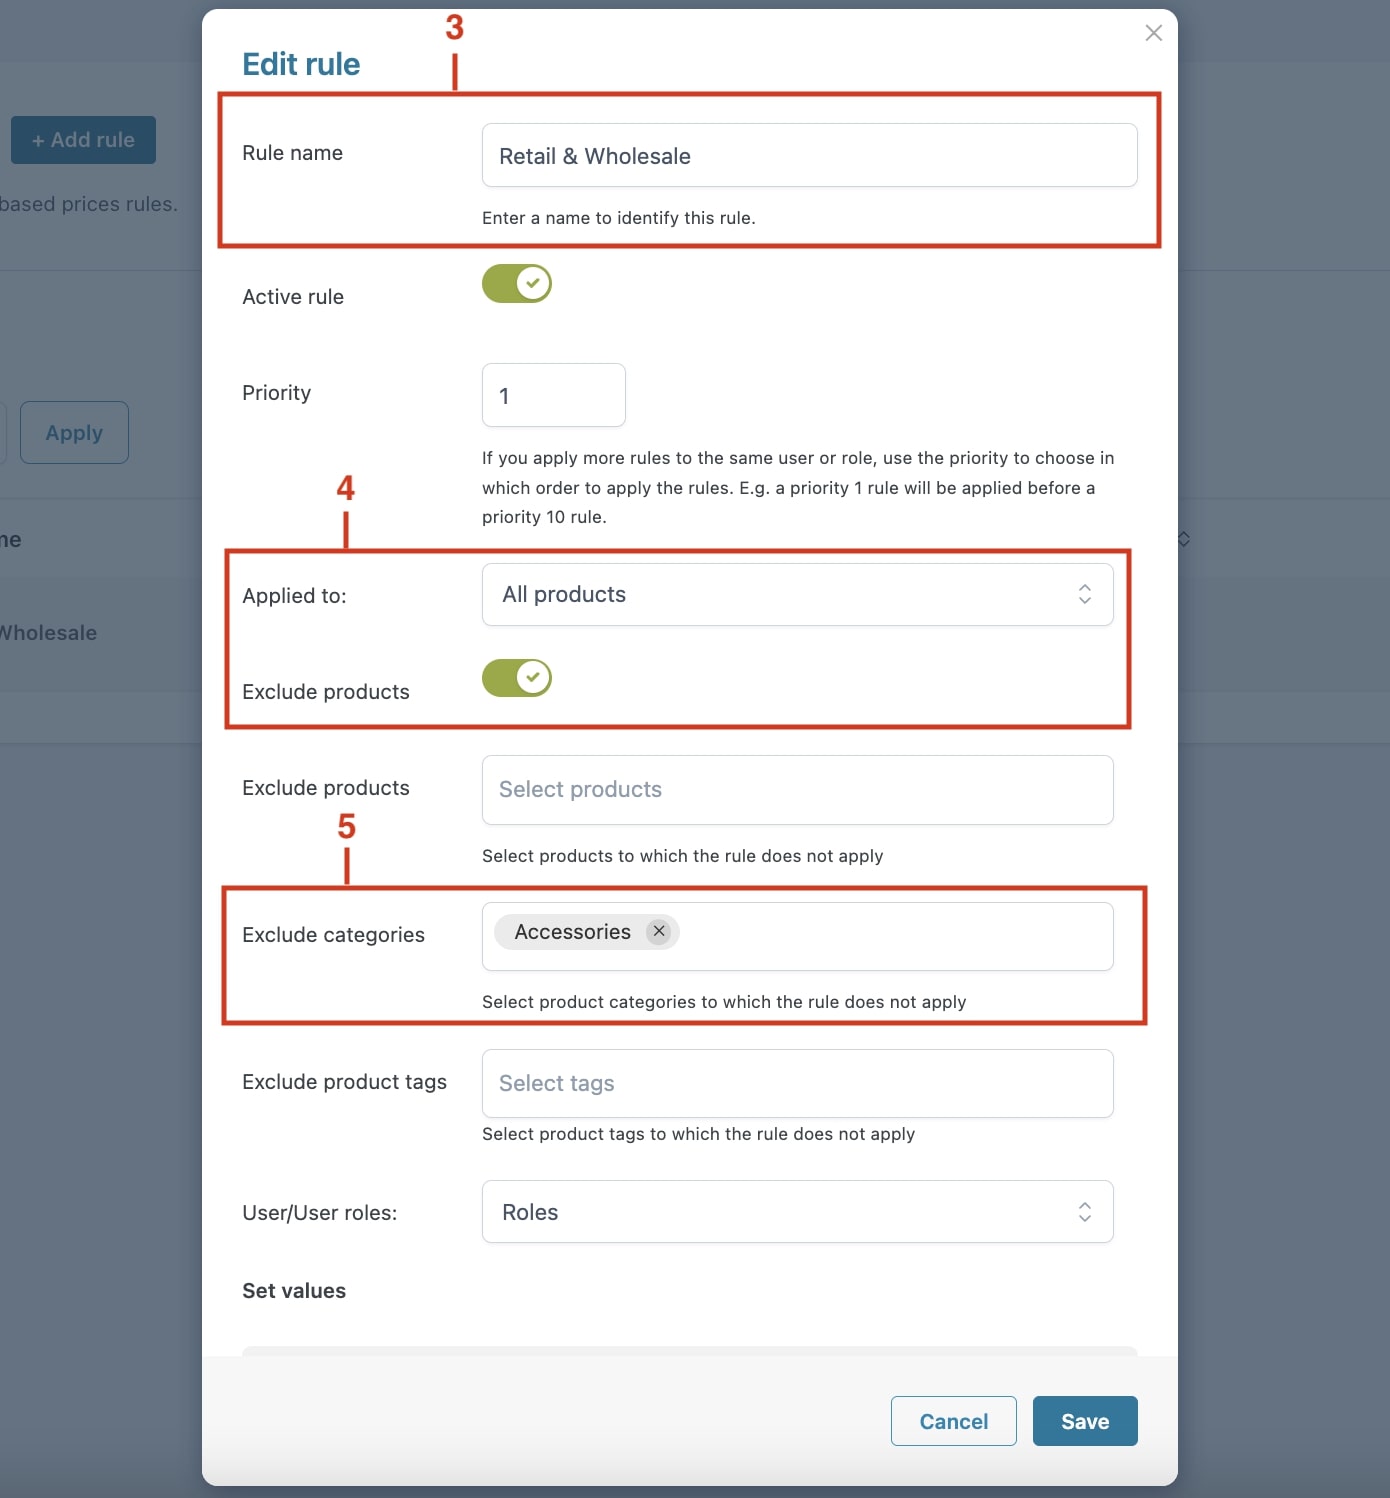
The next step would be to set user options in the rule. You can choose if the rule applies to user roles or to specific users. We want ours to apply to roles (6).
And lastly, let’s set the values for each user role (7). Customers get a fixed increase on all products of $20 and resellers will get a 40% discount on all products instead.
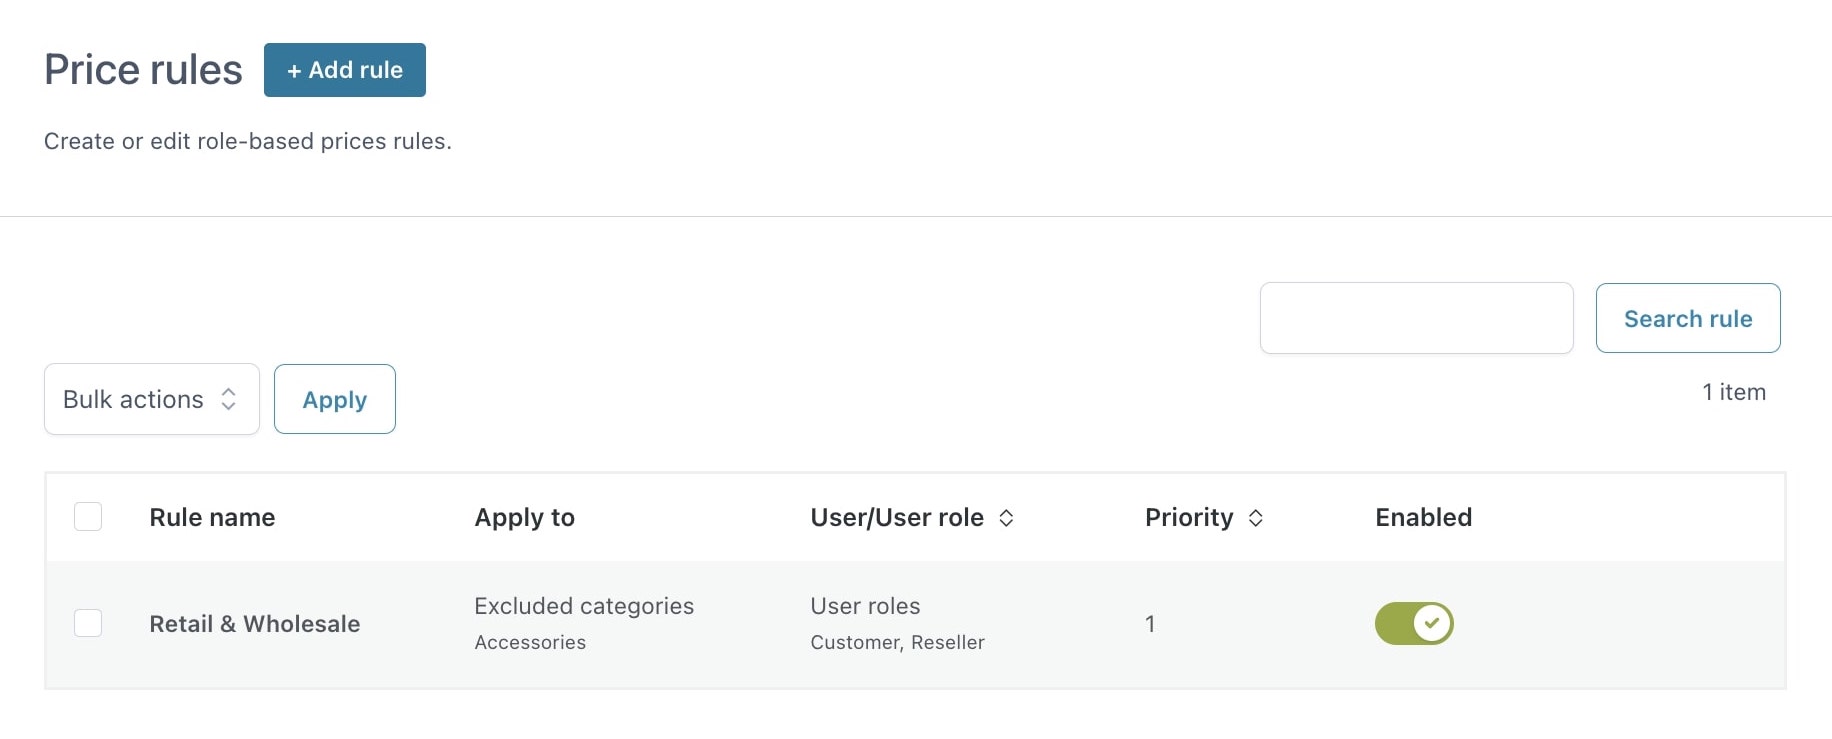
Click on the “Save” button and we have our first price rule created!
Step 3 — Show a discount badge
If you want, you can display a badge to show your users how much they’re saving compared to the standard price. Enable it from the Customization tab > Extra options and customize colors (8).
In the frontend, the badge would look like this:
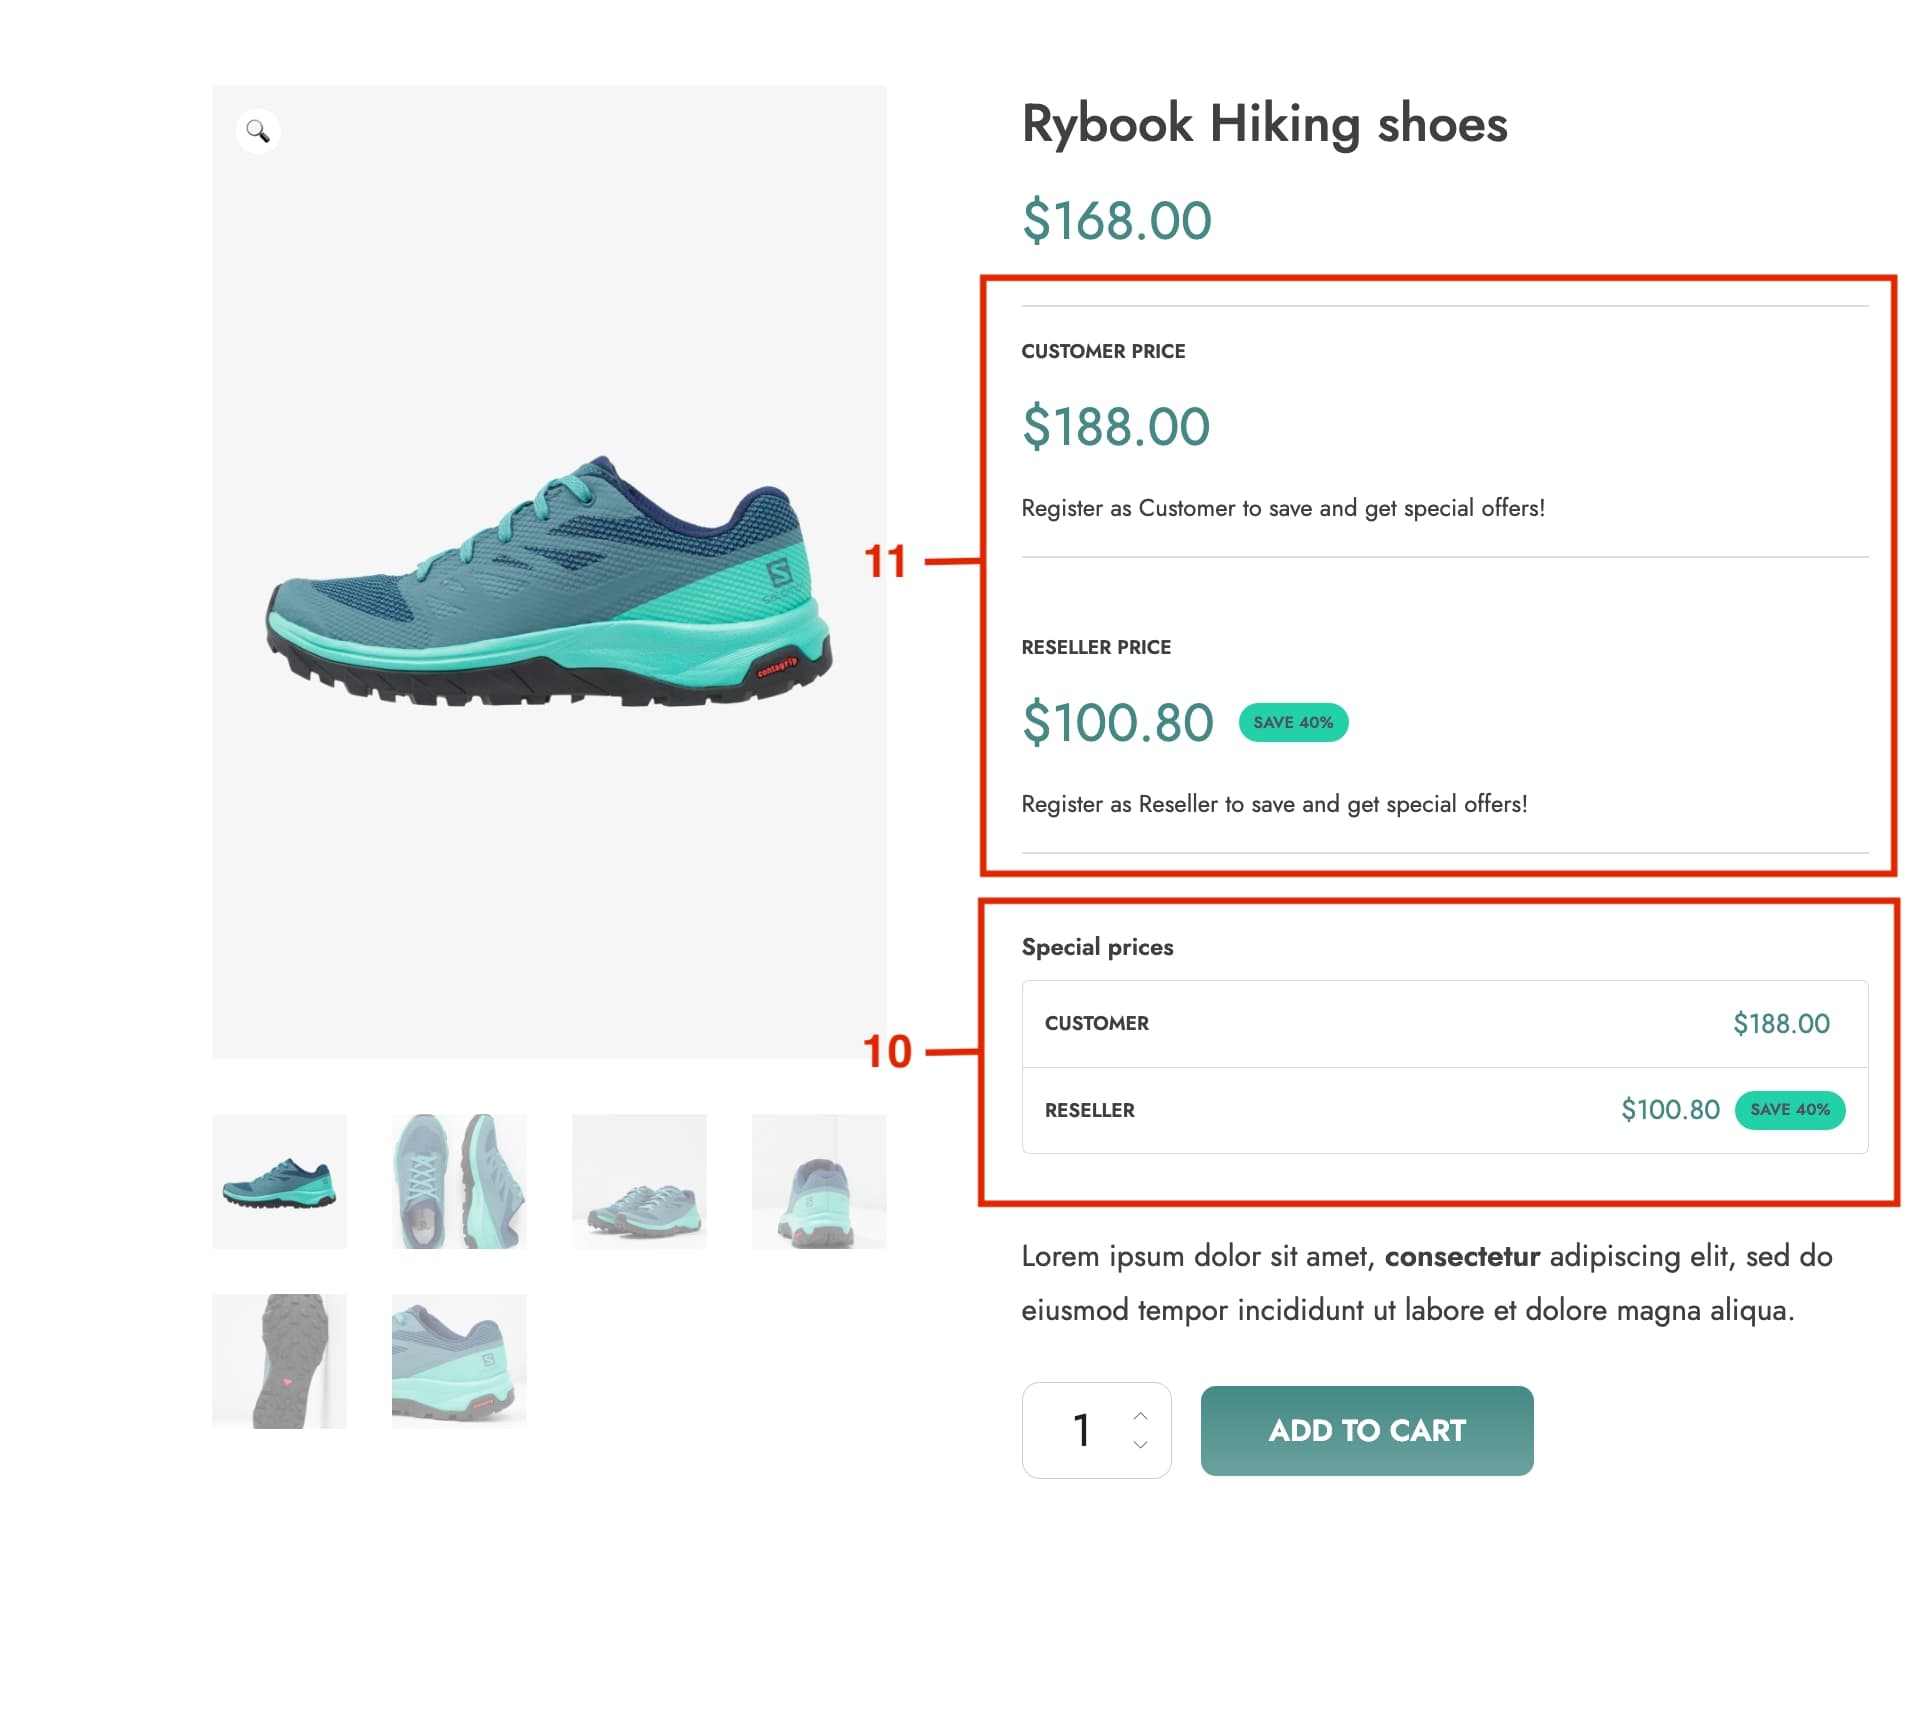
Step 4 — Display a price table and other user role’s prices
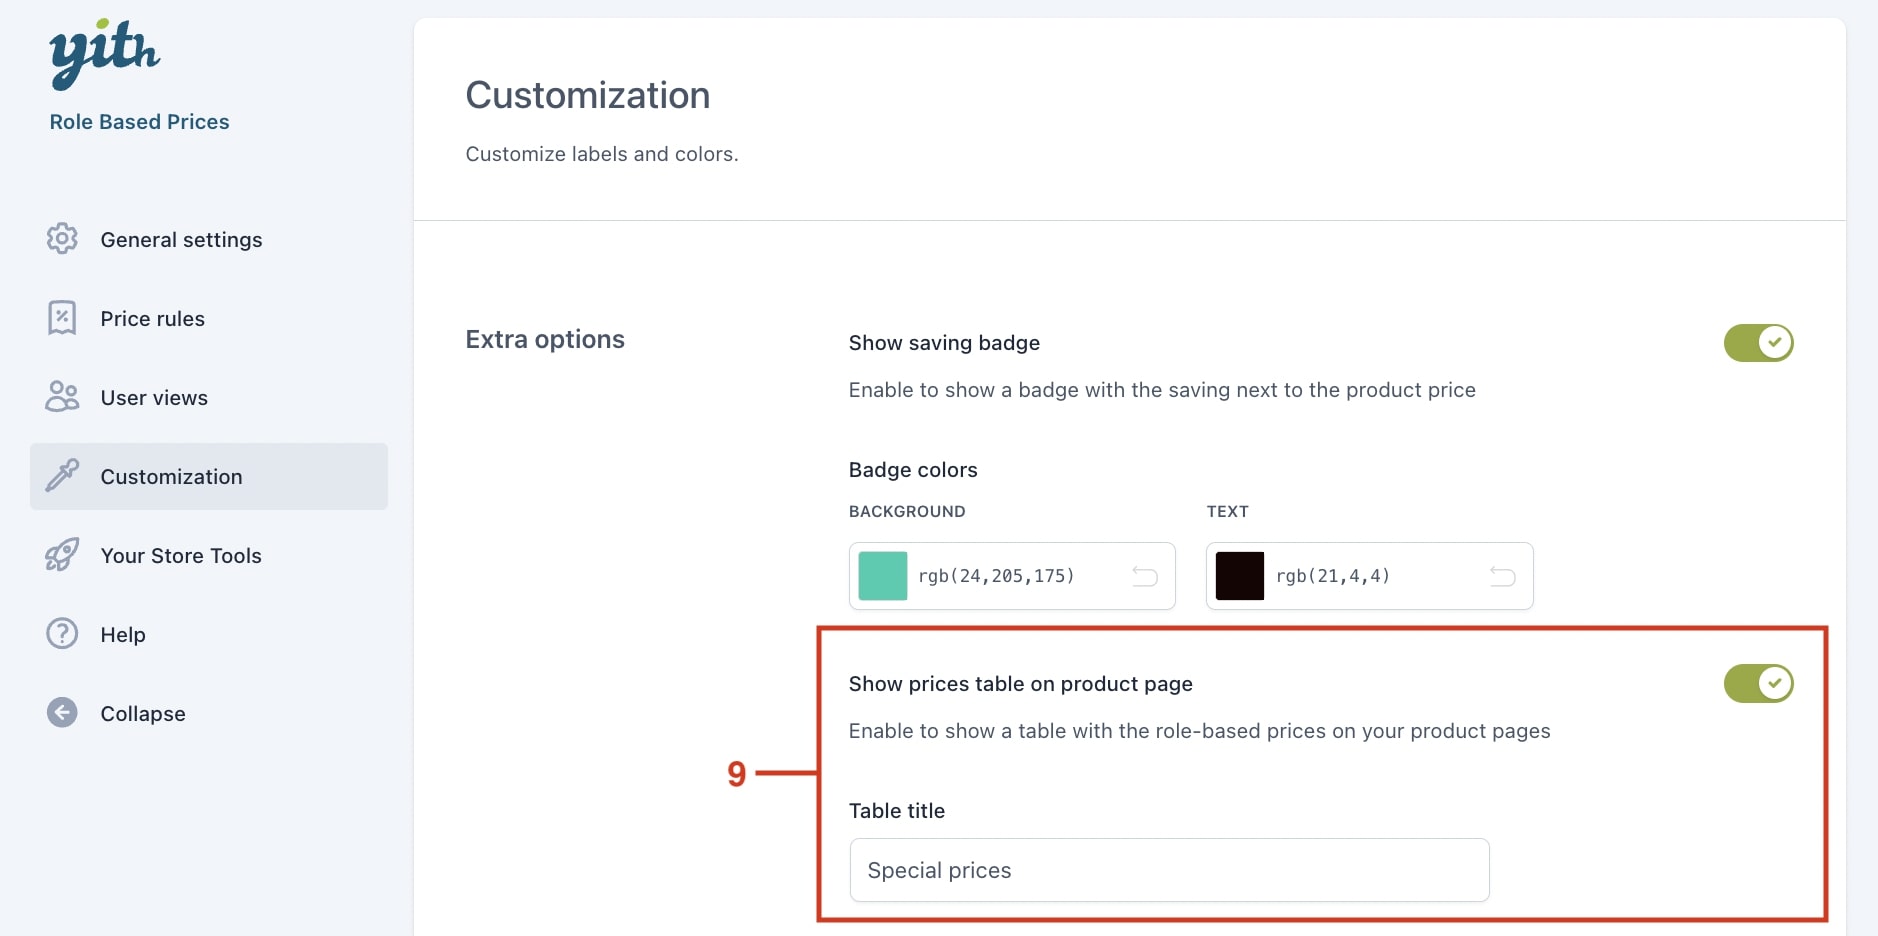
As an additional step, you can show a Price table and the prices available for other roles. First, activate the option from the Customization tab and set a title for the table (9).
Then, from the Users view tab, activate the Price table (10) for a specific role and add another role’s price for display in the product (11).

Once everything is set, this is how it would display in the frontend: