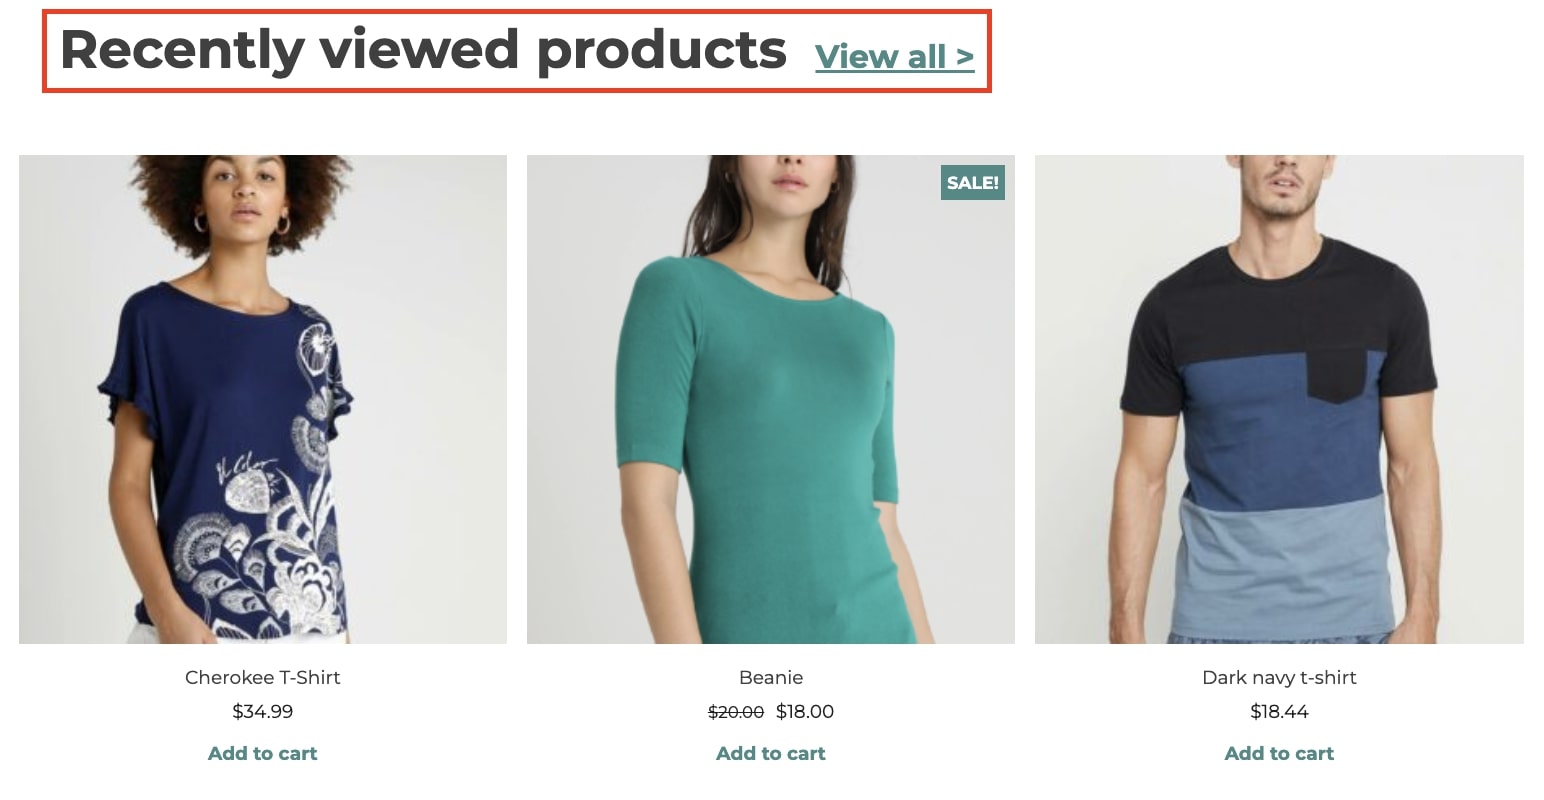
YITH WooCommerce Recently Viewed Products allows you to show the products that your users have recently viewed in a list on the product detail page or through a widget or shortcodes.
The major plugin feature is the possibility to store the information of logged-in users in the database, not only in a cookie for logged-in and non-logged users.
In this way, when users log into the site, the cookie will be deleted and their information stored in the database. By doing so, users will always be able to see their recently viewed products regardless of the browser used, as the system will get this information directly from the database (and not from a cookie).
General settings
Let’s start with the General settings that you can find in YITH > Recently Viewed Products > Settings.
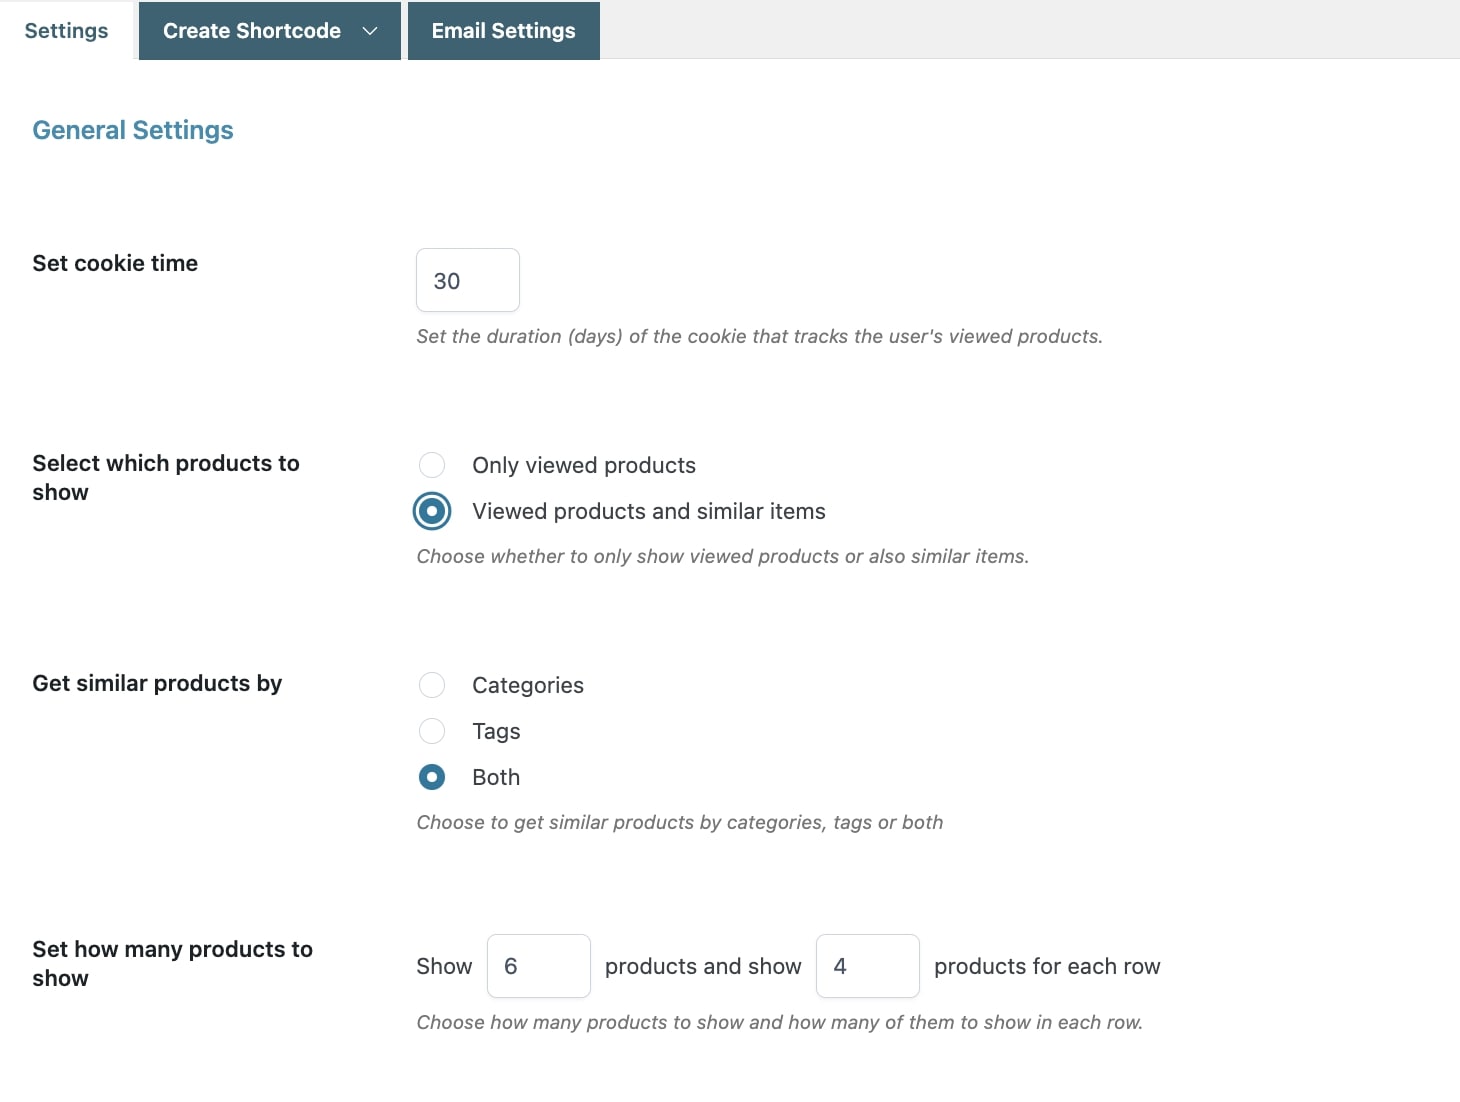
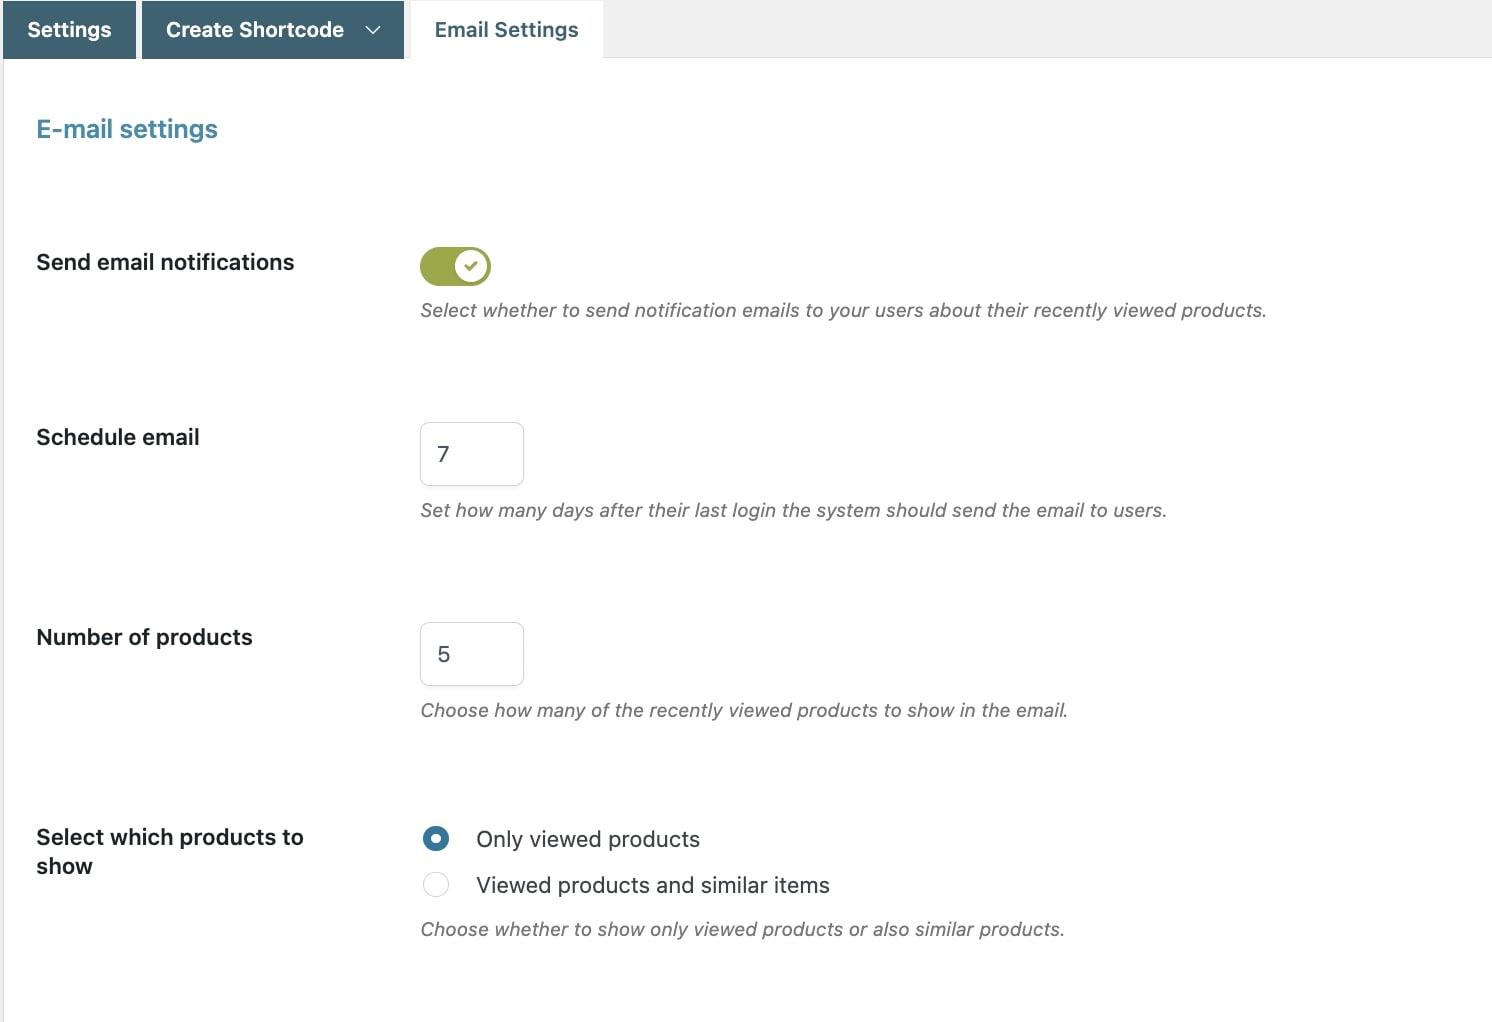
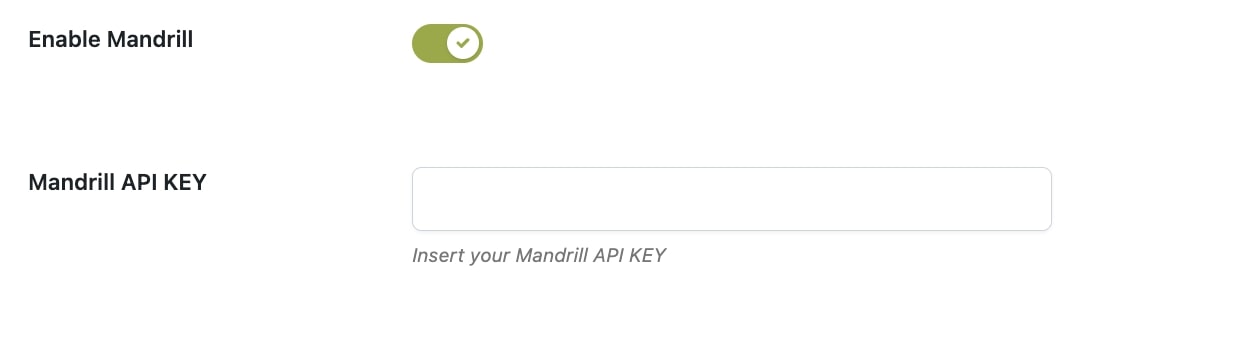
- Set cookie time: set the duration (in days) of the cookie that tracks user-viewed products;
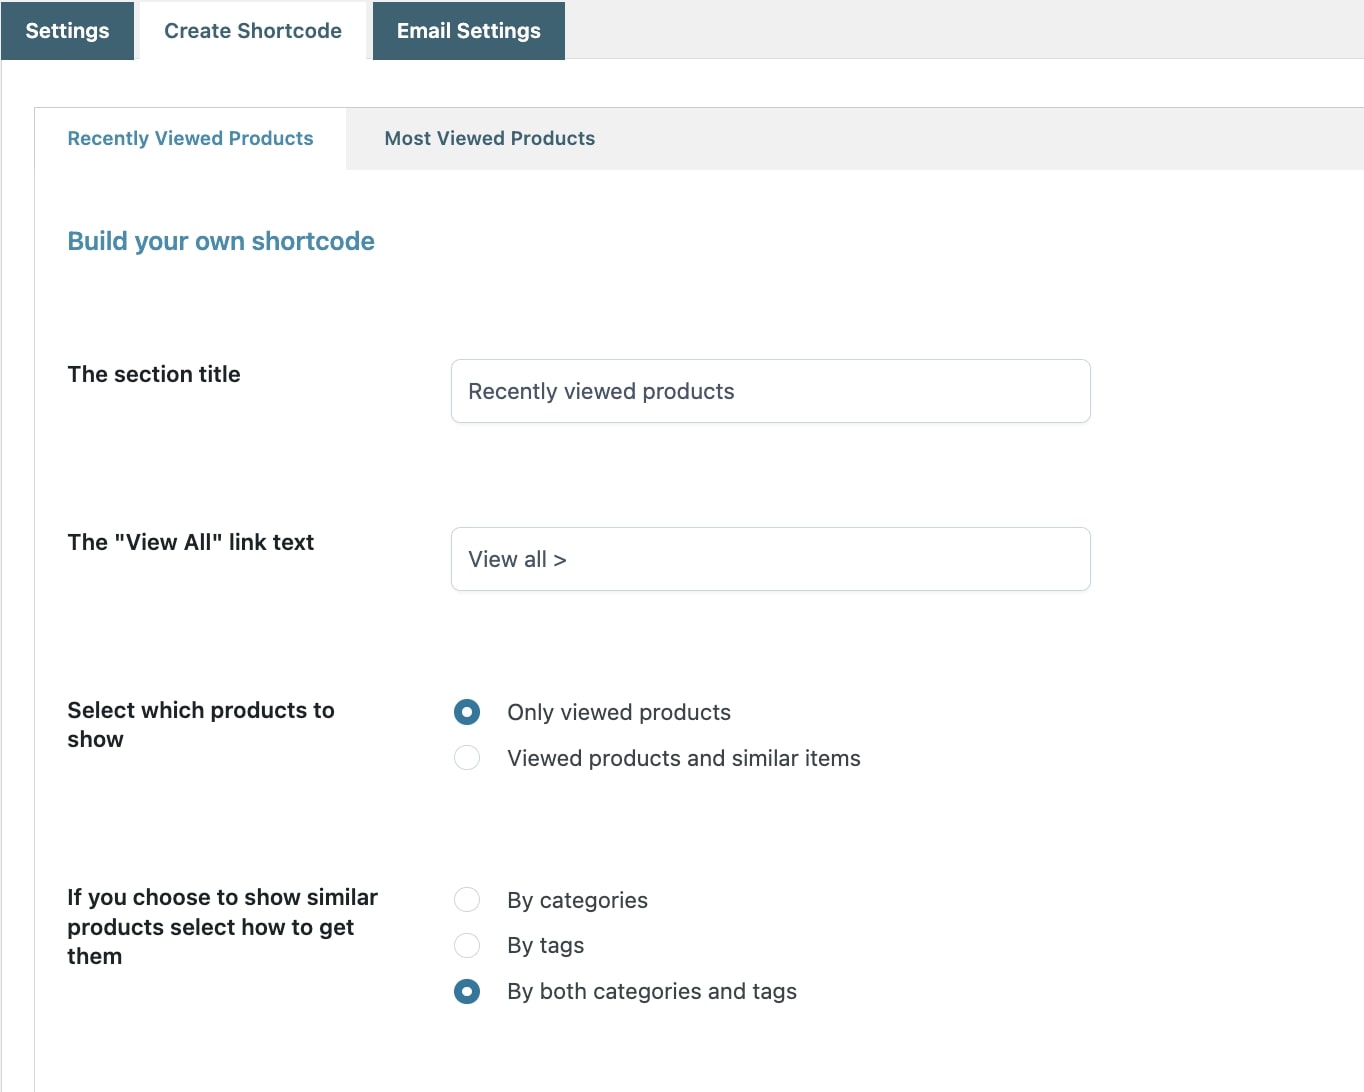
- Select which products to show: choose whether to show Only viewed products or Viewed products and similar items. By selecting Viewed products and similar items, you will be able to decide to get similar products by
- categories
- tags
- both
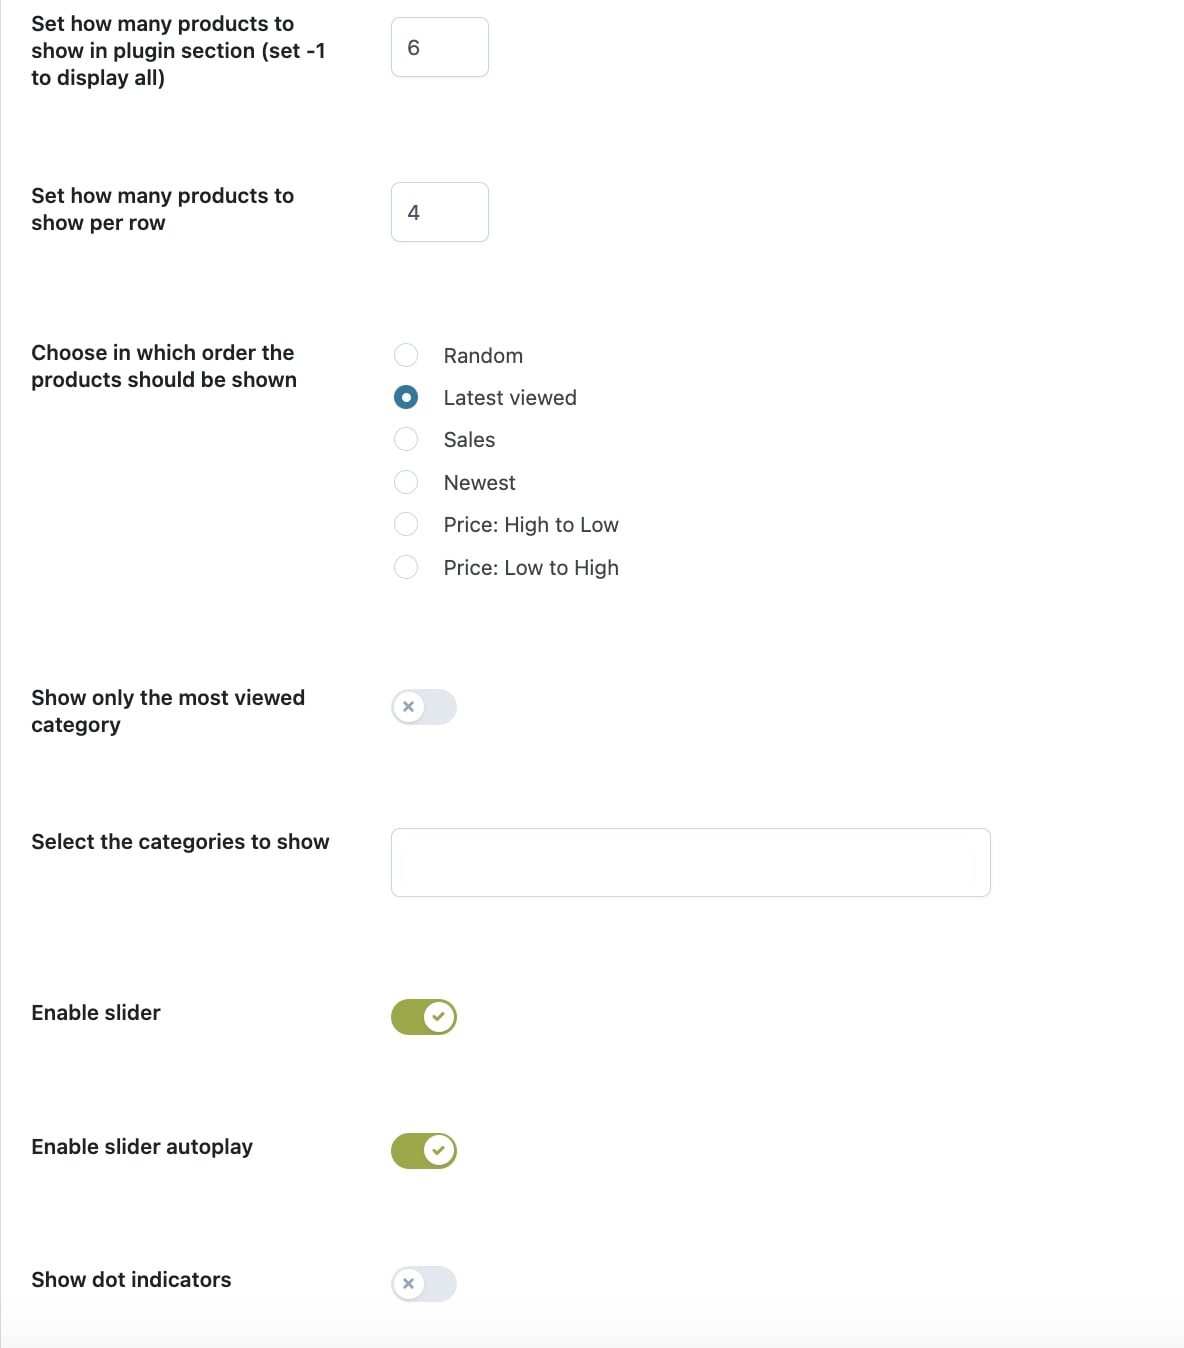
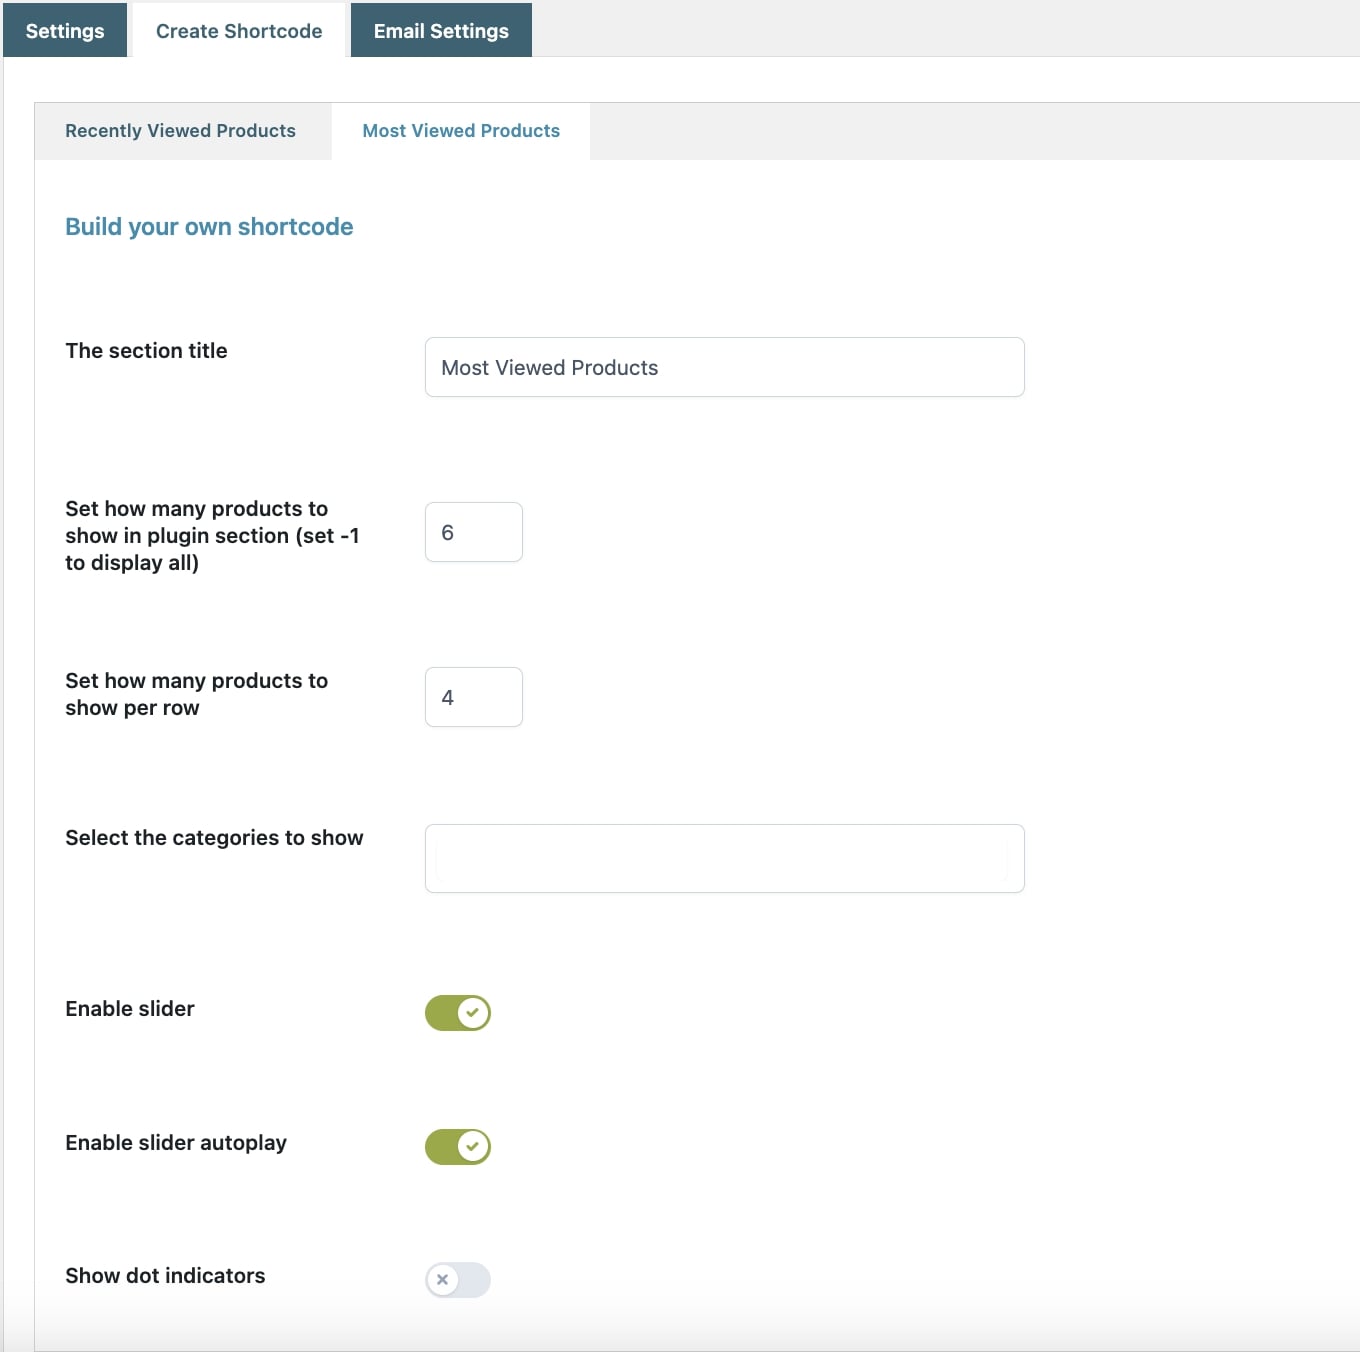
- Set how many products to show: enter the number of products to show and how many of them to show in each row;
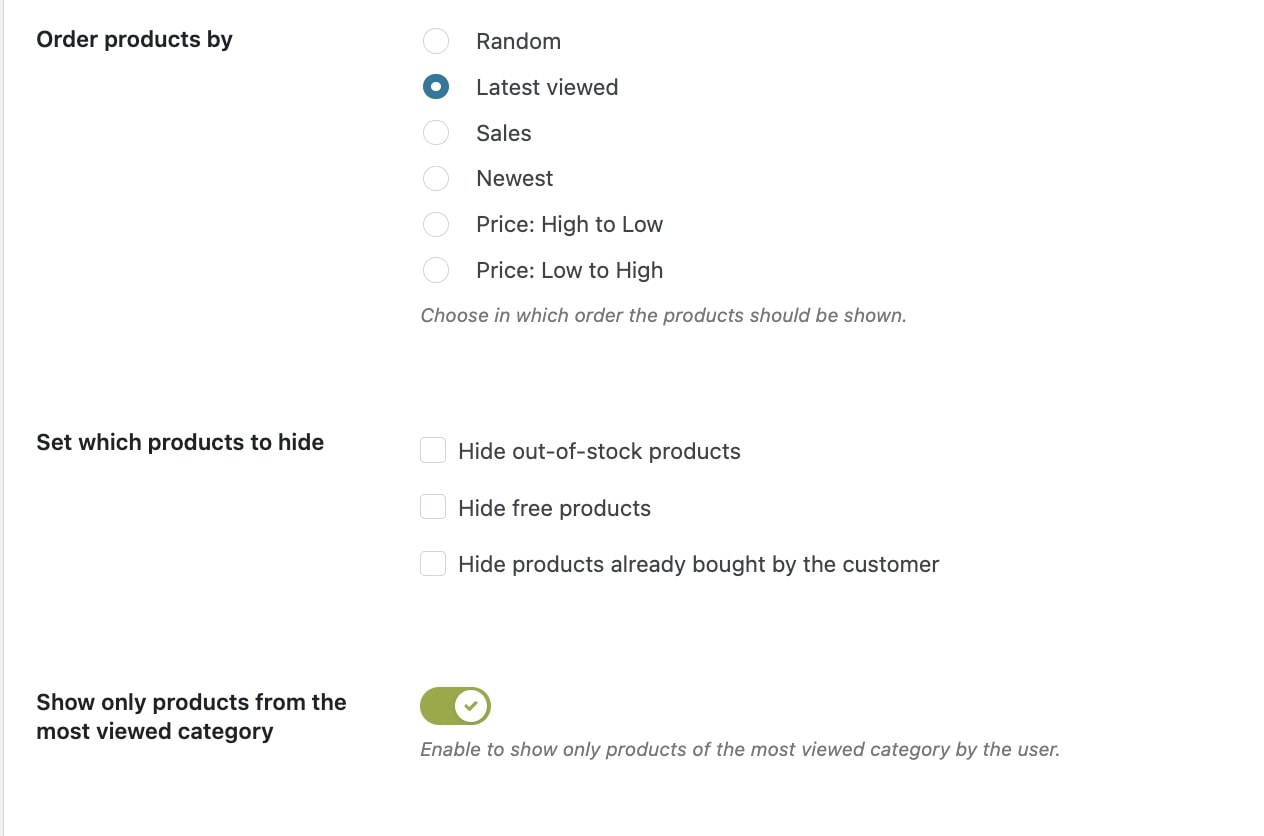
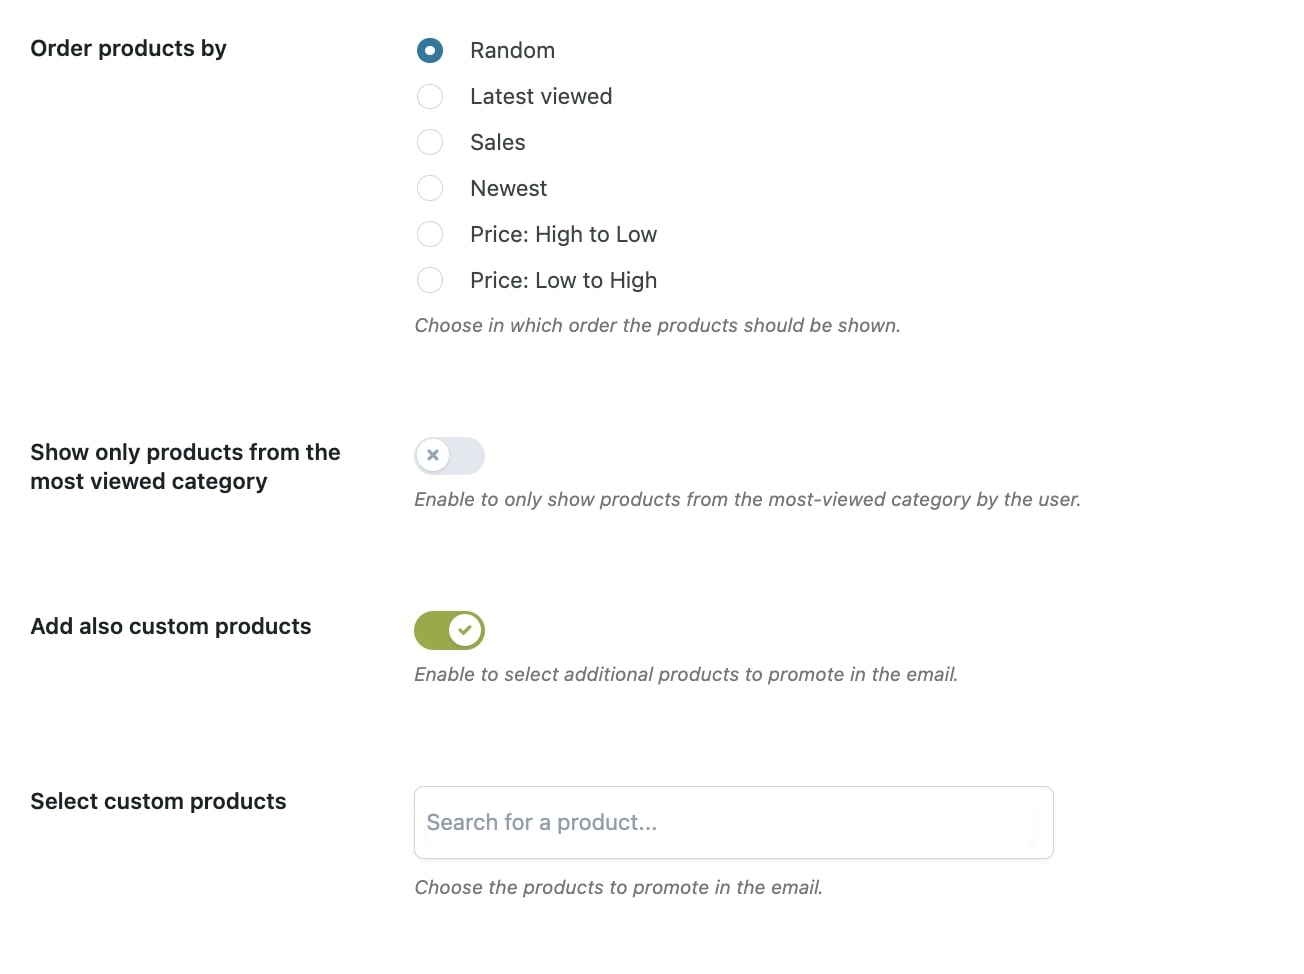
- Order products by: choose how to order the products from Random, Latest viewed, Sales, Newest, Price: high to low, or Price: low to high;
- Set which products to hide: choose if you want to hide out-of-stock products, free products, and/or products already bought by the customer;
- Show only products from the most viewed category: enable to show only products of the most viewed category.
From the General settings, you can also enable and configure a slider to show the recently viewed products.
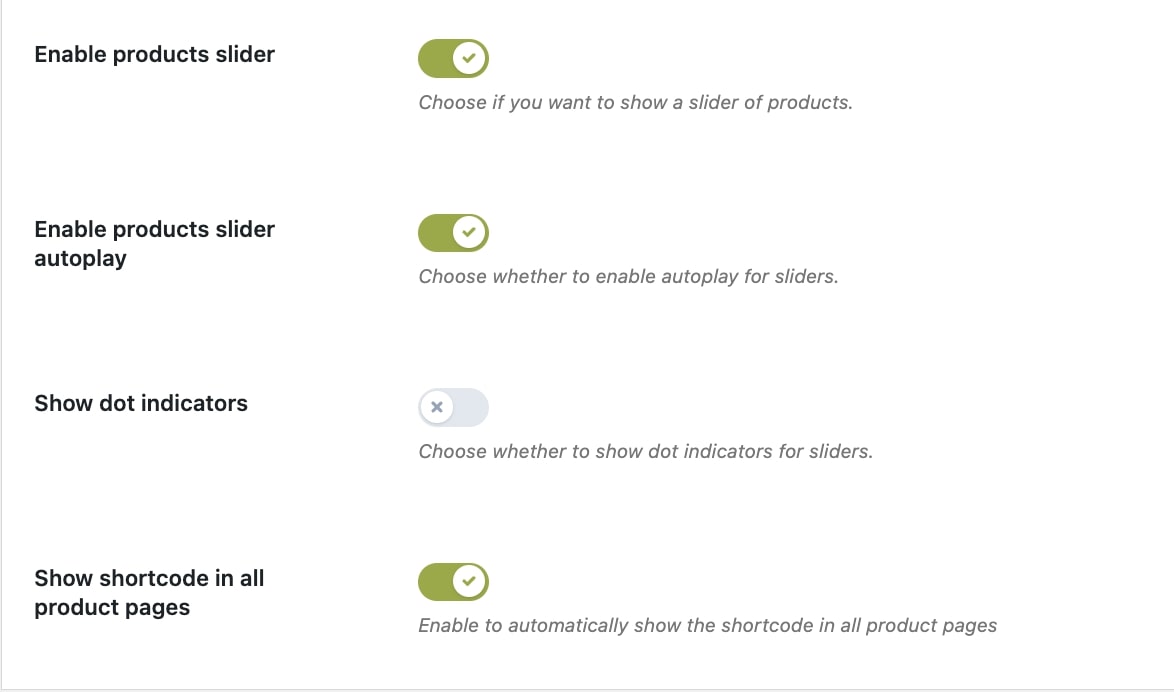
- Enable products slider: enable to show the product list section as a slider;
- Enable products slider autoplay: enable to activate the autoplay for sliders;
- Show dot indicators: enable to show dot indicators for sliders;
- Show shortcode in all product pages: enable to automatically add the shortcode in the single product page.
Texts and labels
In the Texts and Labels section, you can customize the text for the message, the section title, and the link to view the recently viewed list.
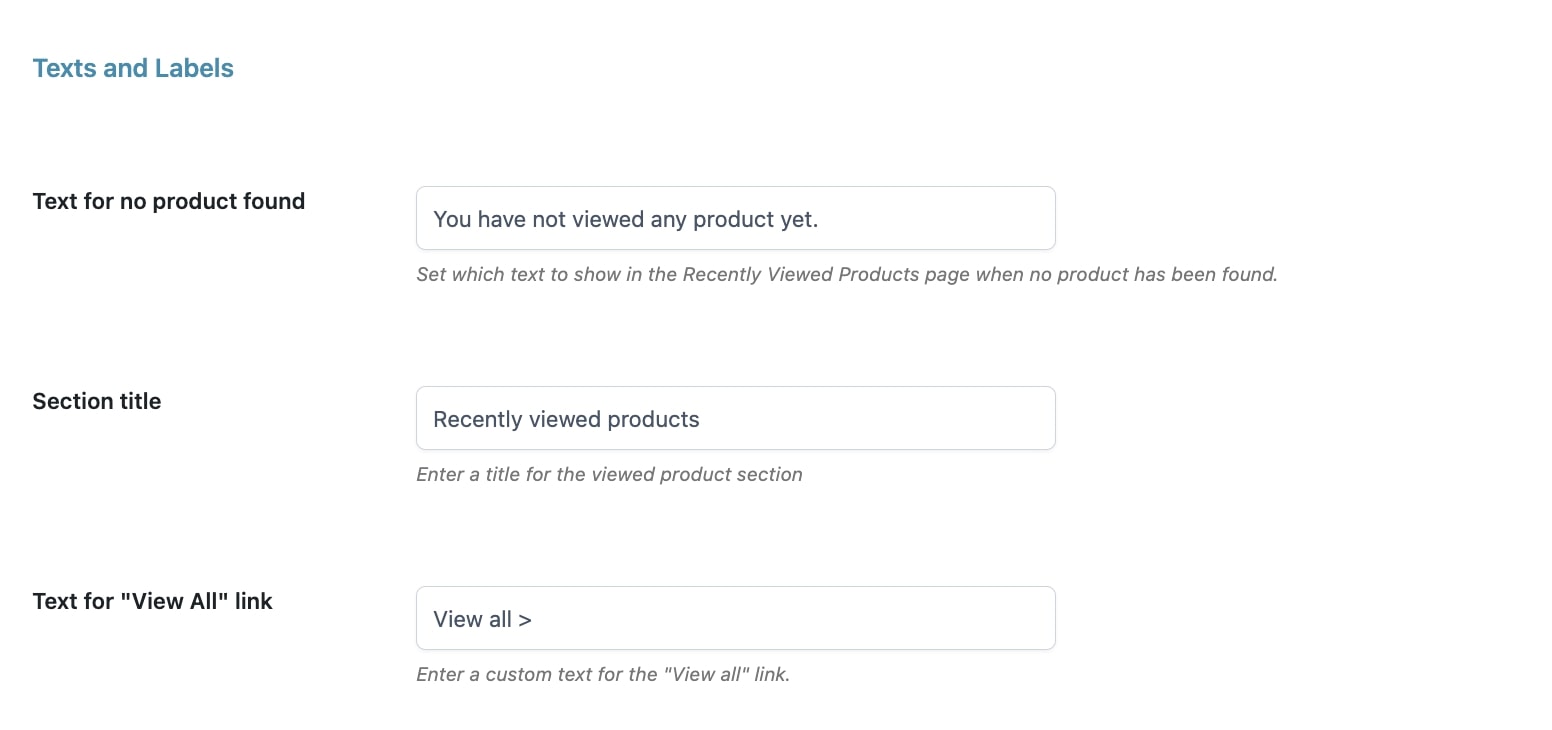
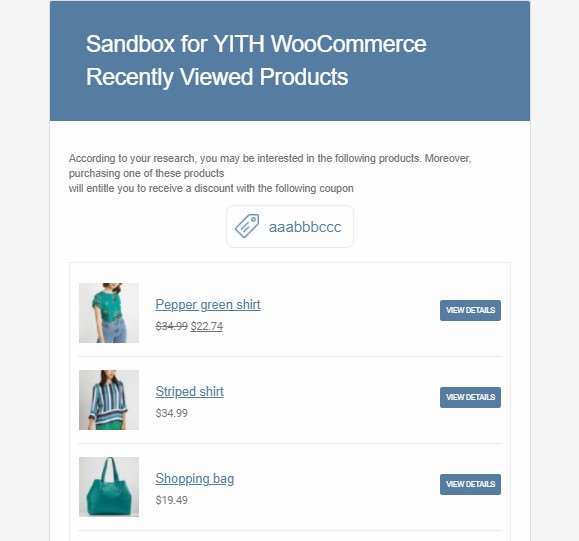
- Text for no product found: enter the message to show when users open the page without any viewed product and, as a consequence, the list is empty (see the example below);

- Section title: text shown above the section of the recently viewed products;
- Text for “View All” link: link text that redirects users to the “Recently Viewed Products” page.