In this section, you can customize the options related to each step.
Go to YITH > Multi Step Checkout > Steps Options and scroll down to Steps Customization, where you will find the options grouped in a dropdown for each of the following steps:
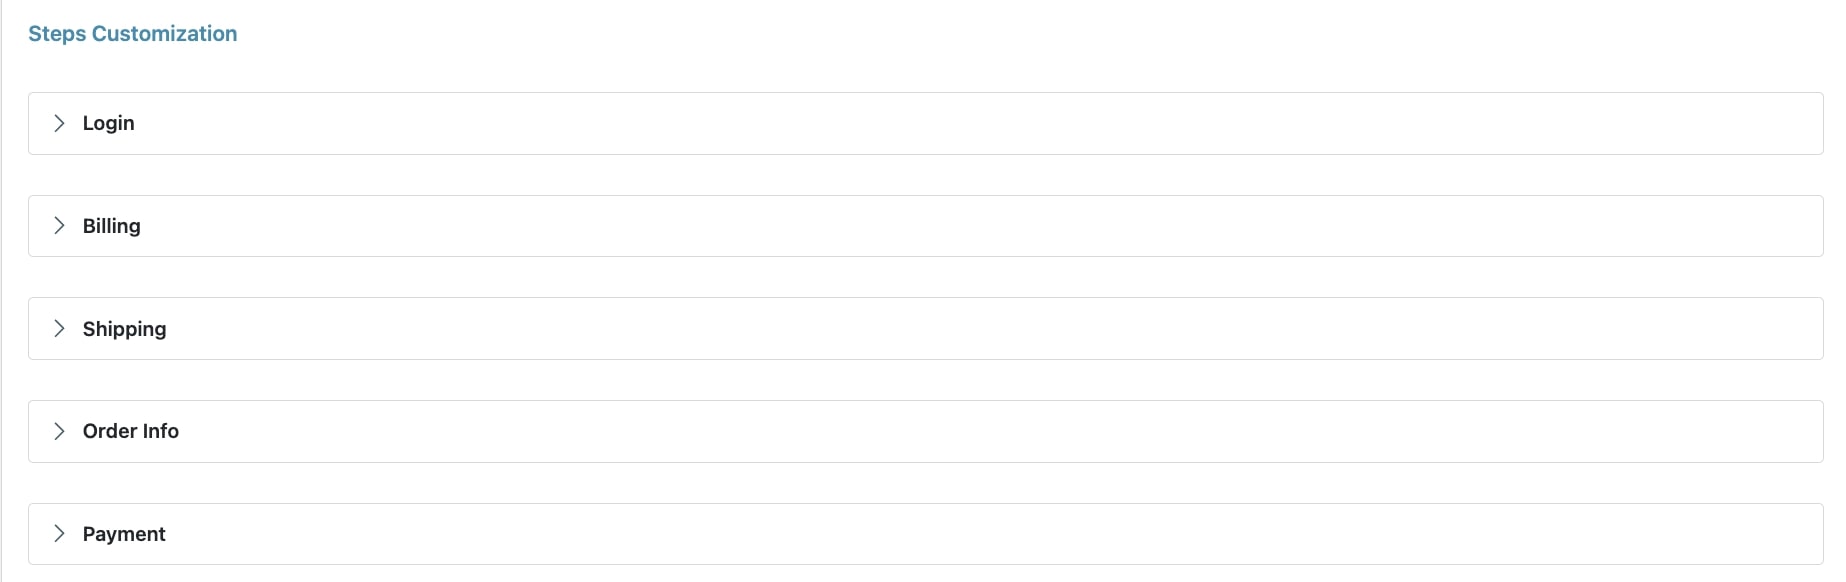
Let’s analyze them one by one.
Login
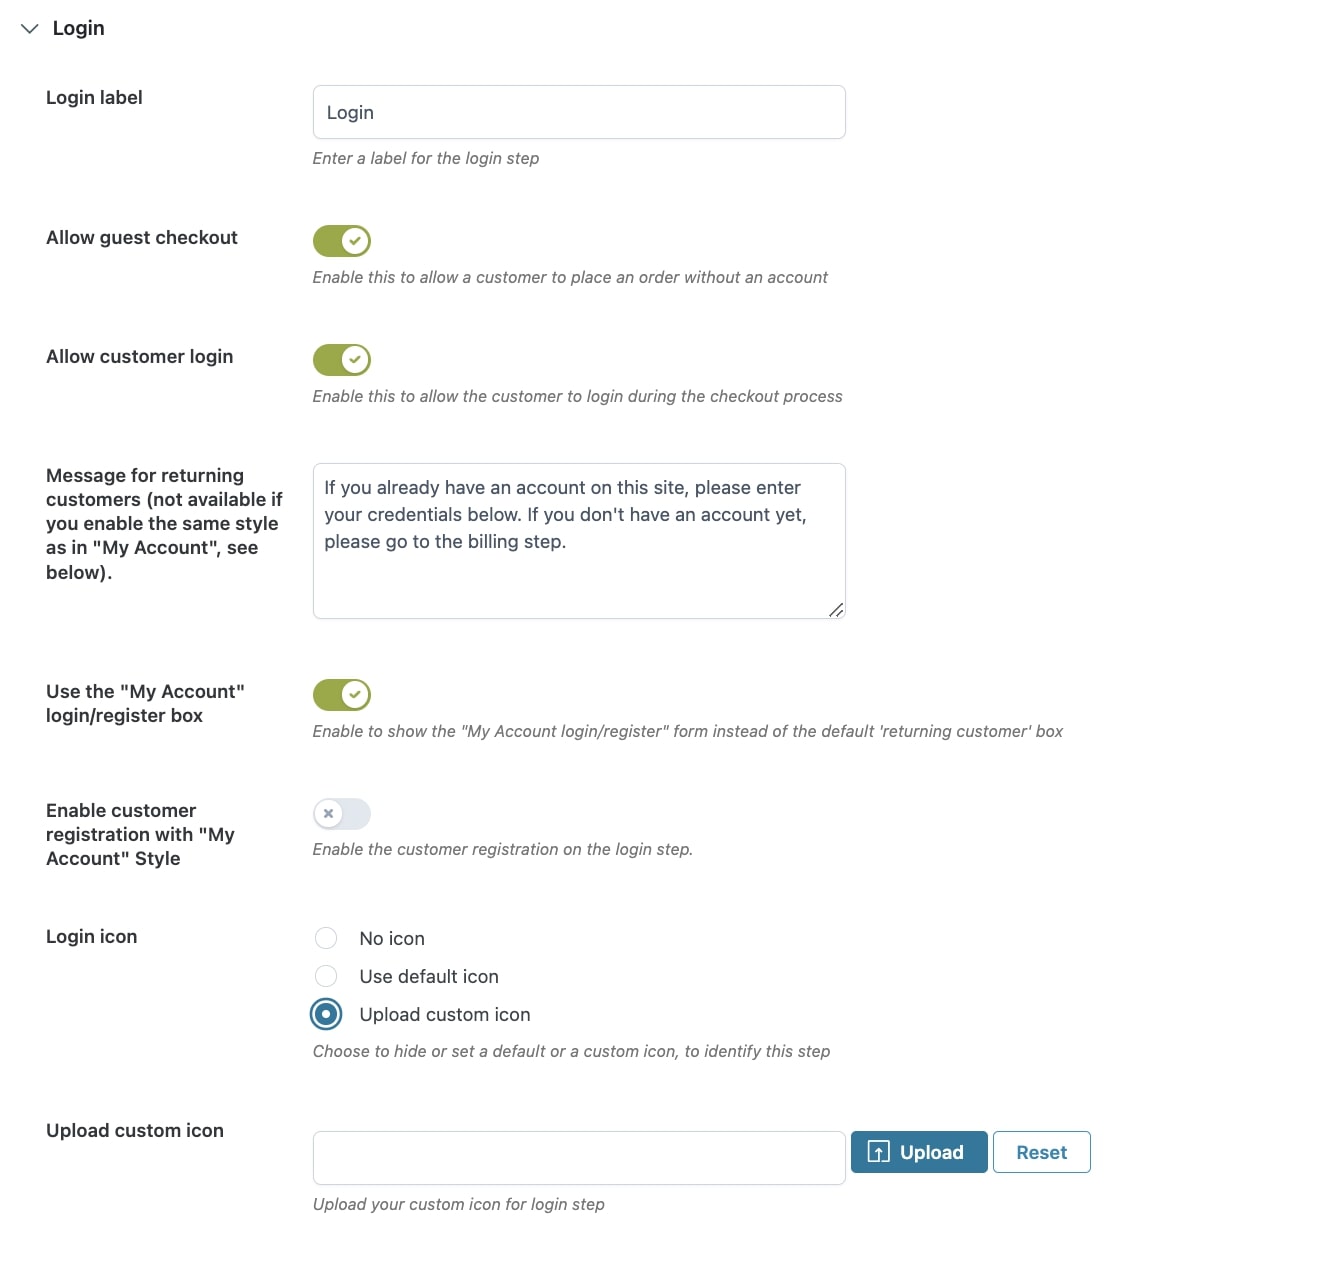
- Login label: customize the name of the Login step.
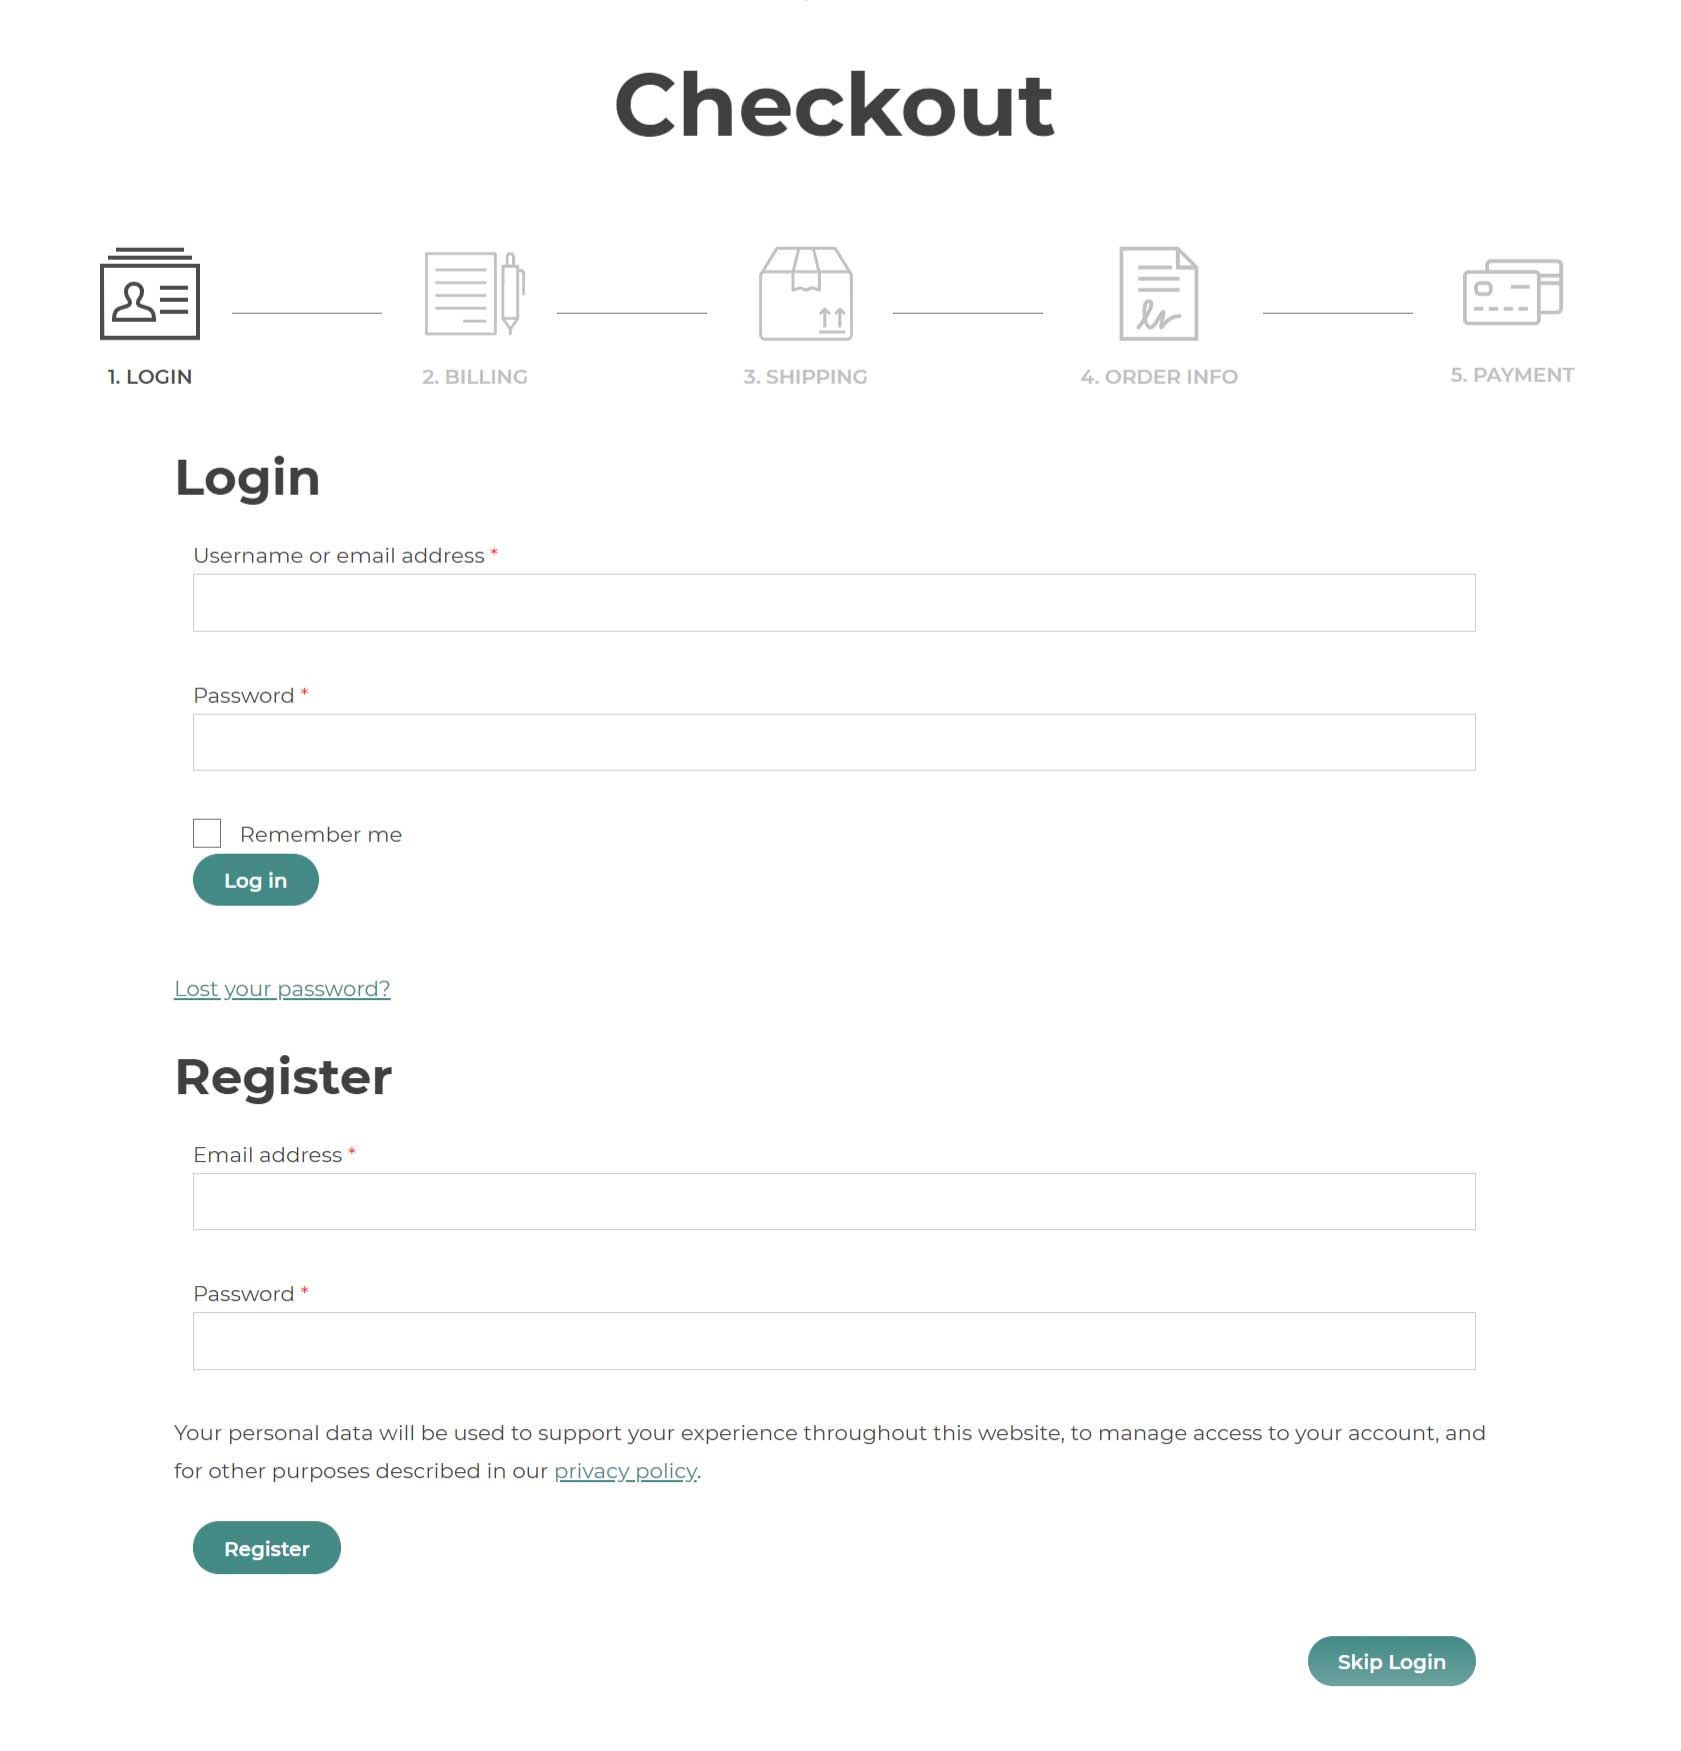
- Allow guest checkout: enable this option to allow customers to checkout as guest without creating an account. If you enable this option they will be able to see a Skip login button.
- Allow customer login: choose whether to allow customer login here or not. If enabled, you’ll see the following options show up:
- Message for returning customers (not available for “My Account” style): set up a custom message to invite your customers to login. This message is only visible if you do not enable the login with the same style as in My Account page (option below).
- Use the “My Account” login/register box: enable this option to use the same Login box and Register box (if enabled below) that is shown on My Account page.
- Enable customer registration for “My Account” Style: choose whether to include the Register box in the Checkout or not.
- Login icon: through this option, you can choose whether to hide the icon, use one of the default ones included in the plugin or upload your custom icon:
- No icon
- Use default icon

- Upload custom icon

Billing
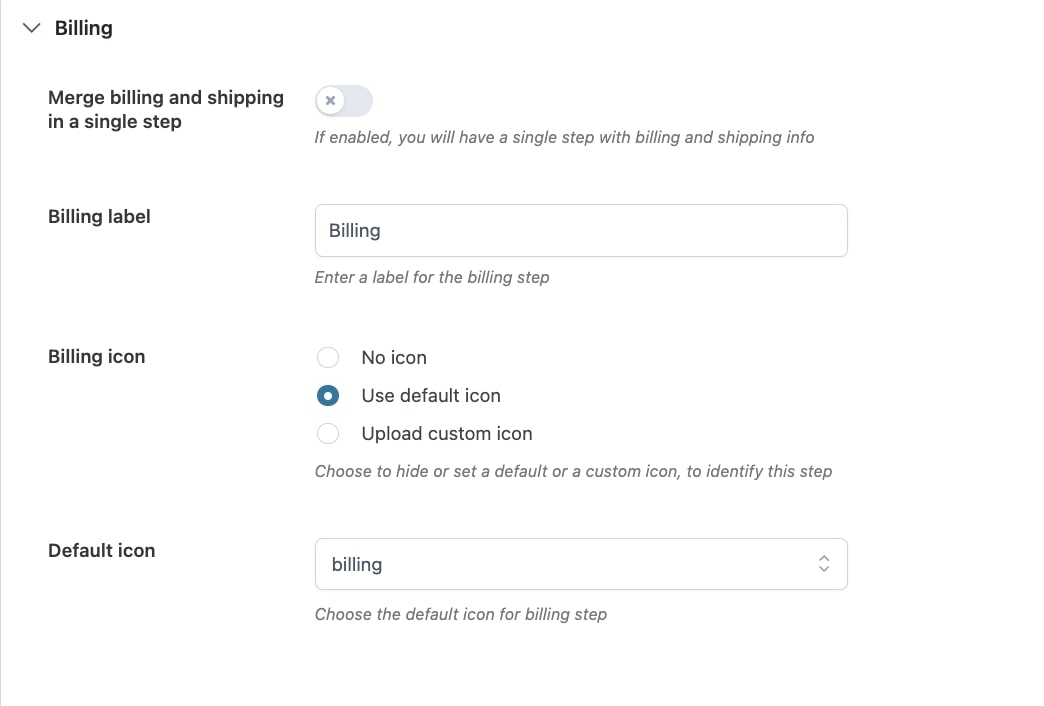
- Merge billing and shipping in a single step: enable this option to create only one step from the two related to “Billing” and “Shipping”. By merging them, there will be one step only and you can edit its name in the option below.
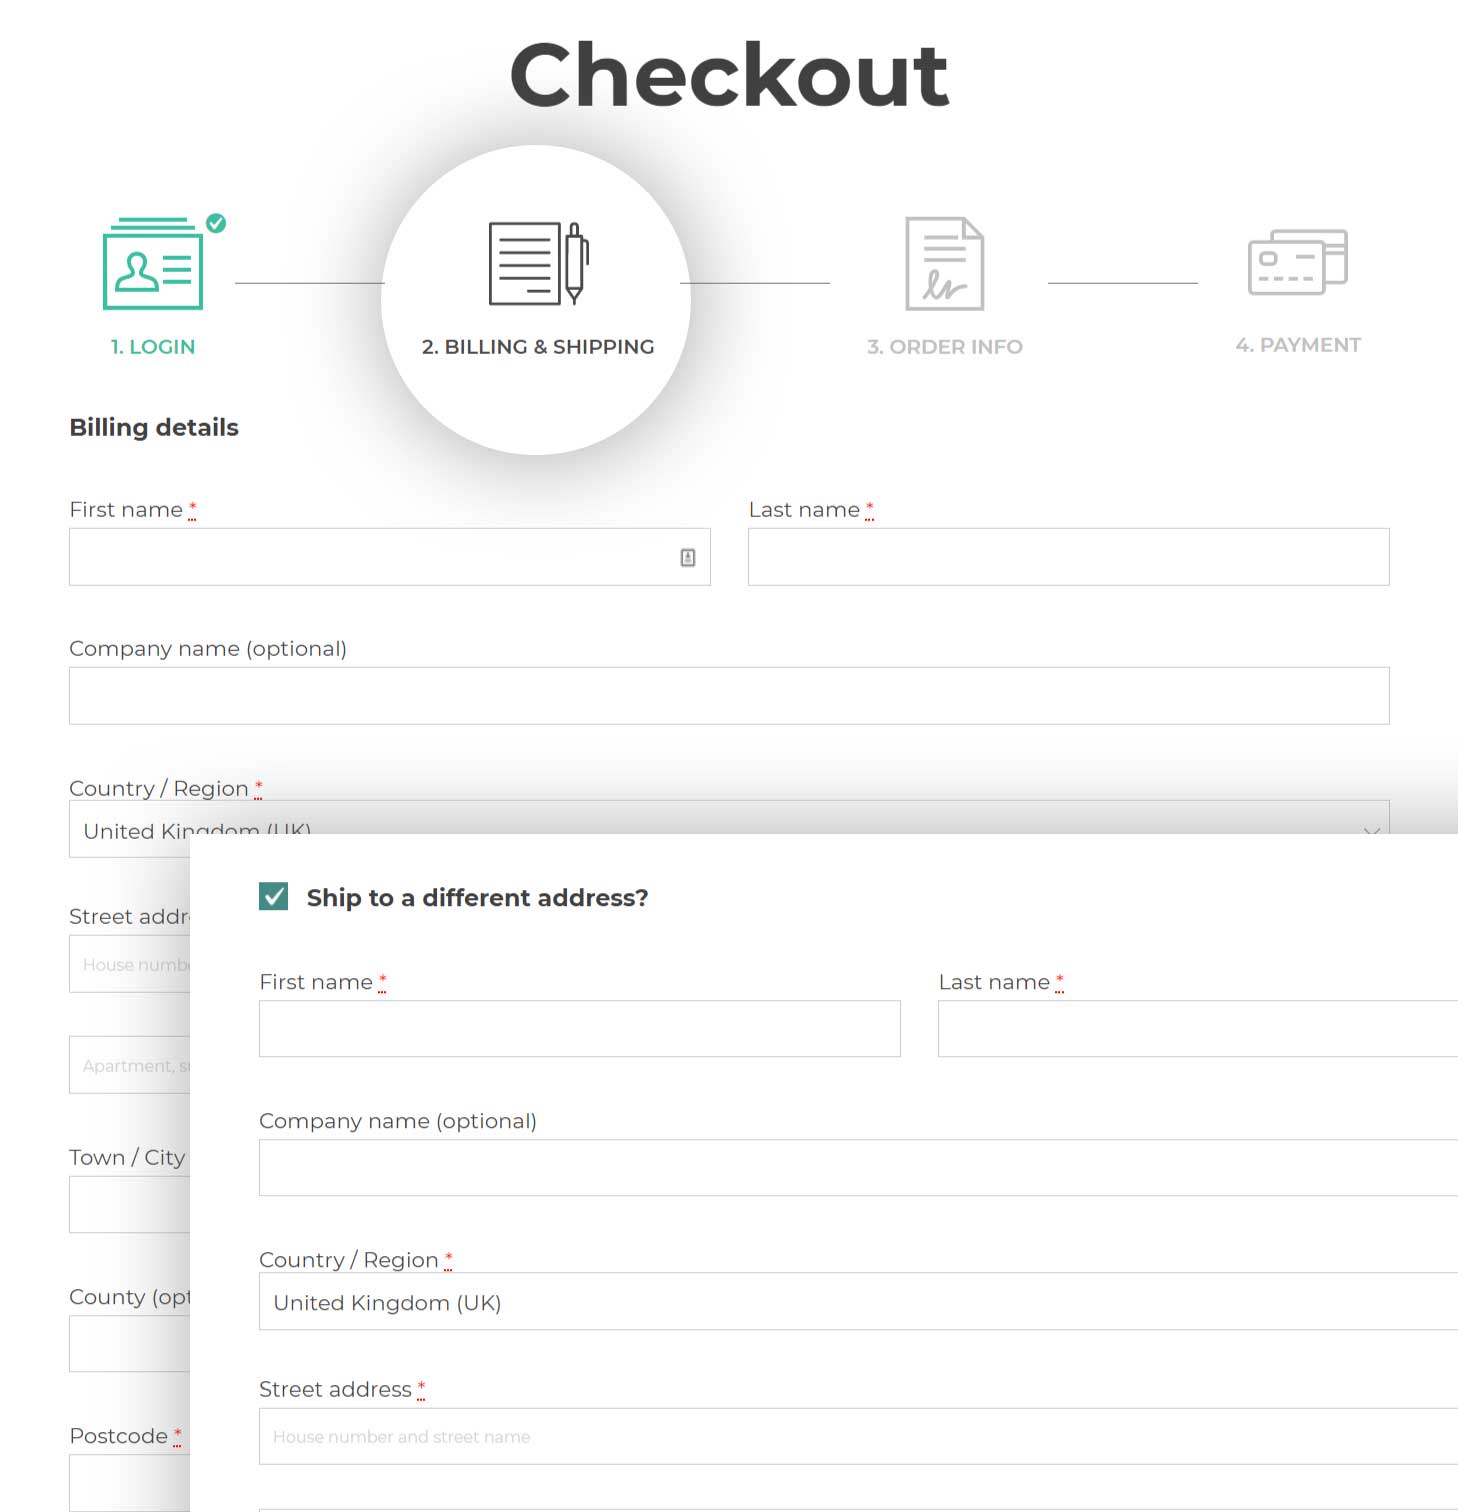
- Billing label: customize the name of the step here.
- Billing icon: choose whether to hide the icon, use one of the default one included in the plugin or upload your custom one:
- No icon
- Use default icon
- Upload custom icon
Shipping
This step will be automatically disabled if the Billing & Shipping steps have been merged in the Billing settings as explained above.
If they are kept separated, instead, you will see the following options:
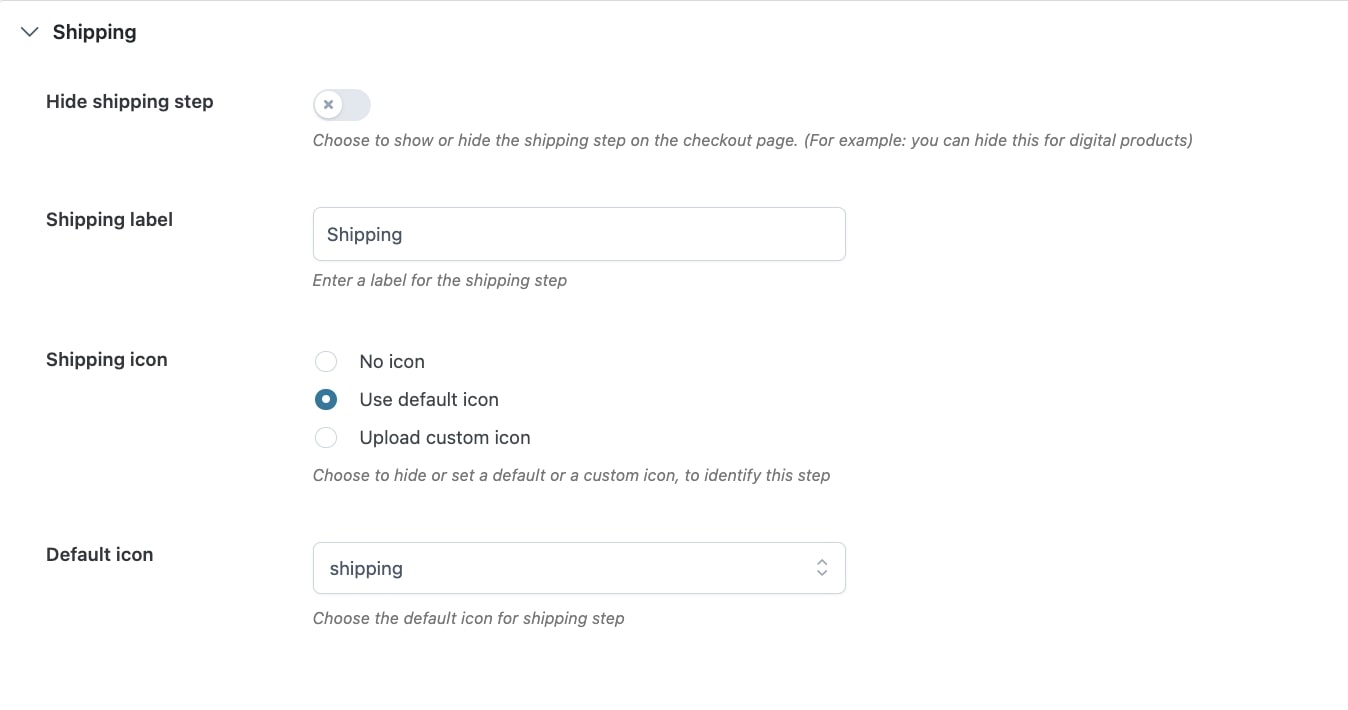
- Hide shipping step: decide whether to hide the shipping step and all its content or not. This is particularly useful when you sell digital products that do not need shipping.
- Shipping label: customize the name of the step here.
- Shipping icon: choose whether to hide the icon, use one of the default one included in the plugin or upload your custom one:
- No icon
- Use default icon
- Upload custom icon
Order Info
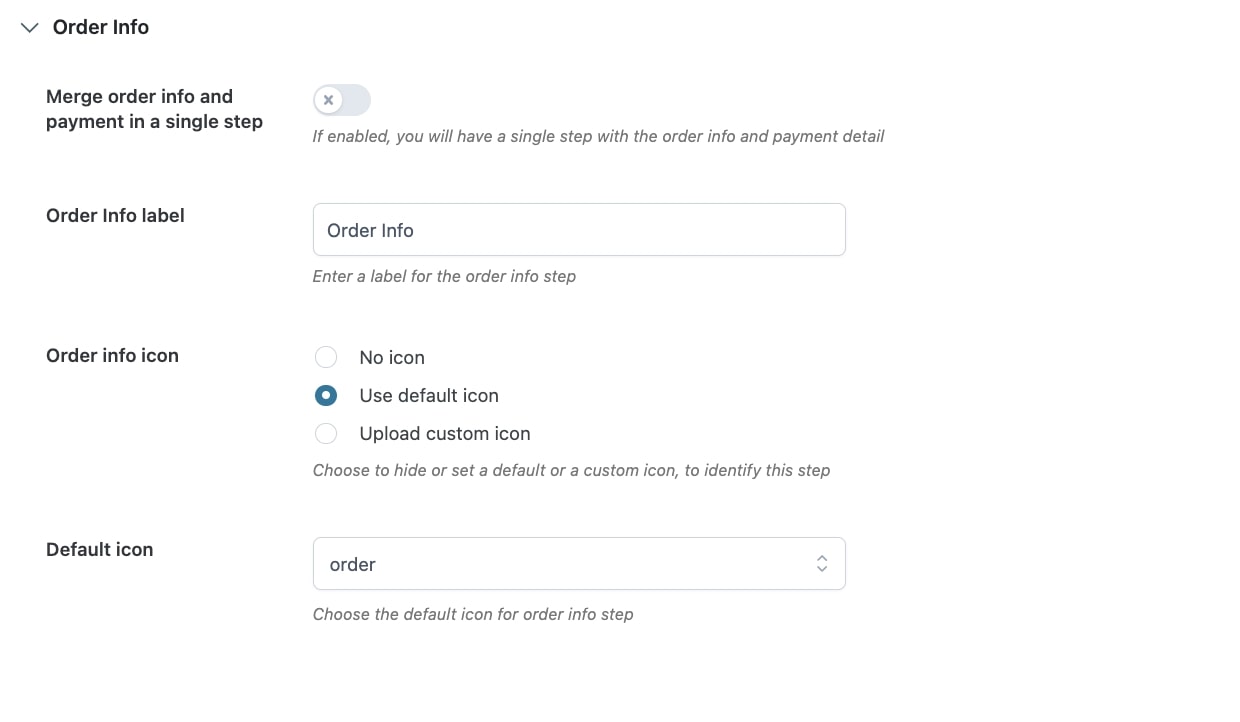
- Merge order info and payment in a single step: enable this option to create only one step from the two related to “Order Info” and “Payment”. By merging them, there will be one step only and you can edit its name in the option below.
- Order Info label: customize the name of the step here.
- Order info icon: choose whether to hide the icon, use one of the default one included in the plugin or upload your custom one:
- No icon
- Use default icon
- Upload custom icon
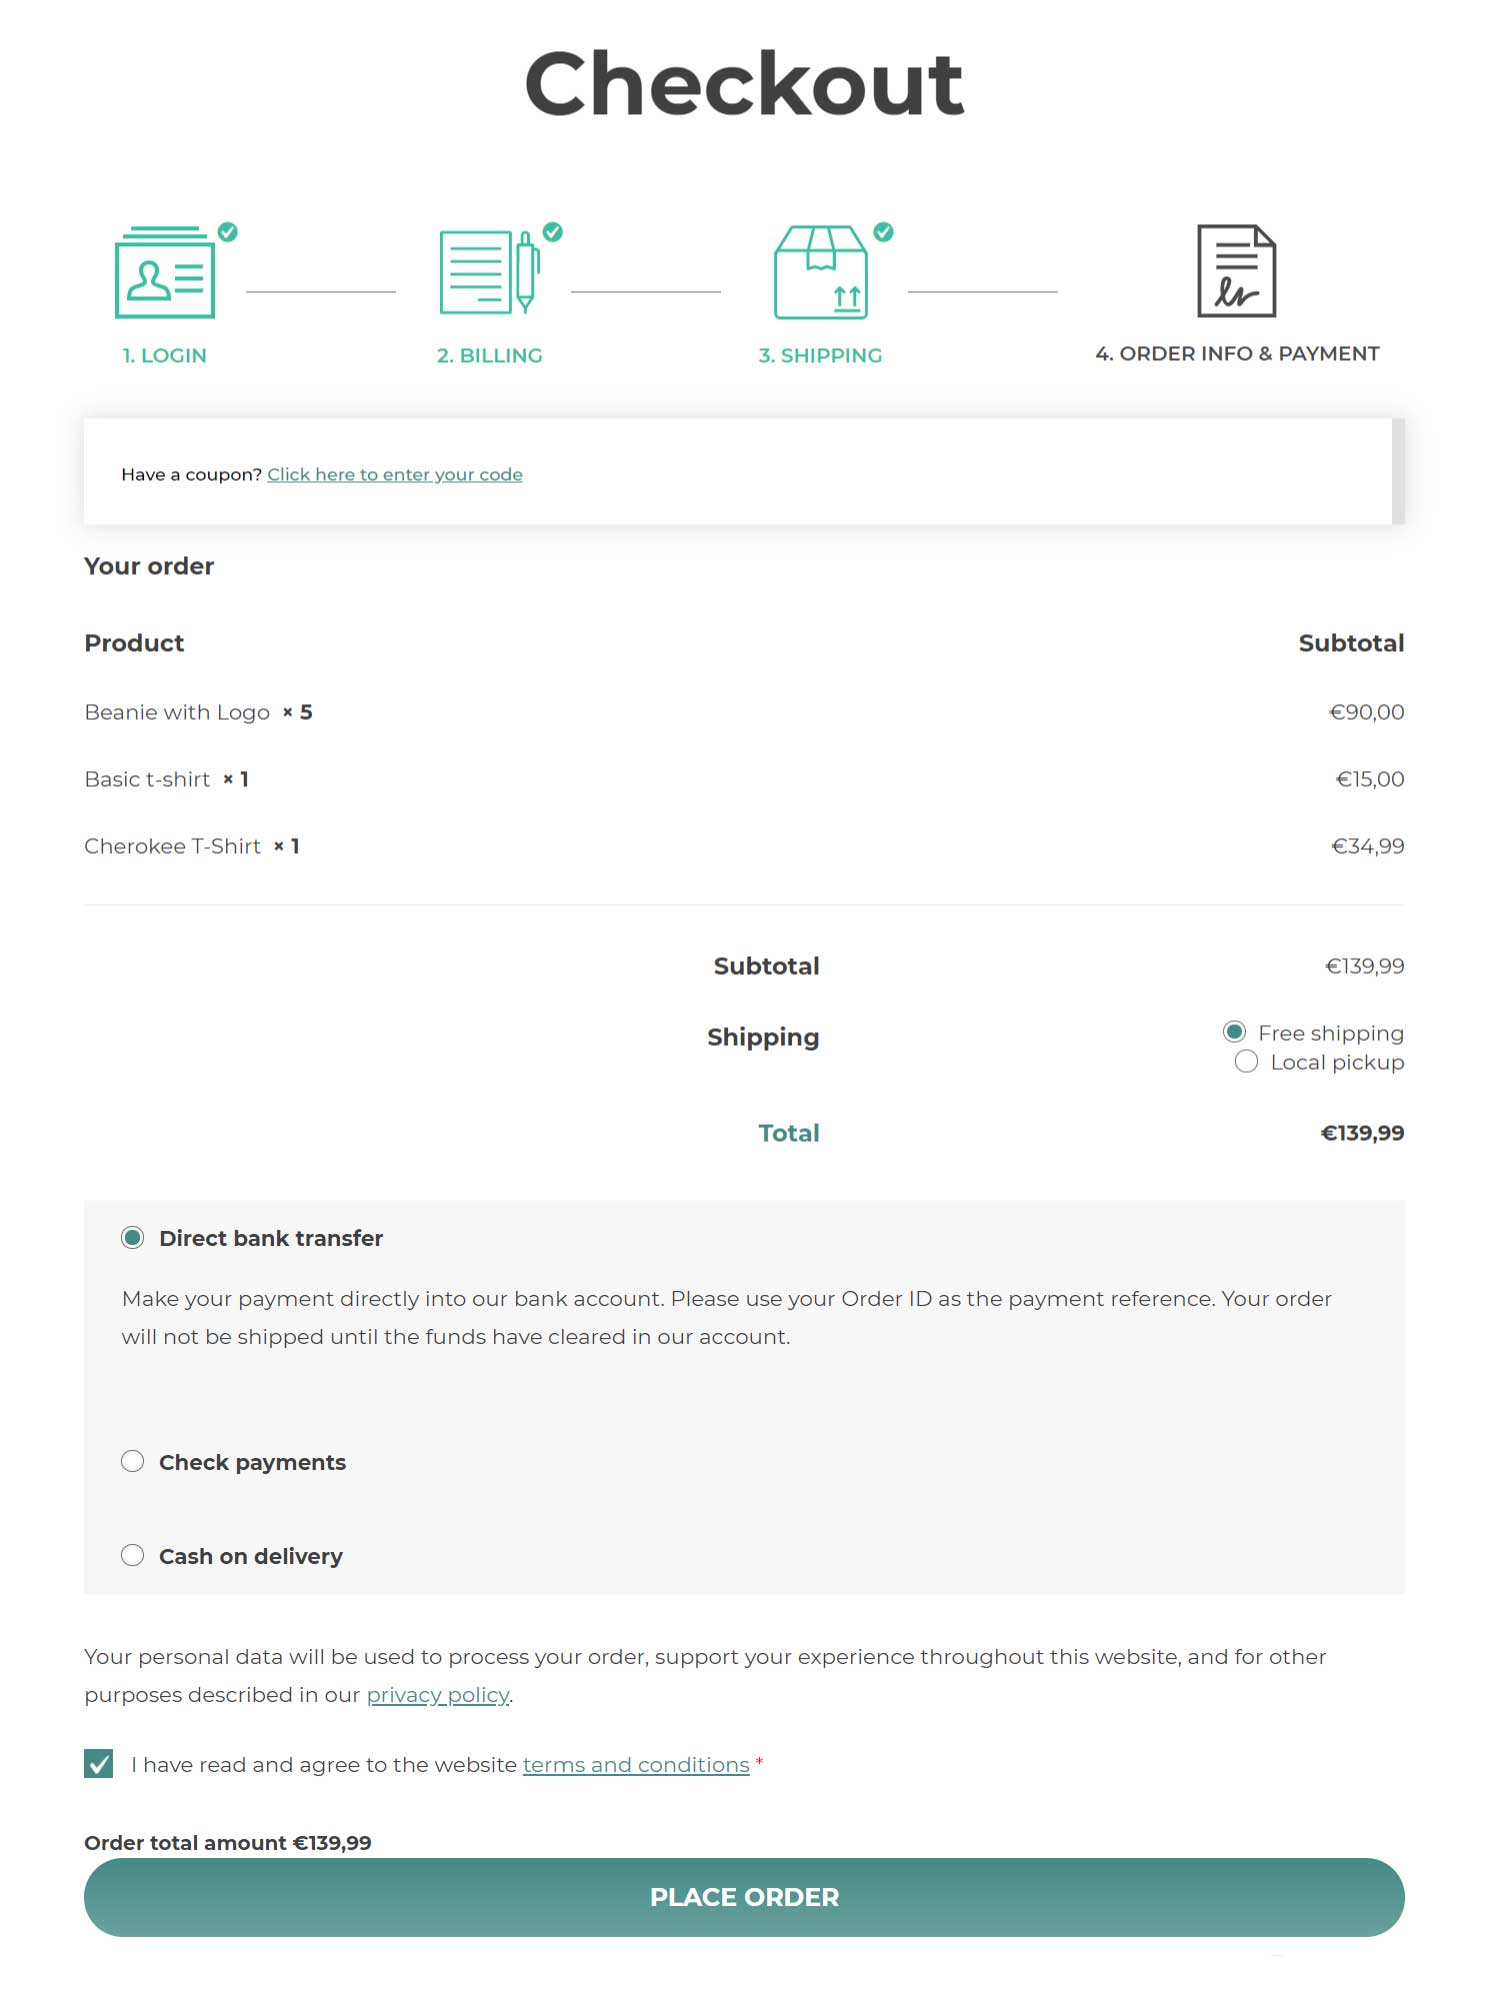
Payment
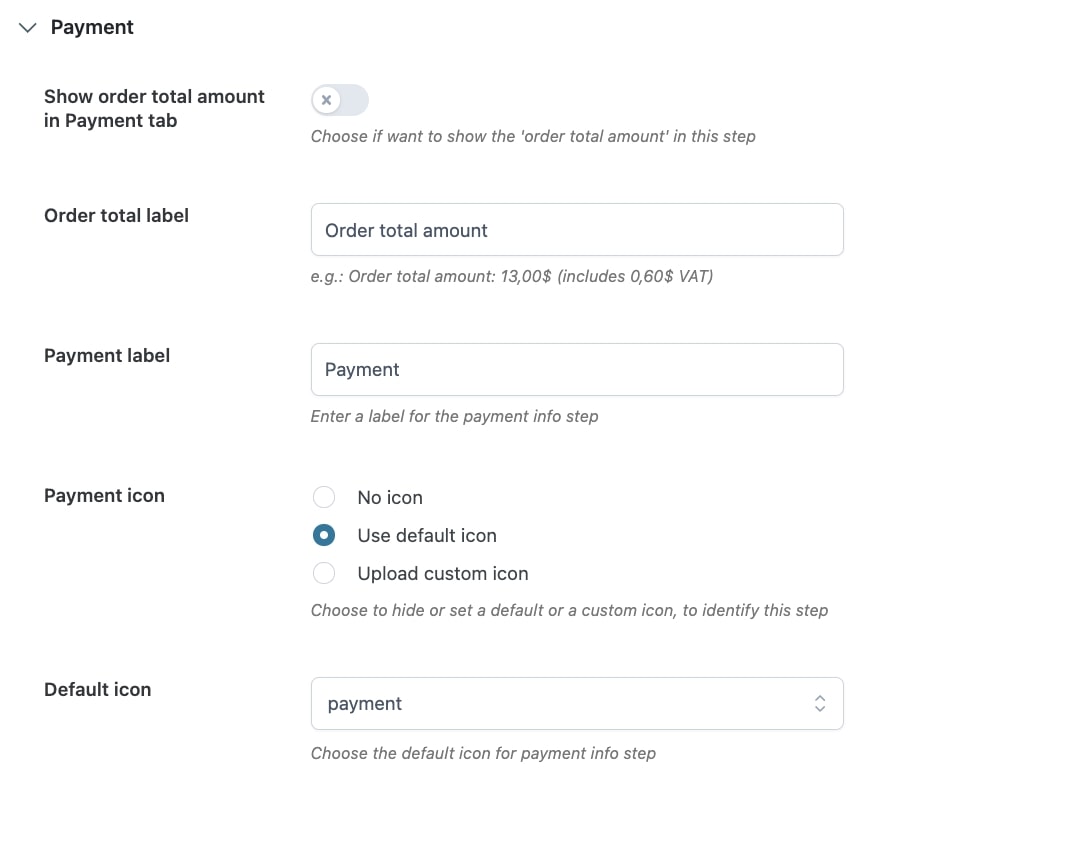
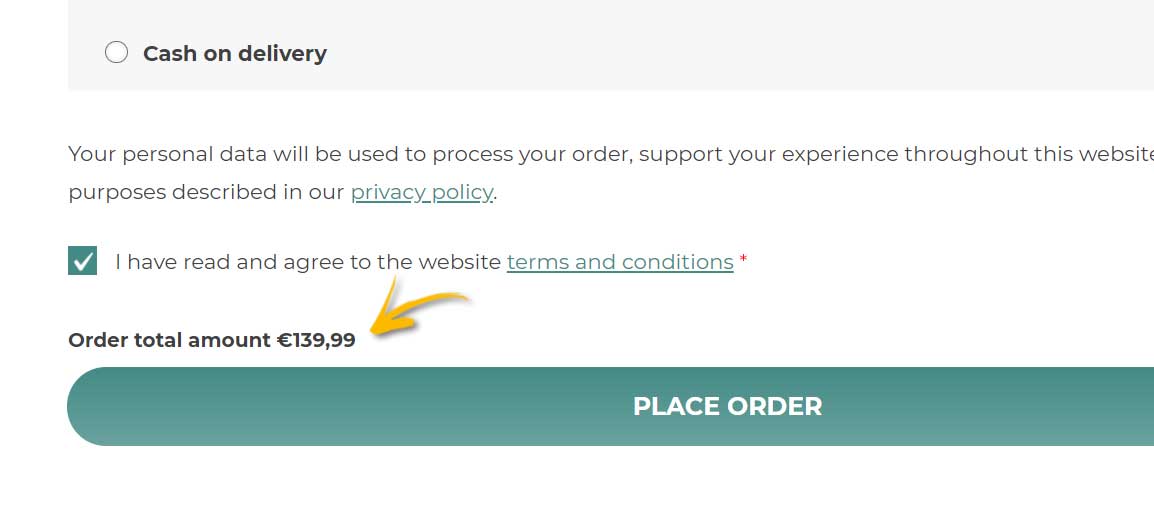
- Show order total amount in Payment tab: enable this option to show the total order amount at the bottom of the Payment tab just above the Place order button.
- Payment info icon: choose whether to hide the icon, use one of the default one included in the plugin or upload your custom one:
- No icon
- Use default icon
- Upload custom icon