On this page, we can choose the best style for your multi-step checkout and make sure it fits your theme style.
Go to the plugin panel in YITH > Multi-step Checkout > Steps options > Steps Style to select your favorite style among the five available and choose whether you prefer it to show horizontally or vertically.
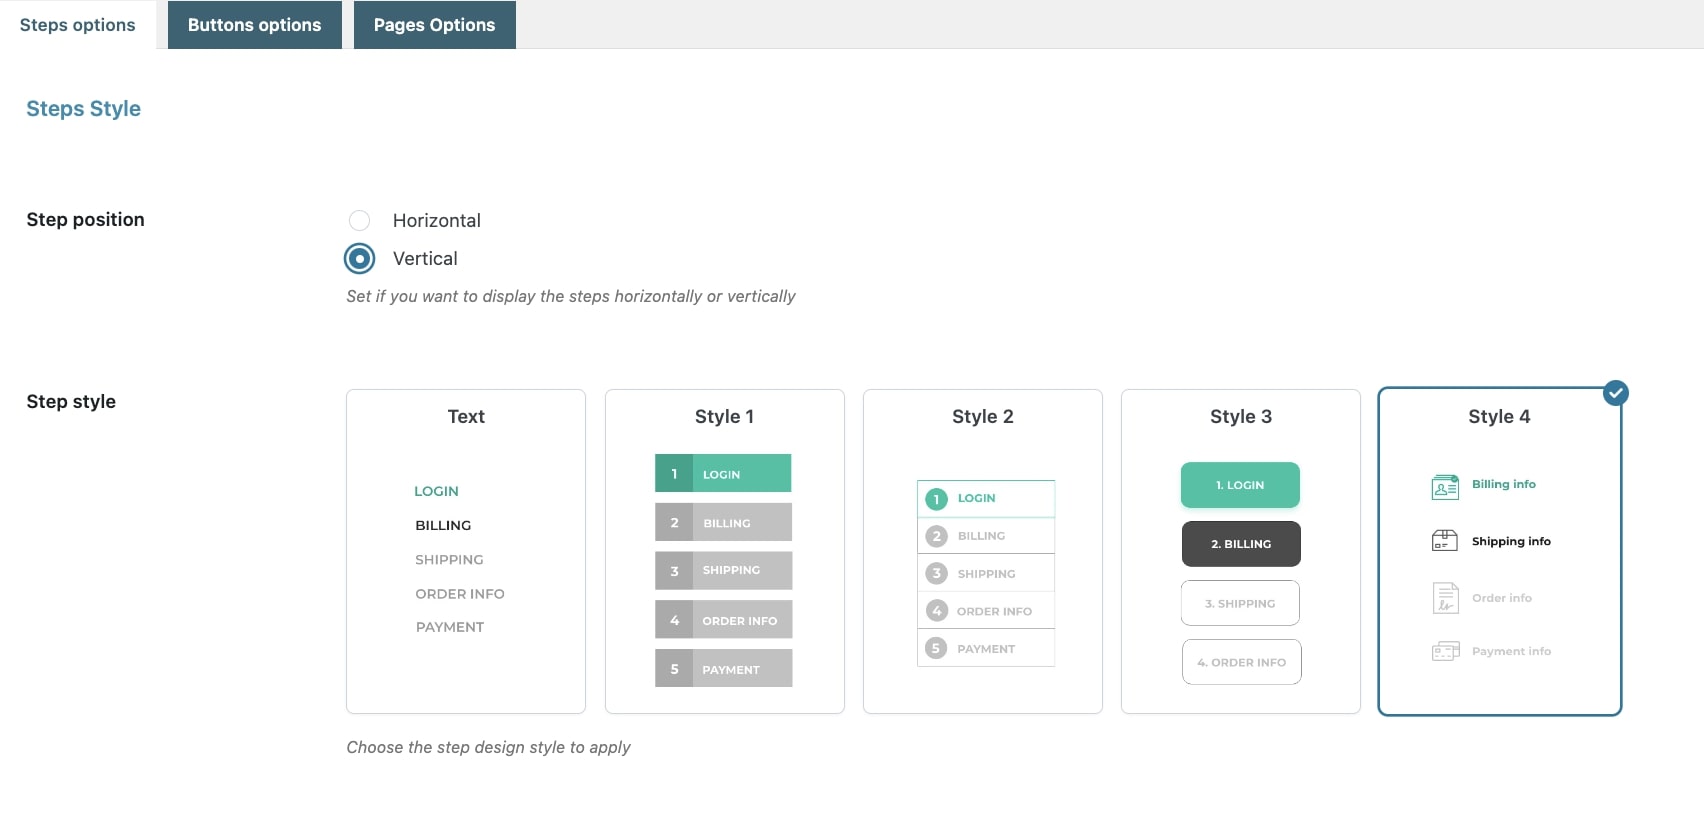
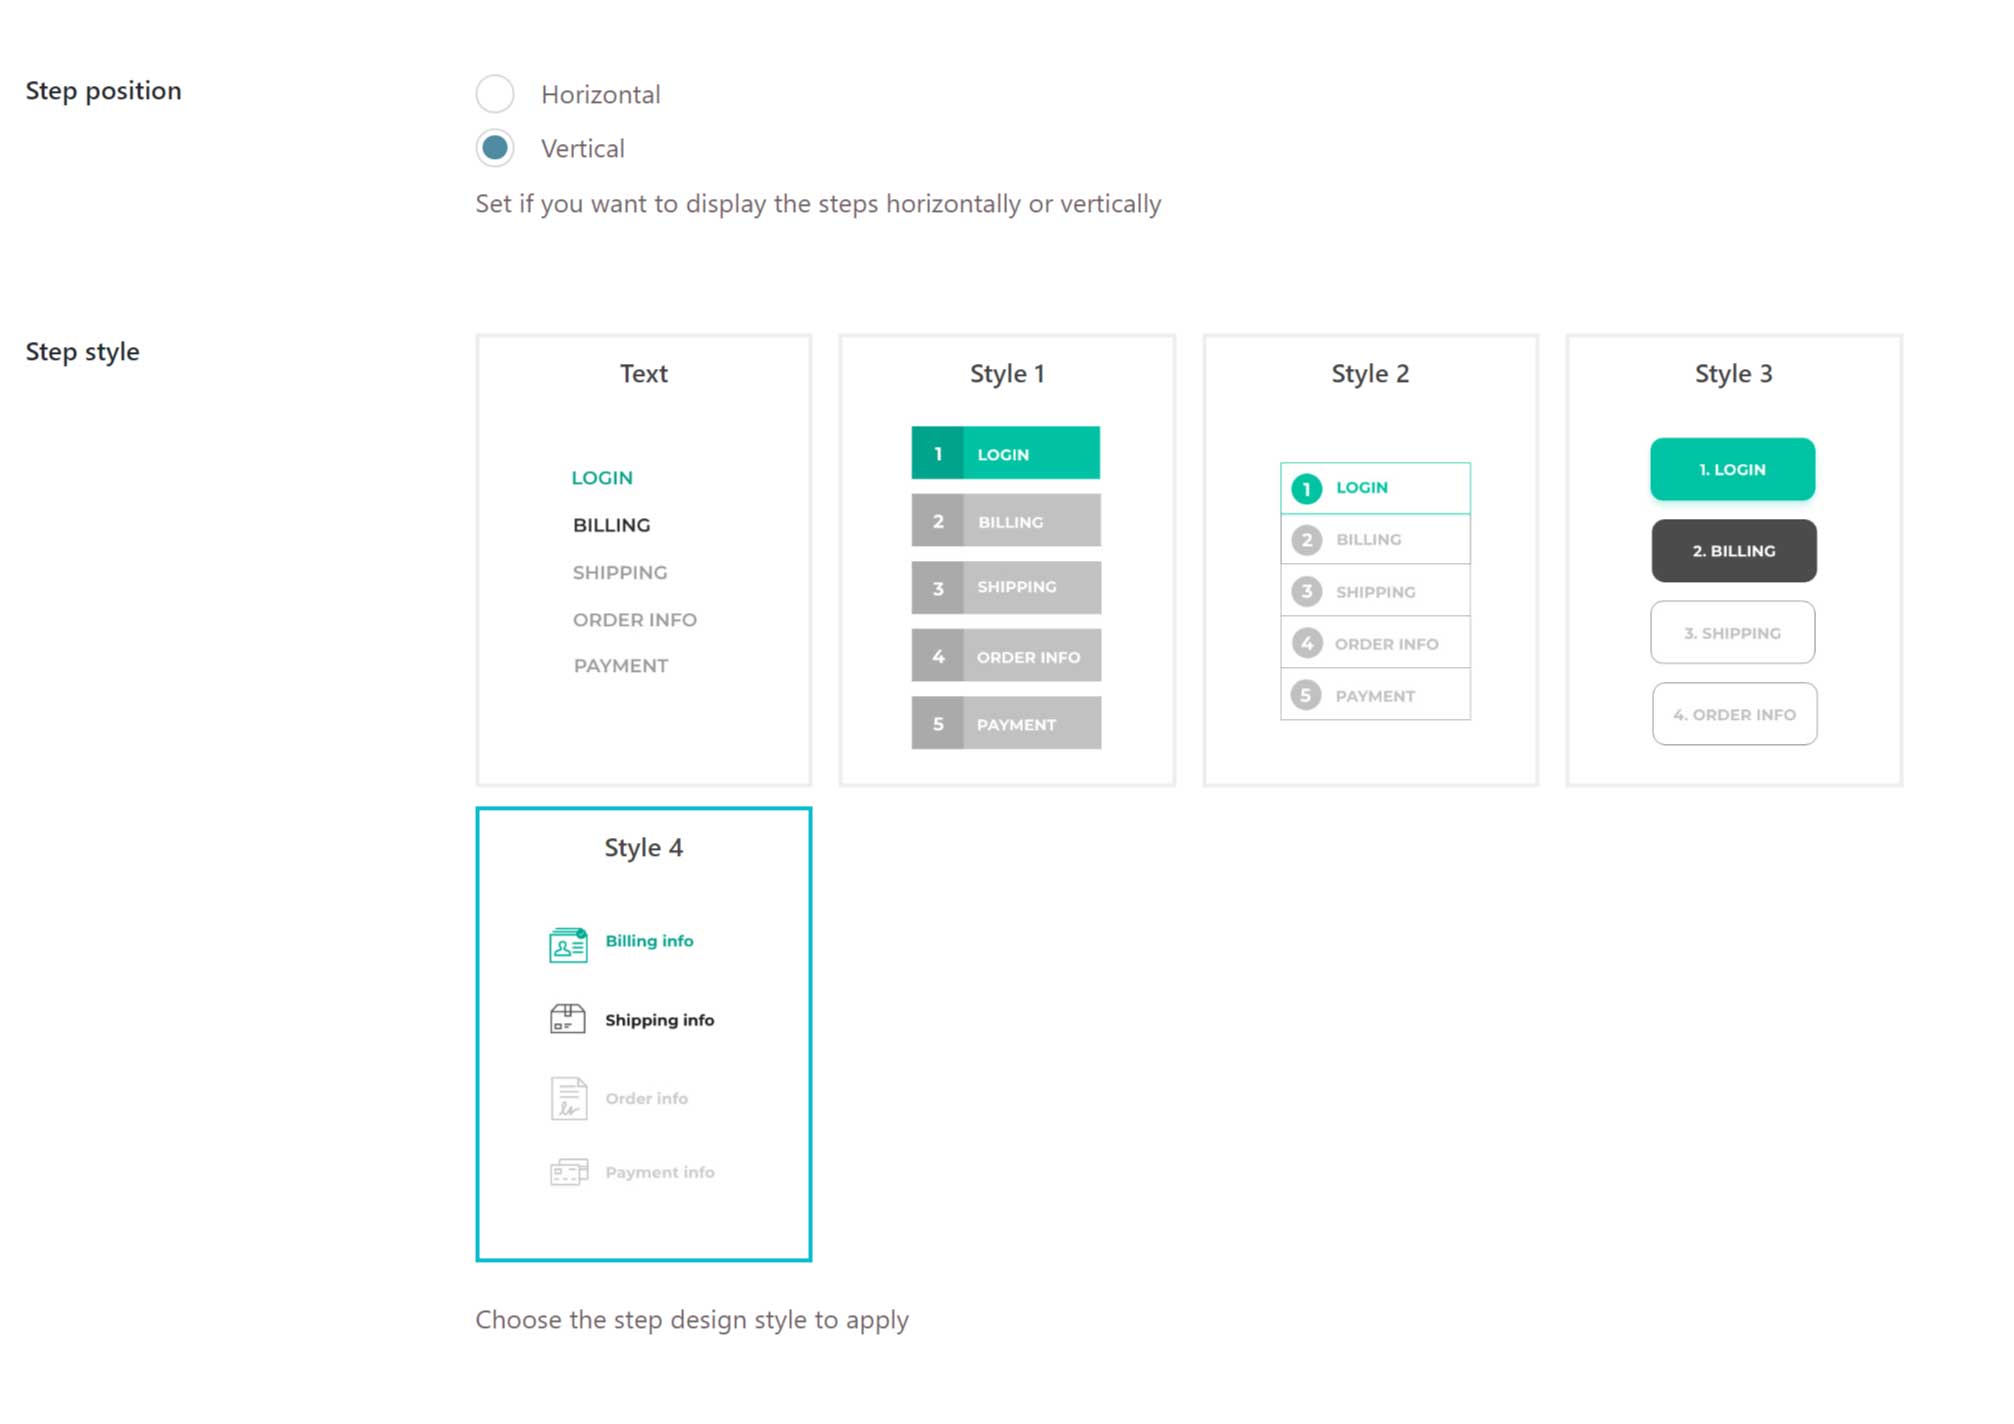
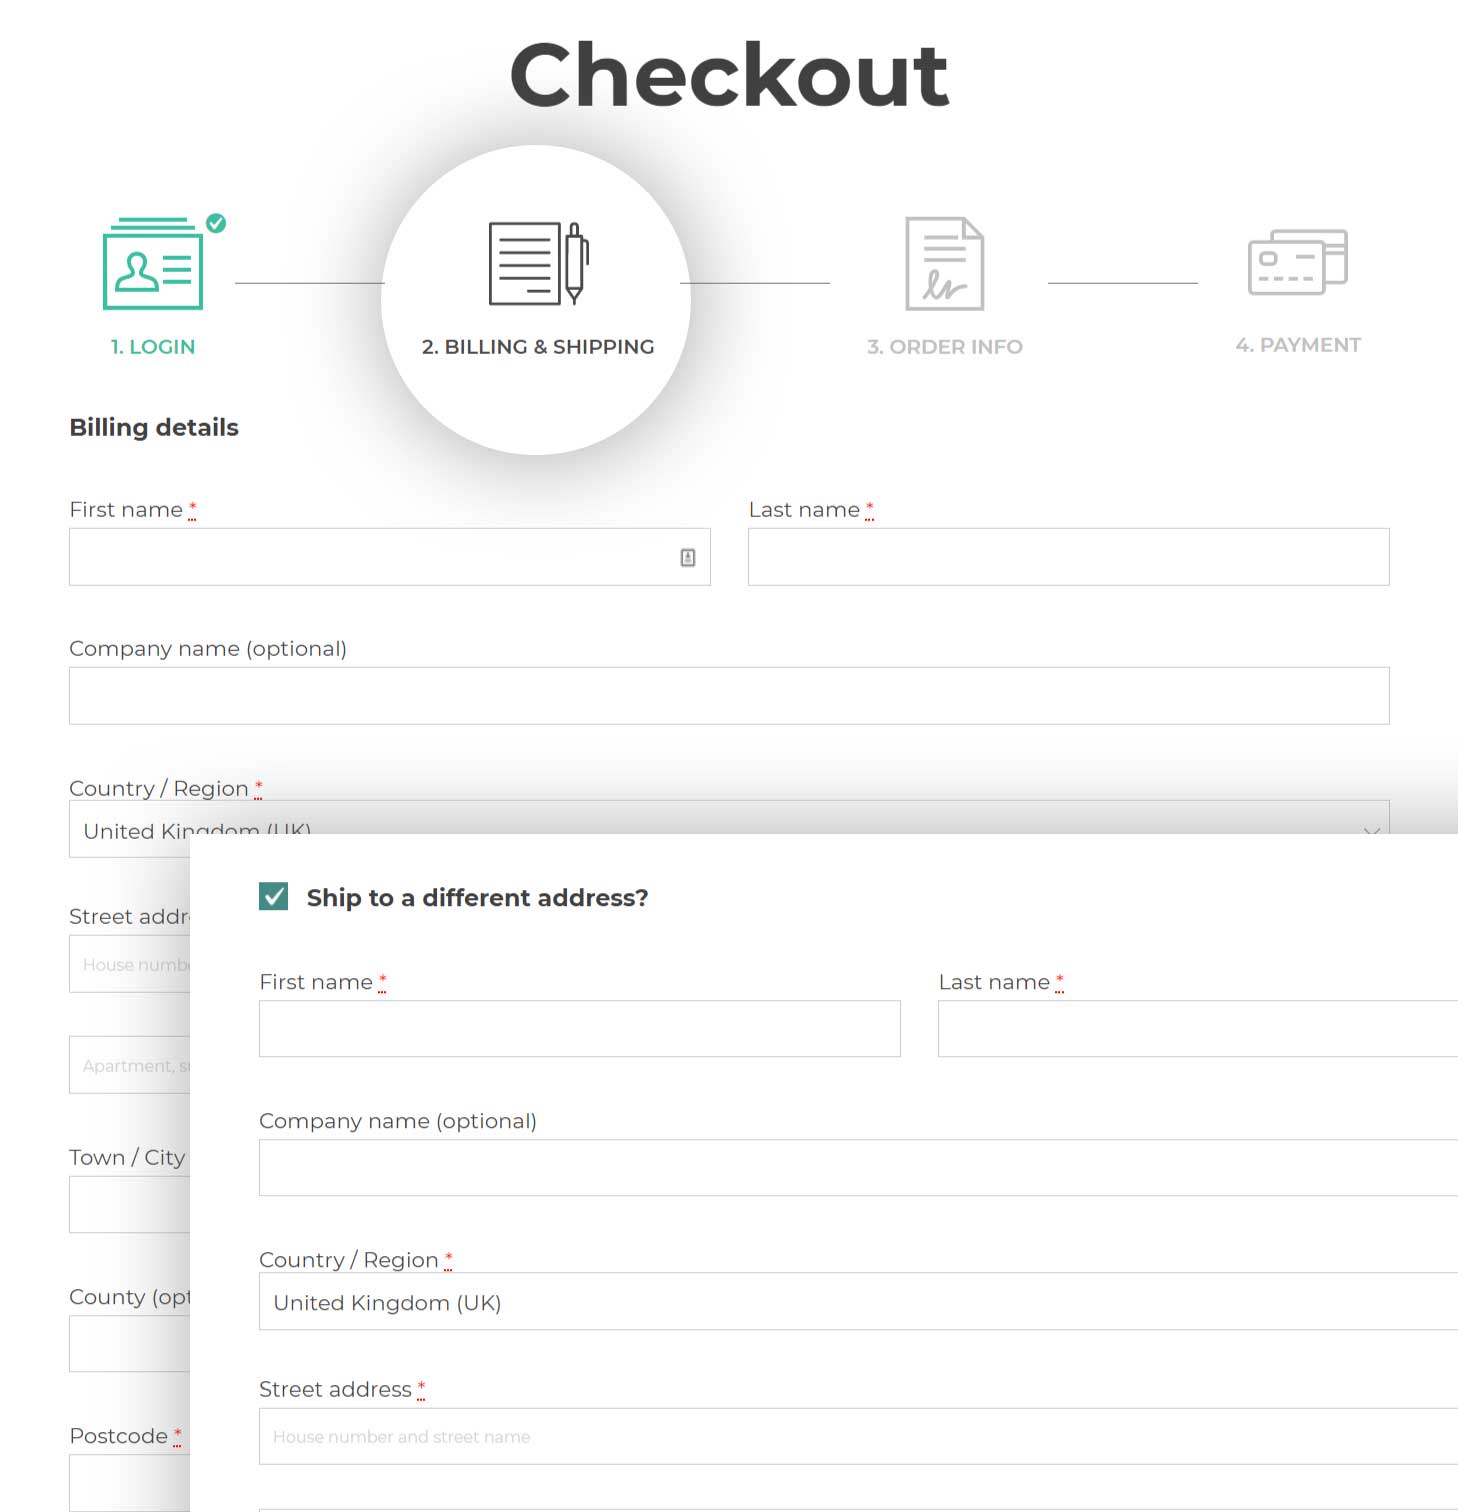
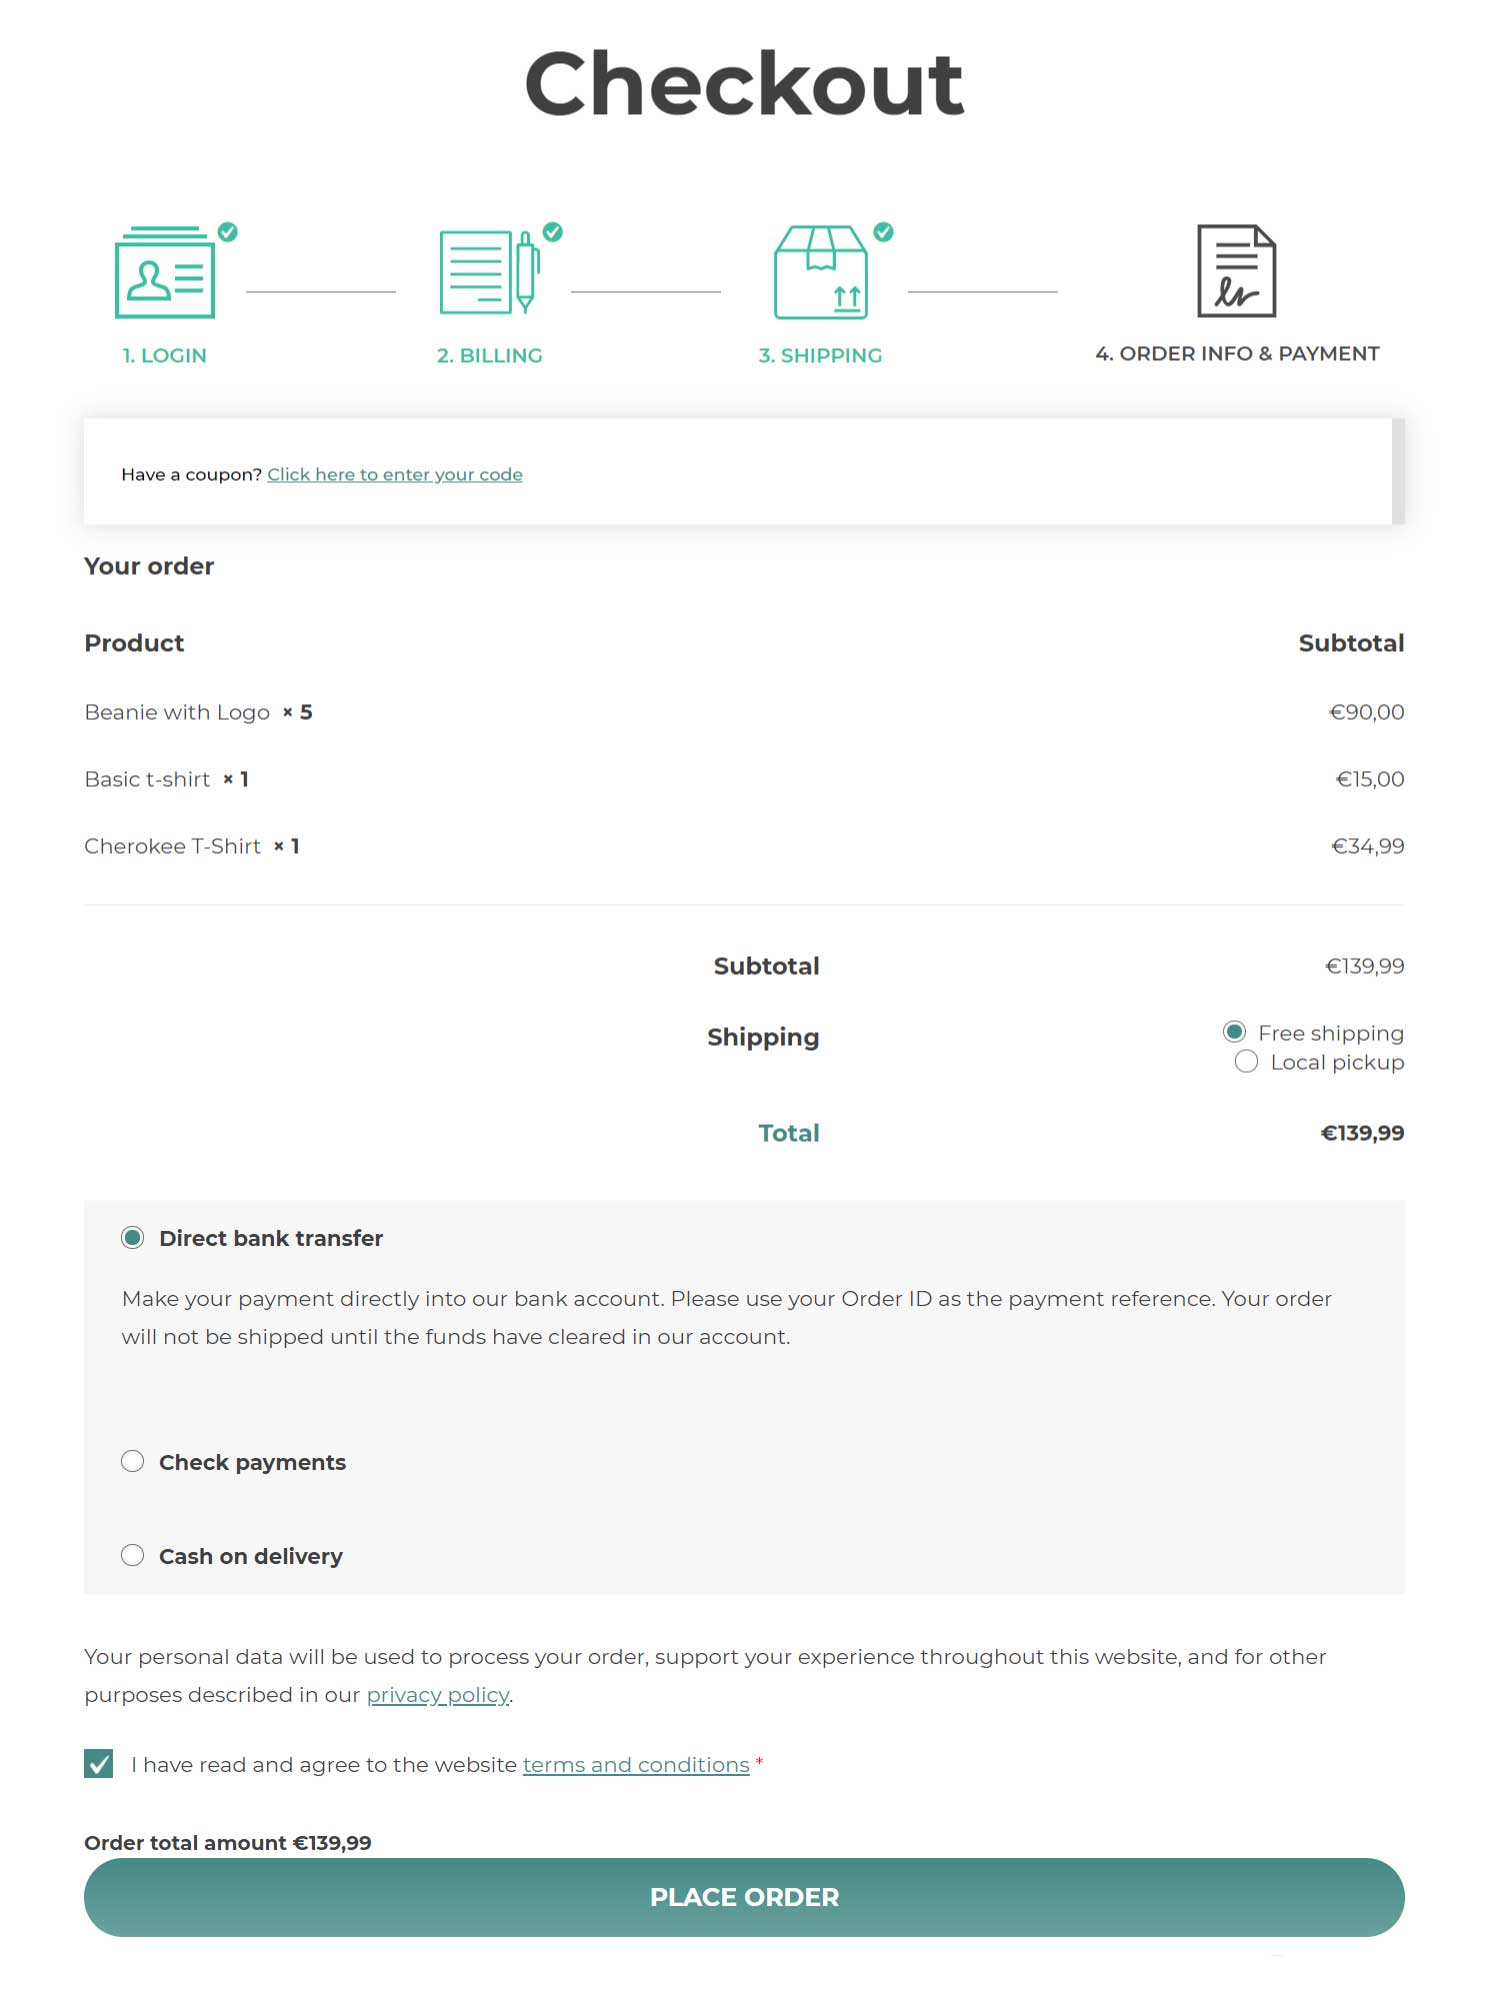
Let’s take a look at the available styles one by one:
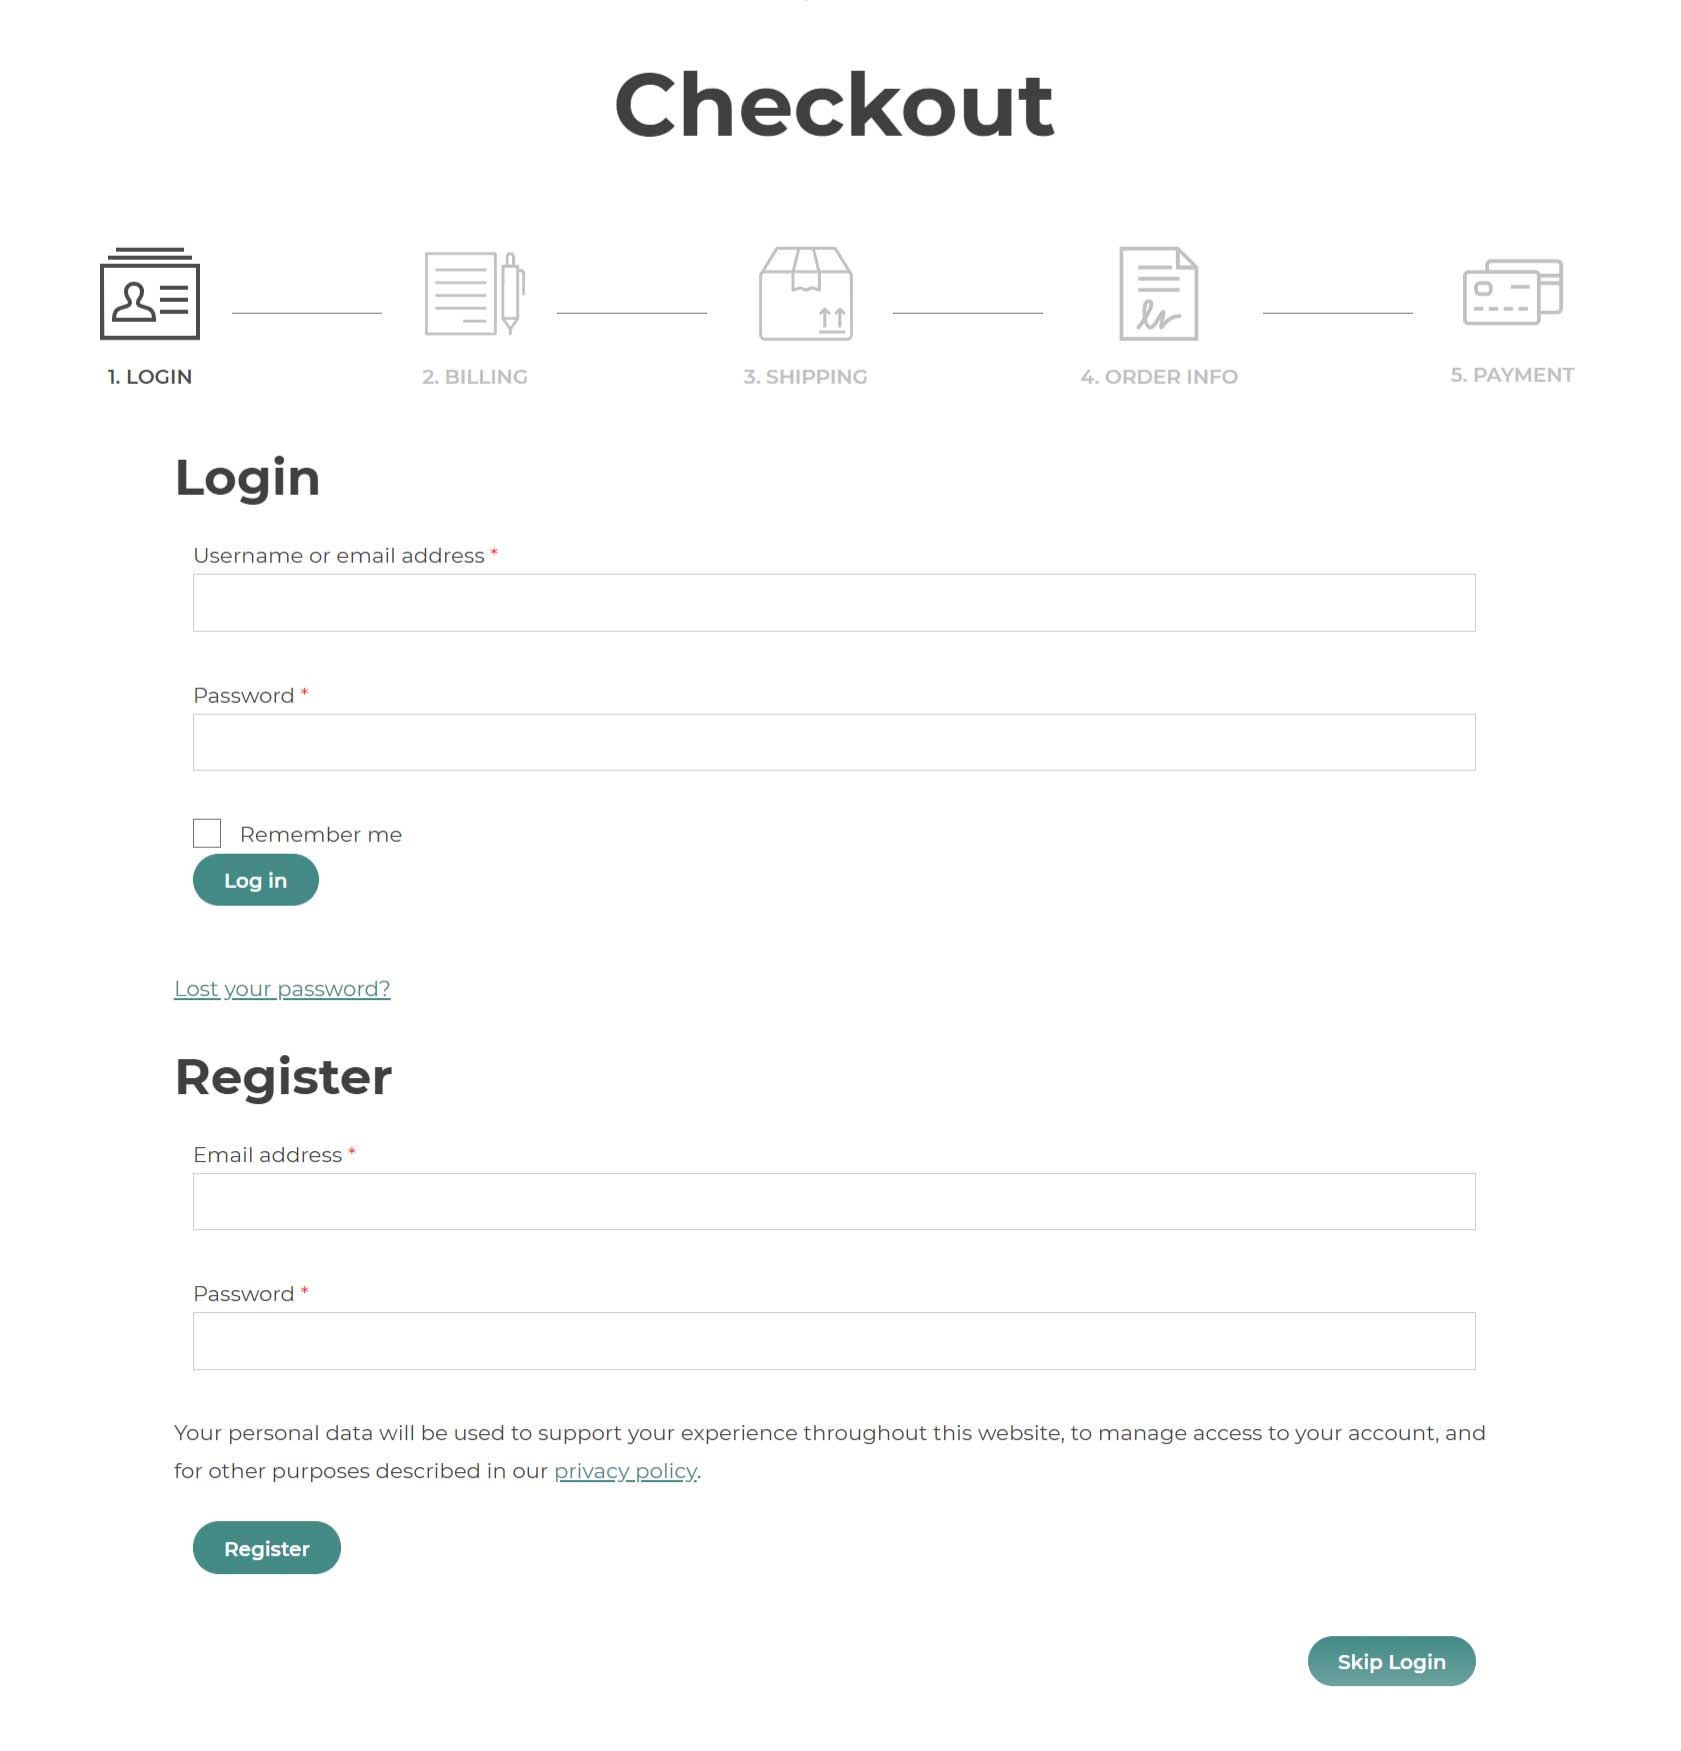
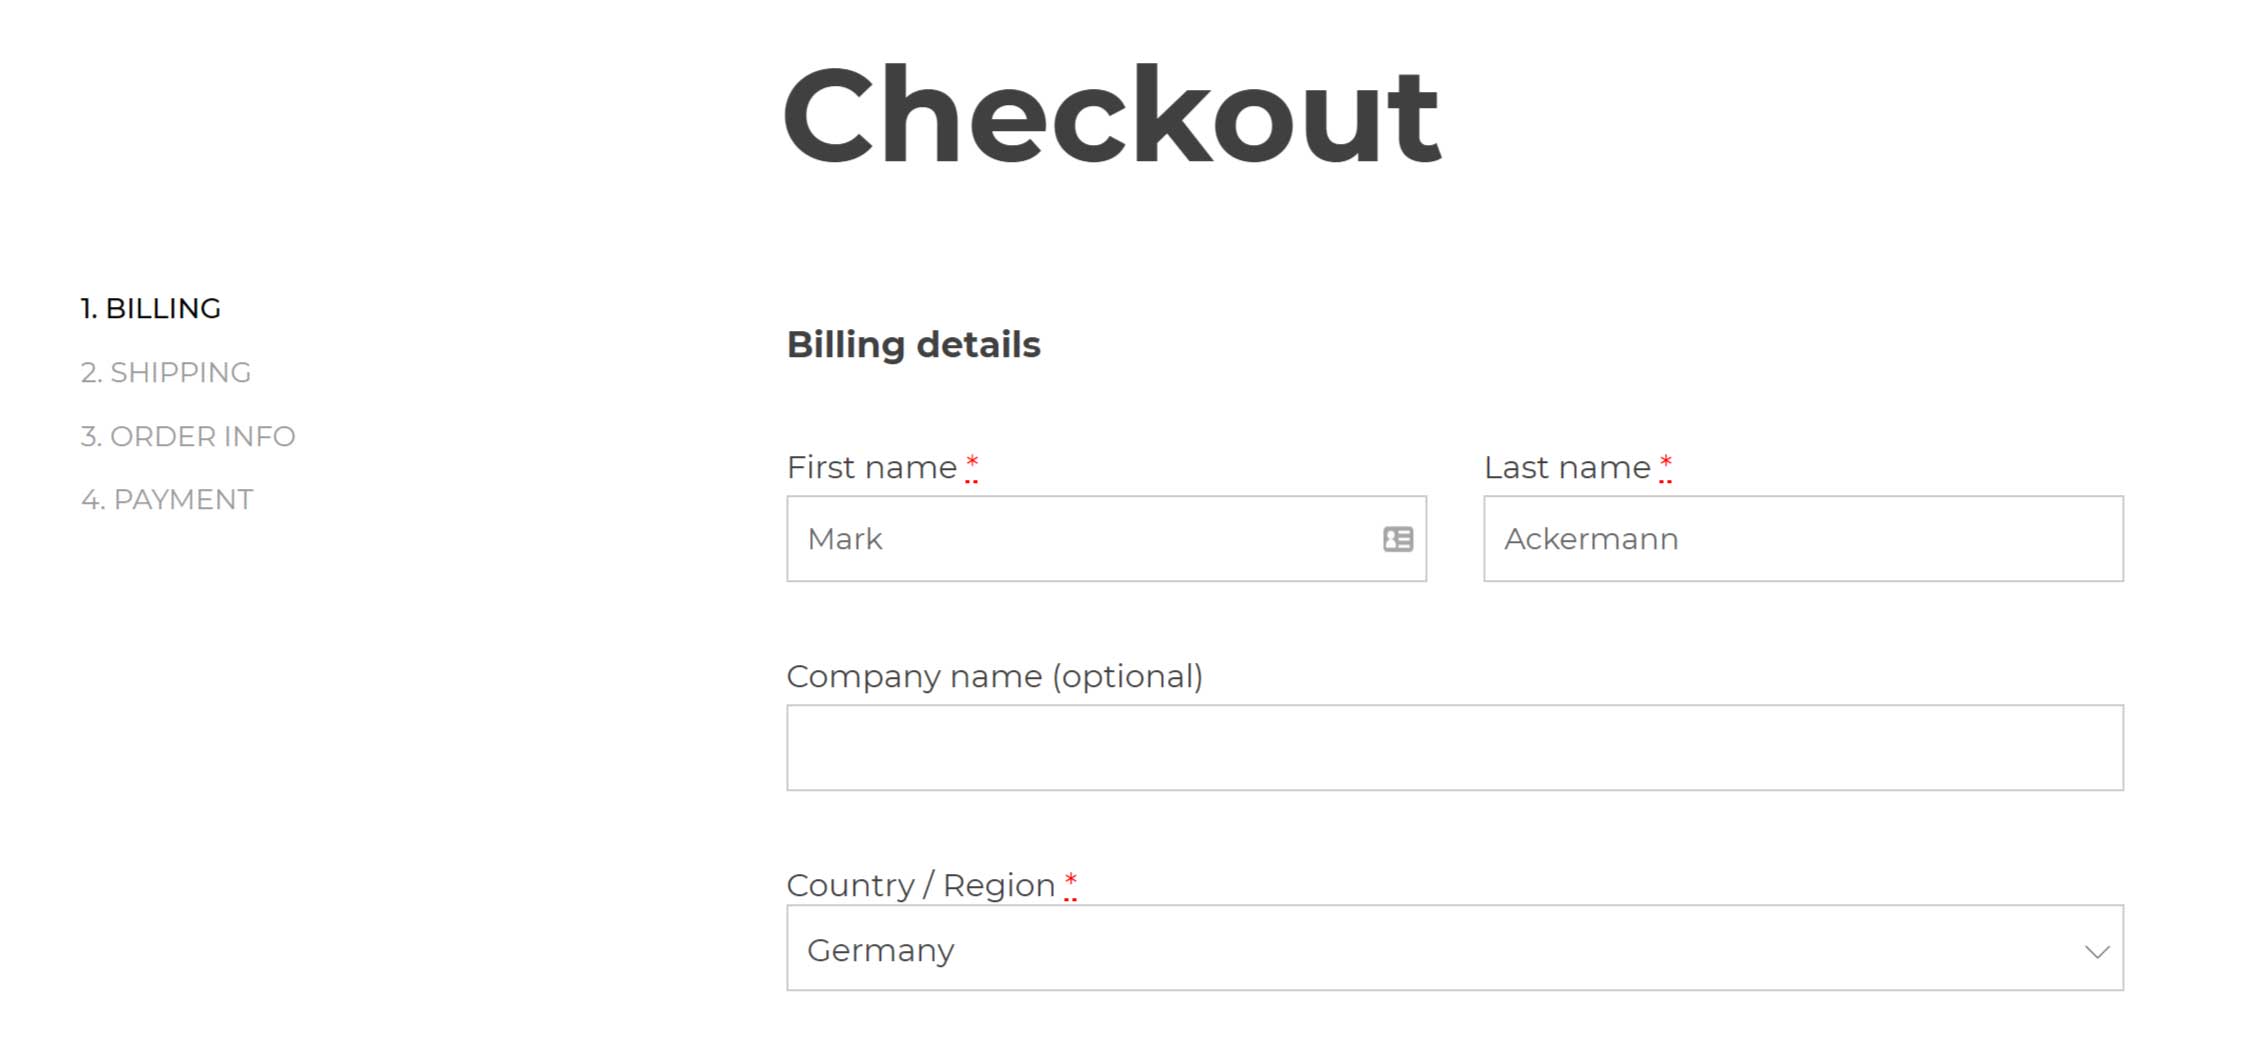
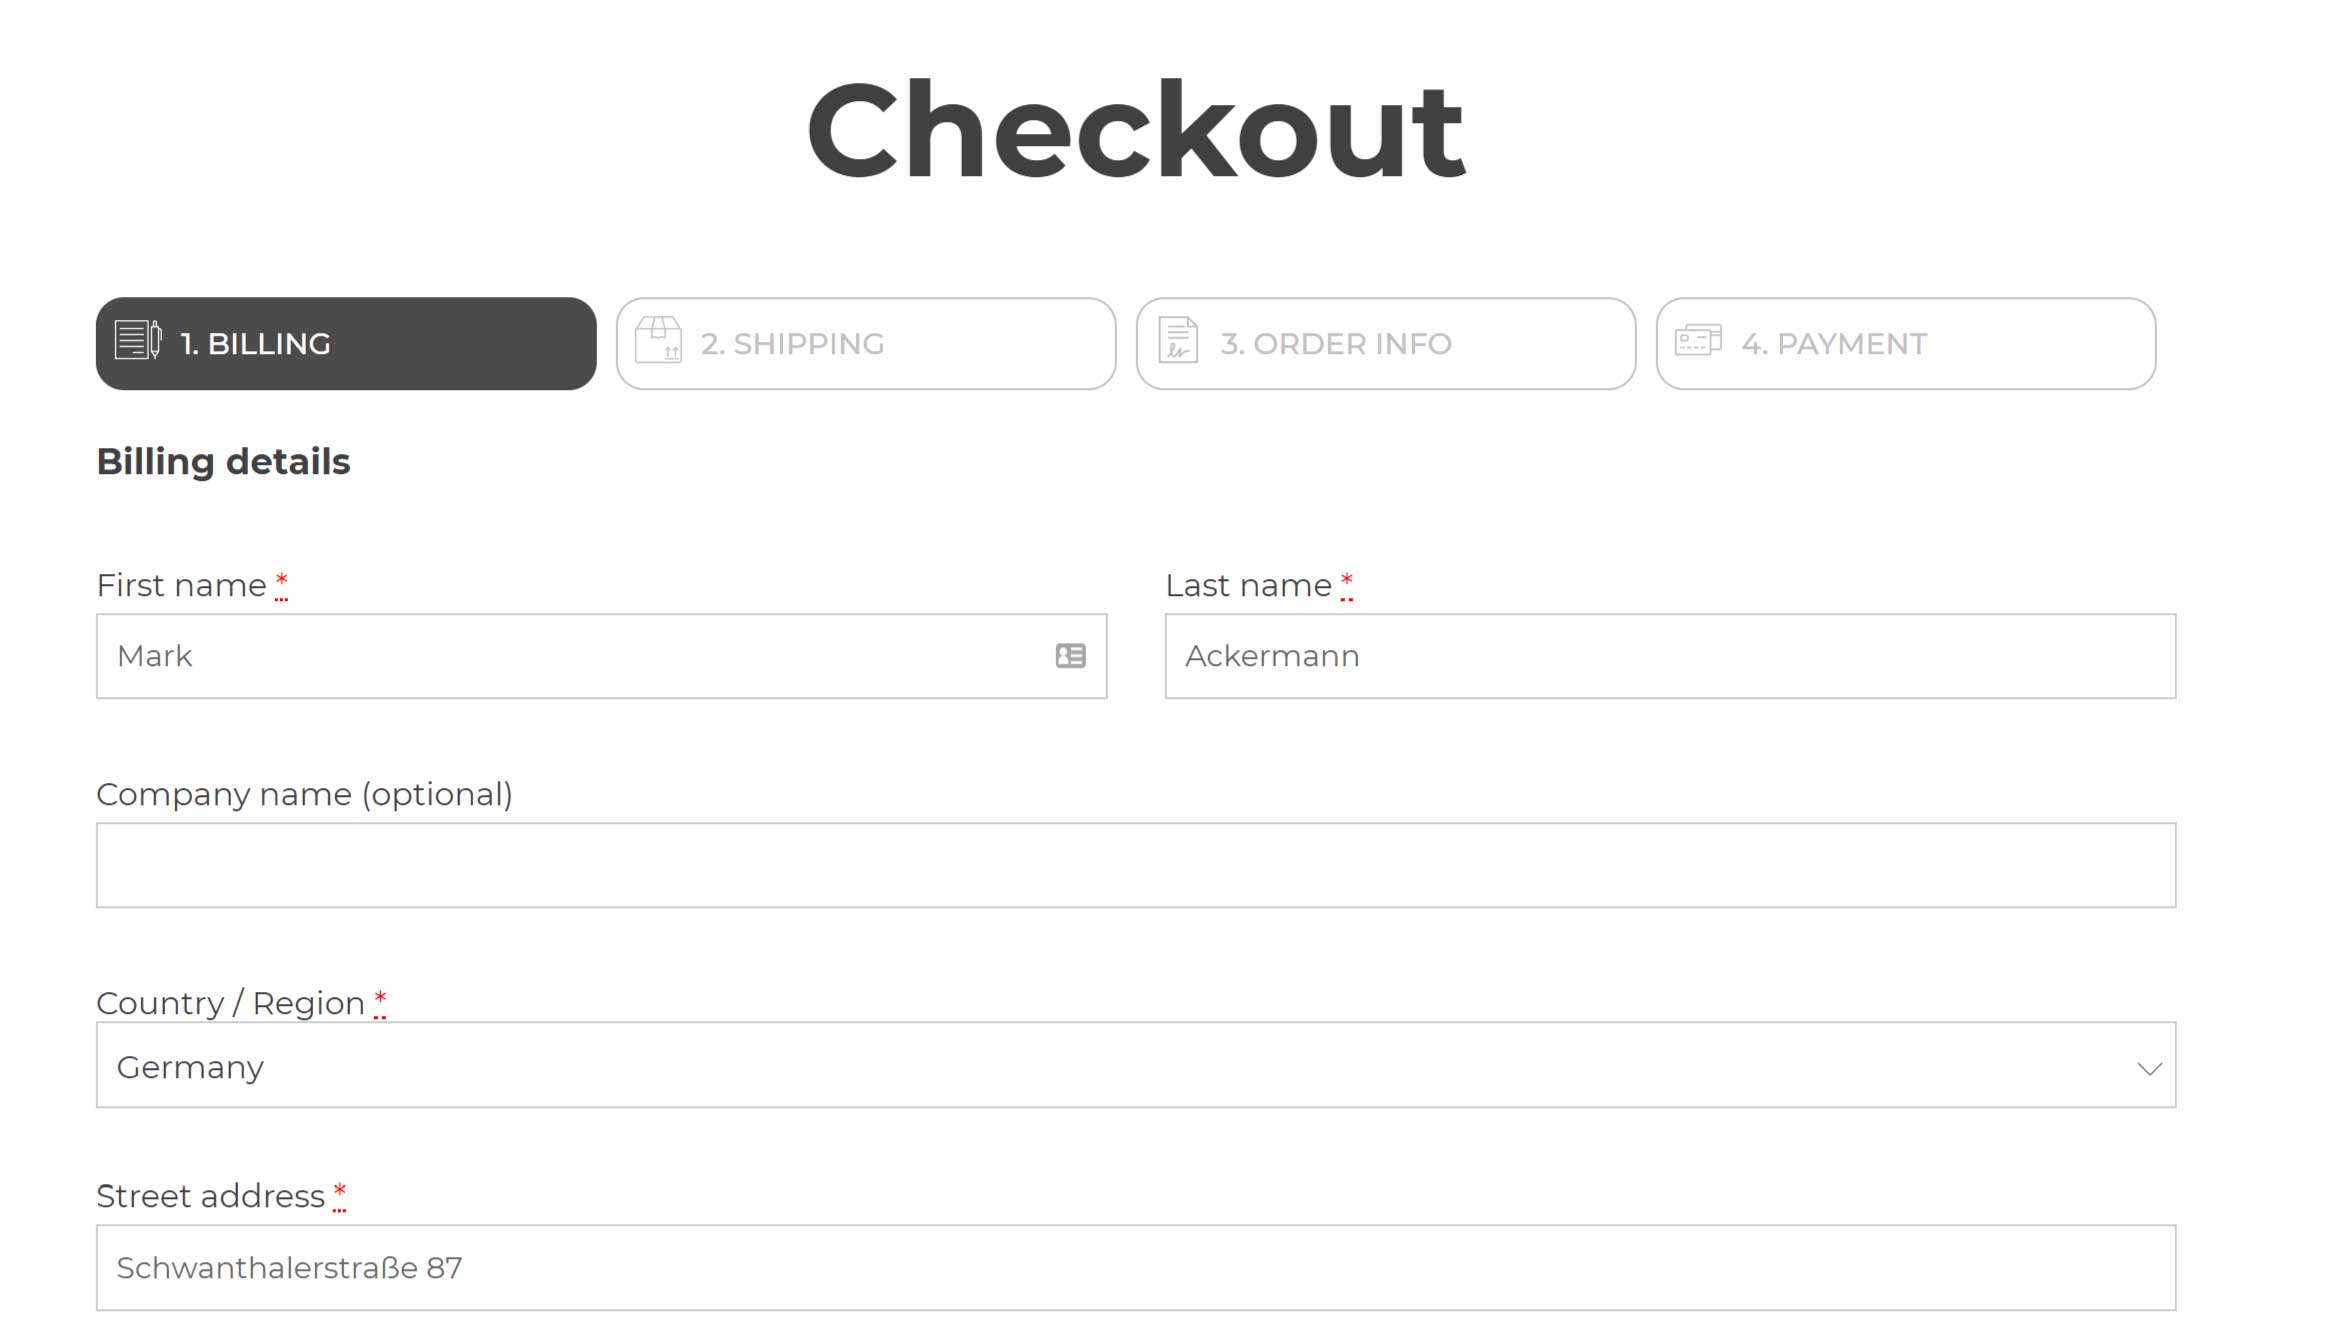
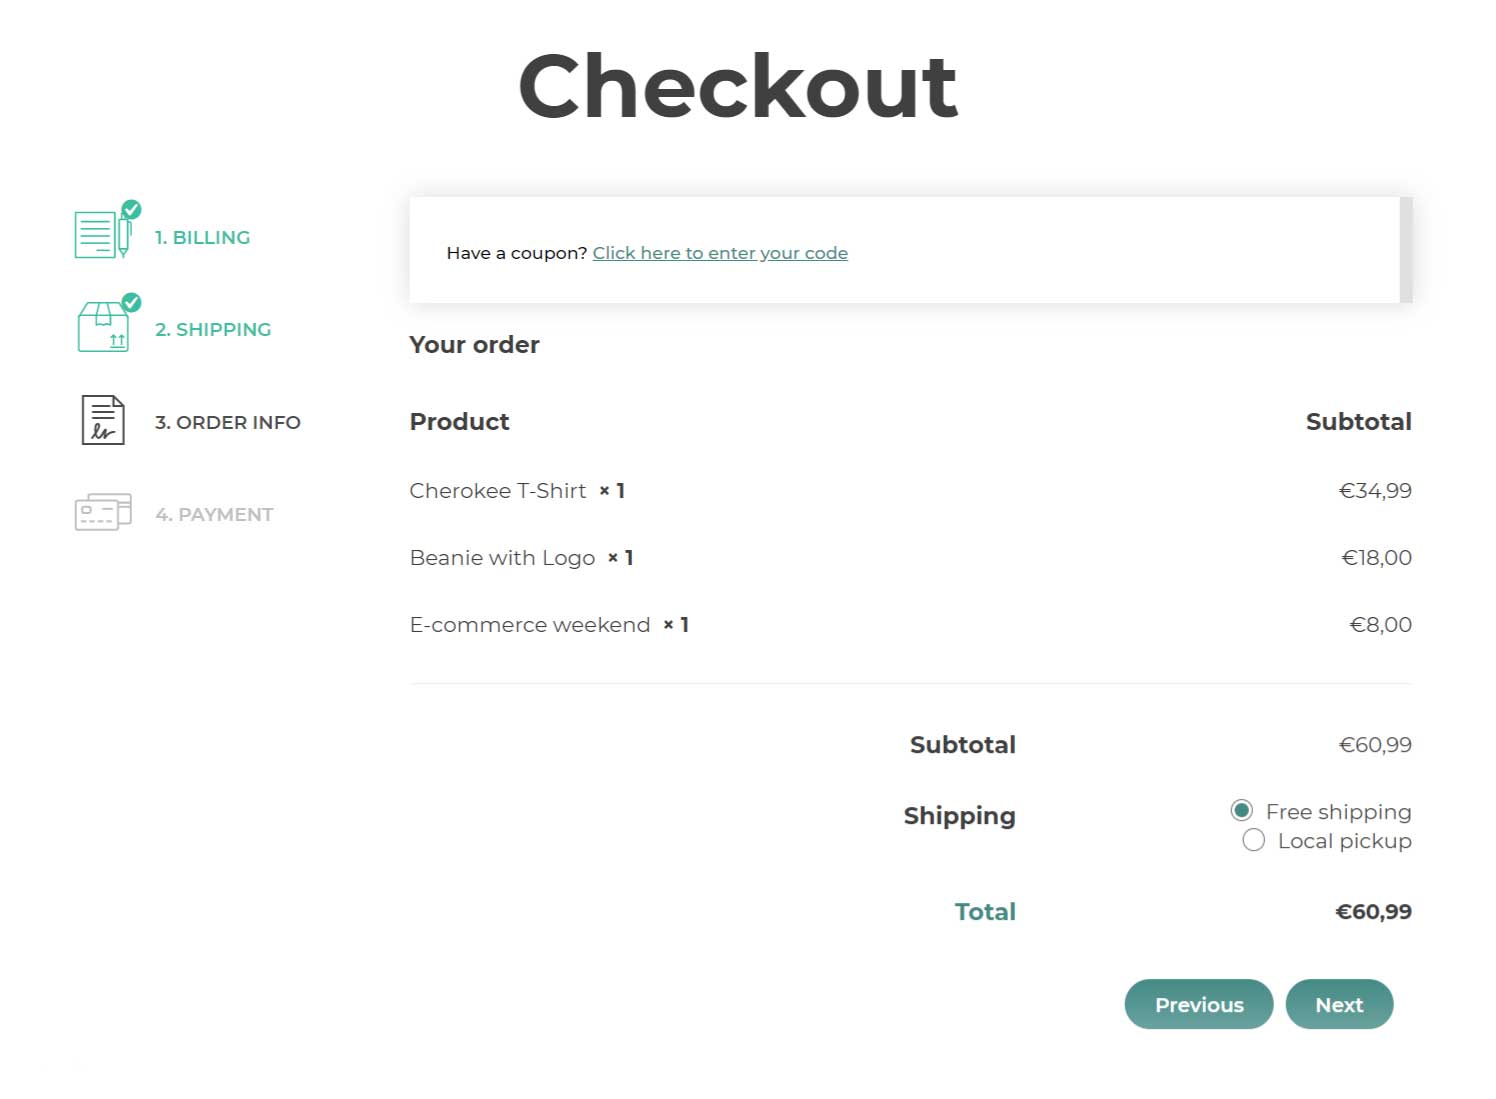
Text style

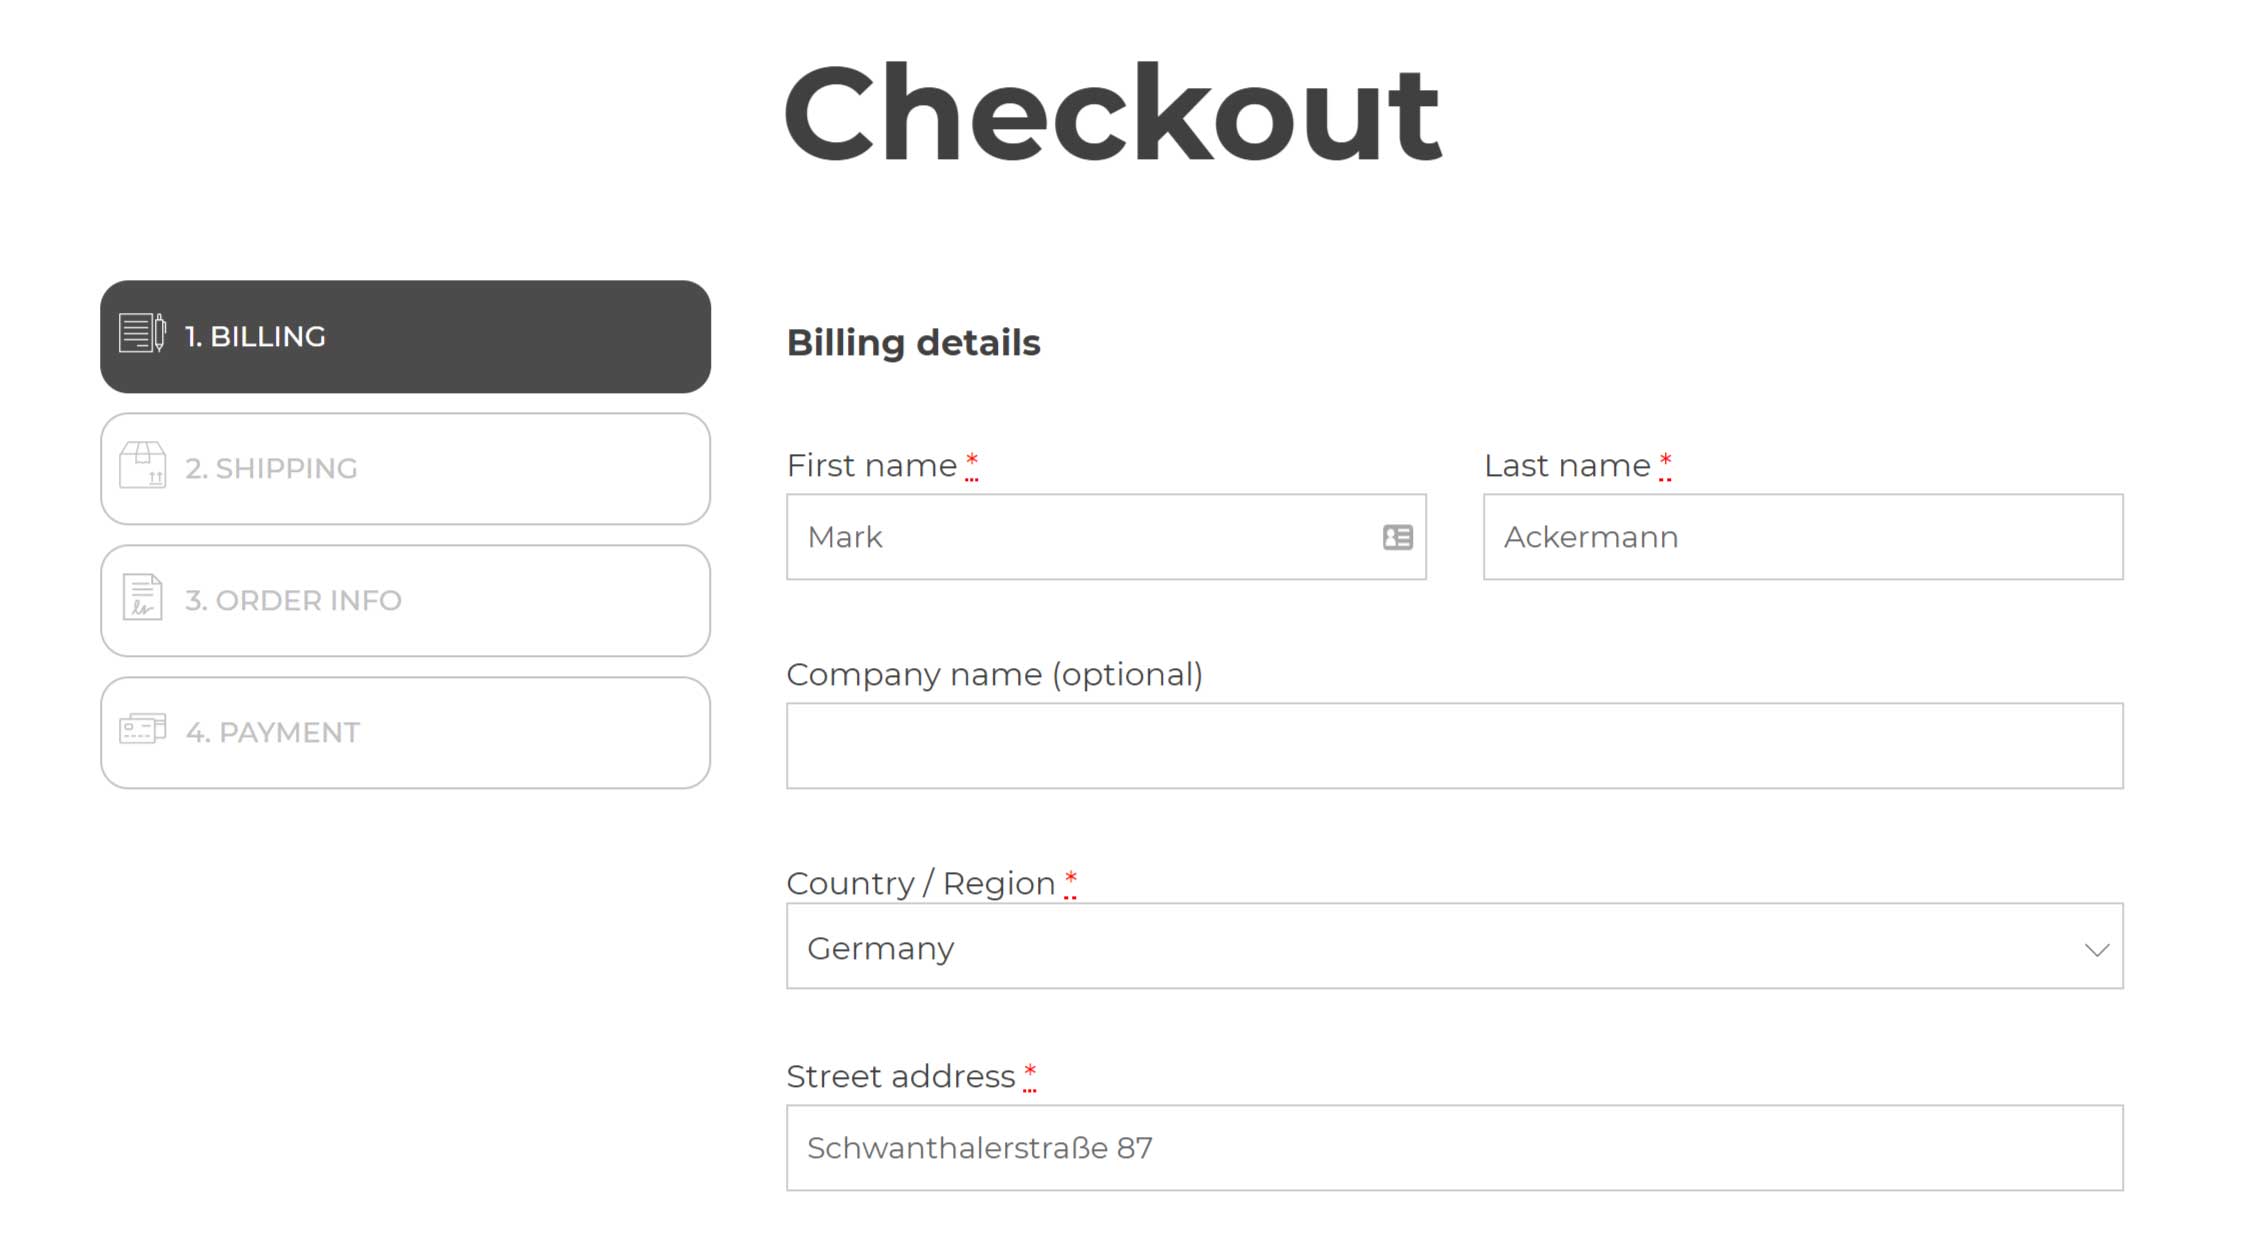
Style 1
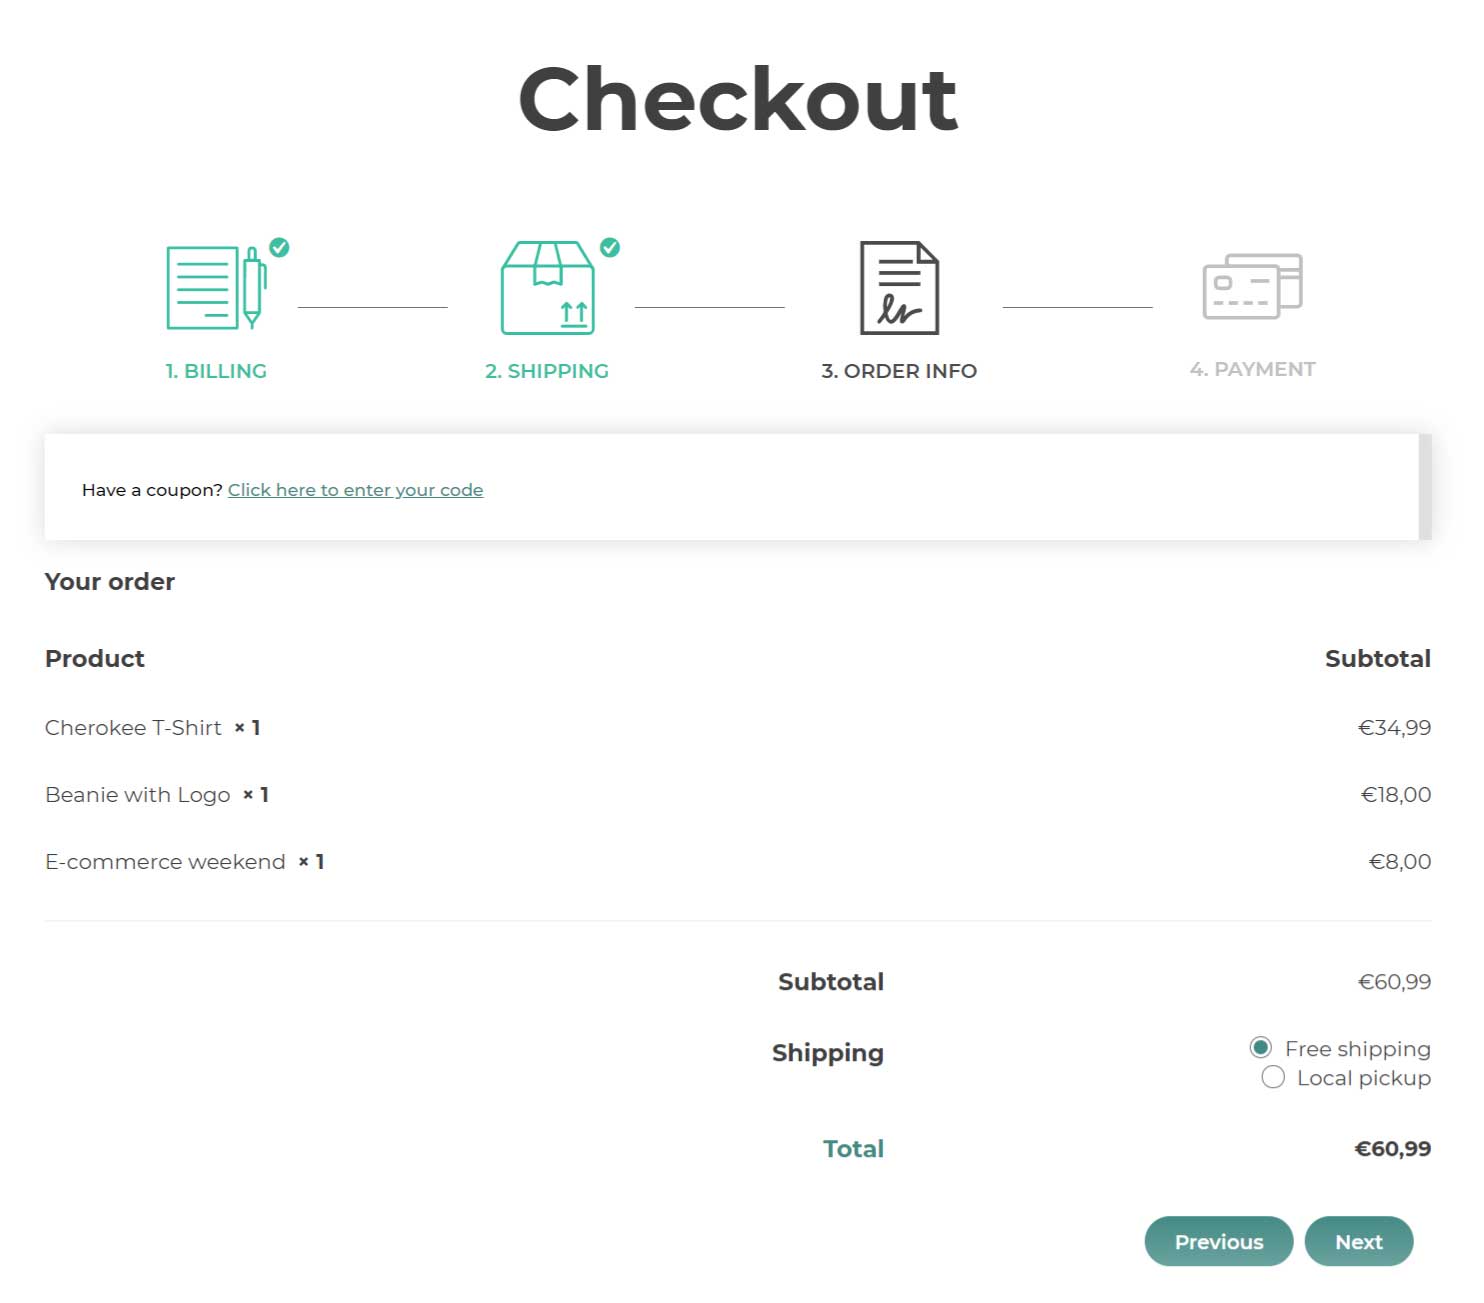
Style 2
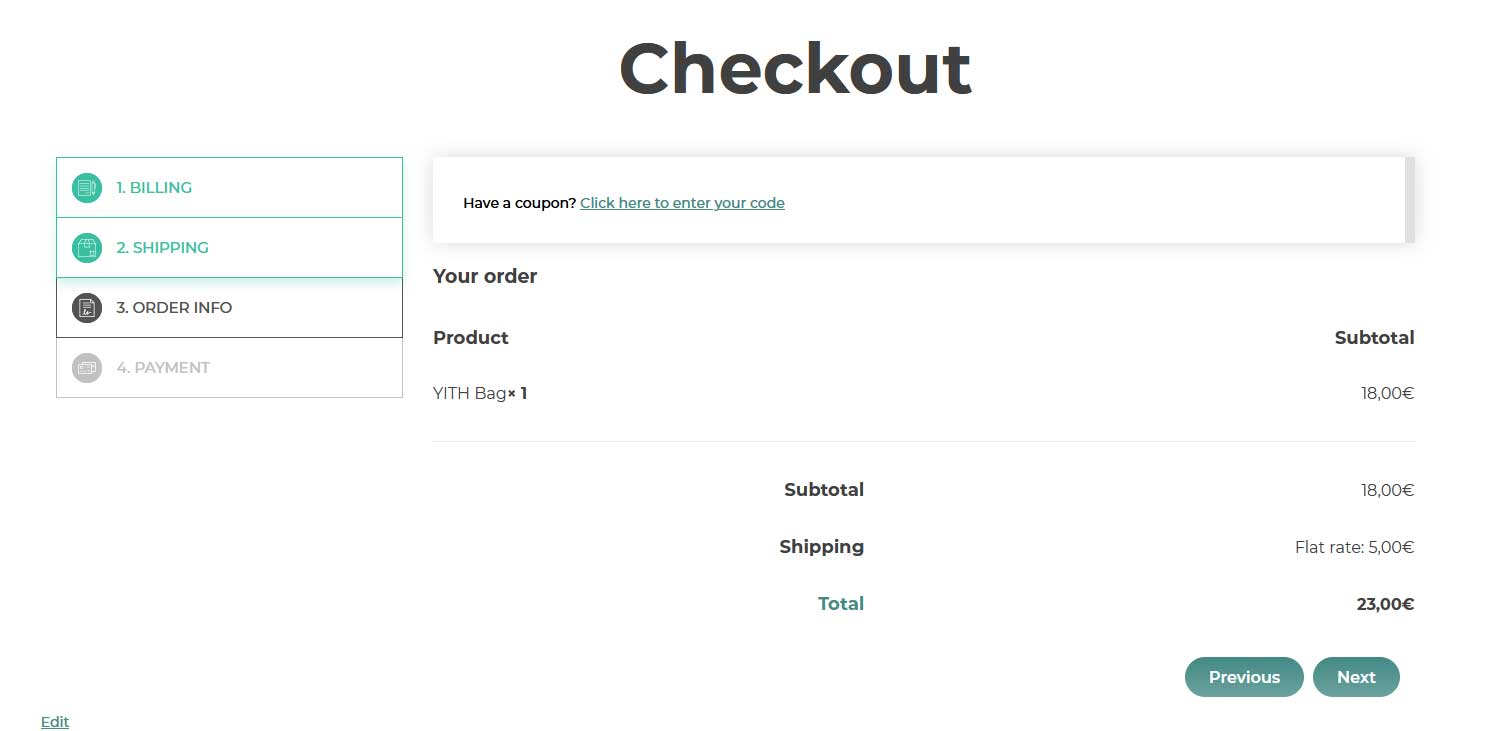
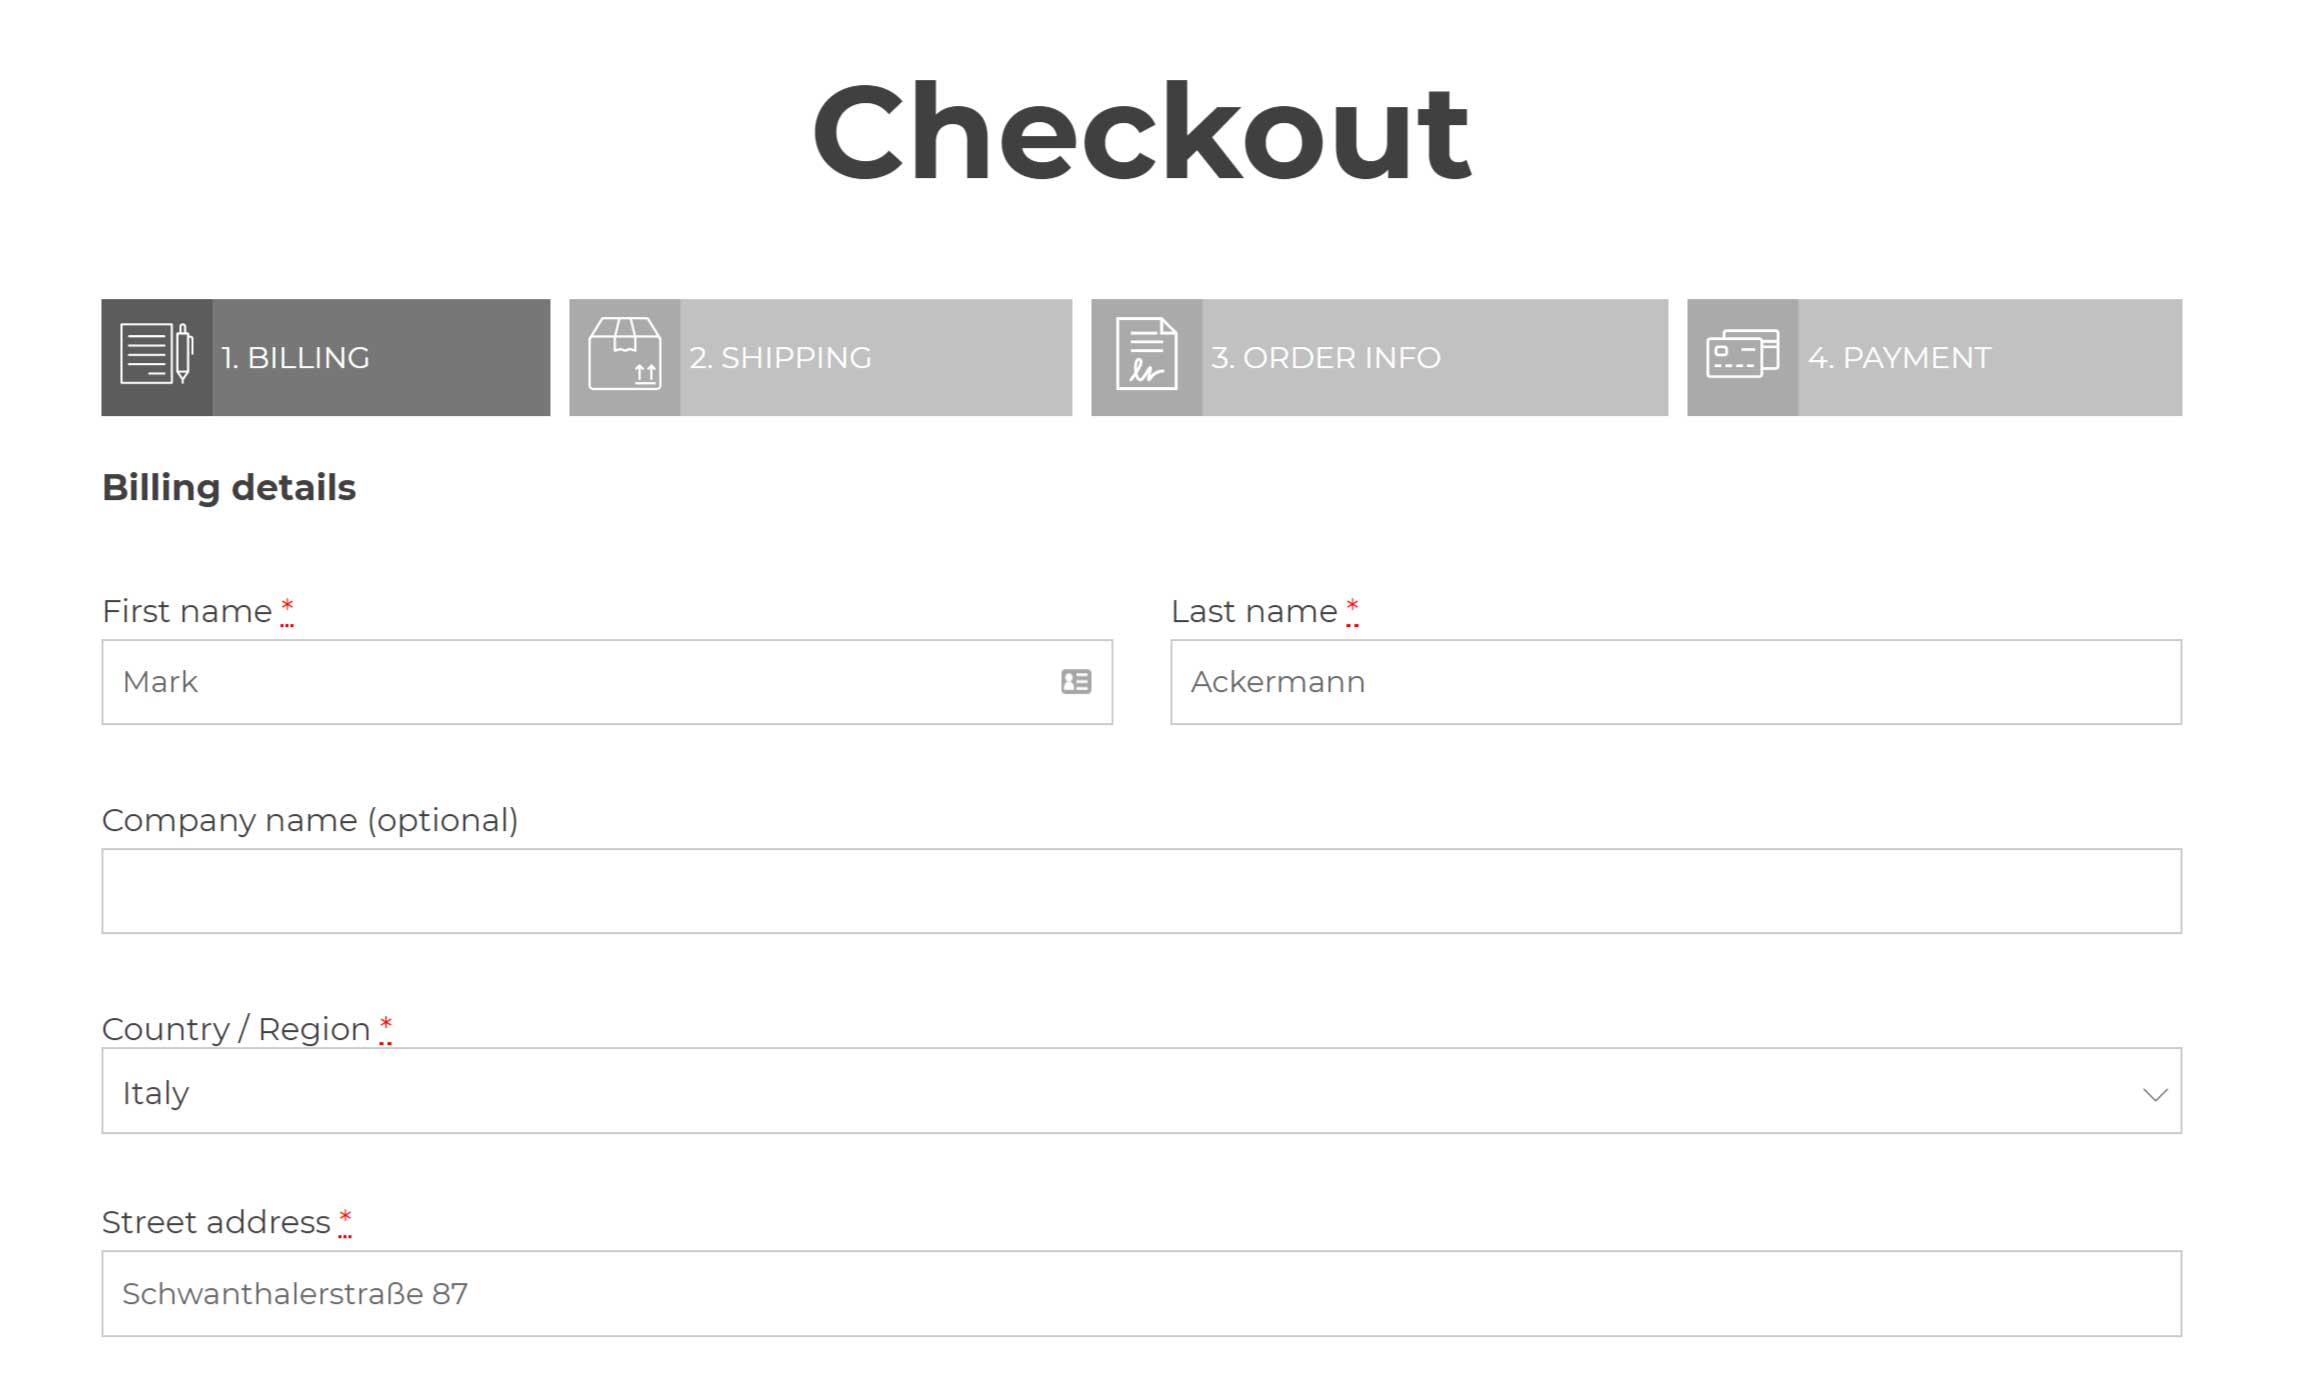
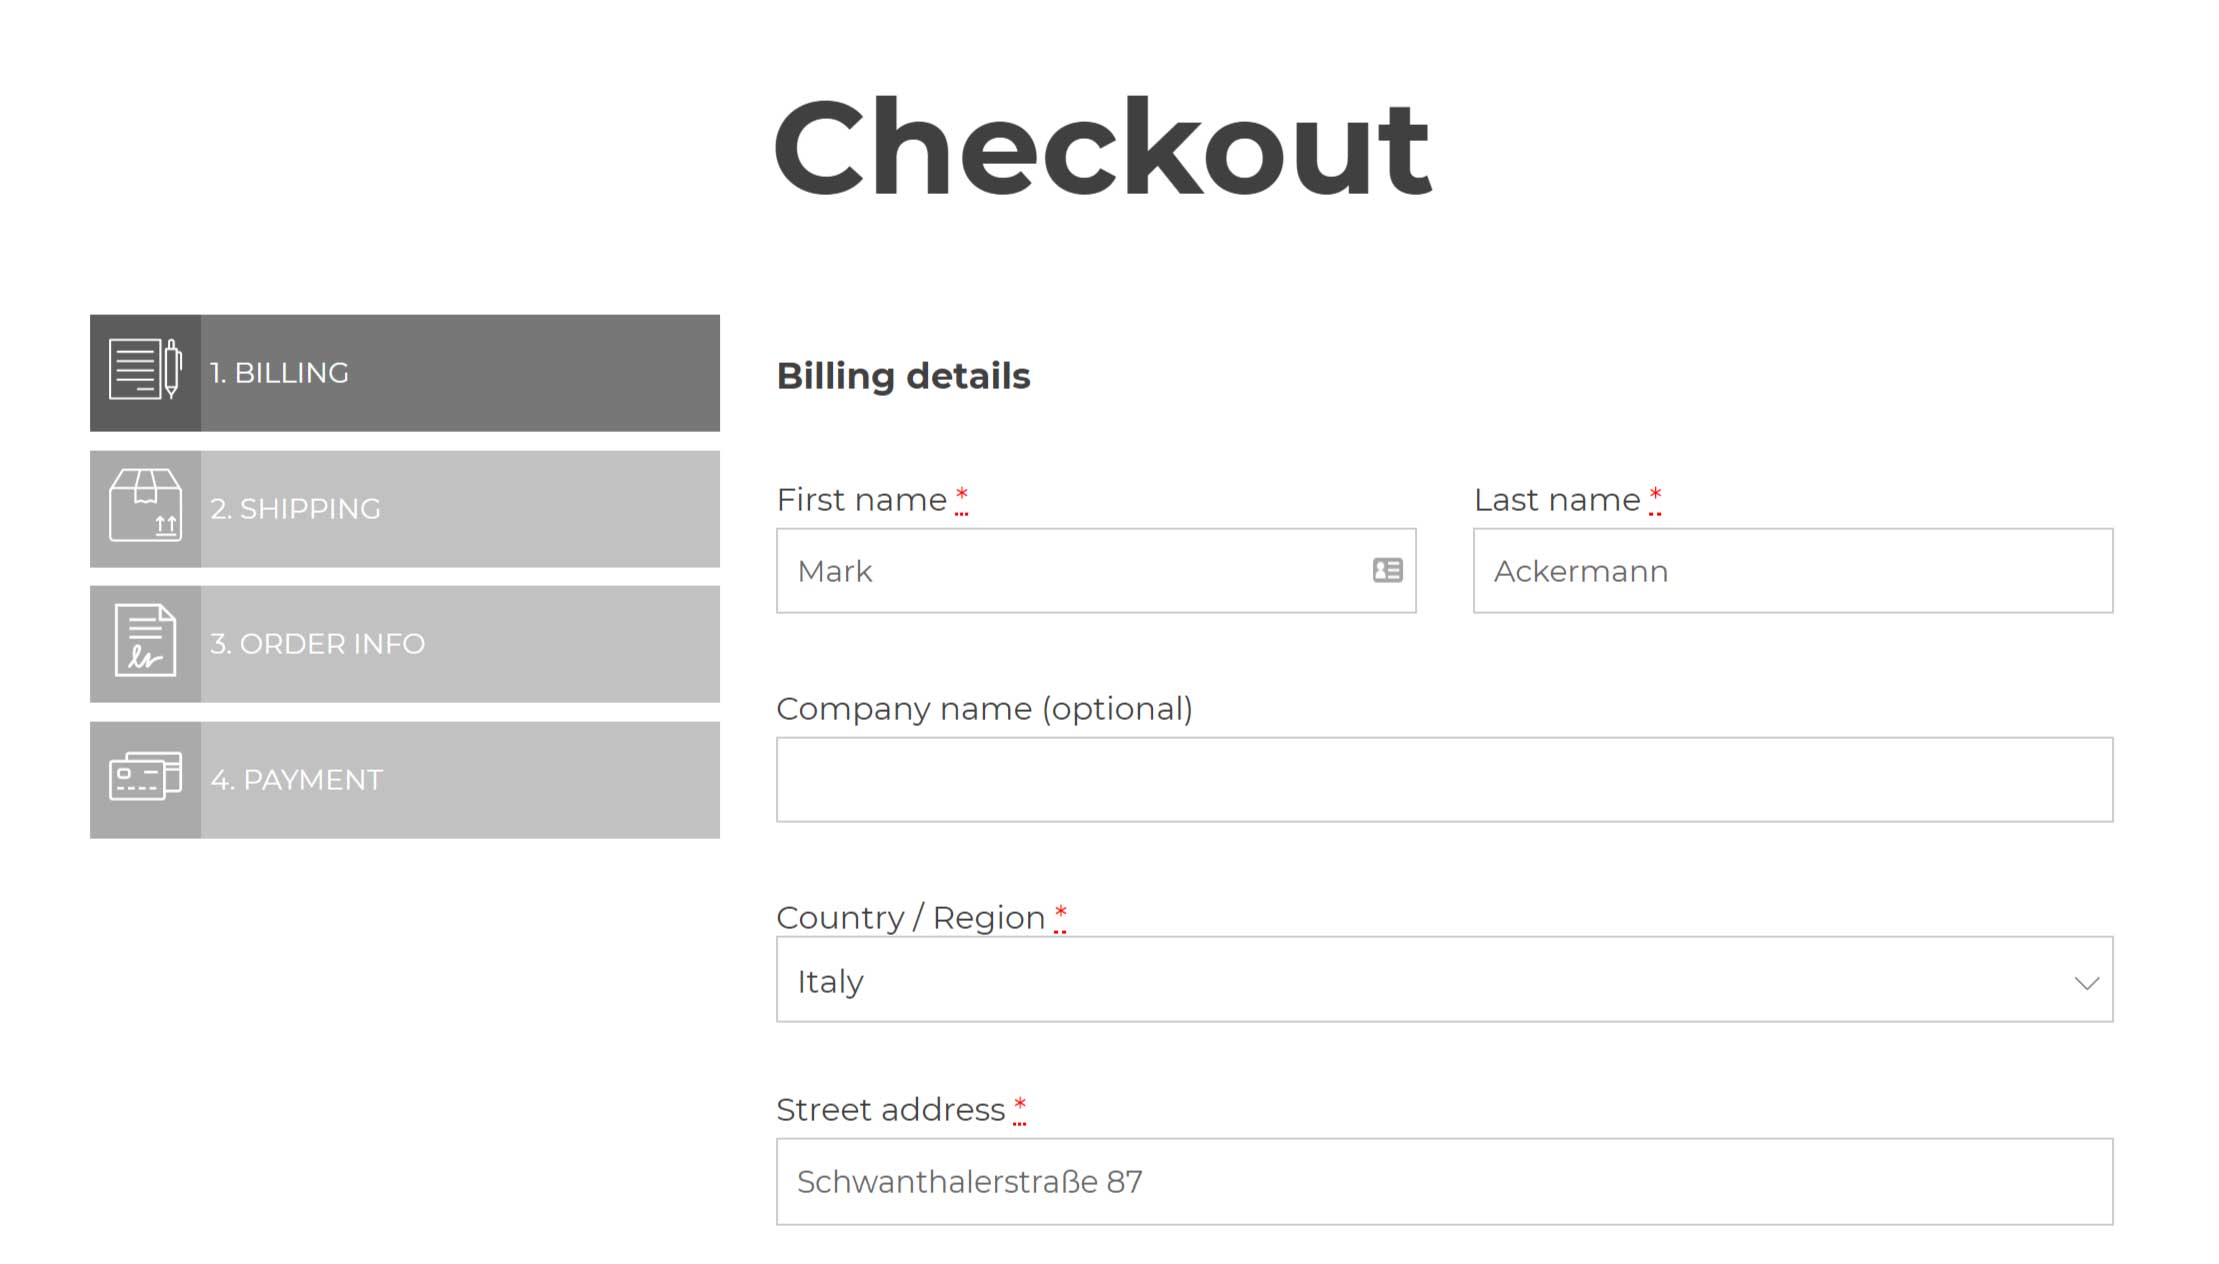
Style 3
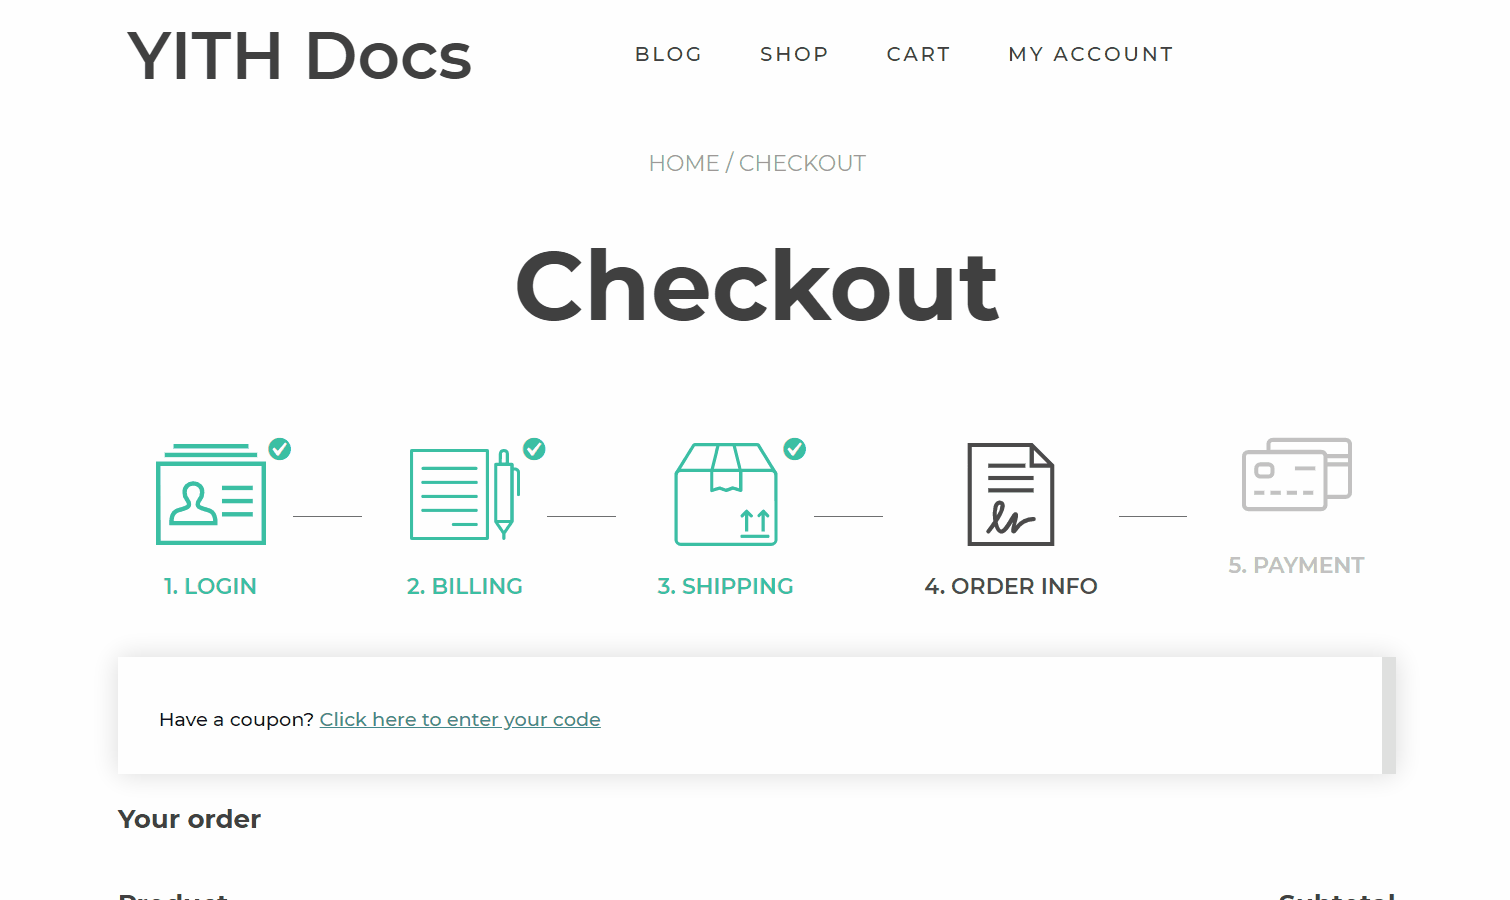
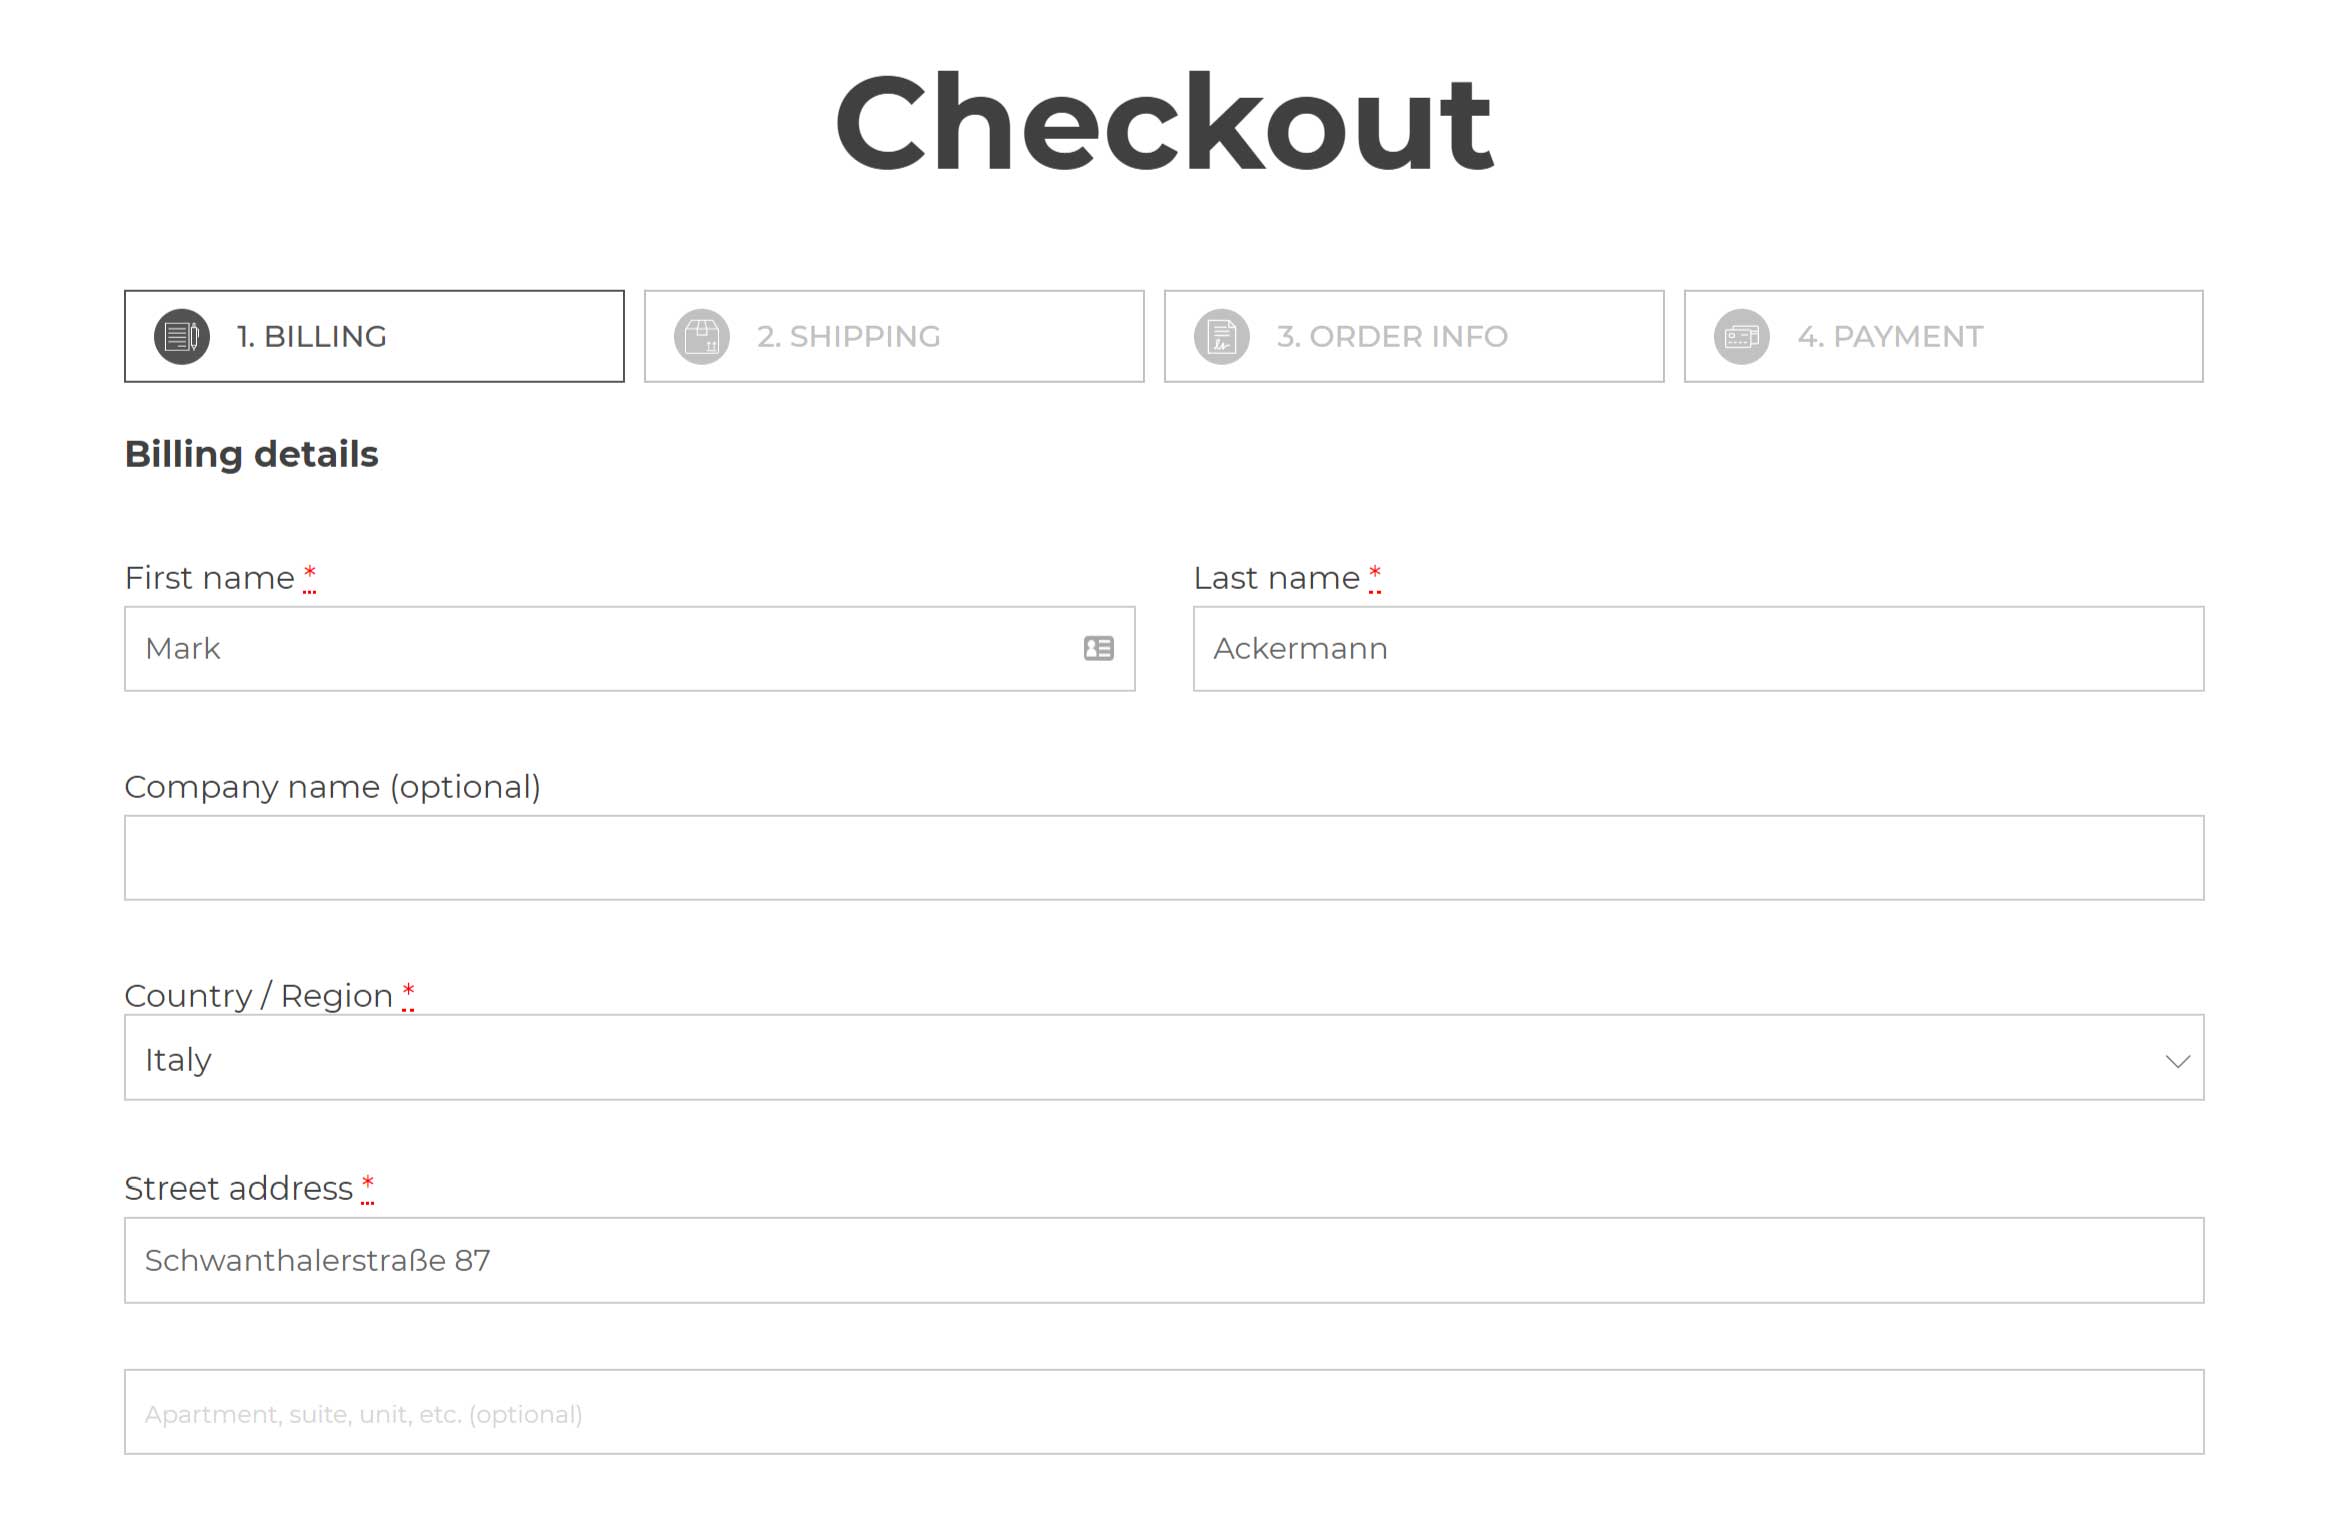
Style 4
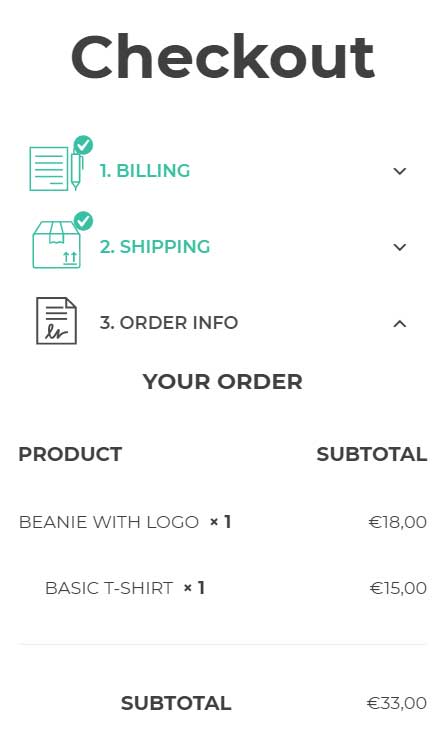
Mobile layout
Besides the style for your site’s desktop version, if you want, you can also choose a different style to show on mobile devices that will automatically be set vertically.

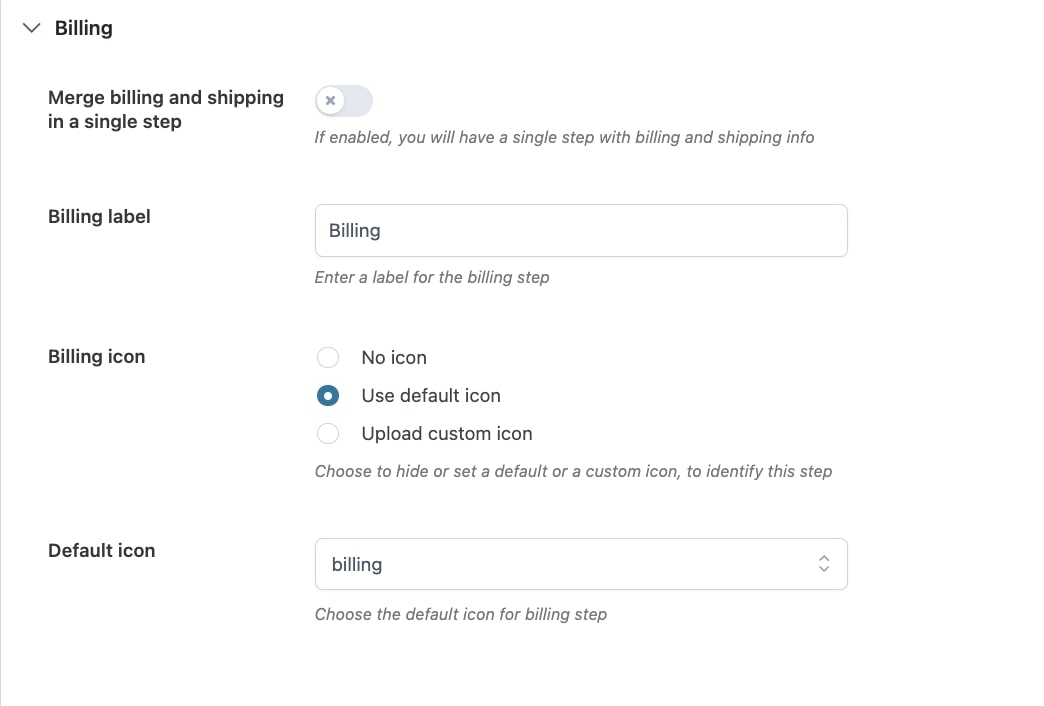
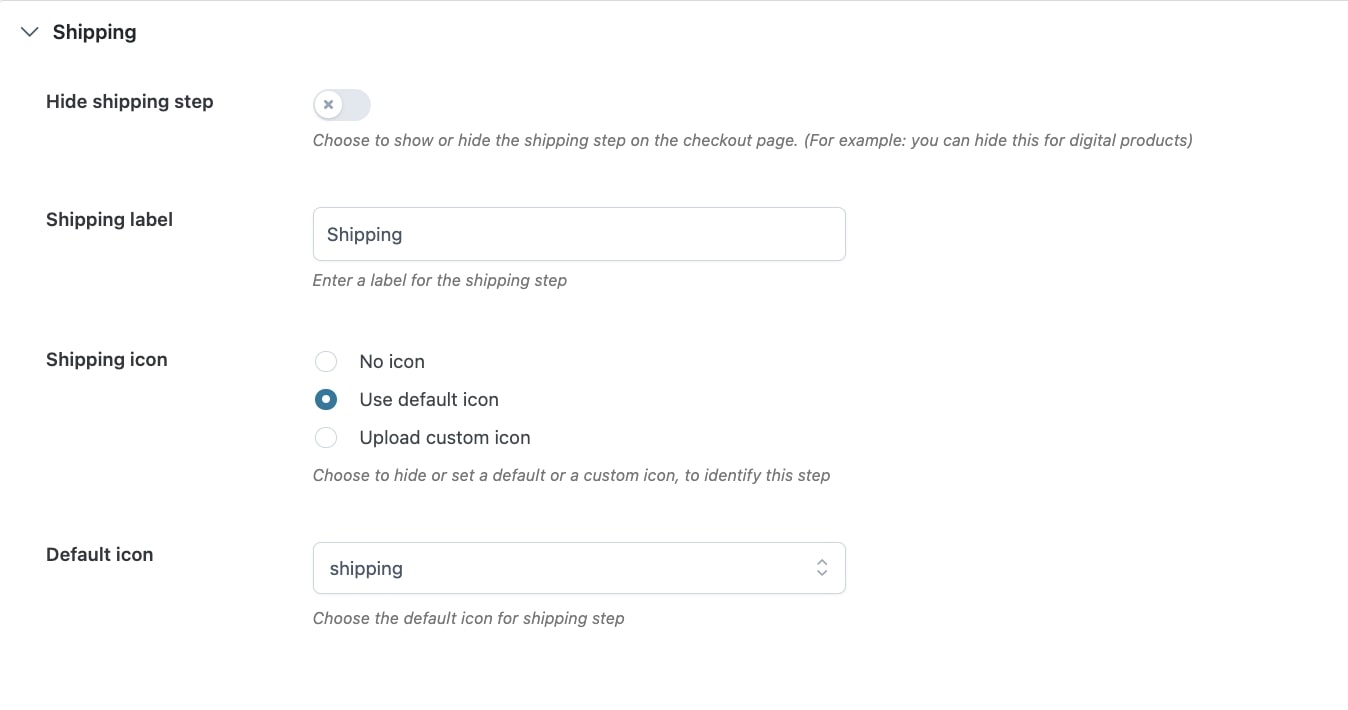
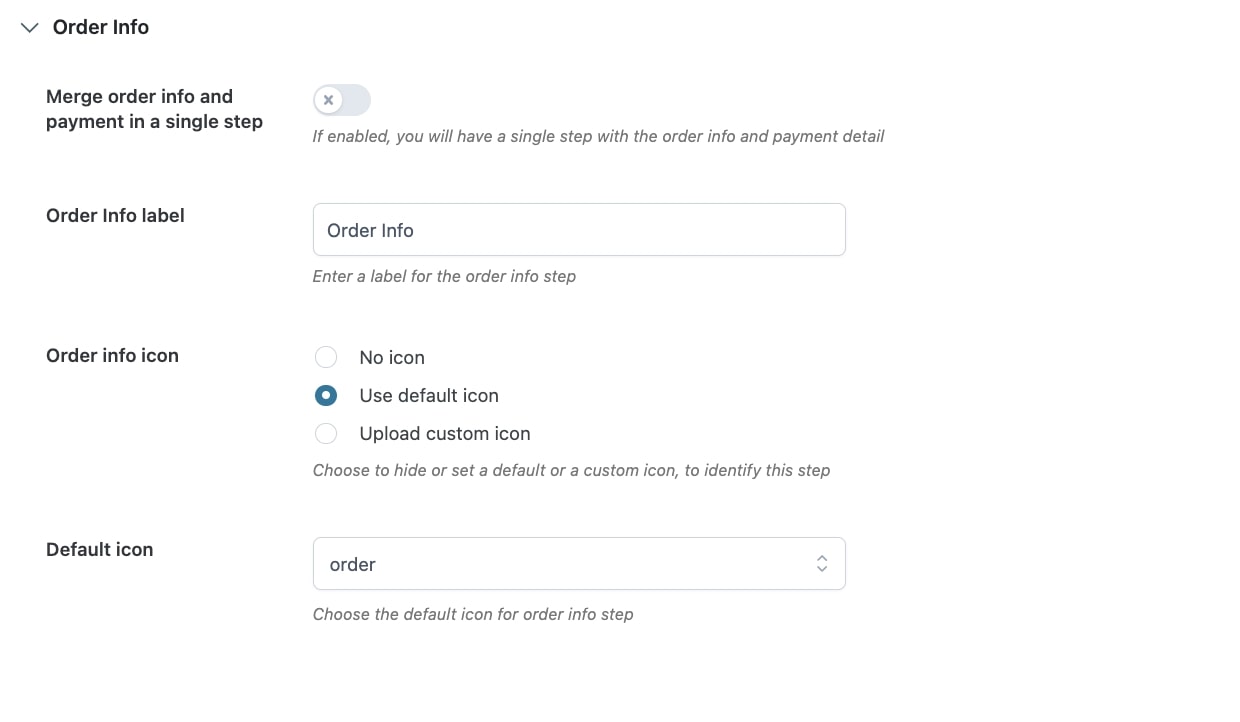
On the same page, you can find more options to customize the style of your steps:
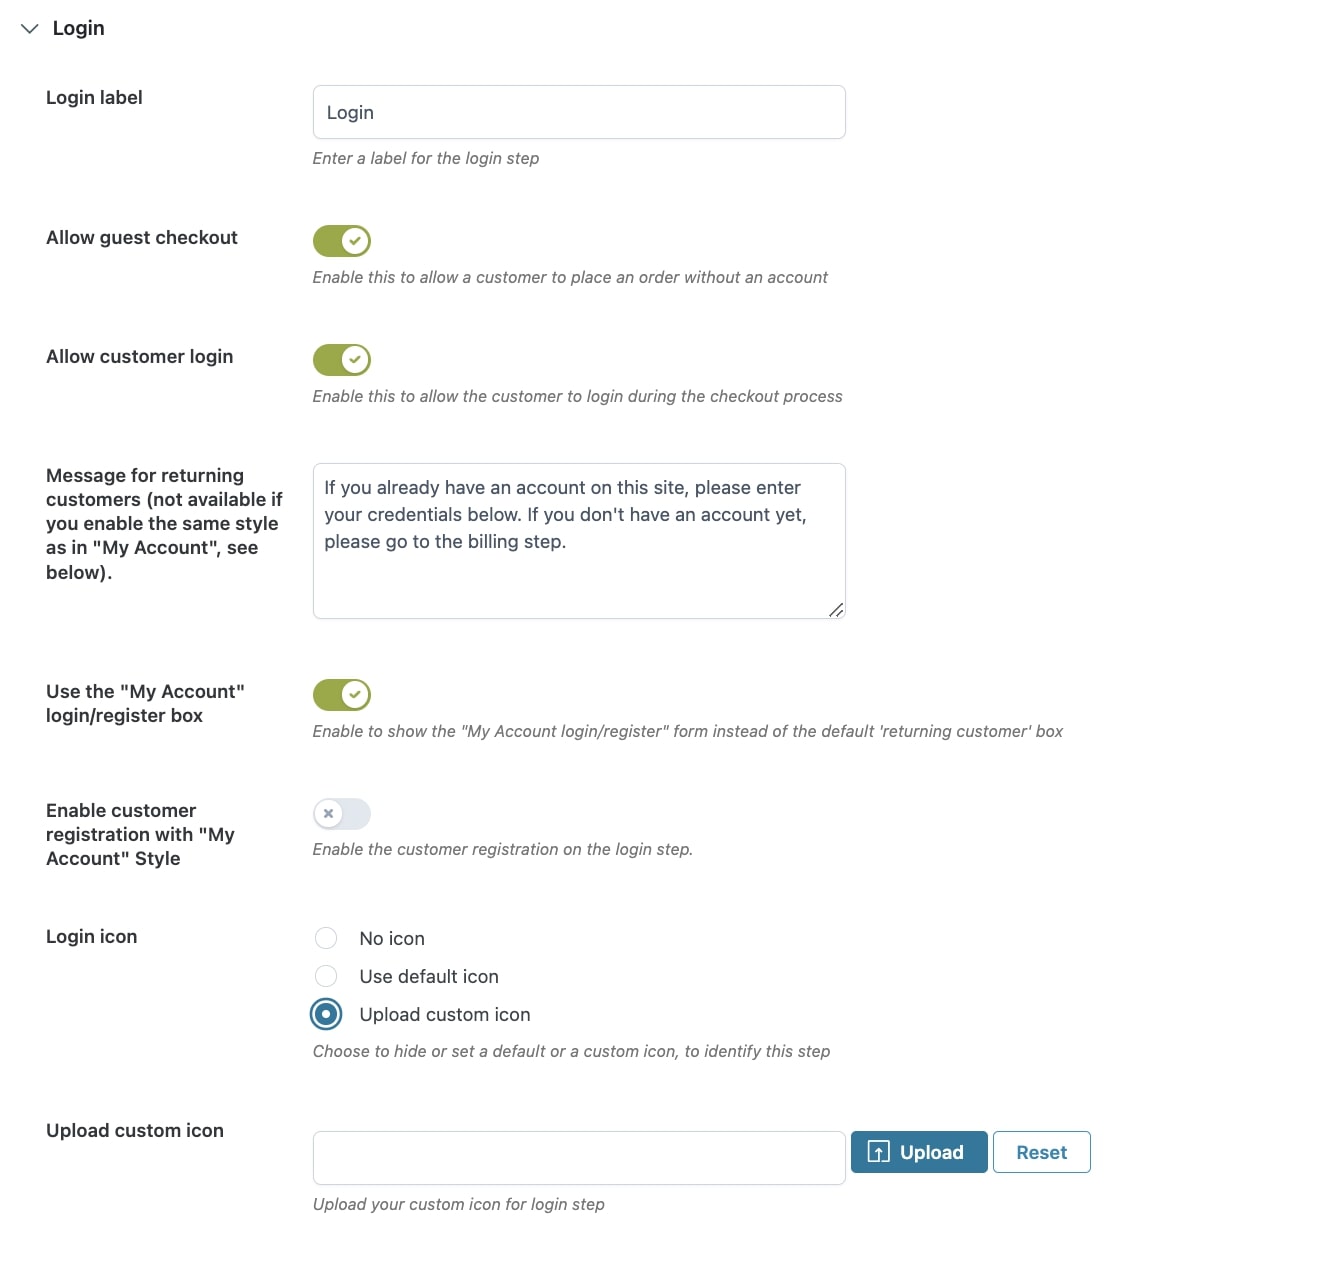
Based on the selected style, you will see different options to customize the steps:
Text style

- Separate steps with
- Step text color
Style 1

- Step text alignment
- Step background color
- Step text color
- Square color
- Square text color
Style 2

- Step text alignment
- Step background color
- Step text color
- Step border color
- Circle color
- Circle border color
- Circle text color
Style 3

- Step text alignment
- Step background color
- Step text color
- Step border color
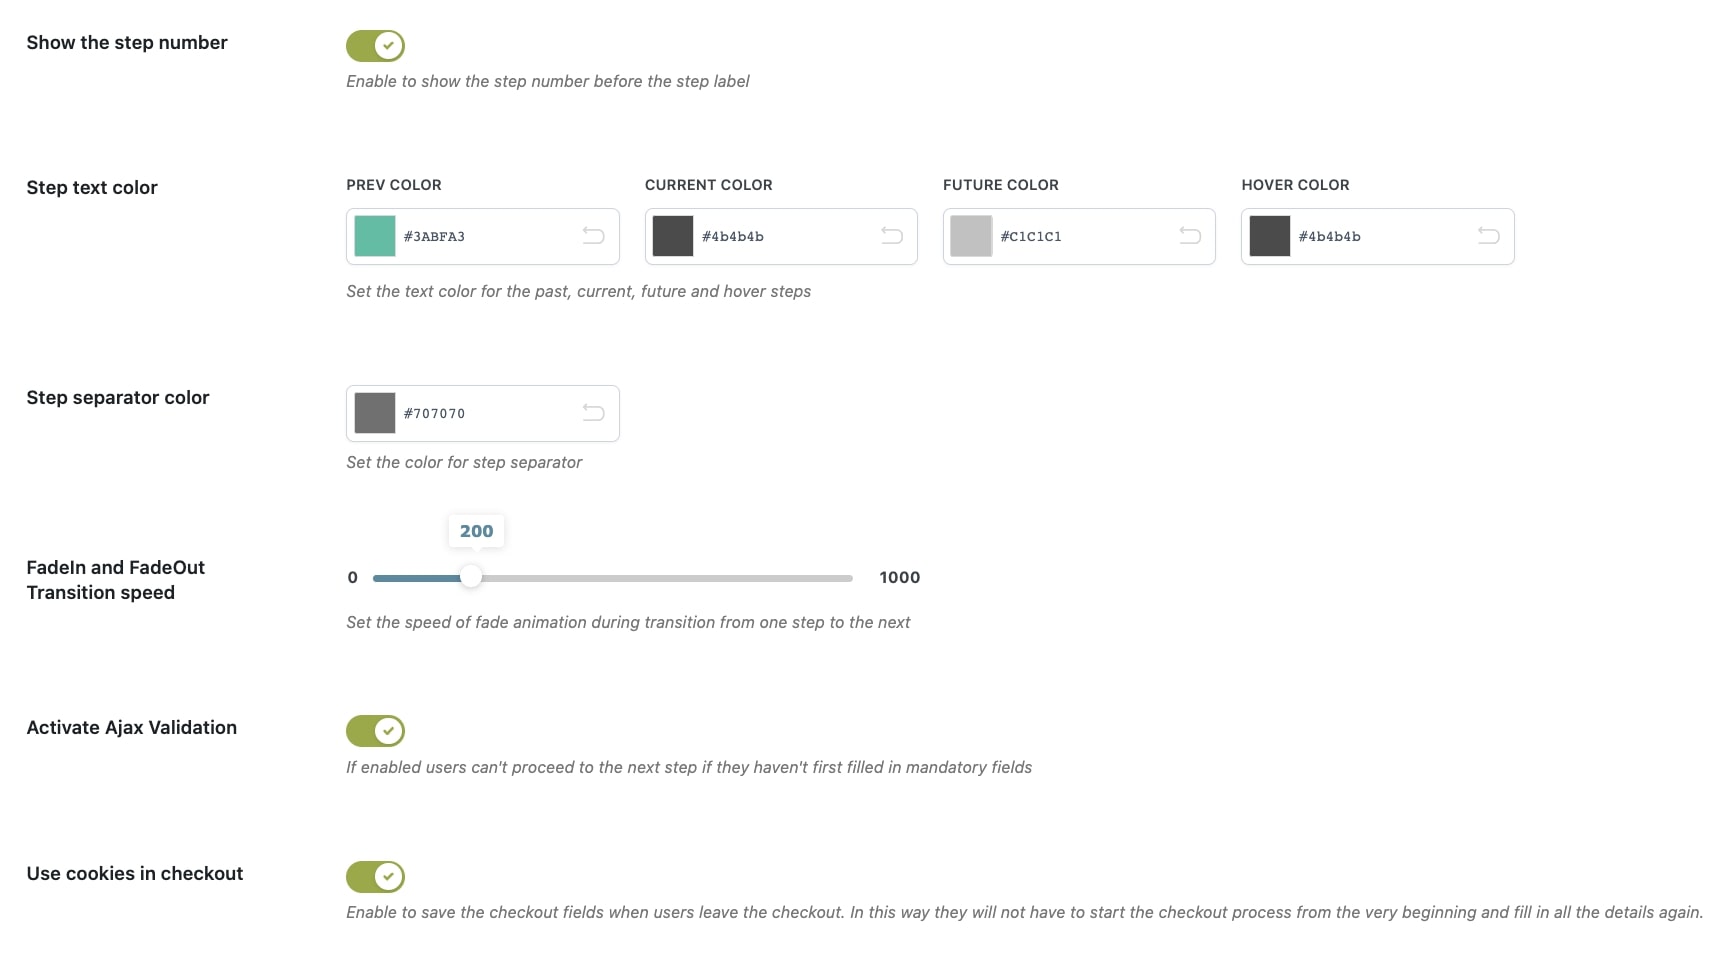
Style 4

- Step text color
- Step separator color
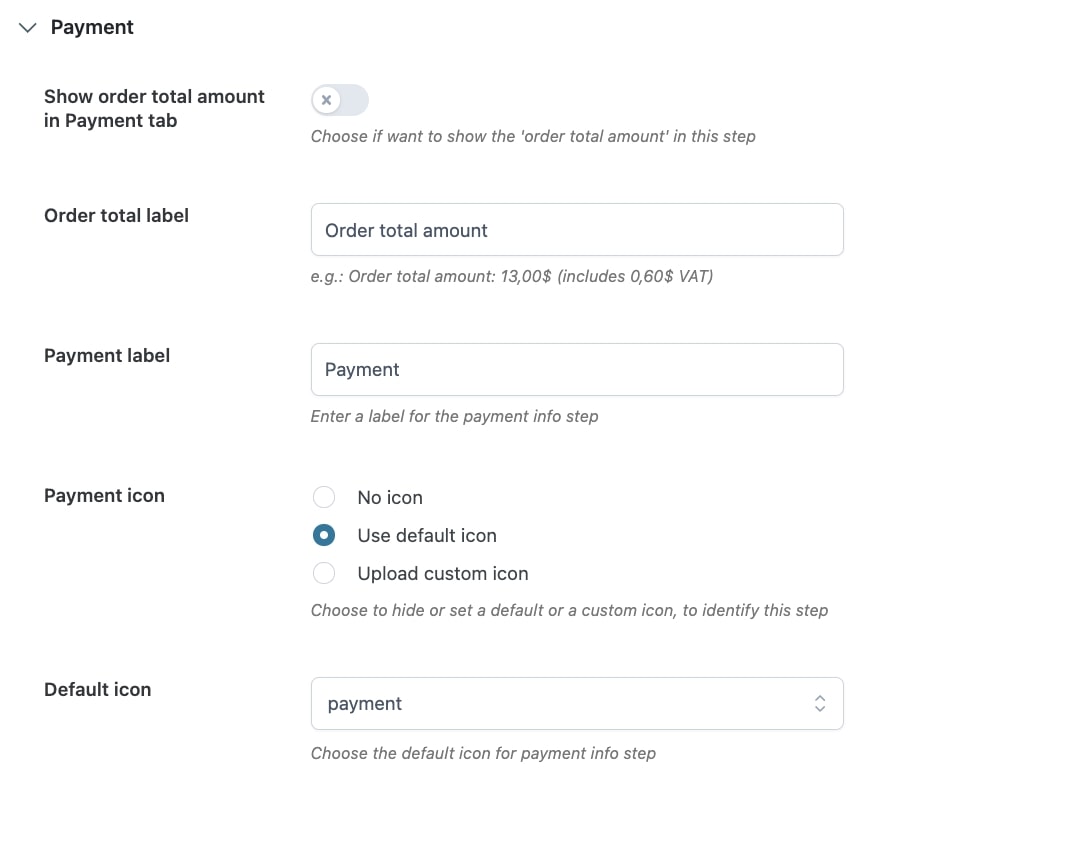
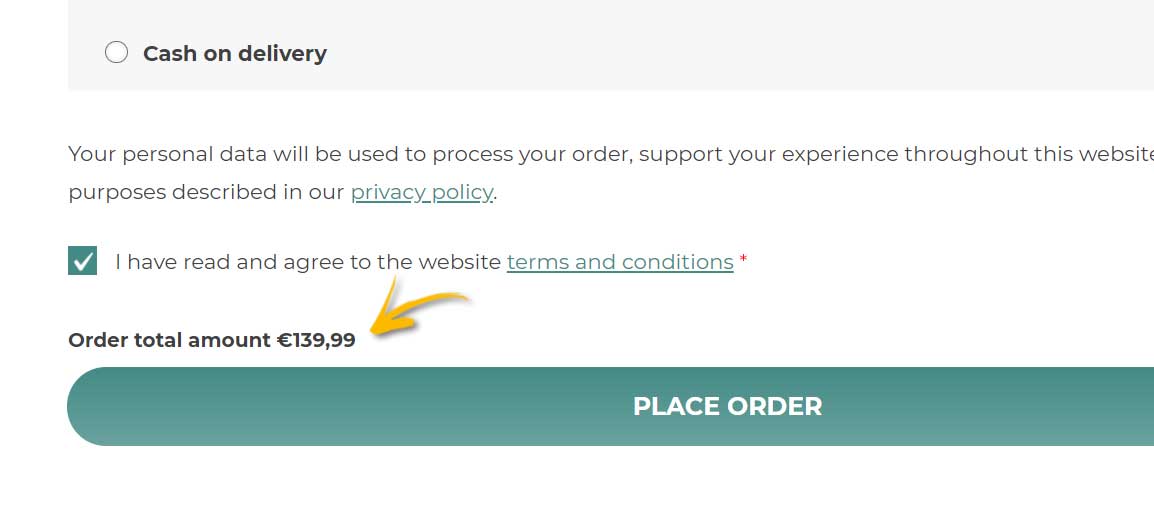
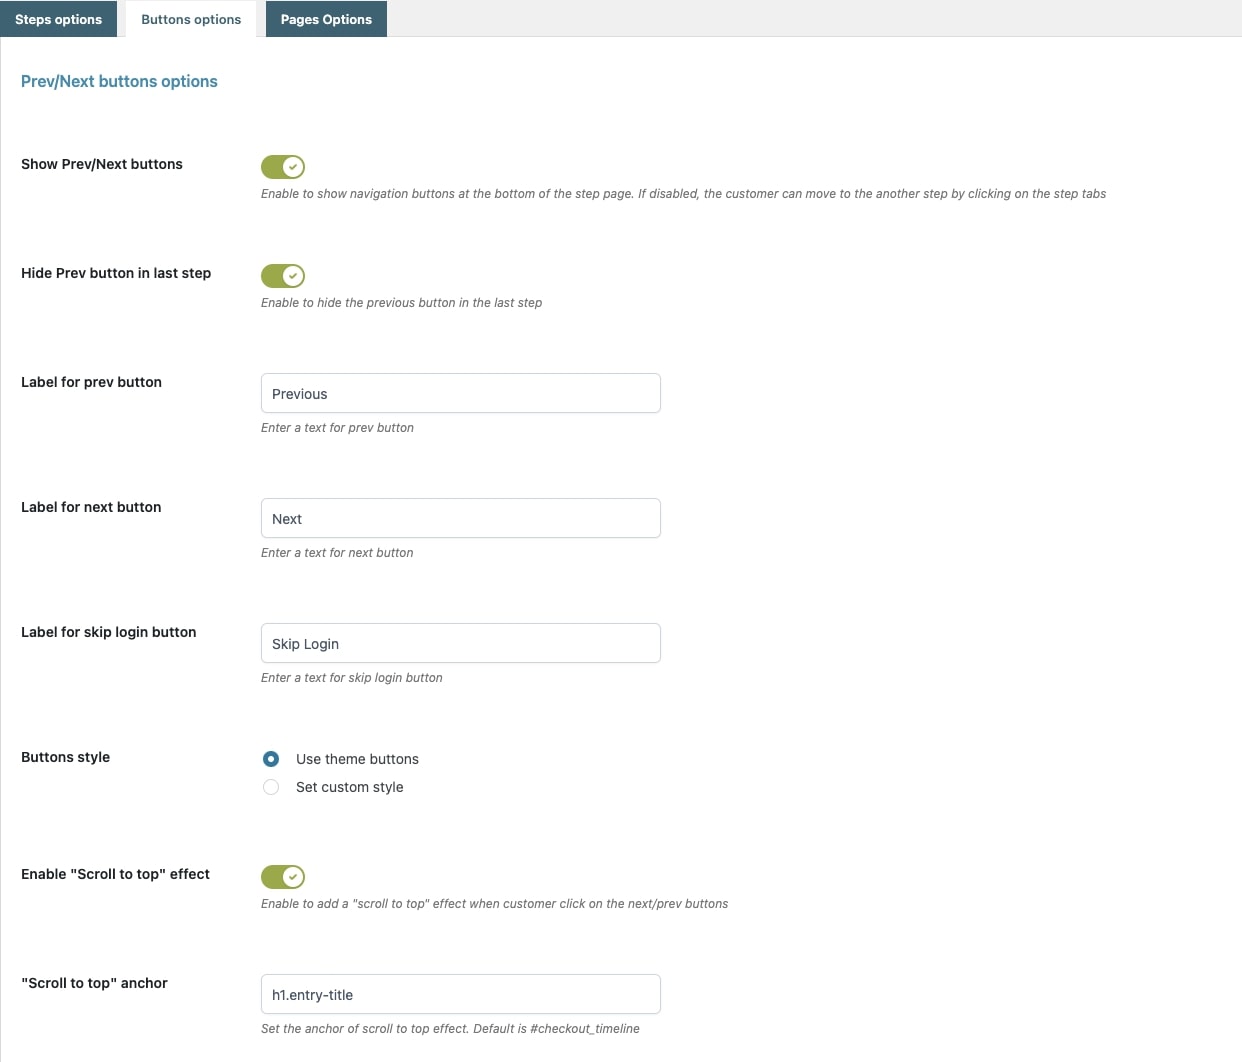
The following options, instead, apply to all styles:
- Show the step number: enable this option to show the step number in the step. Keep it disabled to only show the step name.
- FadeIn and FadeOut Transition speed: set the transition speed in milliseconds.
- Activate Ajax Validation: enable this option to make sure that the customer can go on with the next step only after all the mandatory fields have been filled out.

- Use cookies in checkout: enable this option to save the details added by the customer in the checkout fields when they leave the checkout. In this way, they will not have to start the checkout process and add all the details again.