To offer your users the possibility to leave a deposit and pay the balance at a later time for all the products of your shop, go to the section Deposit options >General settings and enable the option Enable deposit on all products.
Now you can decide how to manage the deposit payment through the option Set the deposit payment as:
Here, you can select:
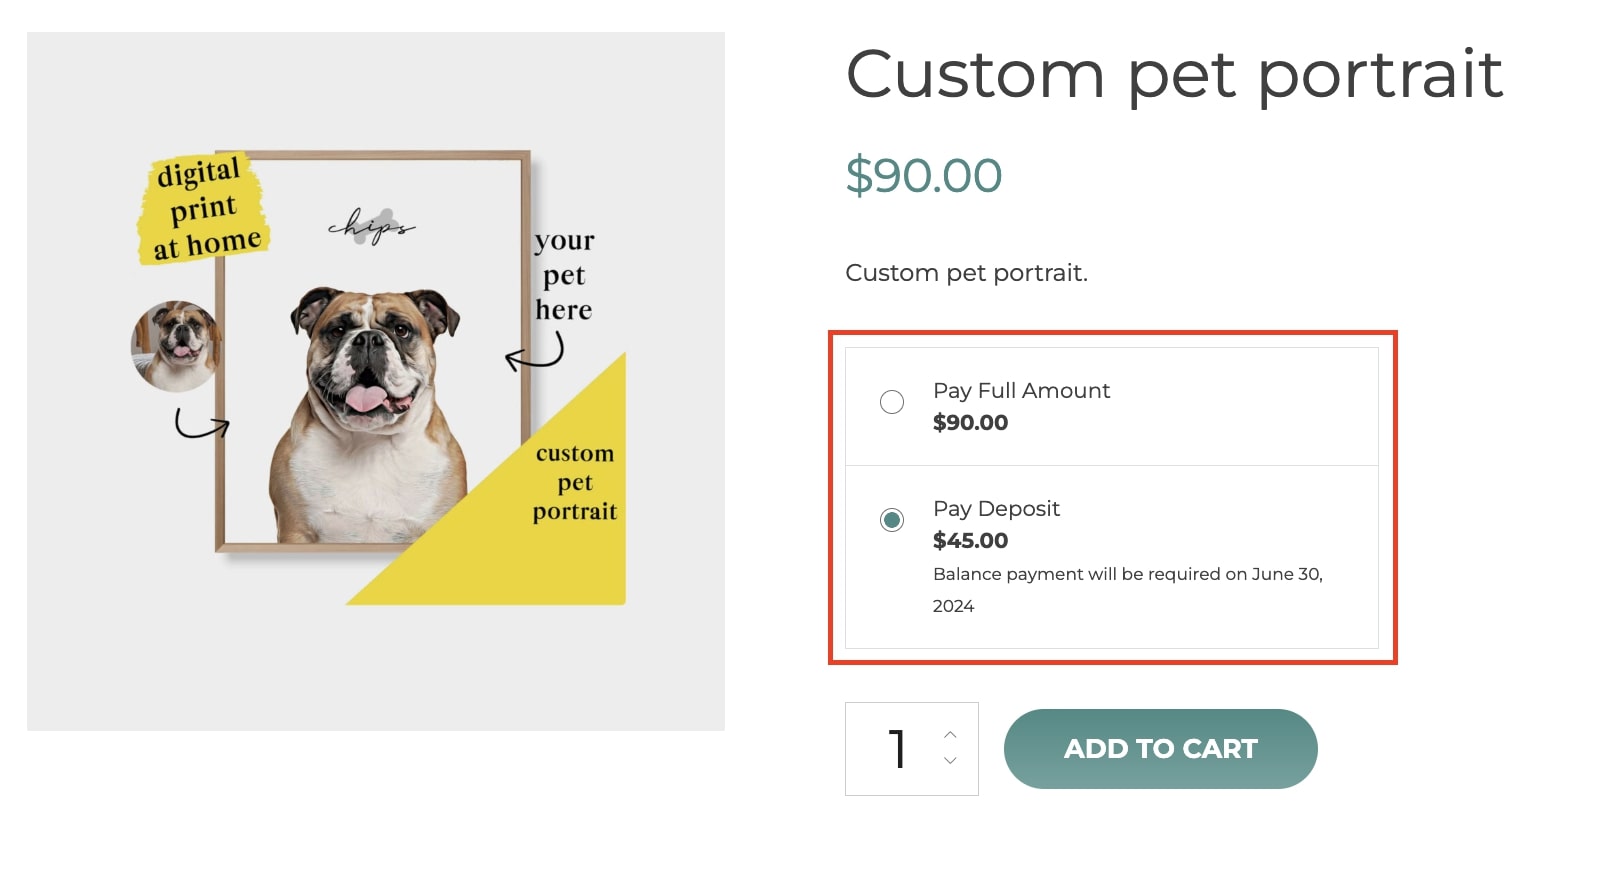
Optional: in this case, users will be free to decide whether to pay for the whole product price or leave only a deposit.
Optionally, you can also show the deposit as selected by default by enabling the option Show deposit option selected by default.
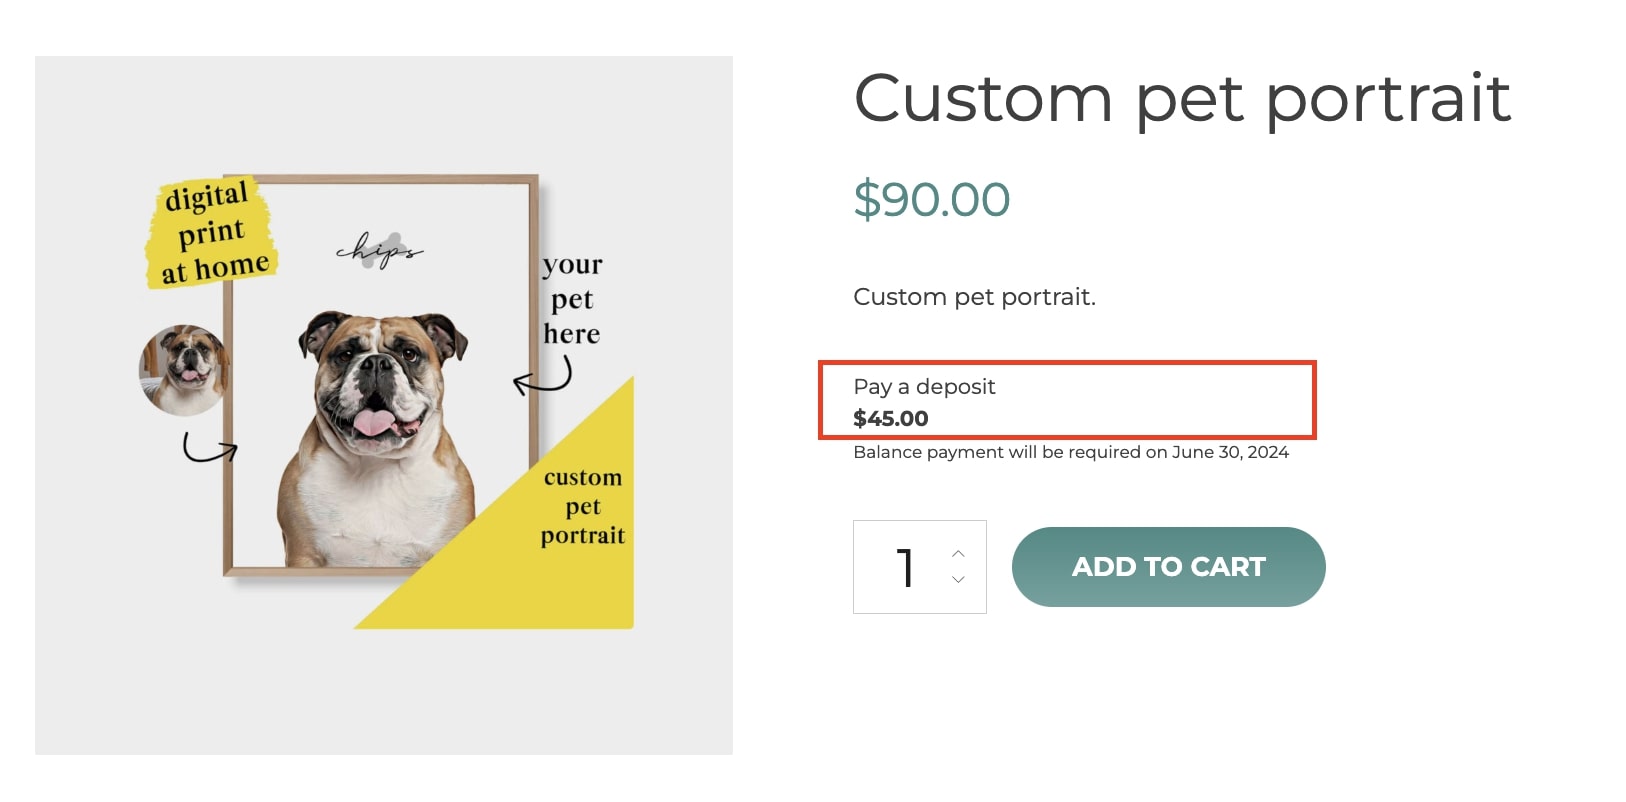
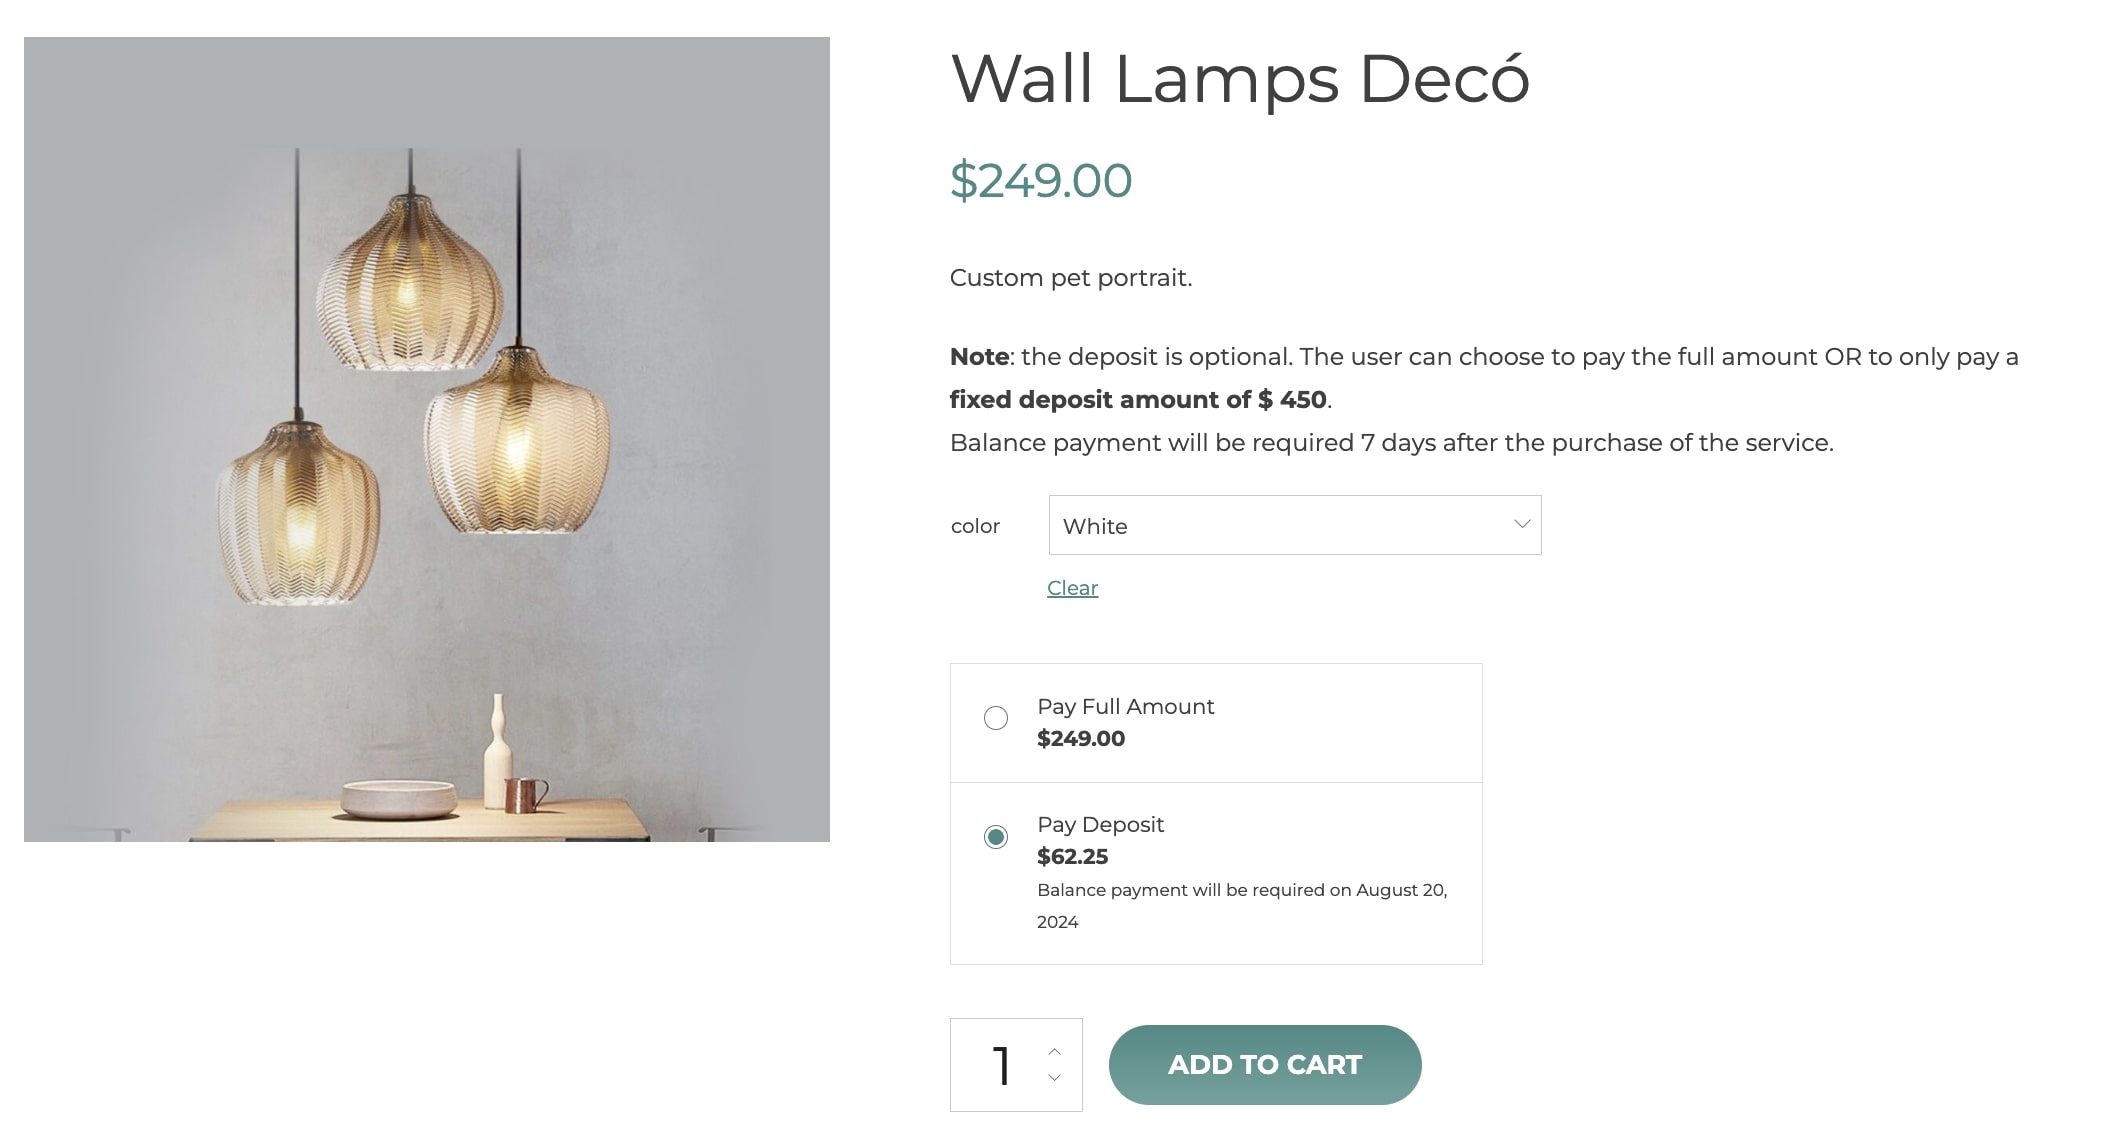
Forced: by selecting this option, users will only have the option to pay for a deposit, like in the image below.
Now you can define the default deposit value by entering it as a percentage of the product price or a fixed amount.
If you apply shipping costs to your products, you can decide to charge them to the deposit or the balance order by selecting it in the dedicated option.
Finally, if you want to load the deposit section in AJAX for product variations, you can enable the option Load deposit data dynamically . This will reduce the loading time for variable products but will require a small update every time a new variation is selected.
Although you can globally configure deposit options for all your products, the plugin allows you to create custom deposits by product, category, or user role.
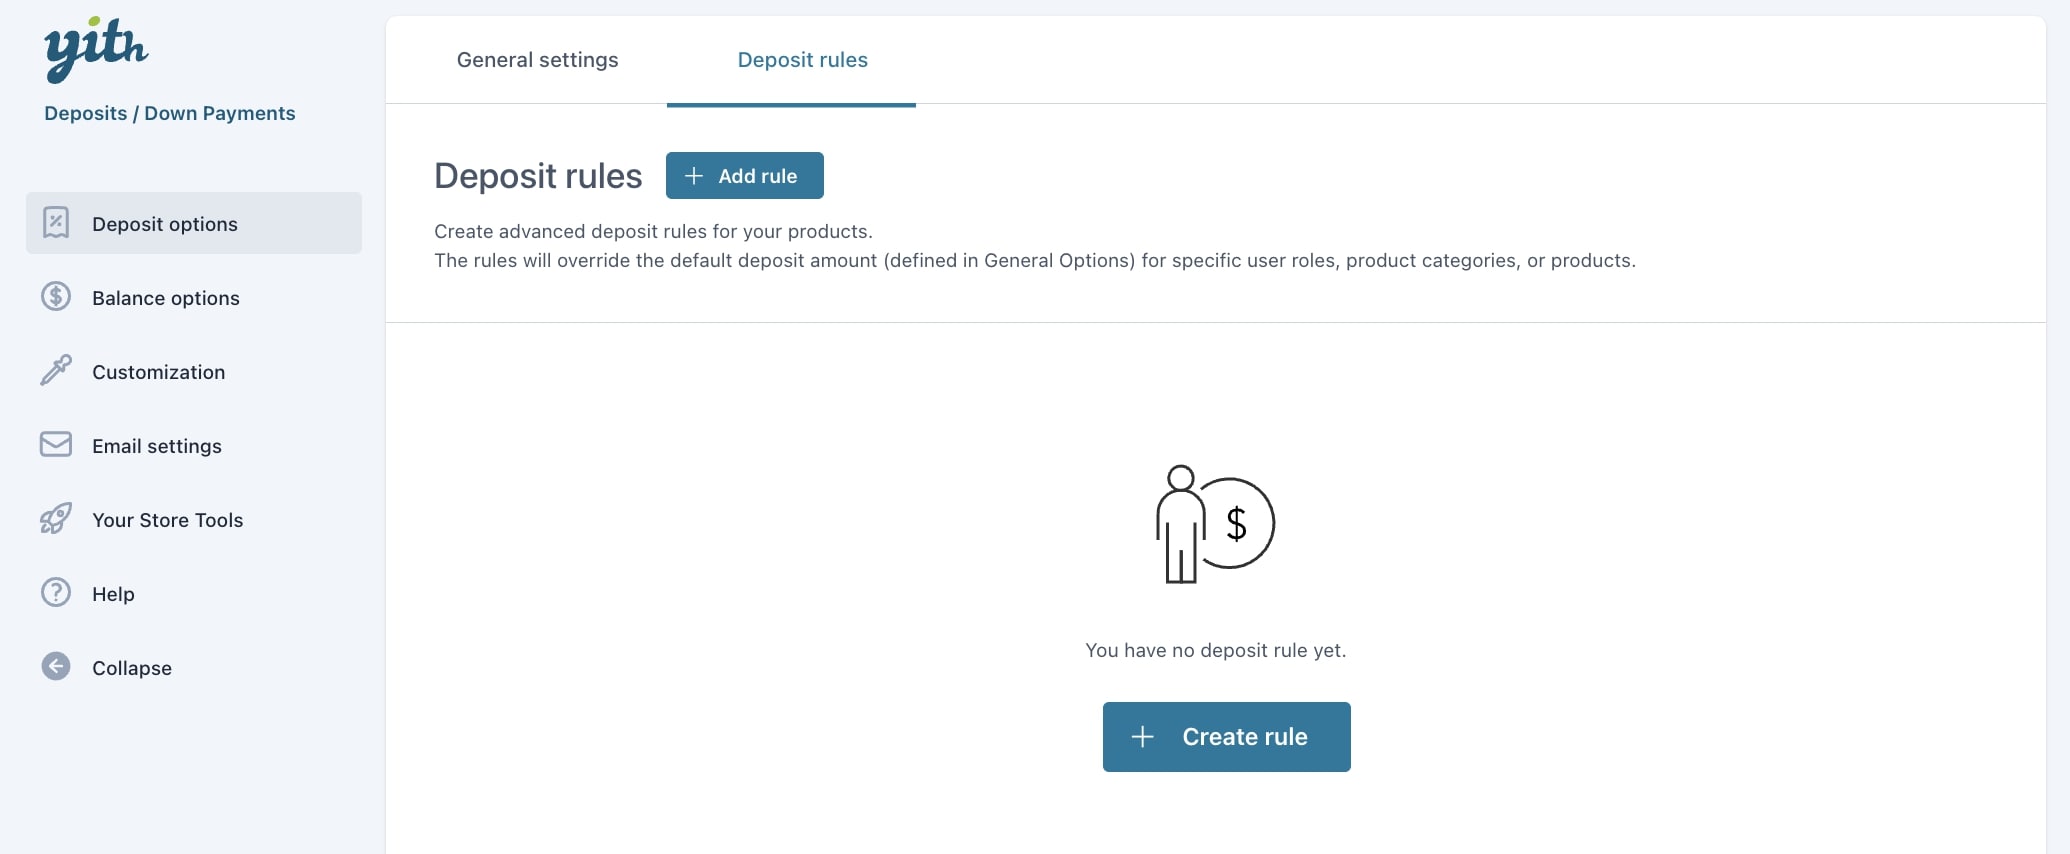
To create your rules, go to the section Deposit options > Deposit rules.
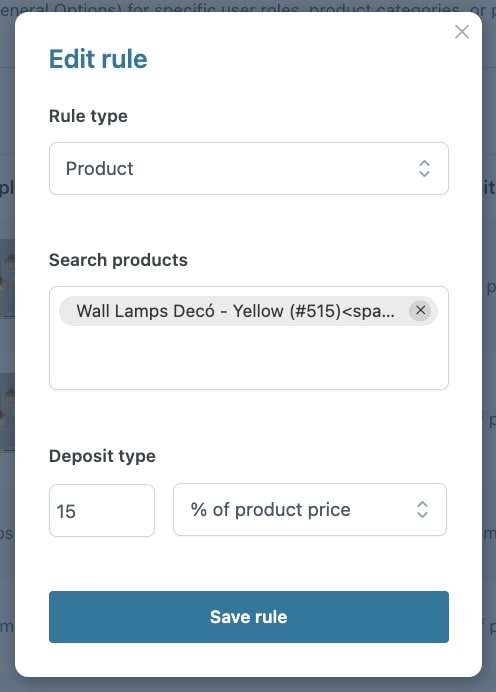
Now, from the popup, choose the type of rule you want to create from Product, Product categories, or User roles.
Product rule
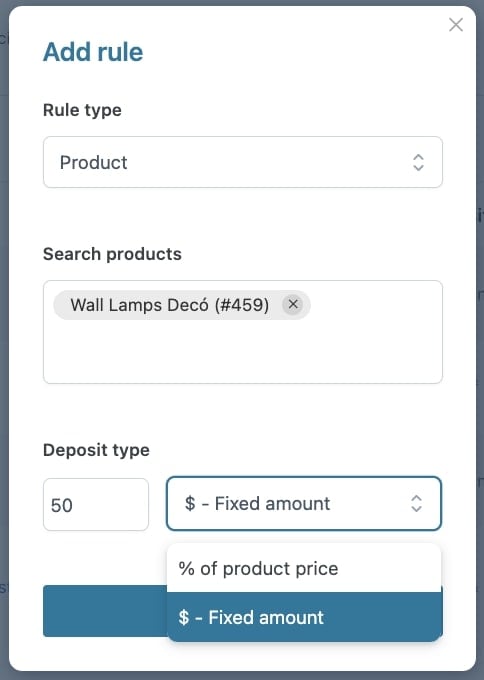
To create a deposit rule for one or more products, select Product from the dropdown in Rule type, search for the products to which you want to apply the rule, choose the deposit type (fixed amount or % of product price), and enter a value. Now click on Add rule to save your settings.
You can create rules for product variations too by adding the single variations as explained here.
Category rule
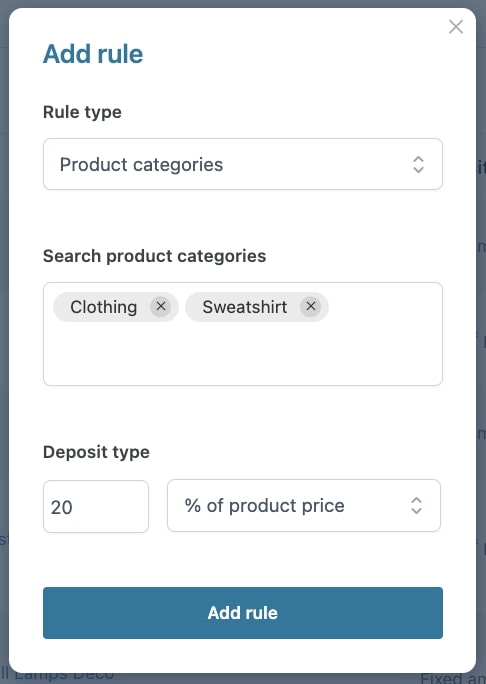
To create a deposit rule for one or more products, select Product categories from the dropdown in Rule type, search for the categories to which you want to apply the deposit rule, choose the deposit type (fixed amount or % of product price), and enter a value. Now click on Add rule to save your settings.
User roles rule
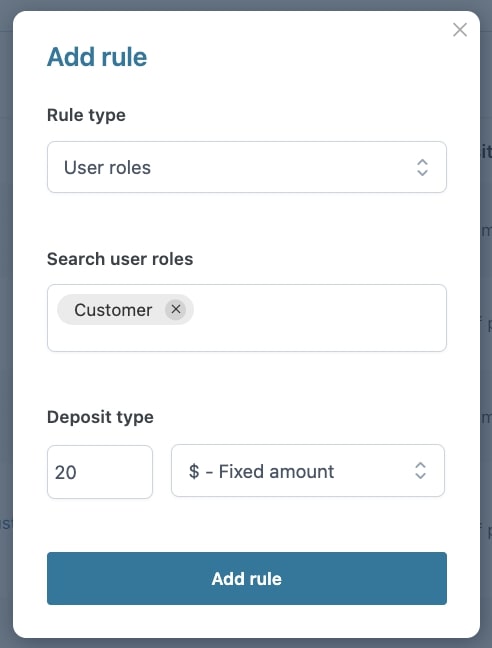
To create a deposit rule for one or more user roles, select User roles from the dropdown in Rule type, search for the user roles to which you want to apply the deposit rule, choose the deposit type (fixed amount or % of product price), and enter a value. Now click on Add rule to save your settings.
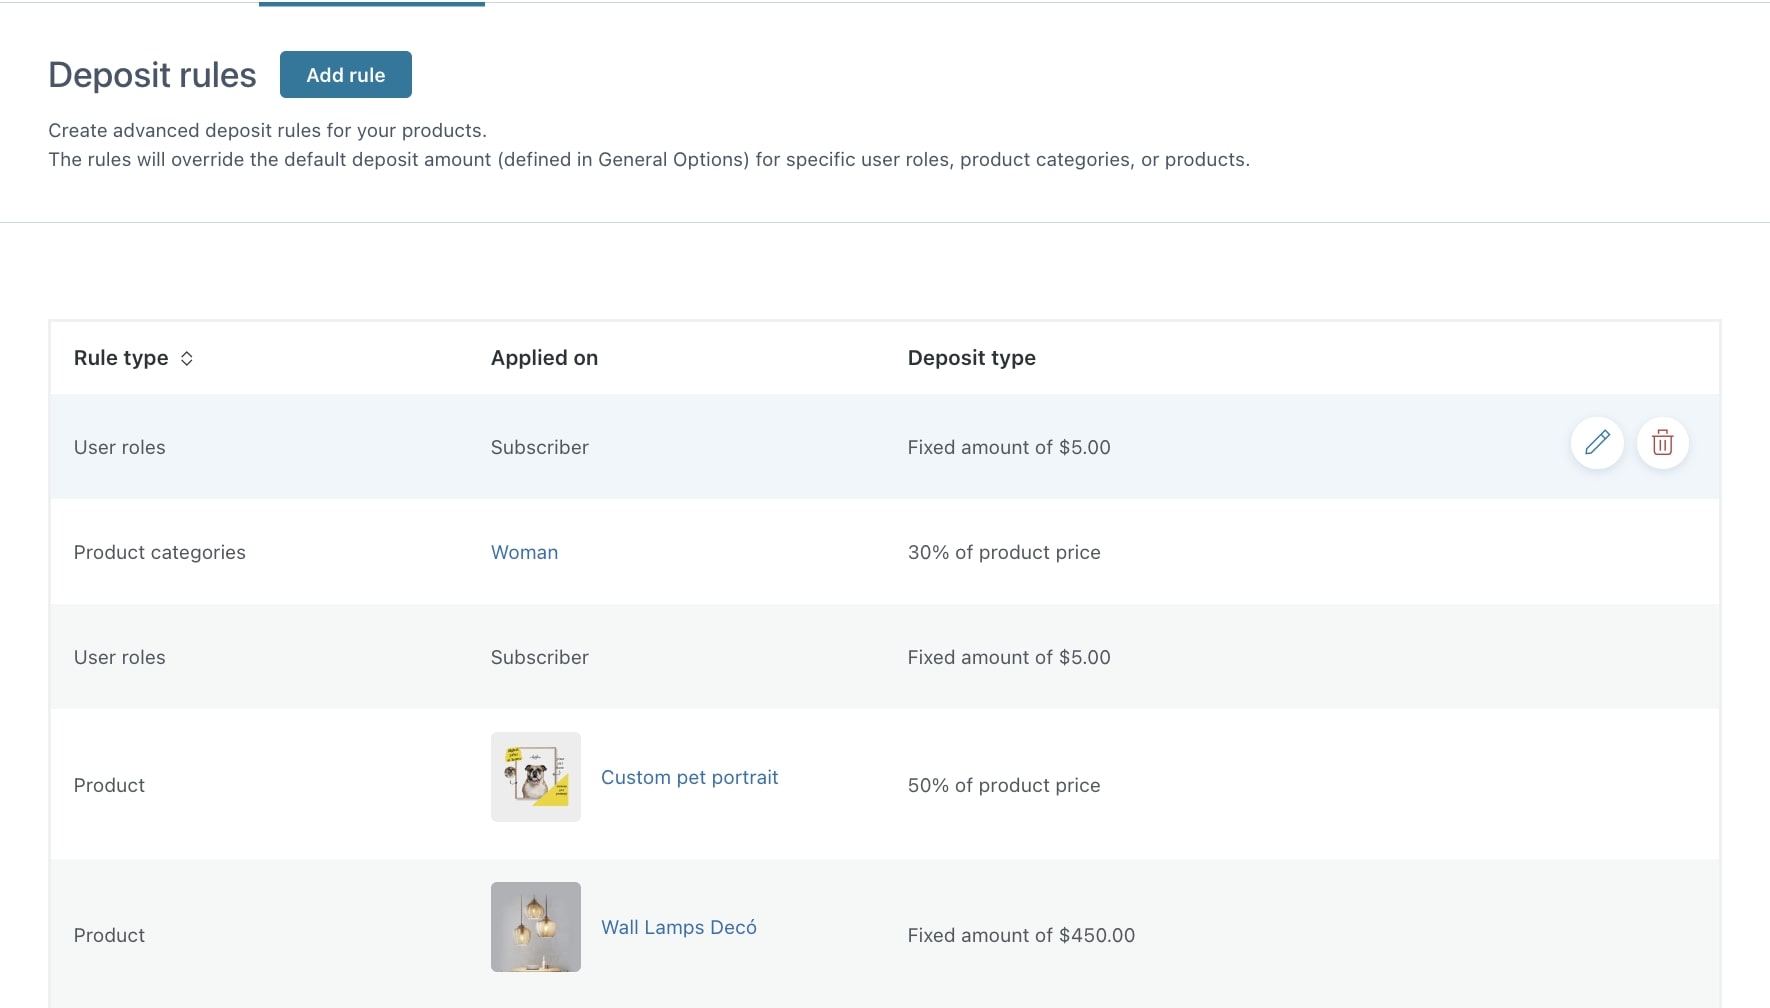
All the rules created will then show as a list in the Deposit rules table. Here, you will be able to edit or delete each rule.
If you have created more rules that apply to the same products, please consider that the system will manage deposit options based on the following descendent priority: 1 – product variation 2 – product (simple or variable) 3 – category 4 – user role
The plugin supports variable products and allows you to request a different deposit for single variations.
If you want, for example, to offer 2 different deposit options based on the product variation selected by the user, you must create 2 deposit rules for products in the section Deposit rules as described here by selecting the product variation in the field Search products.
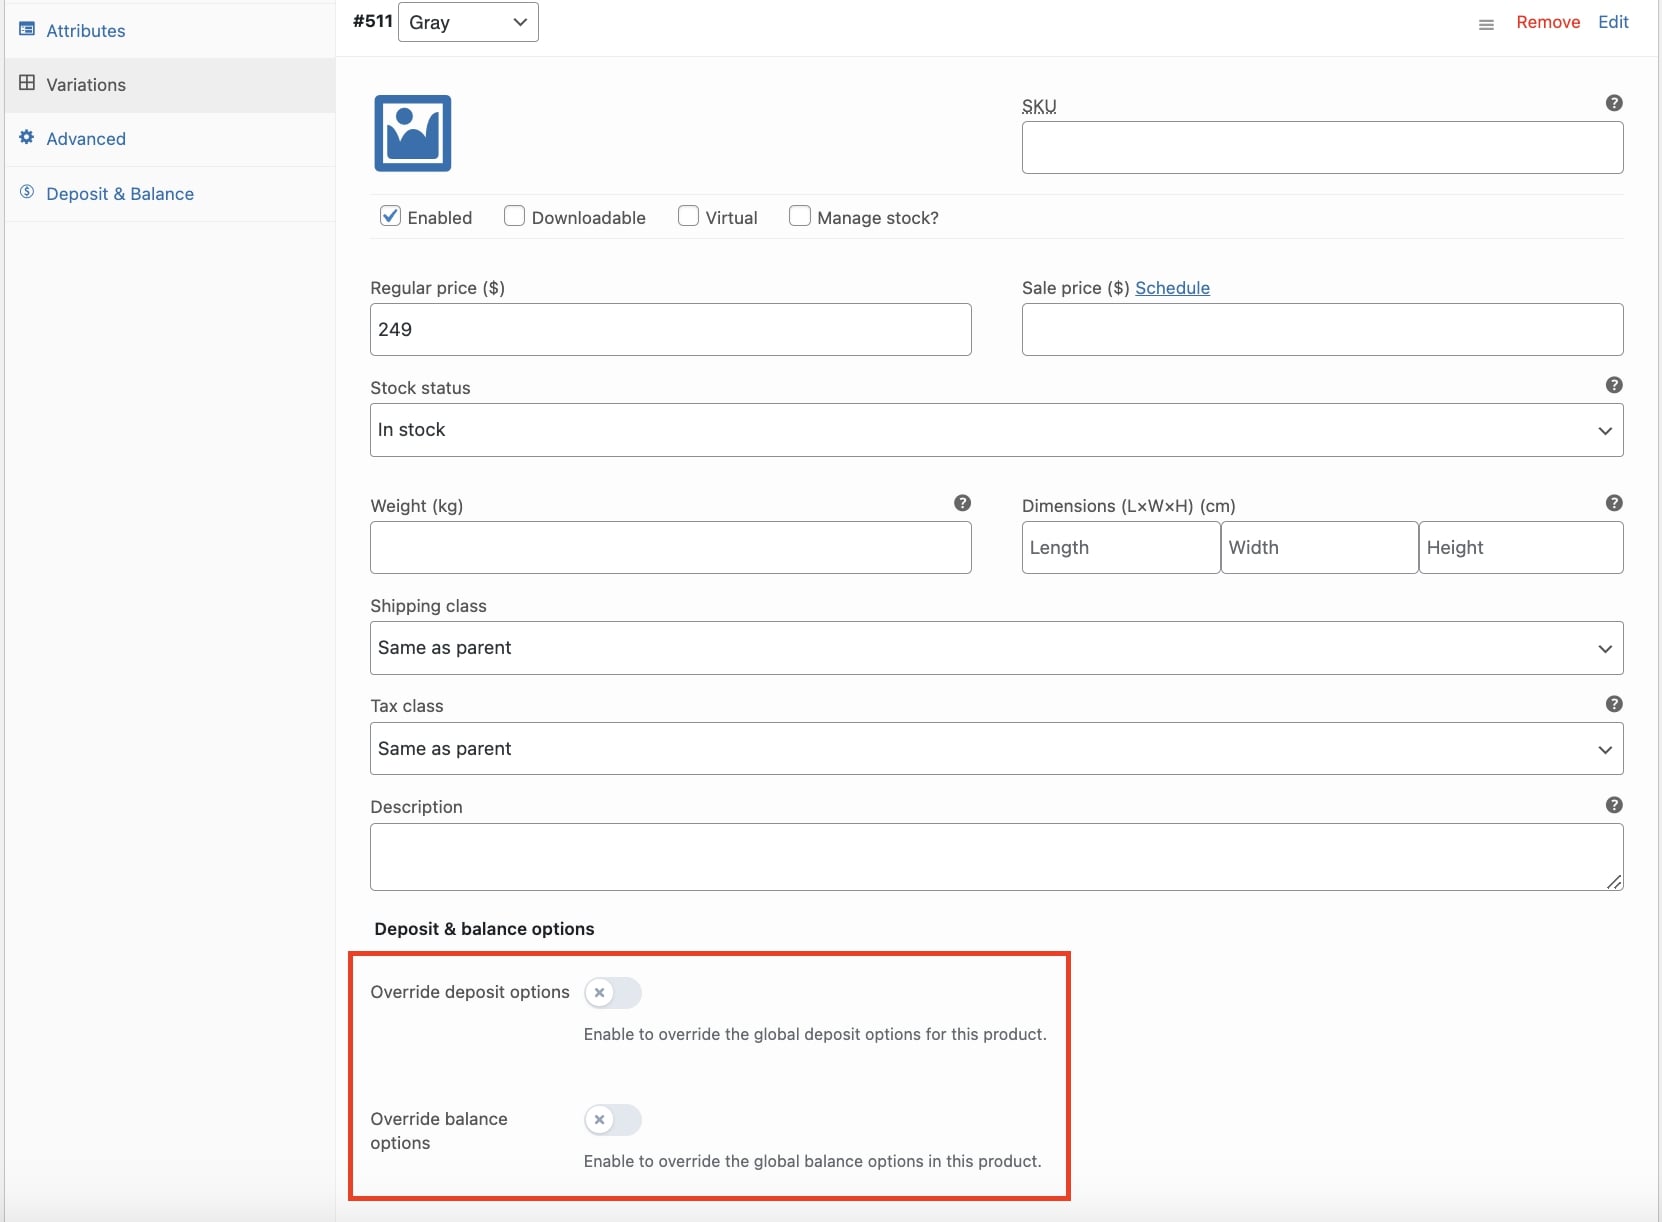
For each product variation, you can also override the global deposit and balance options from the product edit page.
Example
If you have created a deposit rule for the variable product and one or more rules for single variations, the plugin will apply the deposit according to the following priority: 1 – deposit on single variation(s); 2 – deposit on the variable product.
Let’s analyze how you can manage balance options through the plugin settings available in the section Balance options.
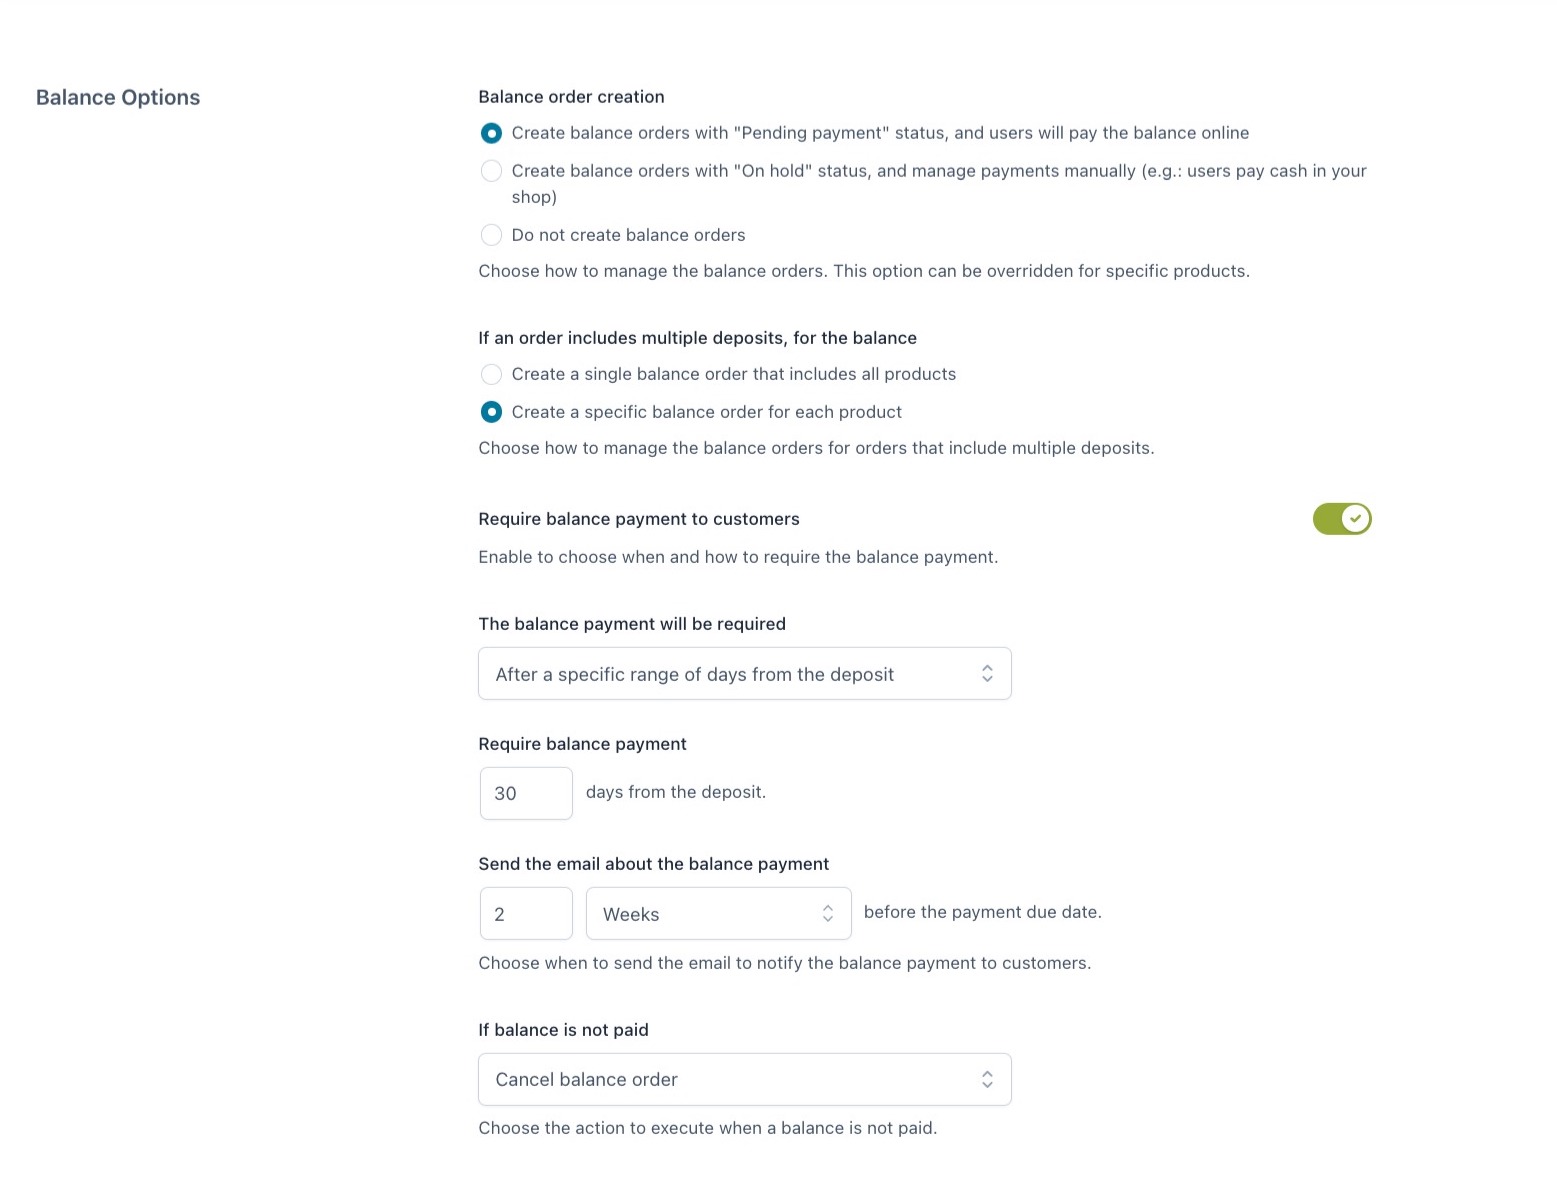
Balance order creation: through this option, you can decide how to manage balance orders by choosing from:
Create balance orders with “Pending payment” status, and users will pay the balance online: this option will assign the Pending payment status to balance orders, and users will have to pay the remaining balance on your online store;
Create balance orders with “On hold” status, and manage payments manually: this option will assign the On hold status to balance orders, and users will have to pay the remaining balance manually, for example, cash in hand in your physical store;
Do not create any balance order: this option won’t create balance orders.
If you decide to create balance orders, either with Pending payment or On hold status, an additional set of options will show.
If an order includes multiple deposits, for the balance: this option lets you choose how to create balance orders for those orders that include more deposits;
Create a single balance order that includes all products or
Create a specific balance order for each product
Require balance payment to customers: enable this option to manage how and when the balance payment will be required;
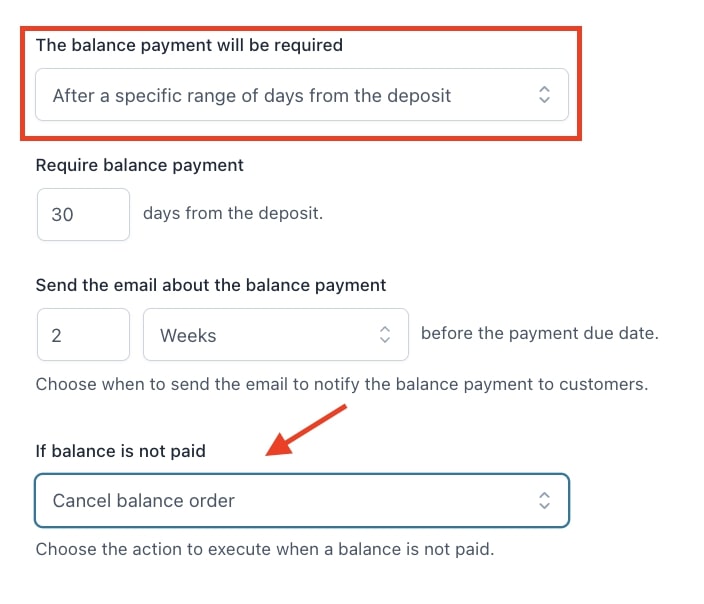
The balance payment will be required: here, you can select one of the two options available:
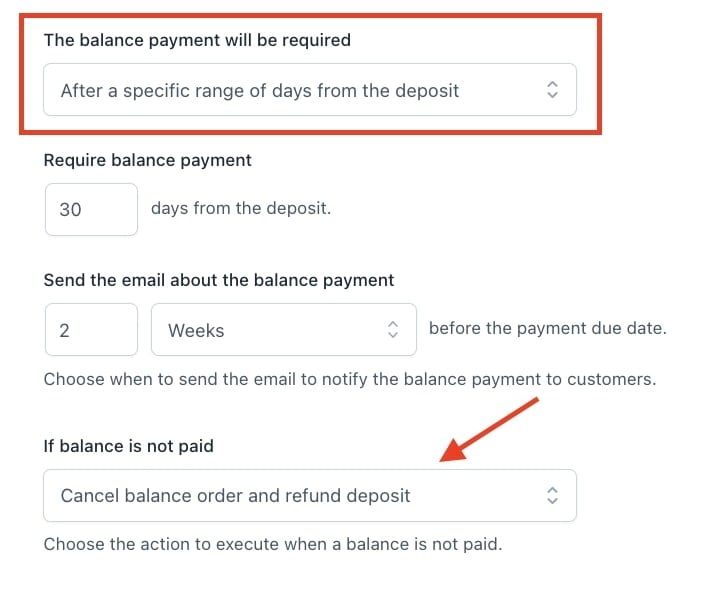
After a specific range of days from the deposit: this option allows you to specify the number of days from the deposit to require the payment of the balance orders;
Require balance payment: enter the number of days;
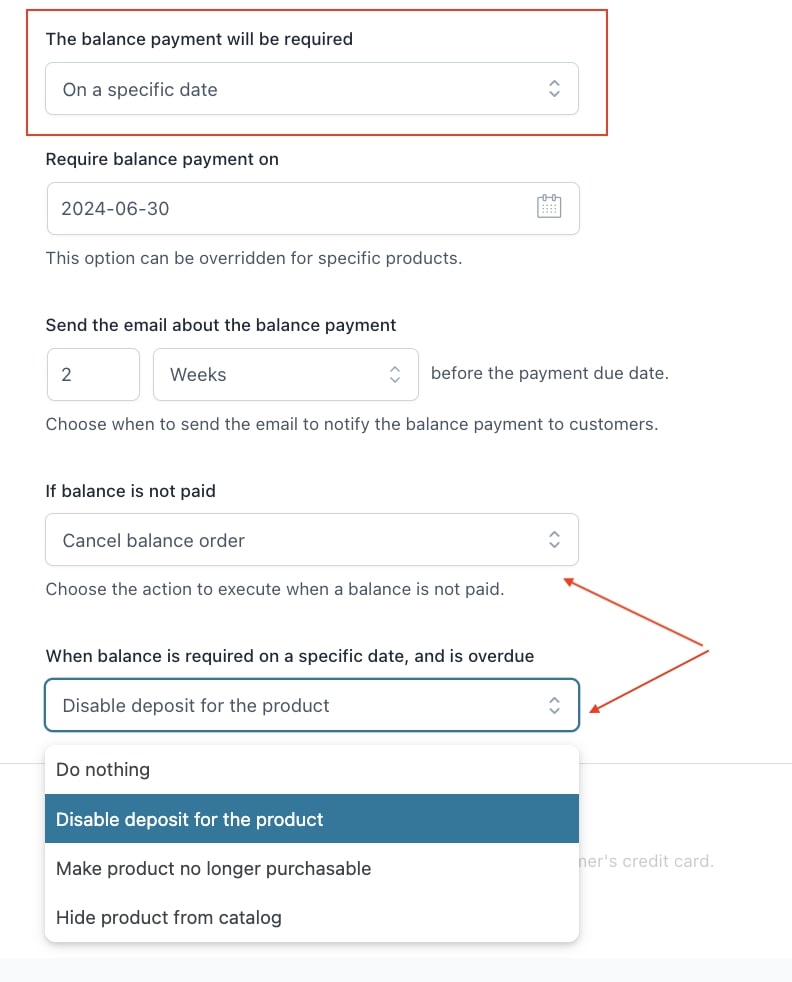
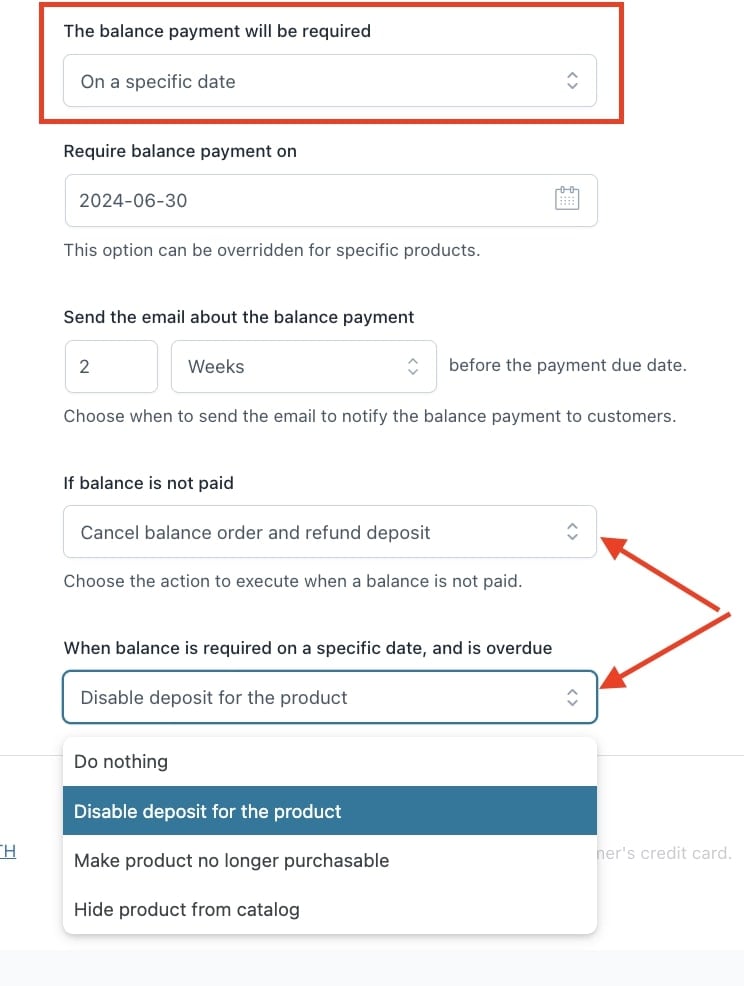
On a specific date: this option allows you to choose a date from the calendar to require the payment of the balance orders;
Send the email about the balance payment: choose how many days, weeks, or months before the payment date to send the balance payment email;
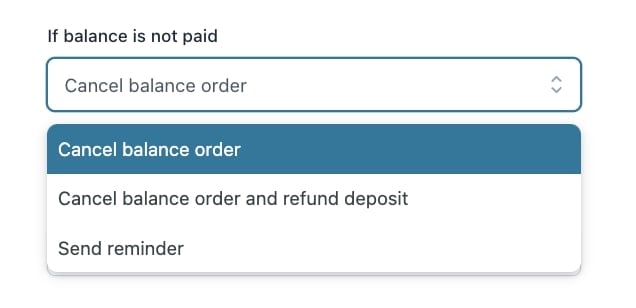
If balance is not paid: if the balance order won’t be paid within the specified number of days, you can choose one of the following actions:
Cancel the balance order;
Cancel the balance order and refund the deposit;
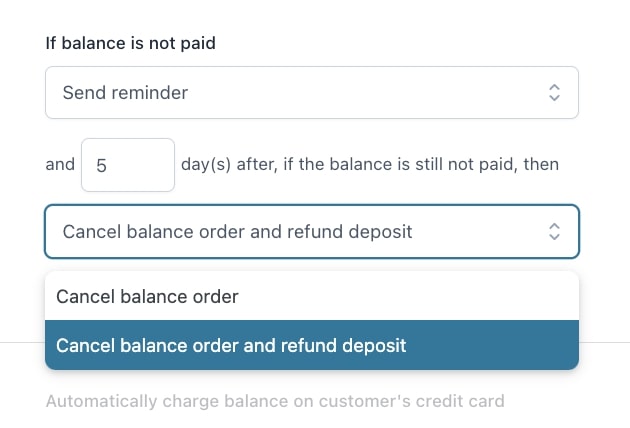
Send reminder.
Go to this page to learn how to manage balance orders that haven’t been paid, and the automatic actions you can apply.
Let’s see the automatic actions you can apply when customers don’t pay the balance order.
In the section Balance options, you can find the option If balance is not paid through which you can manage these cases according to when the payment is required.
If the balance isn’t paid within the previously set specified number of days from the deposit, the order will be automatically canceled, and the customer will no longer be able to complete the payment. You can manually process the refund of the paid deposit from the edit page of the balance order.
Balance required on a specific date
If the balance isn’t paid within the previously set date, the order will be automatically canceled, and the customer will no longer be able to complete the payment. You can manually process the refund of the paid deposit from the edit page of the balance order.
Finally, you can also decide what action to apply on the product that has the deposit option enabled and requires the balance to be paid within the specified date. Through the option When balance is required on a specific date, and is overdue you can choose to:
Do nothing
Disable deposit for the product
Make product no longer purchasable
Hide product from catalog
Cancel the balance order and refund the deposit
Balance required after a specific range of days
If the balance isn’t paid within the specified number of days from the deposit previously set, the balance order will be automatically canceled and the deposit order refunded.
Automatic refunds can be processed only for deposits paid with one of the WooCommerce gateways supporting this action.
Balance required on a specific date
If the balance isn’t paid within the specified date previously set, the balance order will be automatically canceled and the deposit order refunded.
Automatic refunds can be processed only for deposits paid with one of the WooCommerce gateways supporting this action.
Finally, you can also decide what action to apply on the product that has the deposit option enabled and requires the balance to be paid within the specified date. Through the option When balance is required on a specific date, and is overdue you can choose to:
Do nothing
Disable deposit for the product
Make product no longer purchasable
Hide product from catalog
Send reminder
Regardless of when the payment of the balance order is required, you can choose to send a reminder email to customers to invite them to pay for the balance and set an expiration in days. If the balance order isn’t paid within the specified days, you can choose one of the following actions:
cancel the balance order
cancel the balance order and refund the deposit.
Automatic refunds can be processed only for deposits paid with one of the WooCommerce gateways supporting this action.
After activating the plugin, go to Balance options > Stripe options to configure the following settings:
Automatically charge balance on customer’s credit card: enable this option to automatically charge customers’ credit cards to pay their balance orders;
Charge balance on credit card:
Only if the customers paid the deposit with a credit card: select this option to automatically charge only those customers who paid the deposit with a credit card;
Forced for all customers, regardless of deposit’s payment method: select this option to automatically charge all customers who paid the deposit with any payment method and have a valid credit card registered with Stripe;
Notice of automatic charge to show in “Payment Method” section and at checkout: enter the message to show to your customers to inform them about the automatic charge. This notice will show both in the Payment methods section in their My Account and on the Checkoutpage.
Now let’s see how you can customize the plugin button, notices, labels, and messages.
First of all, go to the section Customization and start configuring the available options:
Hide “Pay deposit” button on shop pages: enable this option if you don’t want to show the Pay deposit button on your shop pages;
Show custom notices on product page: enable this option if you want to show a specific custom notice about the deposit on all your product pages;
Notice to show on products with balance payment required online: use the advanced editor to insert the notice to show on product pages for balance payments required online;
Notice to show on products with balance payment not managed online: use the advanced editor to insert the notice to show on product pages for balance payments that won’t be managed online;
Notice position in product page: choose the position where you want to show your custom notice from:
Do not show any note on product
Below product title
Below product price
Below product excerpt
Below single Add to Cart
Below product meta
Below product share
Example of custom notice:
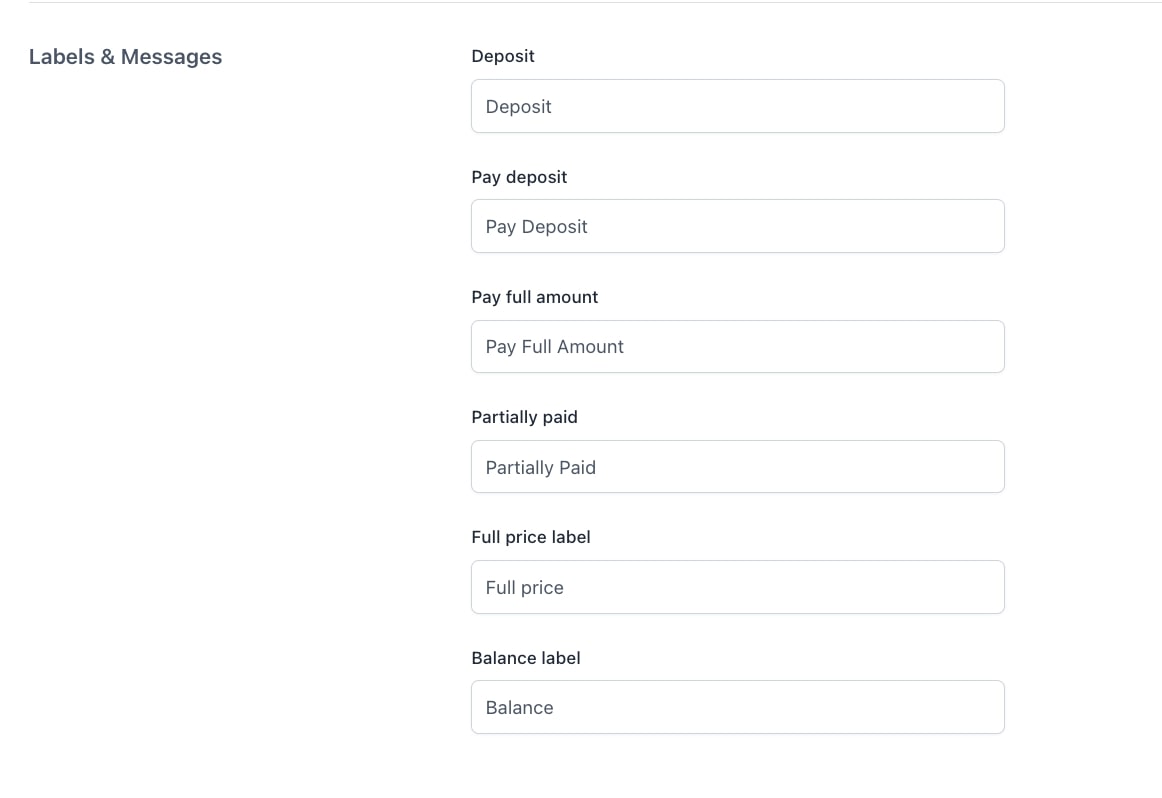
Labels & Messages
The second set of options lets you customize the following labels and messages shown on the frontend by the plugin.
Let’s now see how to manage automatic email notifications from the plugin panel.
Go to the section Email settings and choose the emails you want to automatically send to the site admin and customers on specific conditions:
New deposit for admin
New deposit for customer
Balance expiration reminder
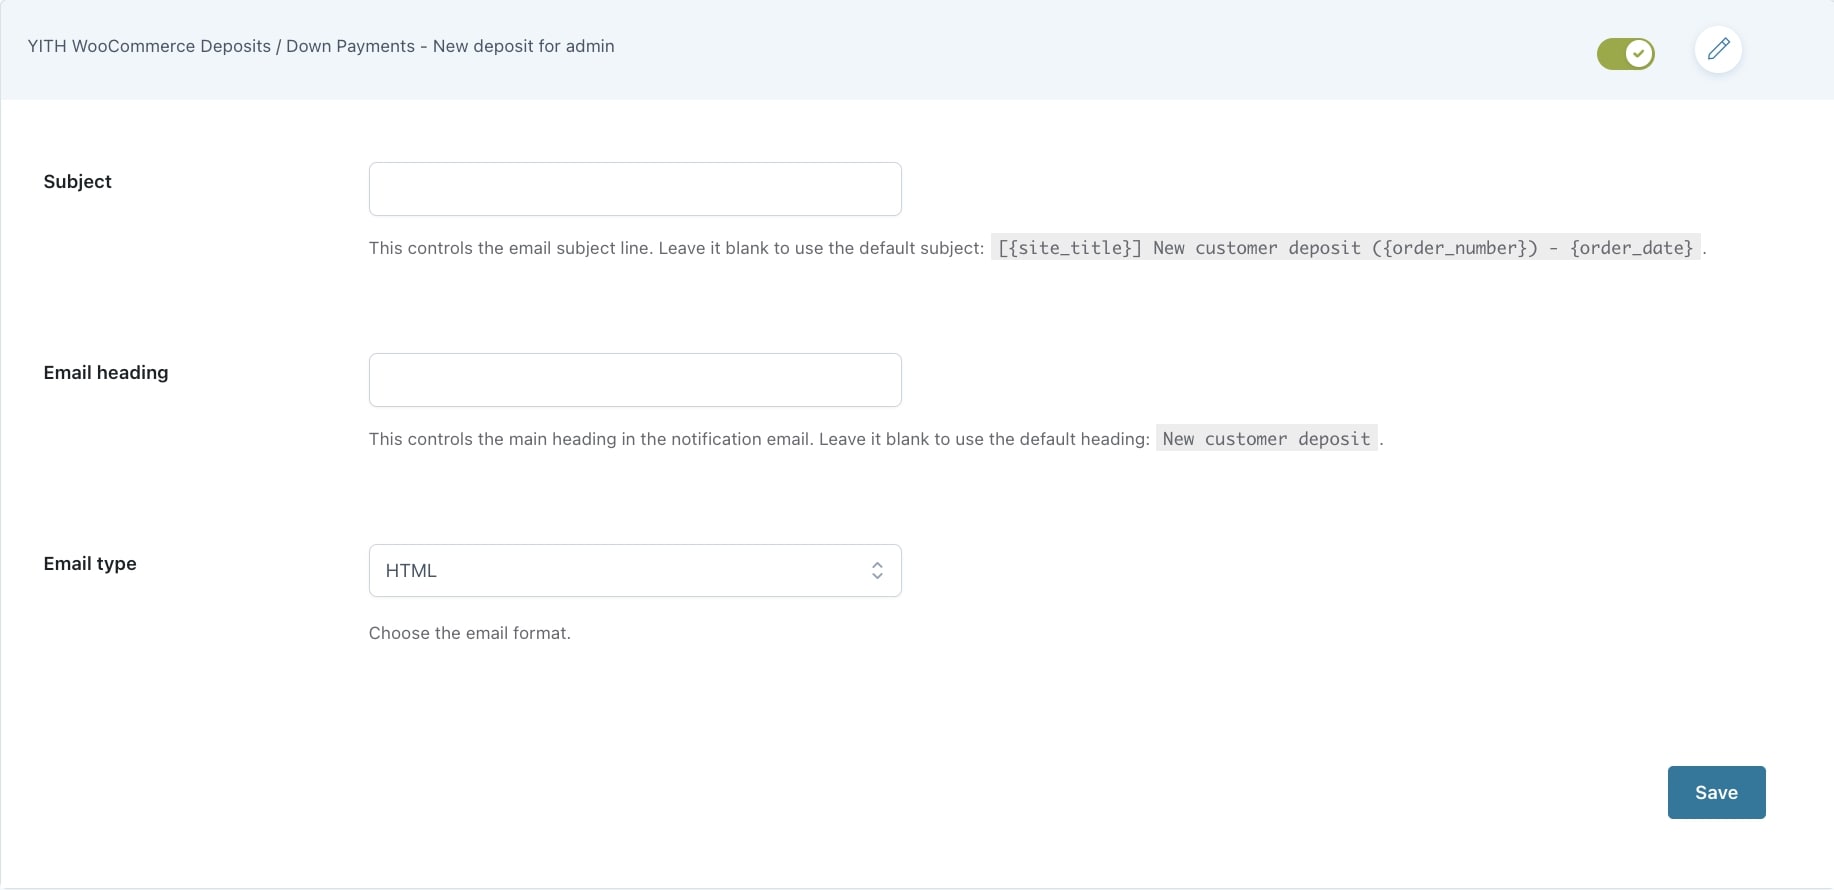
YITH WooCommerce Deposits / Down Payments – New deposit for admin
This is the email sent to the admin whenever a user pays a deposit for a product. For this email, you can set:
Subject: type the text for the email subject. Leave empty to use the default subject: [{site_title}] New customer deposit ({order_number}) – {order_date}.
Email heading: type the text for the email heading. Leave empty to use the default heading: New customer deposit.
Email type: choose the email format from plain text, HTML, or multipart.
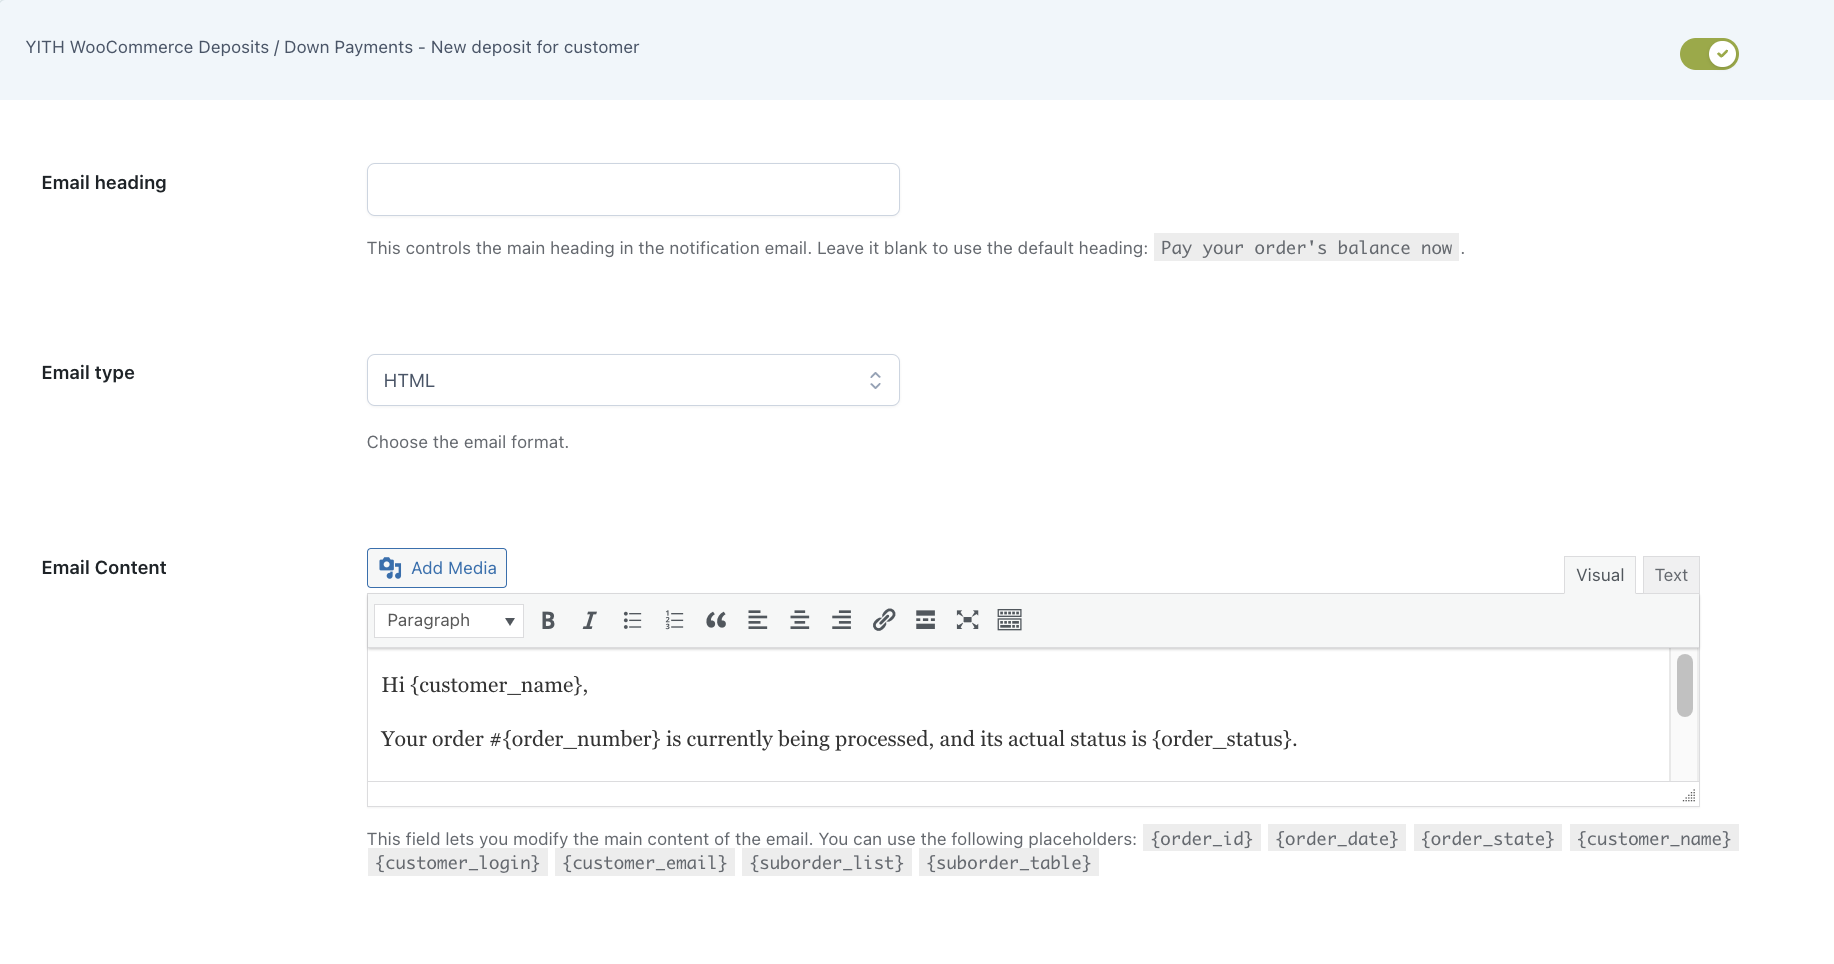
YITH WooCommerce Deposits / Down Payments – New deposit for customer
This is the email sent to the customer whenever they pay a deposit for a product. For this email, you can set:
Email heading: type the text for the email heading. Leave empty to use the default heading: Pay your order’s balance now.
Email type: choose the email format from plain text, HTML, or multipart.
Email content: use the editor to enter your custom email content. You can use the following placeholders: {order_id}, {order_date}, {order_state}, {customer_name}, {customer_login}, {customer_email}, {suborder_list}, {suborder_table}.
YITH WooCommerce Deposits / Down Payments – Balance expiration reminder
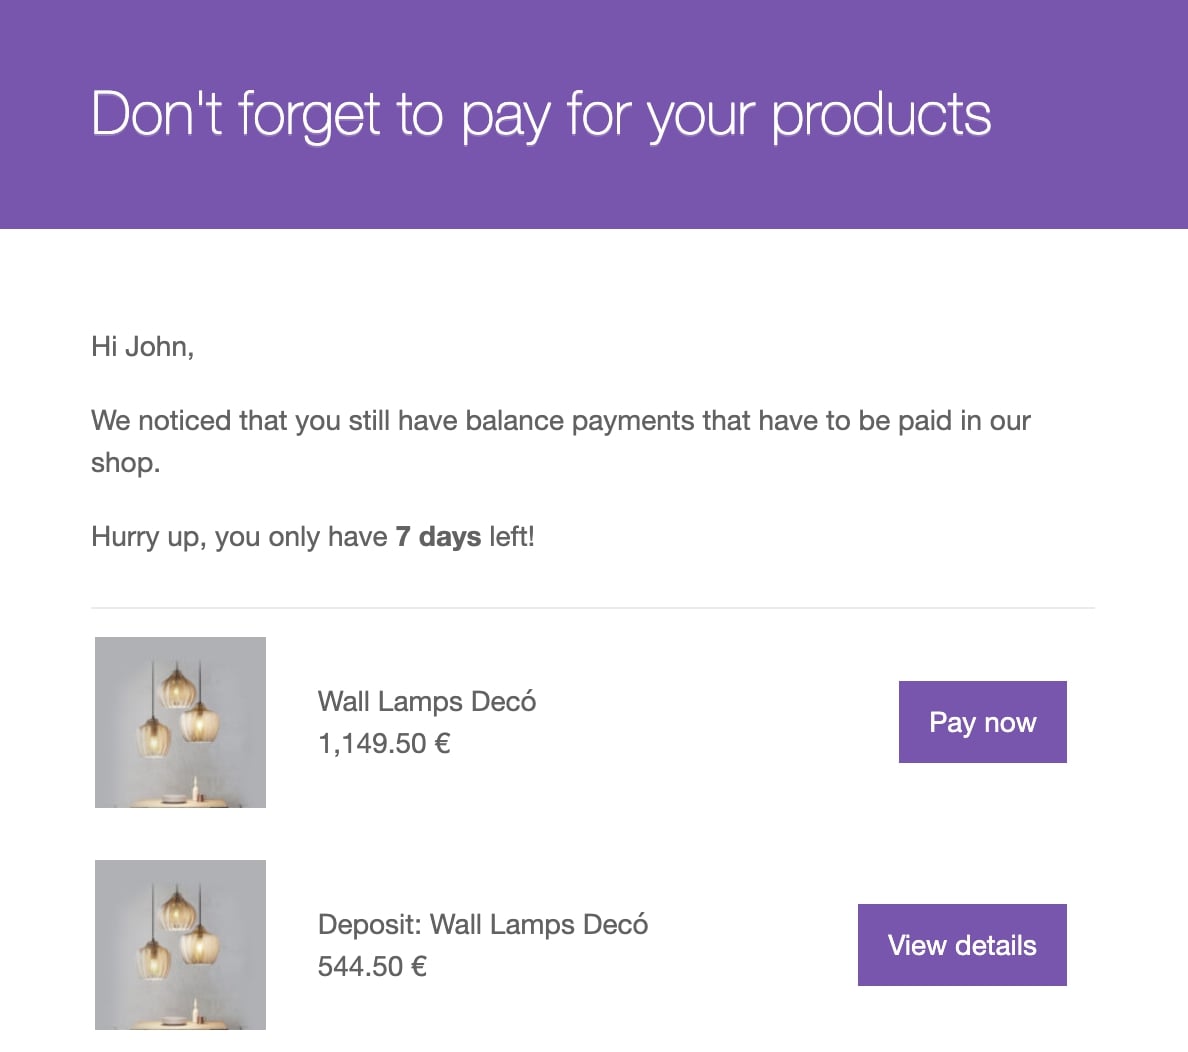
This email is sent to customers as a balance payment reminder. For automatic charges (check Stripe options here), the email is sent as a reminder of the upcoming payment for which customers don’t need to execute any further action. For manual payments, the email will include the link that redirects the customer to the payment page.
Email heading: type the text for the email heading. Leave empty to use the default heading: Pay your order’s balance now.
Email type: choose the email format from plain text, HTML, or multipart.
Email content: use the editor to enter your custom email content. You can use the following placeholders: {order_id}, {order_date}, {order_state}, {customer_name}, {customer_login}, {customer_email}, {suborder_list}, {suborder_table}, {expiration_date} {days_before_expiration}.
The emails sent by the plugin are available in WooCommerce > Settings > Emails.
If you want to override your theme’s default email template, copy the .php template file of the plugin and paste it into the theme. You can do it manually or by clicking on the Copy file to theme button at the bottom of the page.
A copy of the file in the specified path is created and can be changed as you prefer. If you cannot copy the file through the button, to override and edit the email template, copy the path specified on the page into the theme folder.
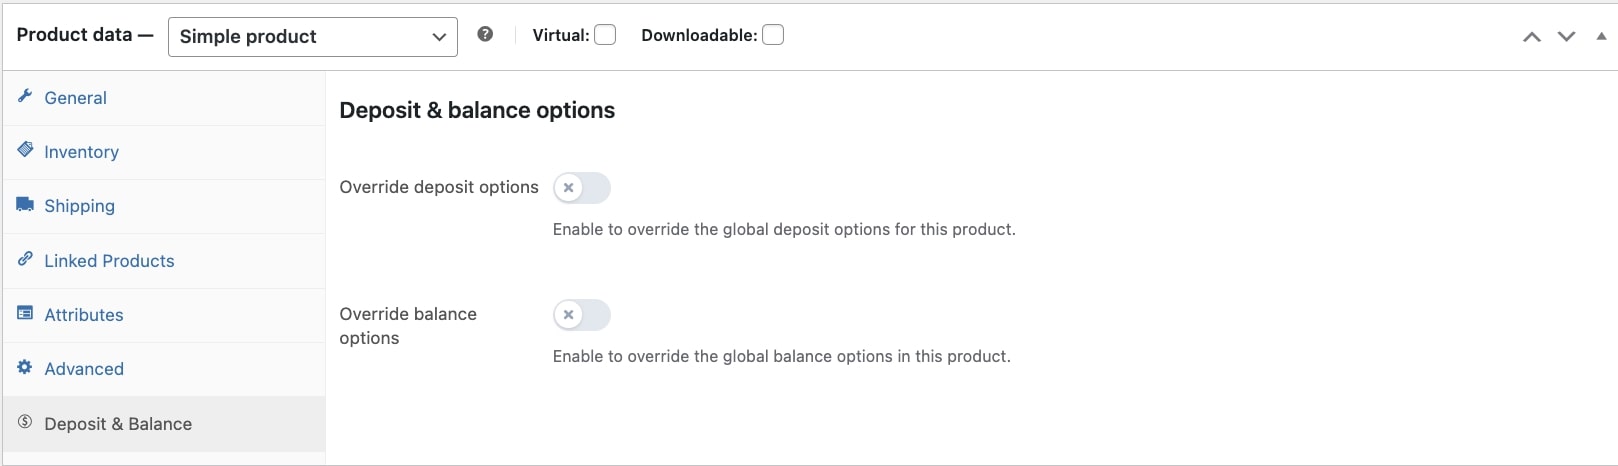
If you need to manage deposit and balance options at the product level, you can override the global settings from the product edit page. Let’s see how.
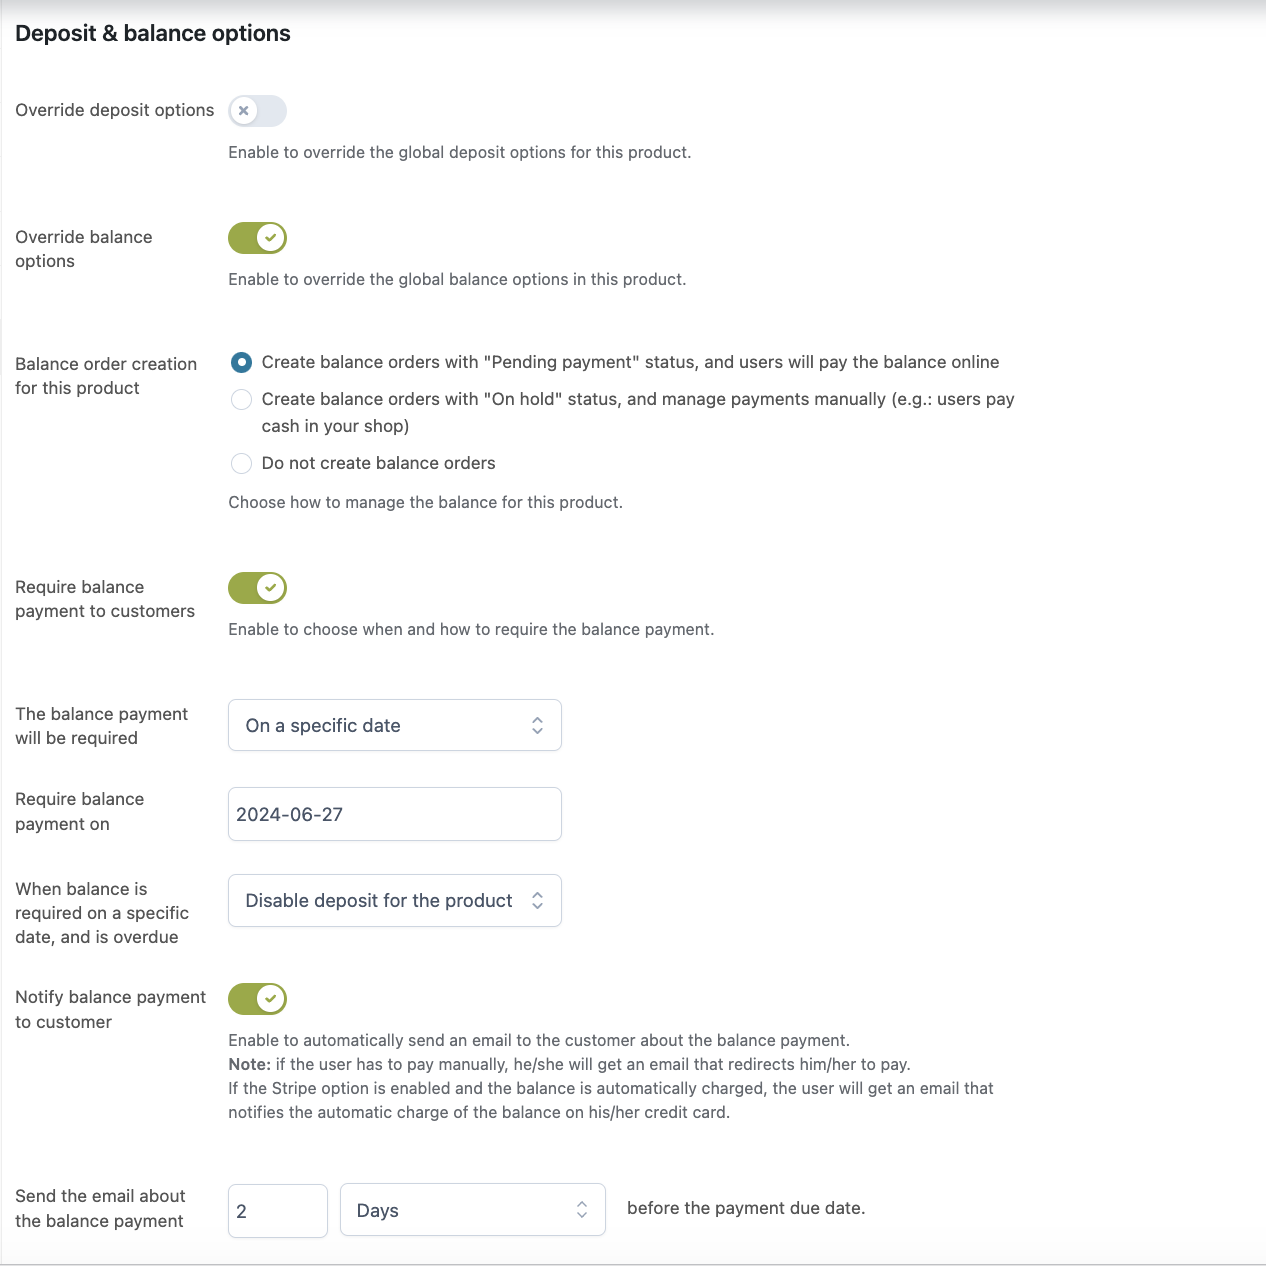
The plugin adds a new section – Deposit & Balance – to the product edit page where you can find two options to override deposit and balance general settings.
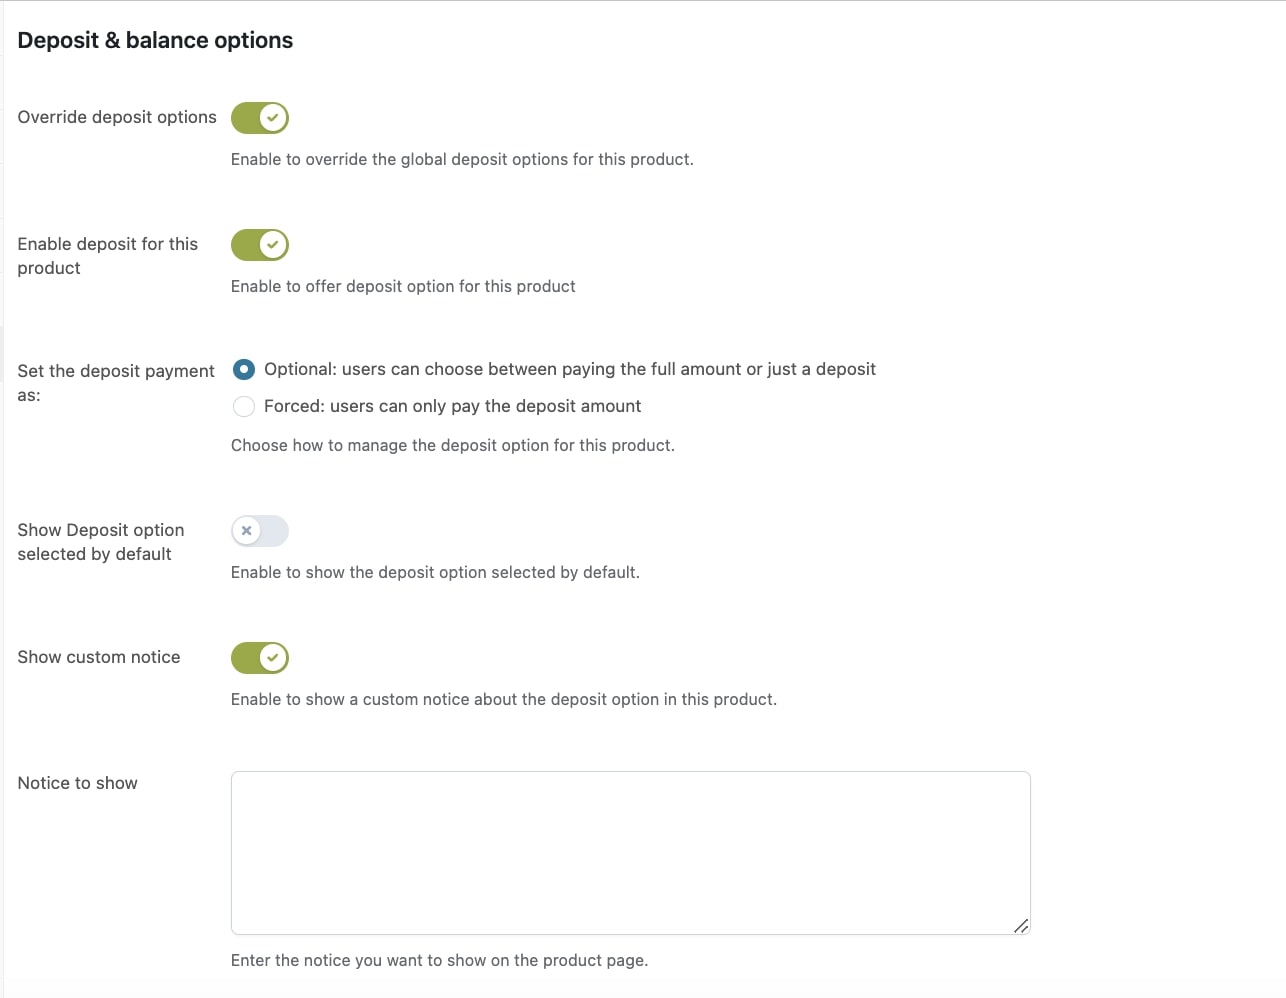
Override deposit options
To override the global deposit settings, enable the options Override deposit options and Enable deposit for this product.
Now you can decide how to manage the deposit payment through the option Set the deposit payment as:
By choosing Optional, users will be free to decide whether to pay for the whole product price or leave only a deposit.
Optionally, you can also show the deposit selected by default by enabling the option Show deposit option selected by default.
On the contrary, if you want your users to only have the option to pay for a deposit without giving them the possibility to pay the full amount, you need to select Forced.
To add a notice about the deposit option on the product page, enable Show custom notice and insert the text in Notice to show.
Override balance options
To override the global balance settings, enable the option Override balance options.
Now you can decide how to manage balance orders through the option Balance order creation for this product by choosing from:
Create balance orders with “Pending payment” status, and users will pay the balance online:by selecting this option, balance orders will get the Pending payment status. Users will have to pay the remaining balance on your online store.
Create balance orders with “On hold” status, and manage payments manually: by selecting this option, balance orders will get the On hold status. Users will have to pay the remaining balance manually, for example in cash in your physical store.
Do not create any balance order: by selecting this option, no balance order will be created.
If you want to push your customers to pay for their balance orders, just enable the option Require balance payment to customers.
Now you can define when the payment will be required by choosing from two options:
After a specific range of days from the deposit: this option allows you to specify the number of days from the deposit to require the payment of the balance orders.
On a specific date: this option allows you to choose a date from the calendar to require the payment of the balance orders.
Additionally, you will be able to decide the action to apply if the balance order ISN’T paid within the specified date. In the option When balance is required on a specific date, and is overdue you can choose to:
Do nothing
Disable deposit for the product
Make product no longer purchasable
Hide product from catalog
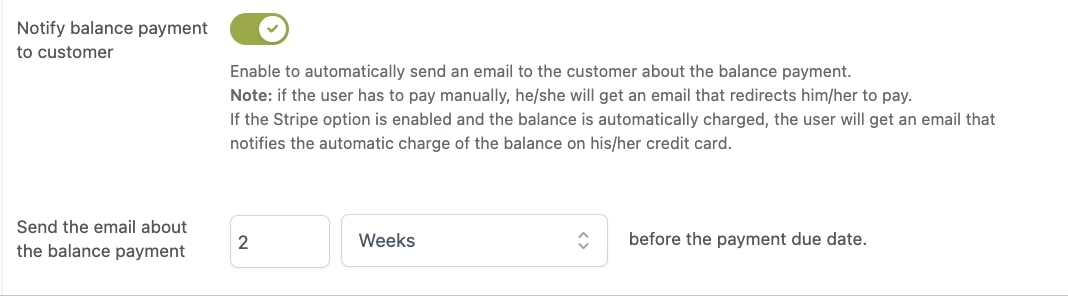
Finally, you can override the email notification about the balance payment by enabling the option Notify balance payment to customer. This email is sent to customers as a balance payment reminder. For automatic charges (check Stripe options here), the email is sent as a reminder of the upcoming payment for which customers don’t need to execute any further action. For manual payments, the email includes the link that redirects the customer to the payment page.
You can now choose when the balance payment email will be sent to customers. Specify a value and select days, weeks, or months. For example, if you set 7 days, the customer will receive the notifications 7 days before the payment due date.
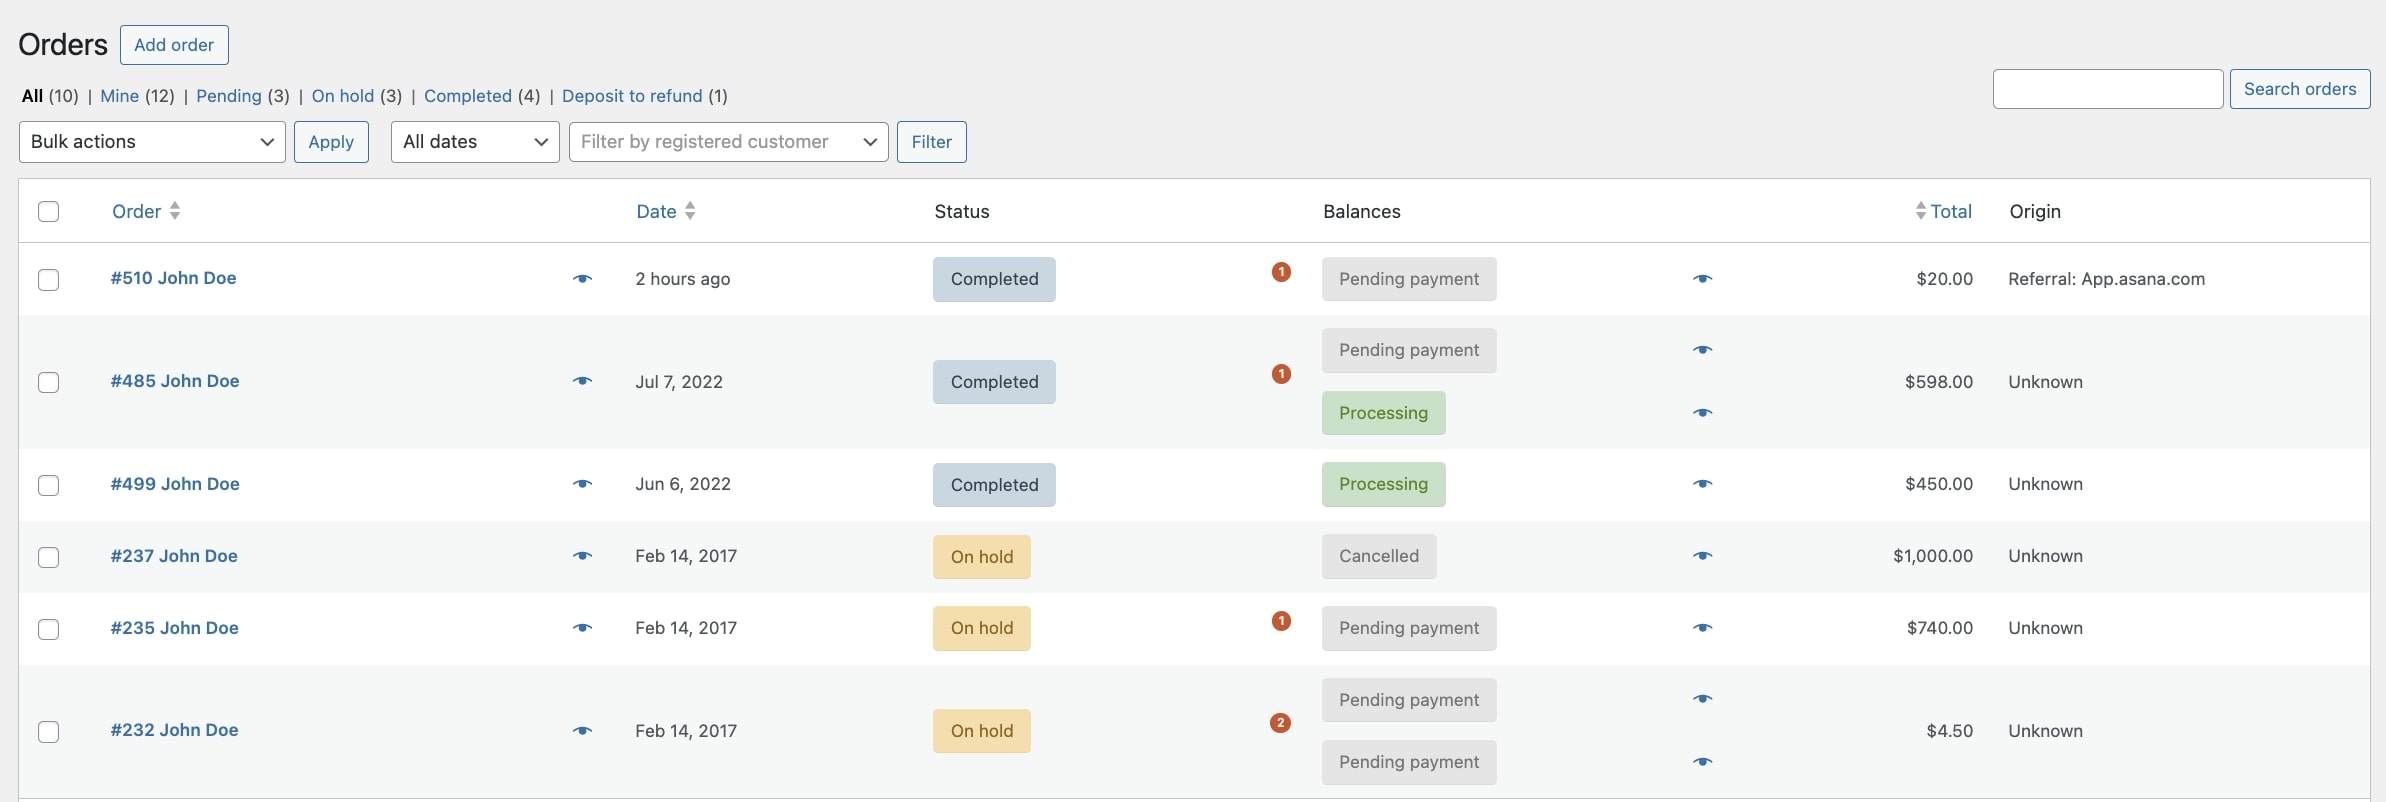
Every time a user purchases with an initial deposit, the system registers the main order with the amount of the paid deposit. Balance order will be generated or not based on what was previously set in Balance options.
You can easily spot the orders with deposits in WooCommerce > Orders.
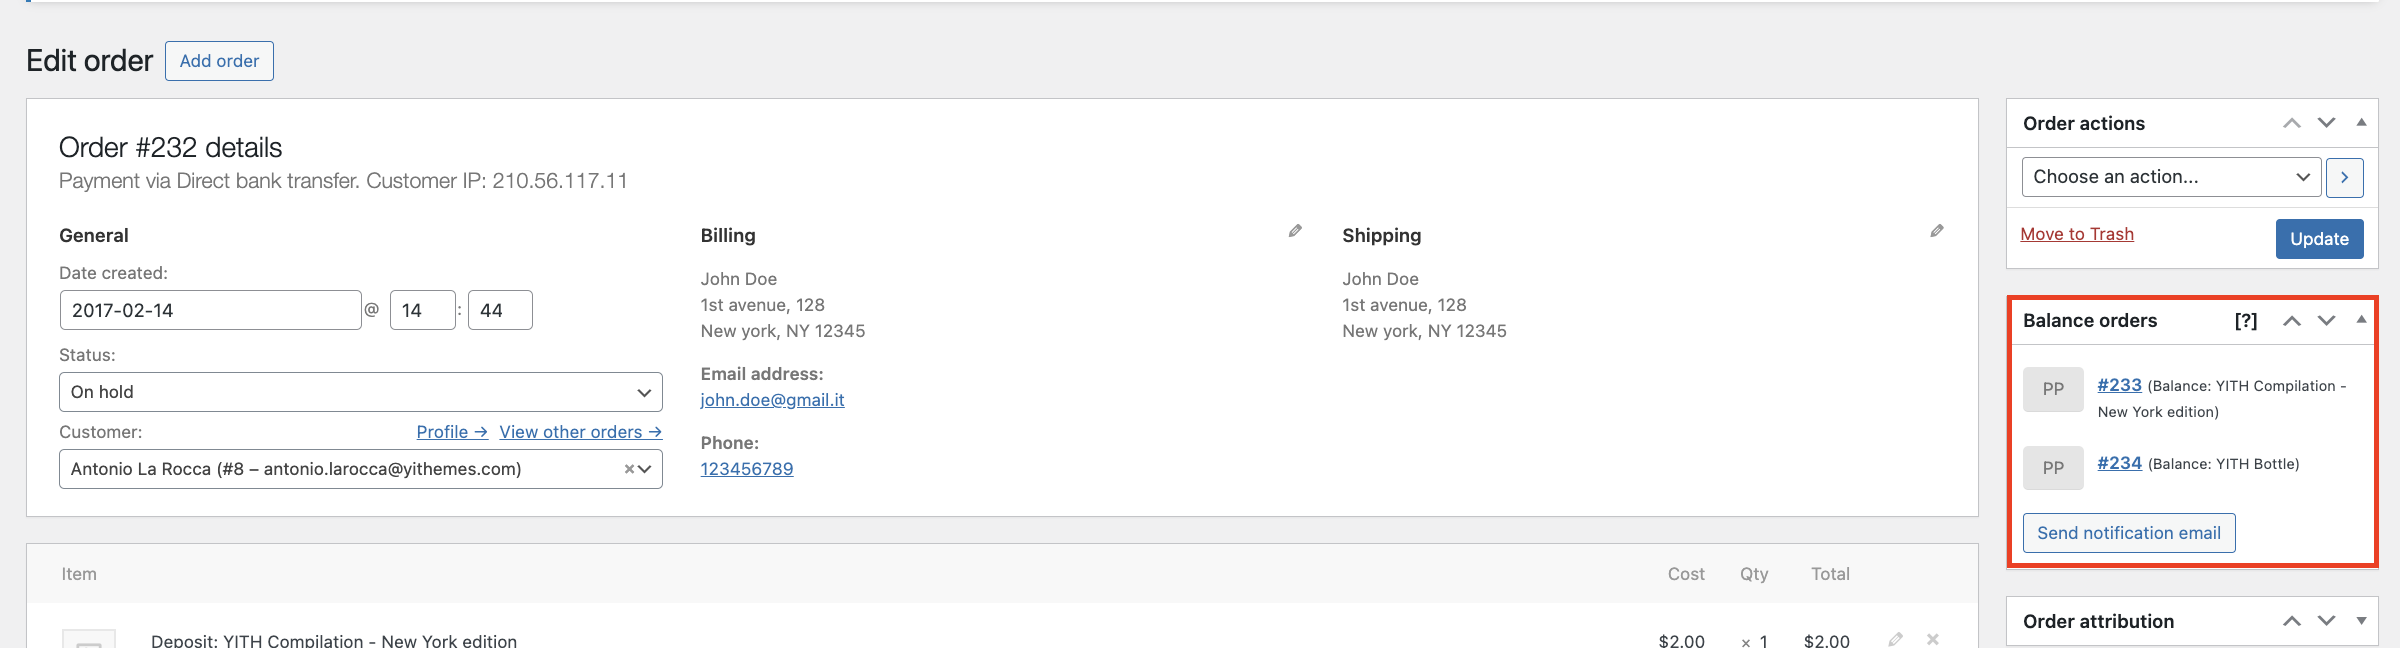
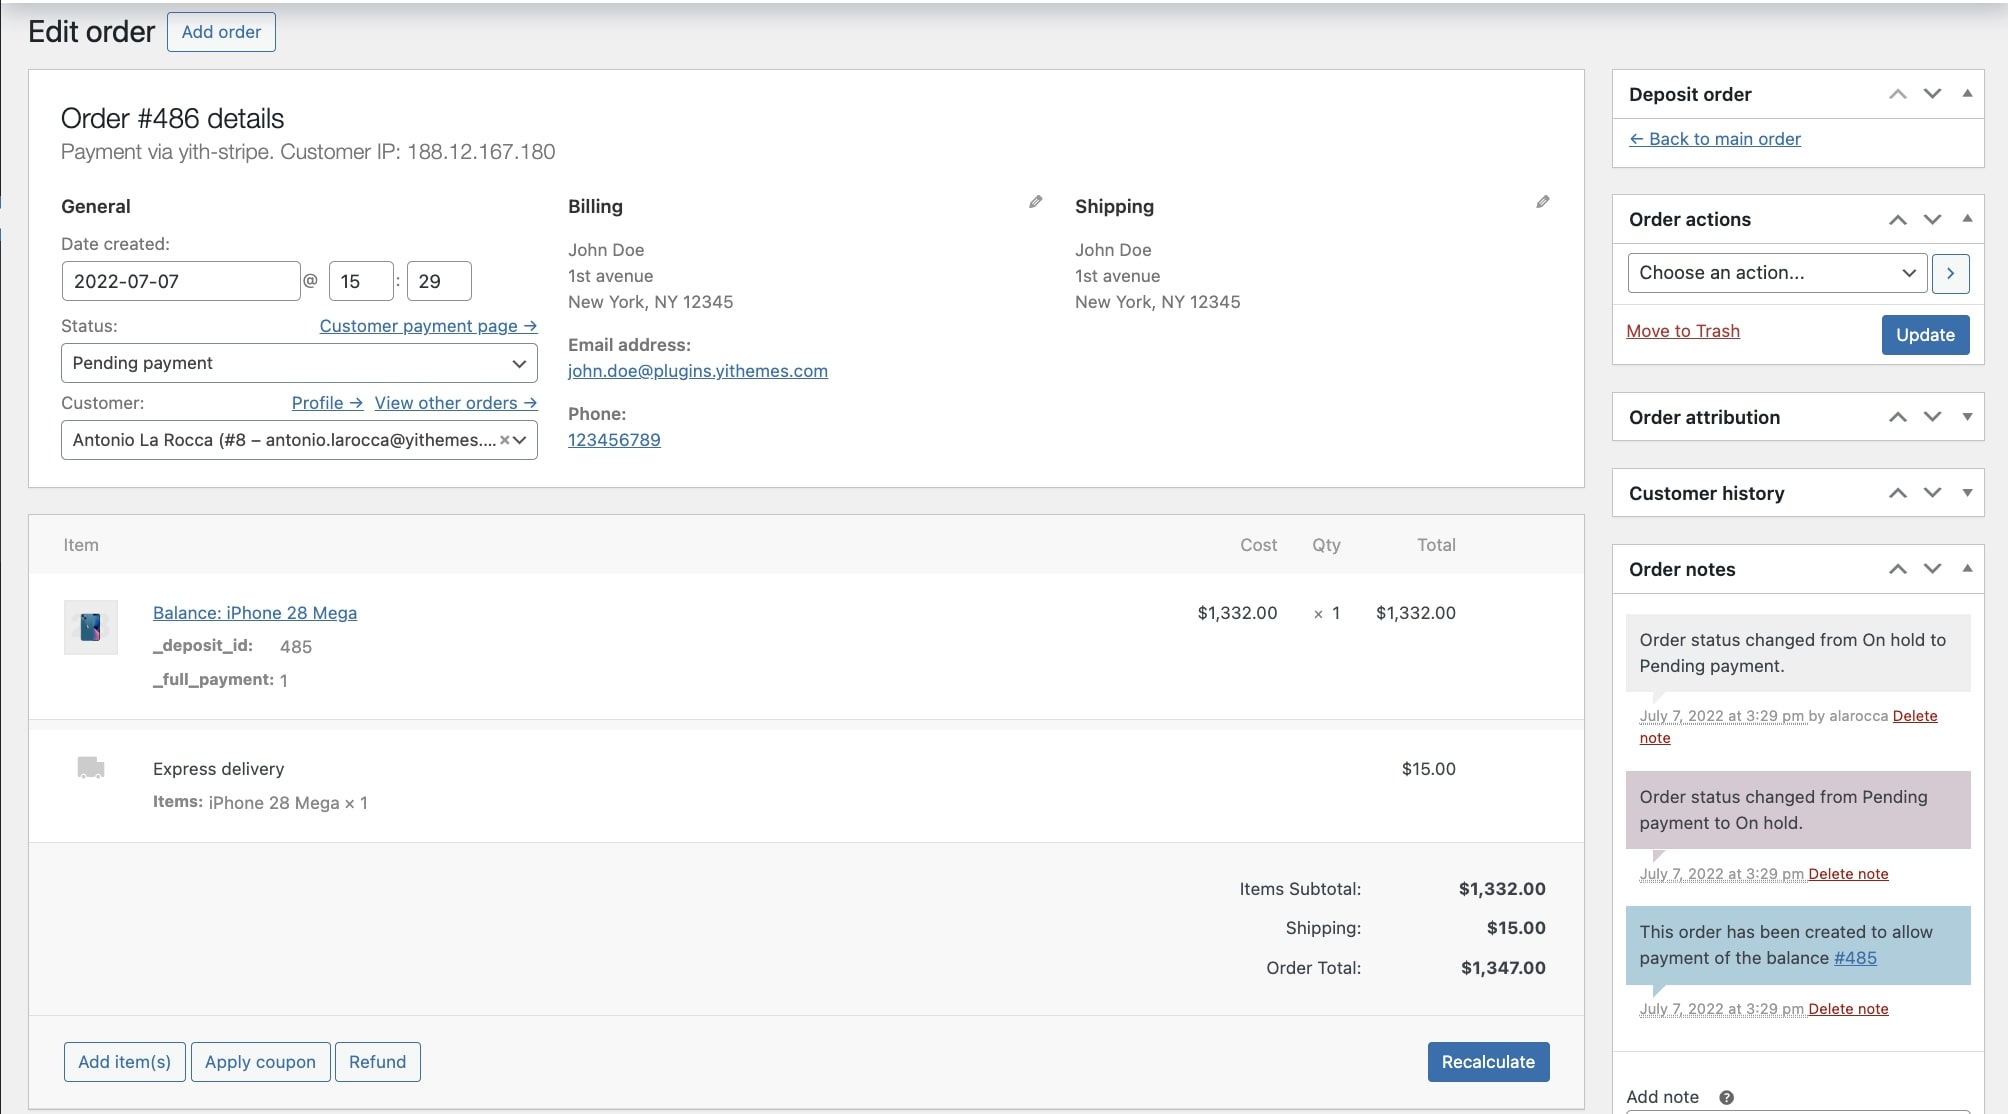
By accessing the edit order page, you will see a metabox with the created balance order(s).
You can now check every balance order detail by clicking on the related order number. The balance order will be linked to the product for which the deposit has been paid.