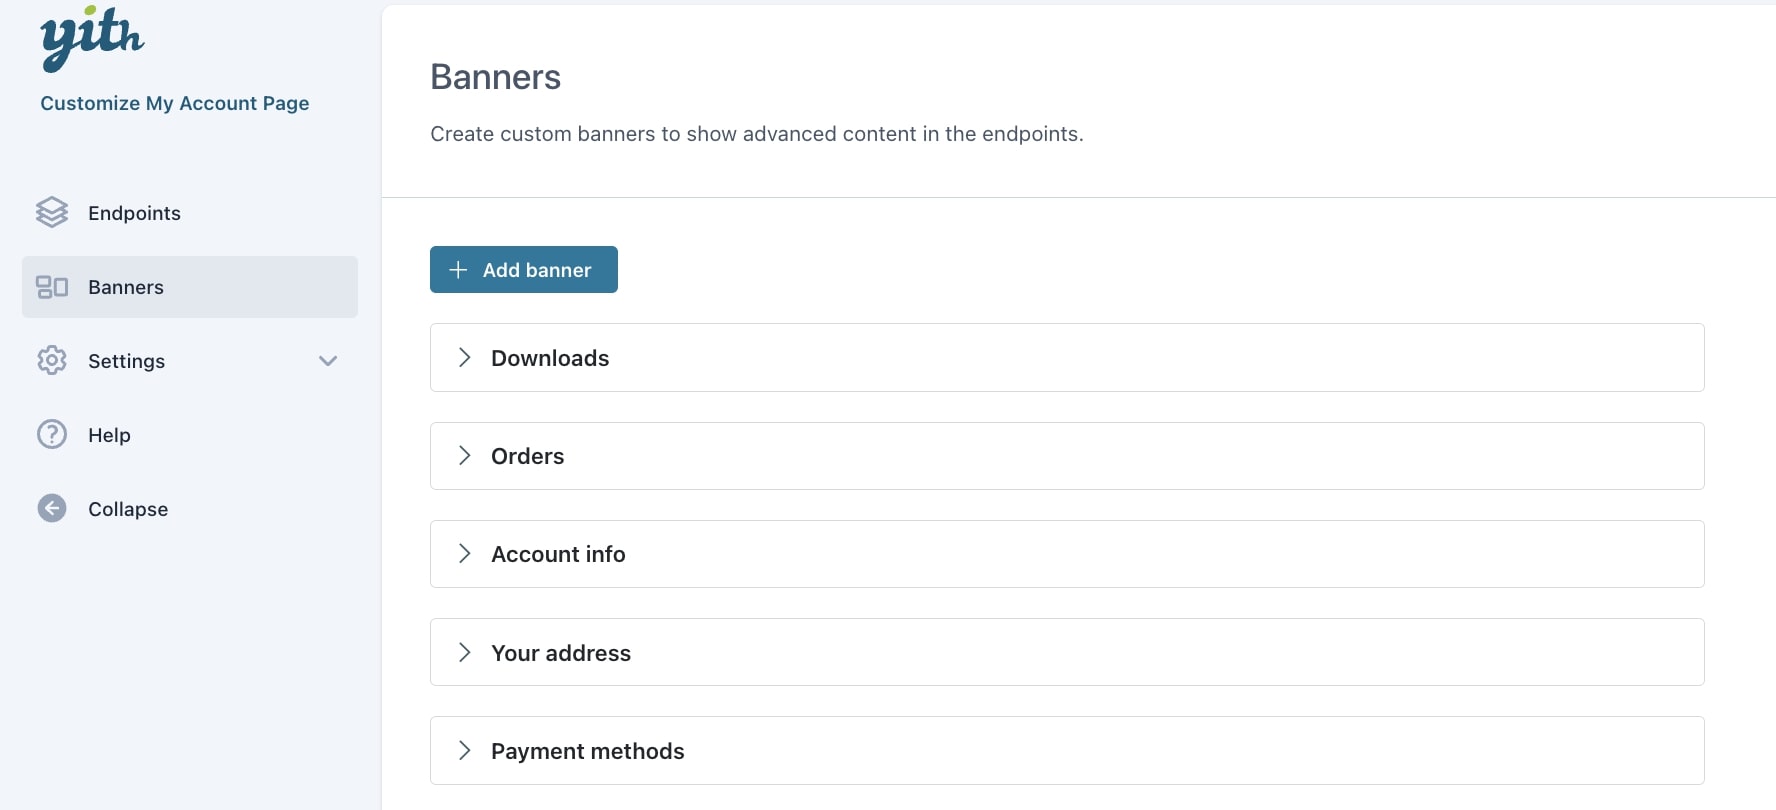
You can create and manage your banners from the Banners tab and insert the banner into the endpoints of your choice to show advanced content.
How to create a banner
Let’s now see how to create/edit a banner.
Open the banner you need to edit or click on the Add banner button to create a new one. You can then configure the available options:
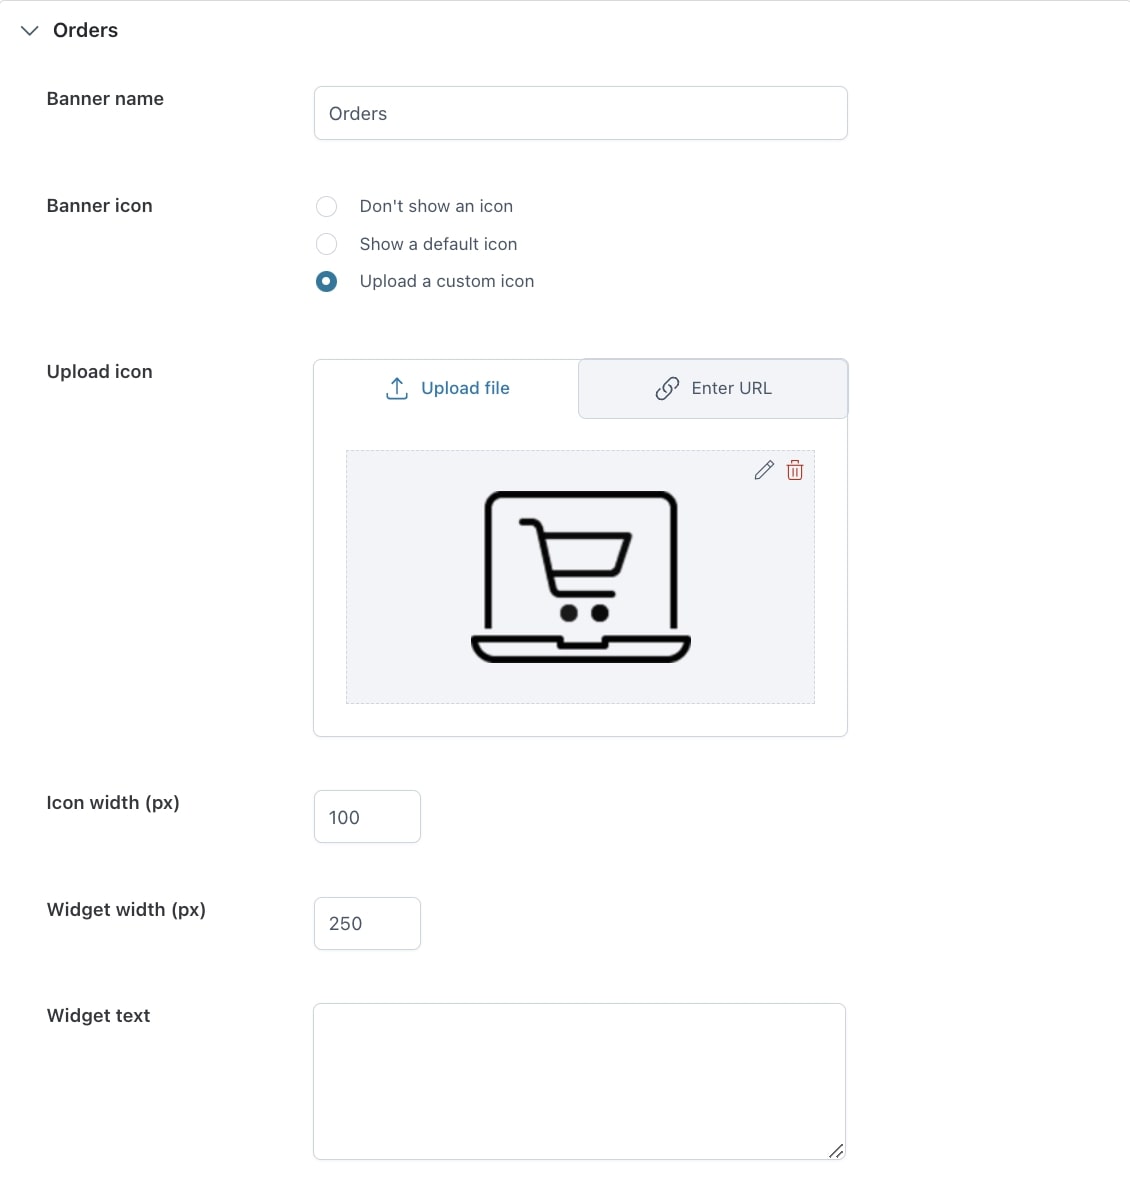
- Banner name: enter or edit the name of the banner;
- Banner icon: choose whether to show a default or custom icon or not. When selecting Upload a custom icon, an additional option will show through which you can upload your icon;
- Icon width: set the width of the icon (100 px by default);
- Widget width: set the width of the widget shown (250 px by default);
- Widget text: enter the text to show within the widget, below the icon;
![]()
- Banner colors: set the colors for the text, background, and border of the banner;
- Show badge with dynamic count of items: by enabling this option, you can decide to show the counts of
- orders
- or downloads
- Badge colors: set the color of the count badge. Available only if Show badge with dynamic count of items is enabled;
- Banner links: choose one of the following options:
- don’t add a link
- to a specific endpoint: you can link the banner to one of the available endpoints that you can choose through the dedicated option;
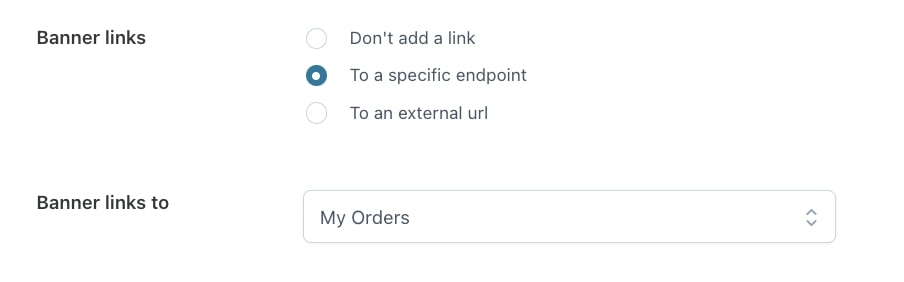
- to an external URL: you can link the banner to an external URL that you can add through the dedicated option;

- Show banner to: decide if you want to show the banner to all users or only those with a specific user role. When selecting Only users with a specific role, an additional option will show through which you can add the user roles that will be able to see the banner.

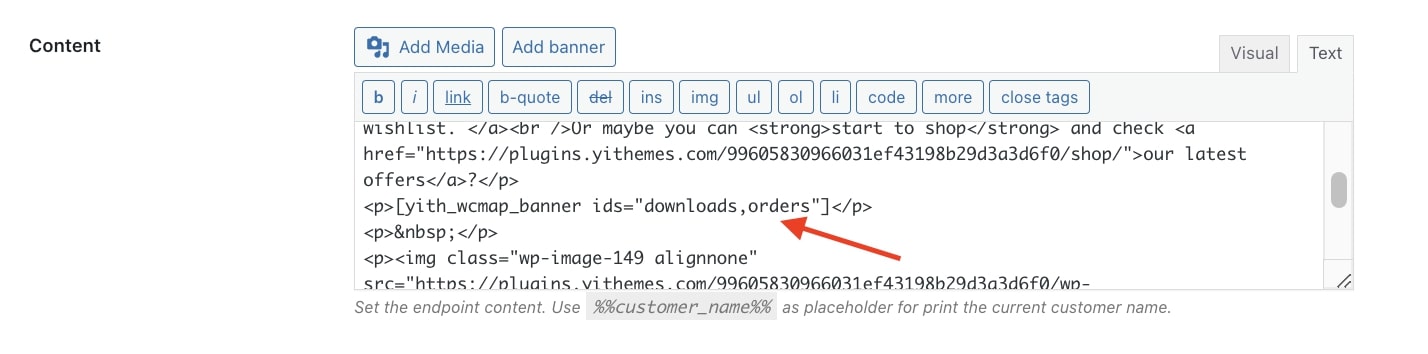
How to add a banner to your endpoint content?
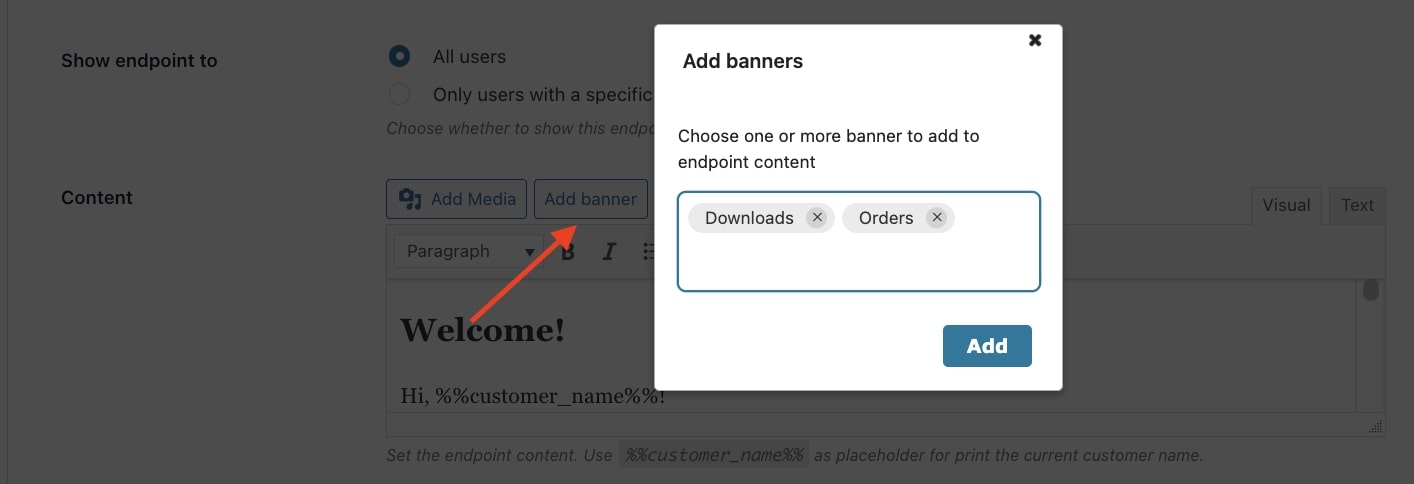
This button creates the shortcode for you. You only need to select the pre-set banners (created in the Banners tab) and click Add to create the shortcode that will be automatically added.
As an alternative you can create the shortcode [yith_wcmap_banner ids=”…..”] by adding the banner IDs that you want to show – for example, downloads, orders, etc.
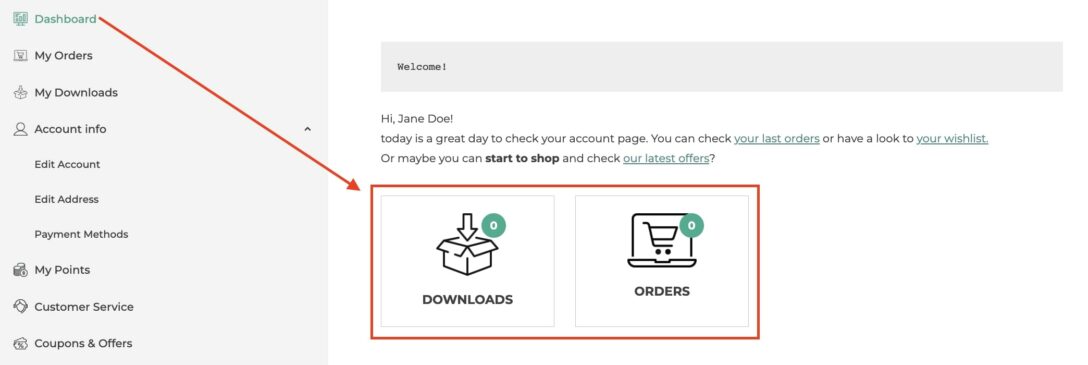
Banner example