After you enable the “Resources” module, you will find the Resources subtab (4) inside the plugin’s Configuration tab.
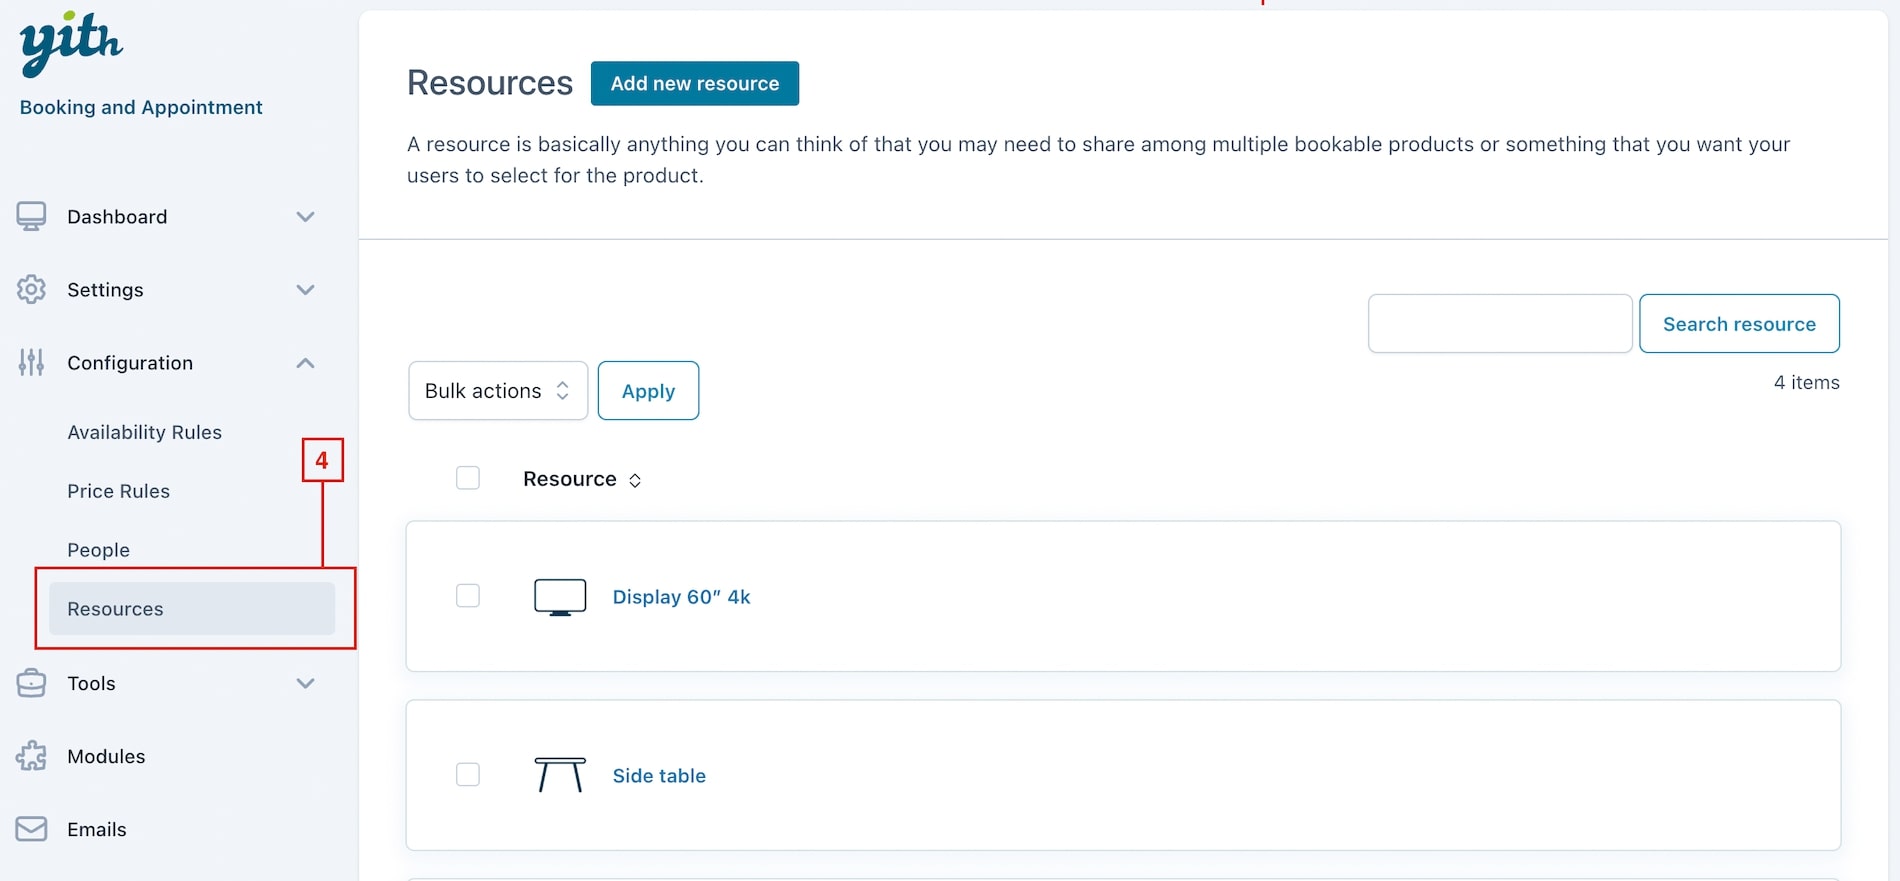
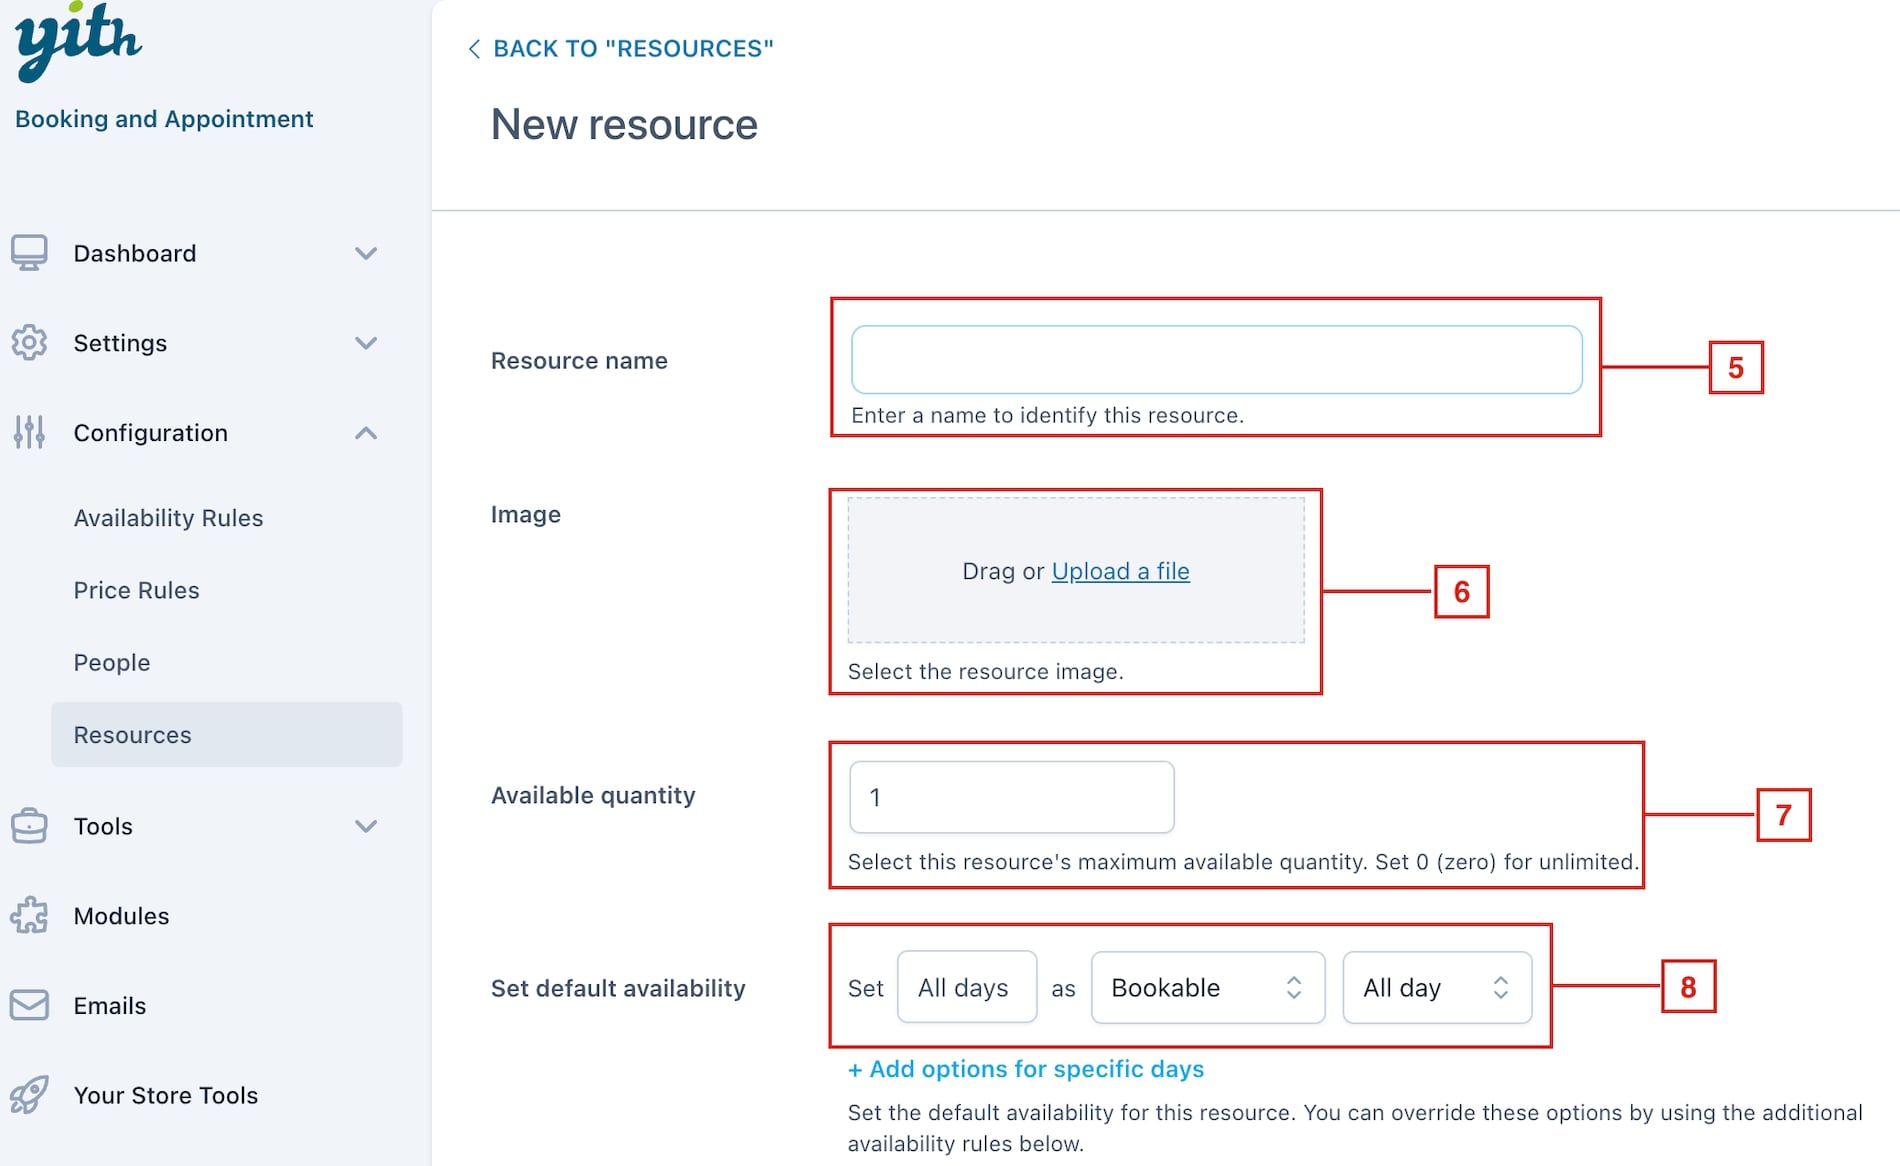
In this section, click on the “Add new resource” button to create unlimited resources: for each of them you can enter a name (5), upload an optional image (a photo or an icon to identify the resource) (6), set the available quantity (7), and the default availability (8).
Let’s see some examples.
- You rent out meeting rooms and workspaces and you only have three projectors available. Also, for some reason, you want to set some limits for this resource: the projector will be available only from 8 a.m. to 2 p.m. on Saturdays, and it will not be available on Sundays.
- Create the “projector” resource, and set the quantity to “3”
- Set the resource as “Bookable” “All days” for “All day”
- Click on “+ Add options for specific days”
- Set Saturdays as “Bookable” only from 8 a.m. to 2 p.m.
- Click again on “+ Add options for specific days”
- Set Sundays as “Not bookable” for “All day”

- You have a hairdressing salon with five hairstylists employed. You want to give your customers the option to choose the hairstylist when they book a haircut appointment, and you need to manage the hairstylists’ availability in an advanced way.
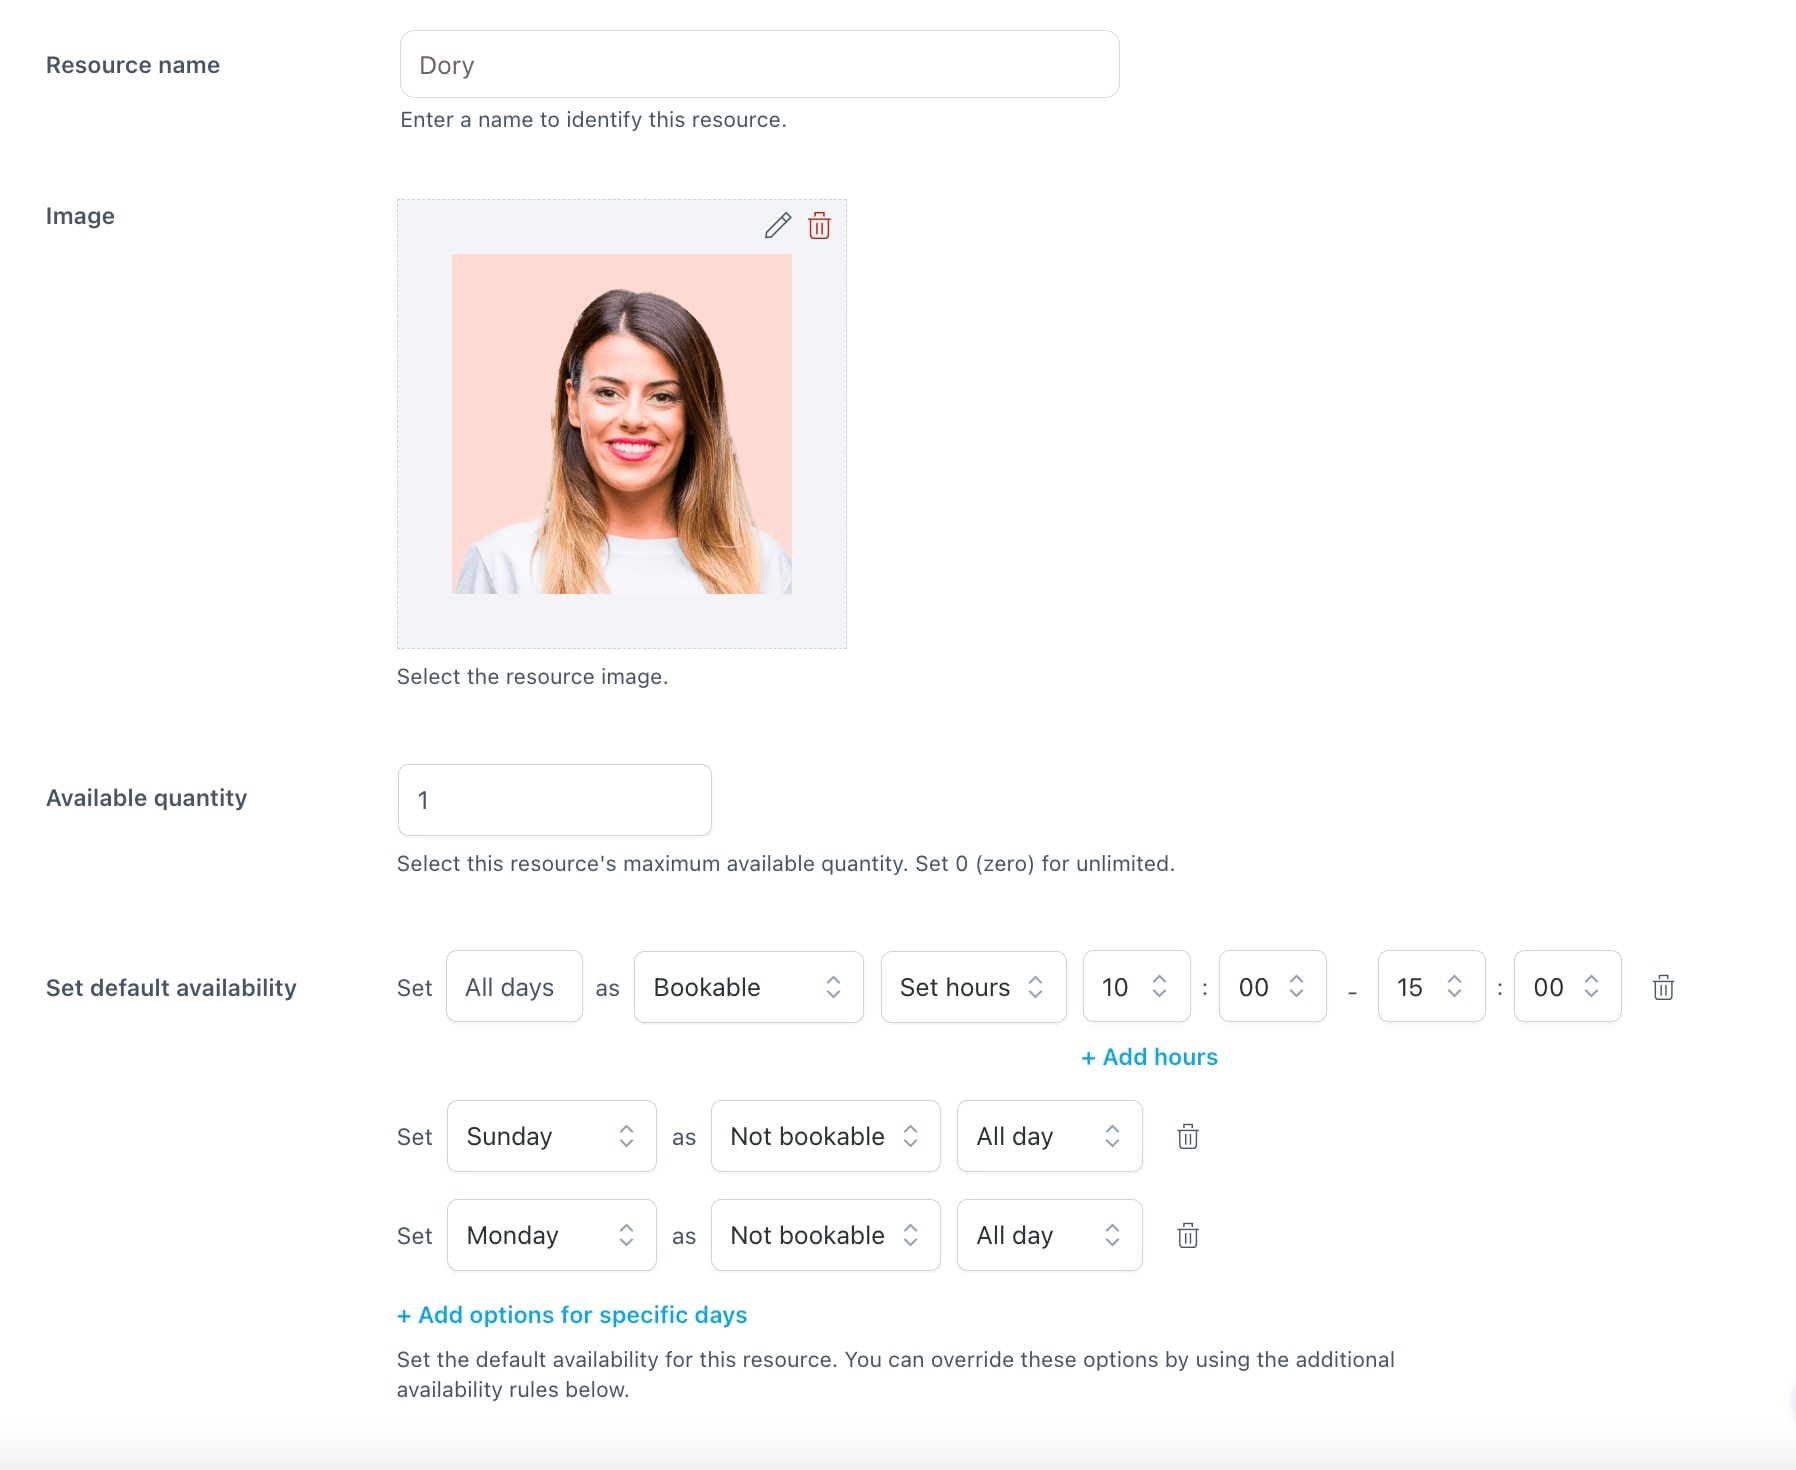
- Create a resource for each hairstylist. So, for example, let’s create the resource “Dory”. Add a photo to identify her
- Set 1 as available quantity
- Set Dory’s availability, according to her work shifts. So, let’s say you set her availability to “All days” from 10 a.m. to 3 p.m., and then on Sundays and Mondays she is not available so you set those days as “Not bookable”
Click on the “Save” button to save the resource.
Now you are able to configure resources for every bookable product. Read the “How to create a bookable product” section for reference.