View Product Page

Settings

In the plugin settings, you will be able to configure this payment gateway.

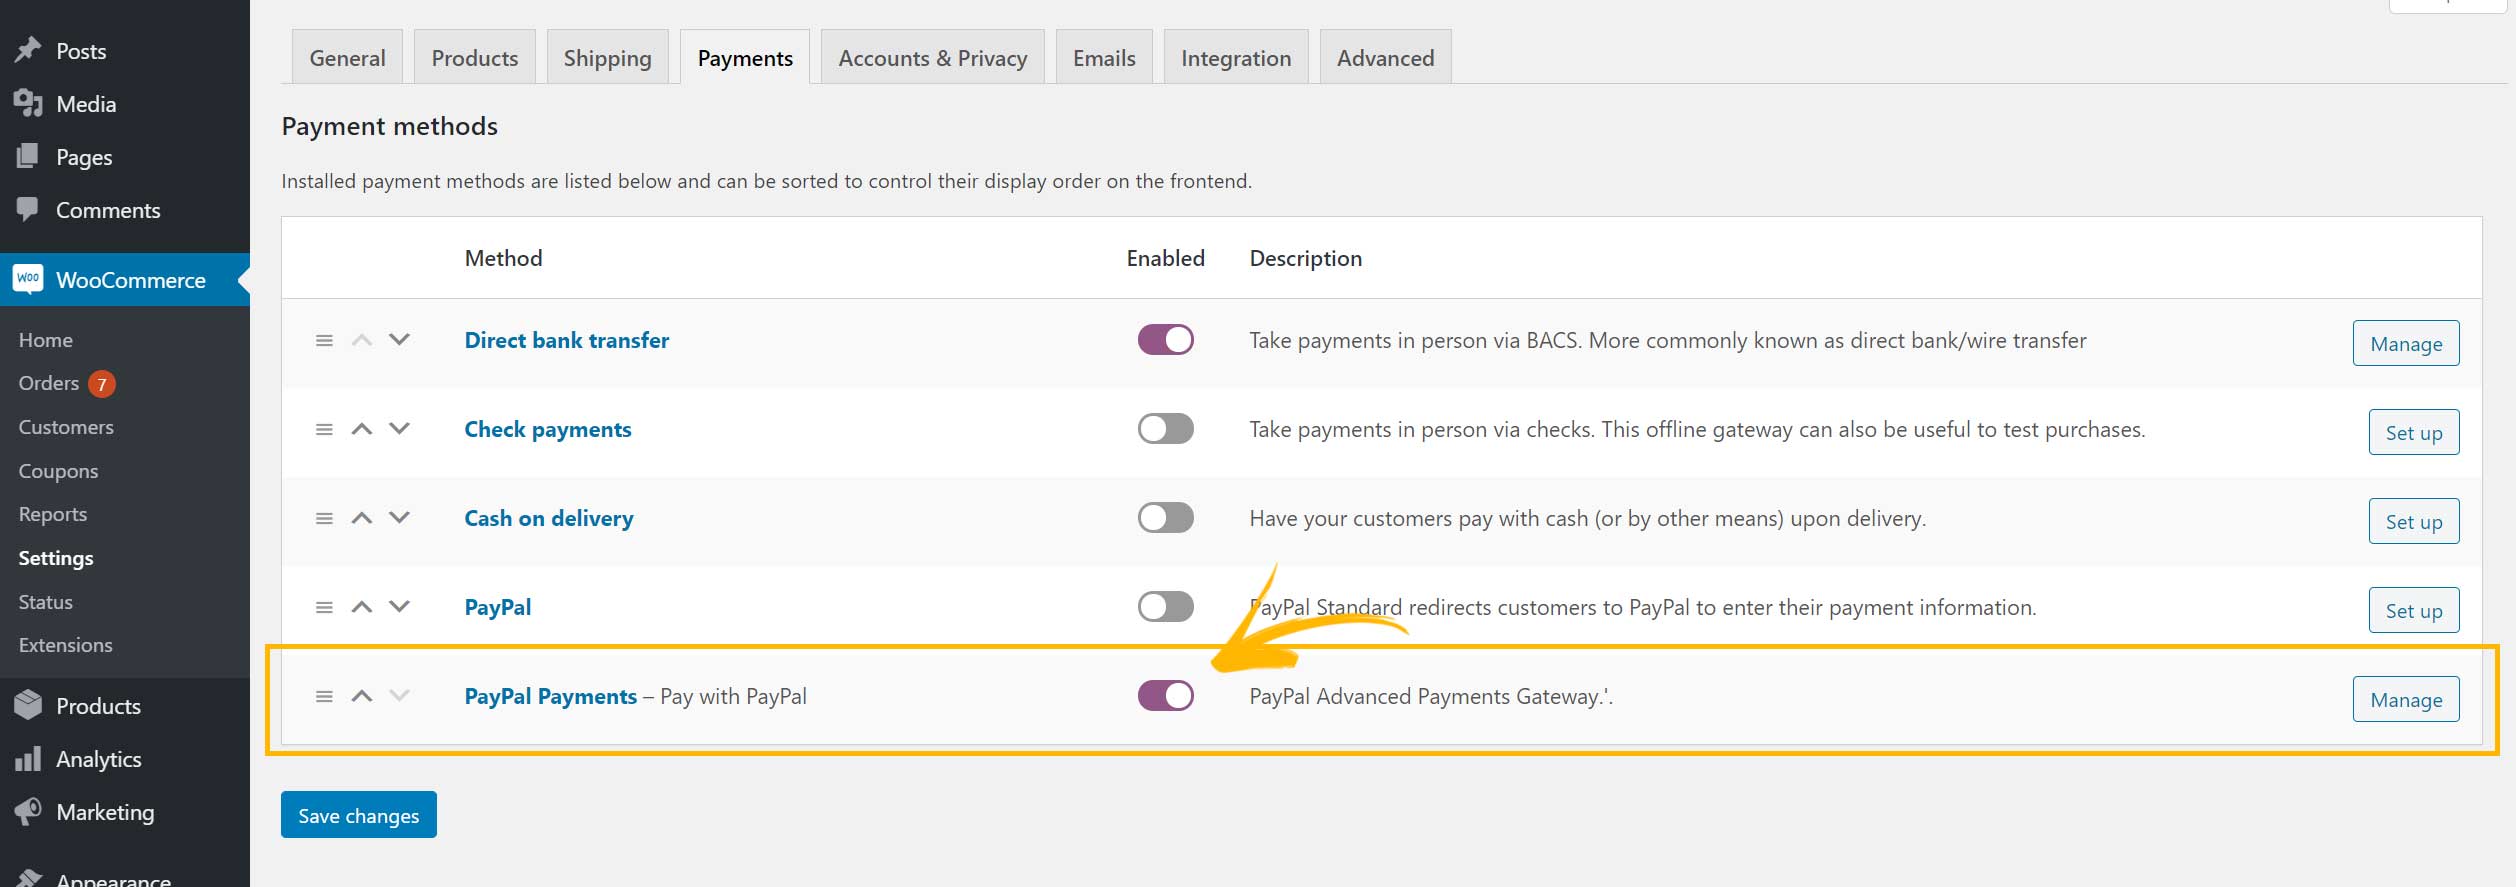
Go to YITH > PayPal Payments > Settings.

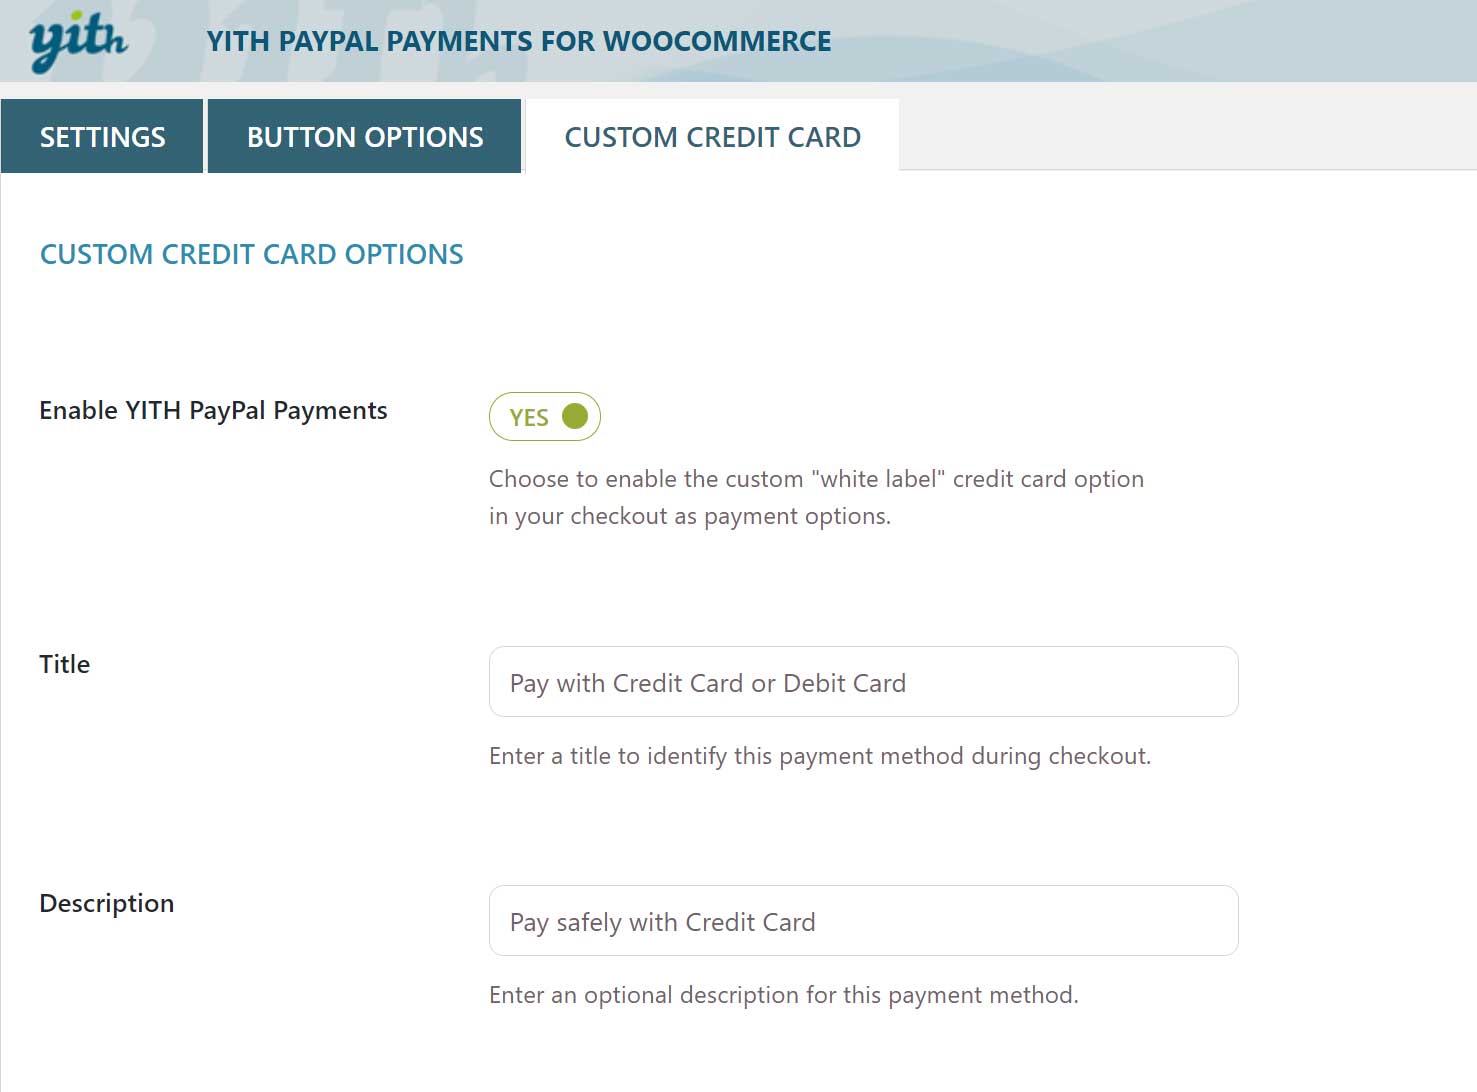
1. Enable the gateway

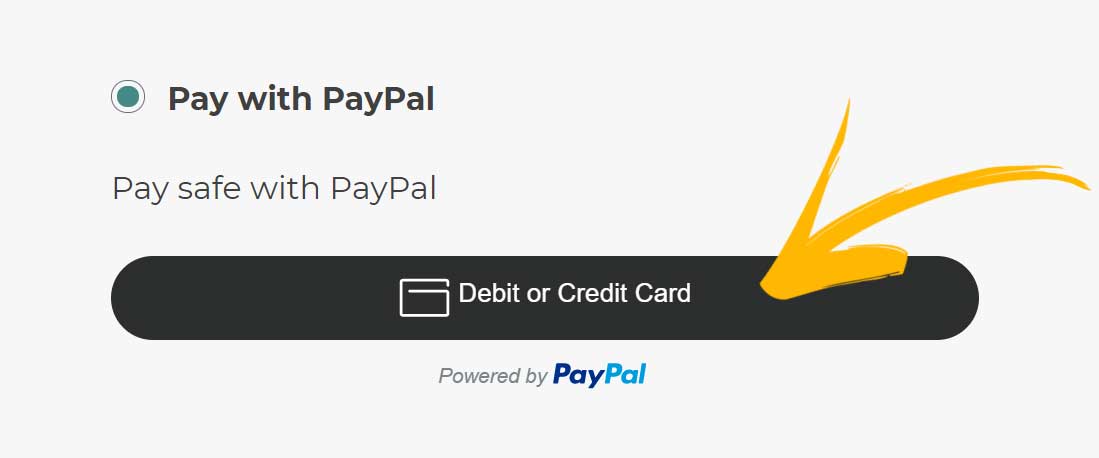
Enable YITH PayPal Payments: here you can enable the new payment method, but keep in mind you can also enable the gateway from the gateways’ list in WooCommerce > Settings > Payments > PayPal Payments.
The two options will be synced, so you can enable/disable the gateway from any of the two locations.

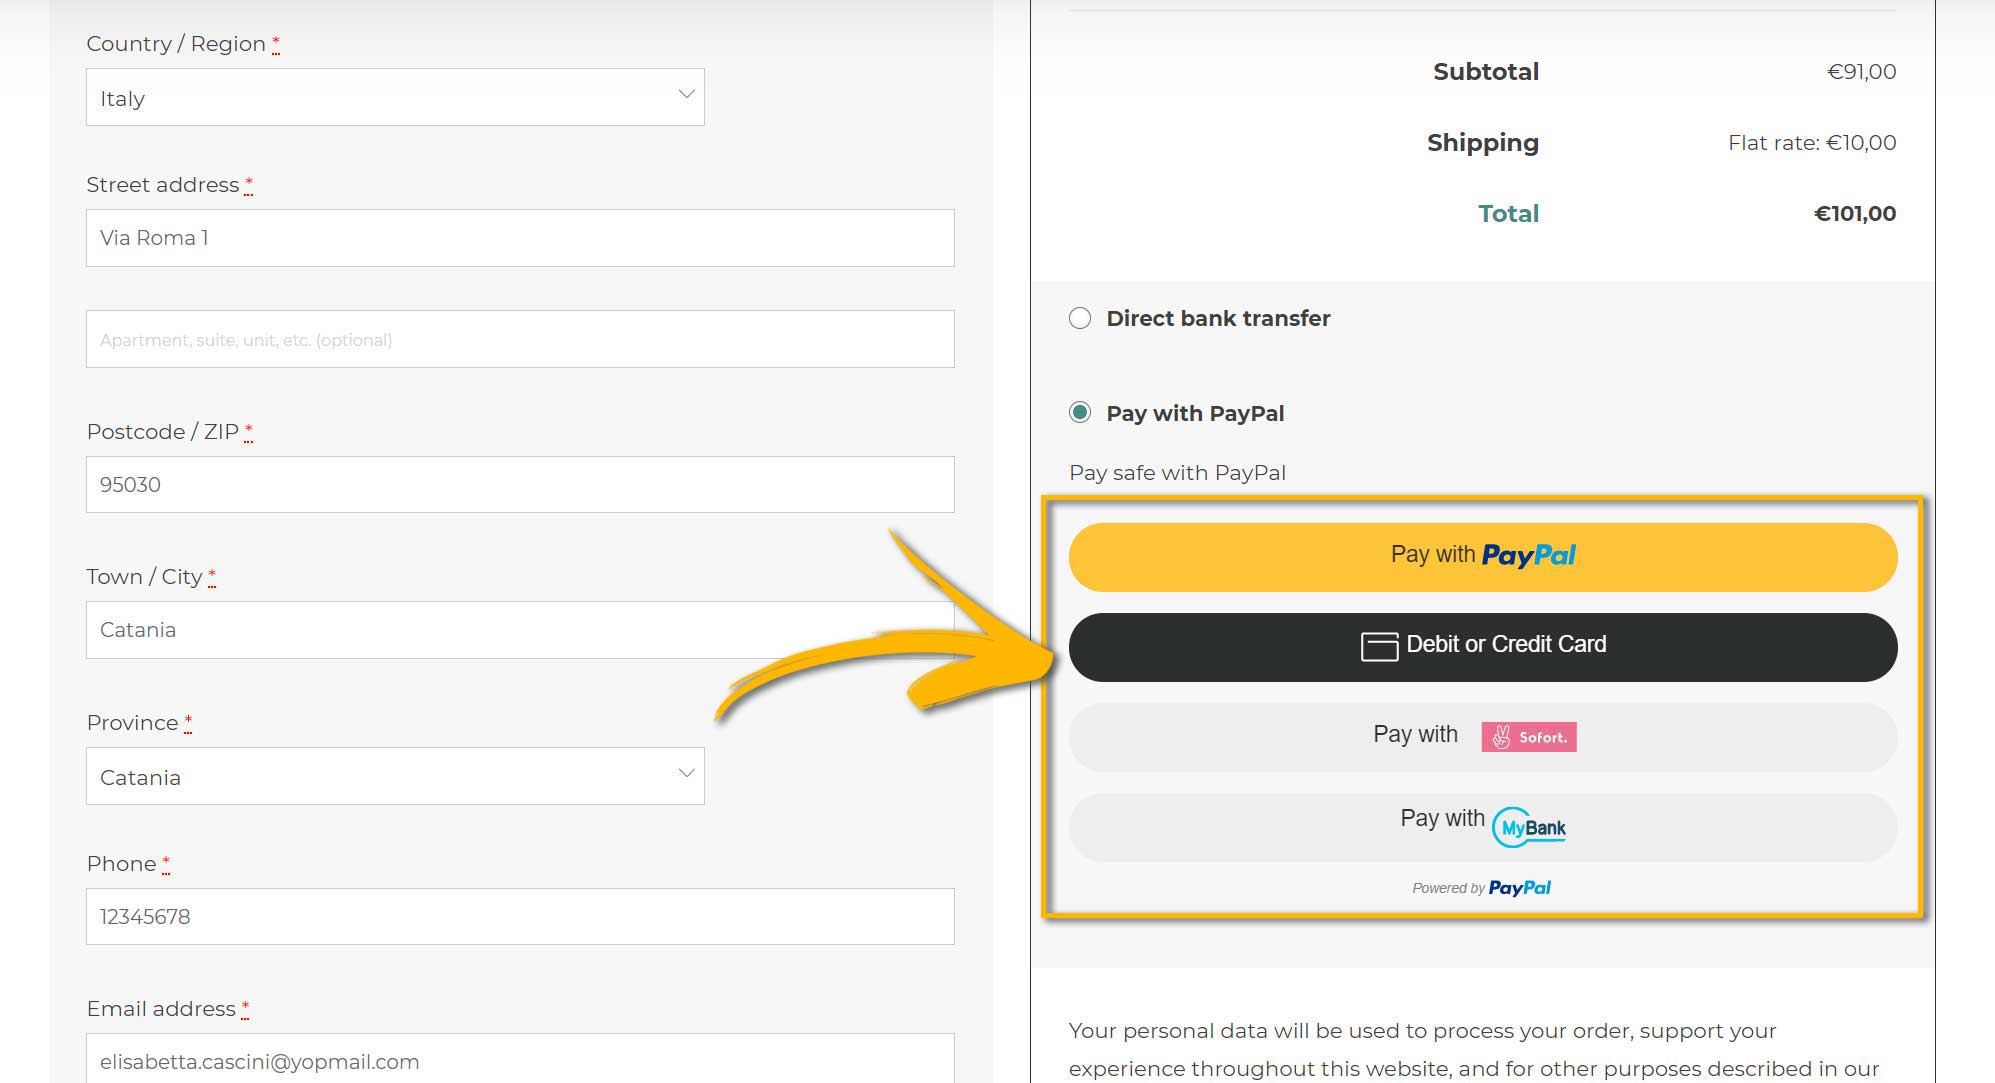
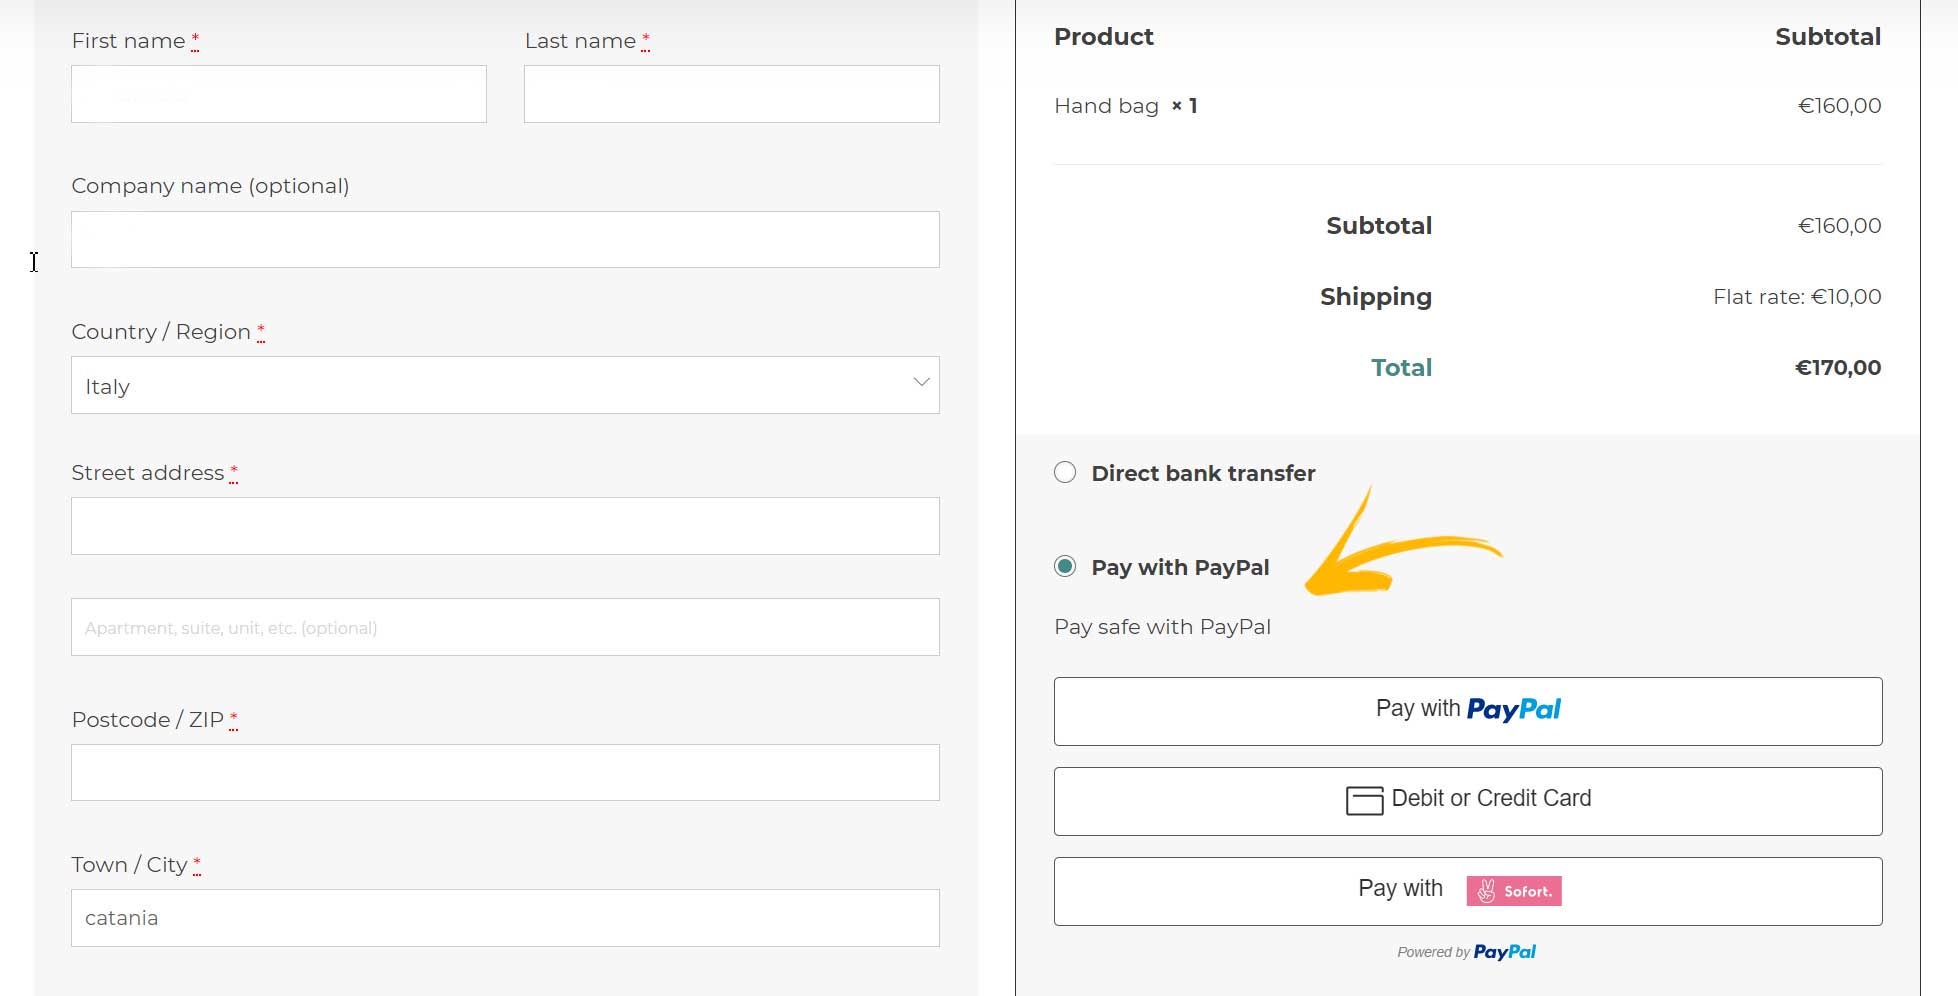
The next two options allow you to customize how this new payment gateway will look like on the checkout page:

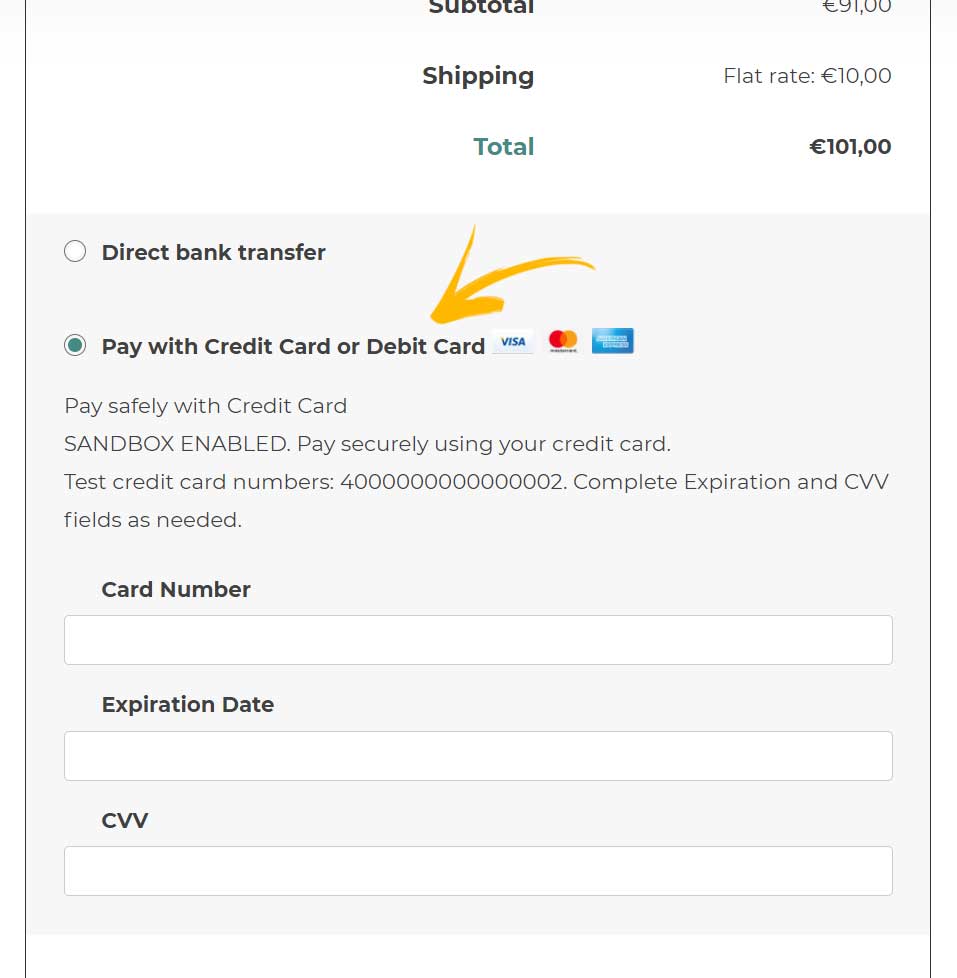
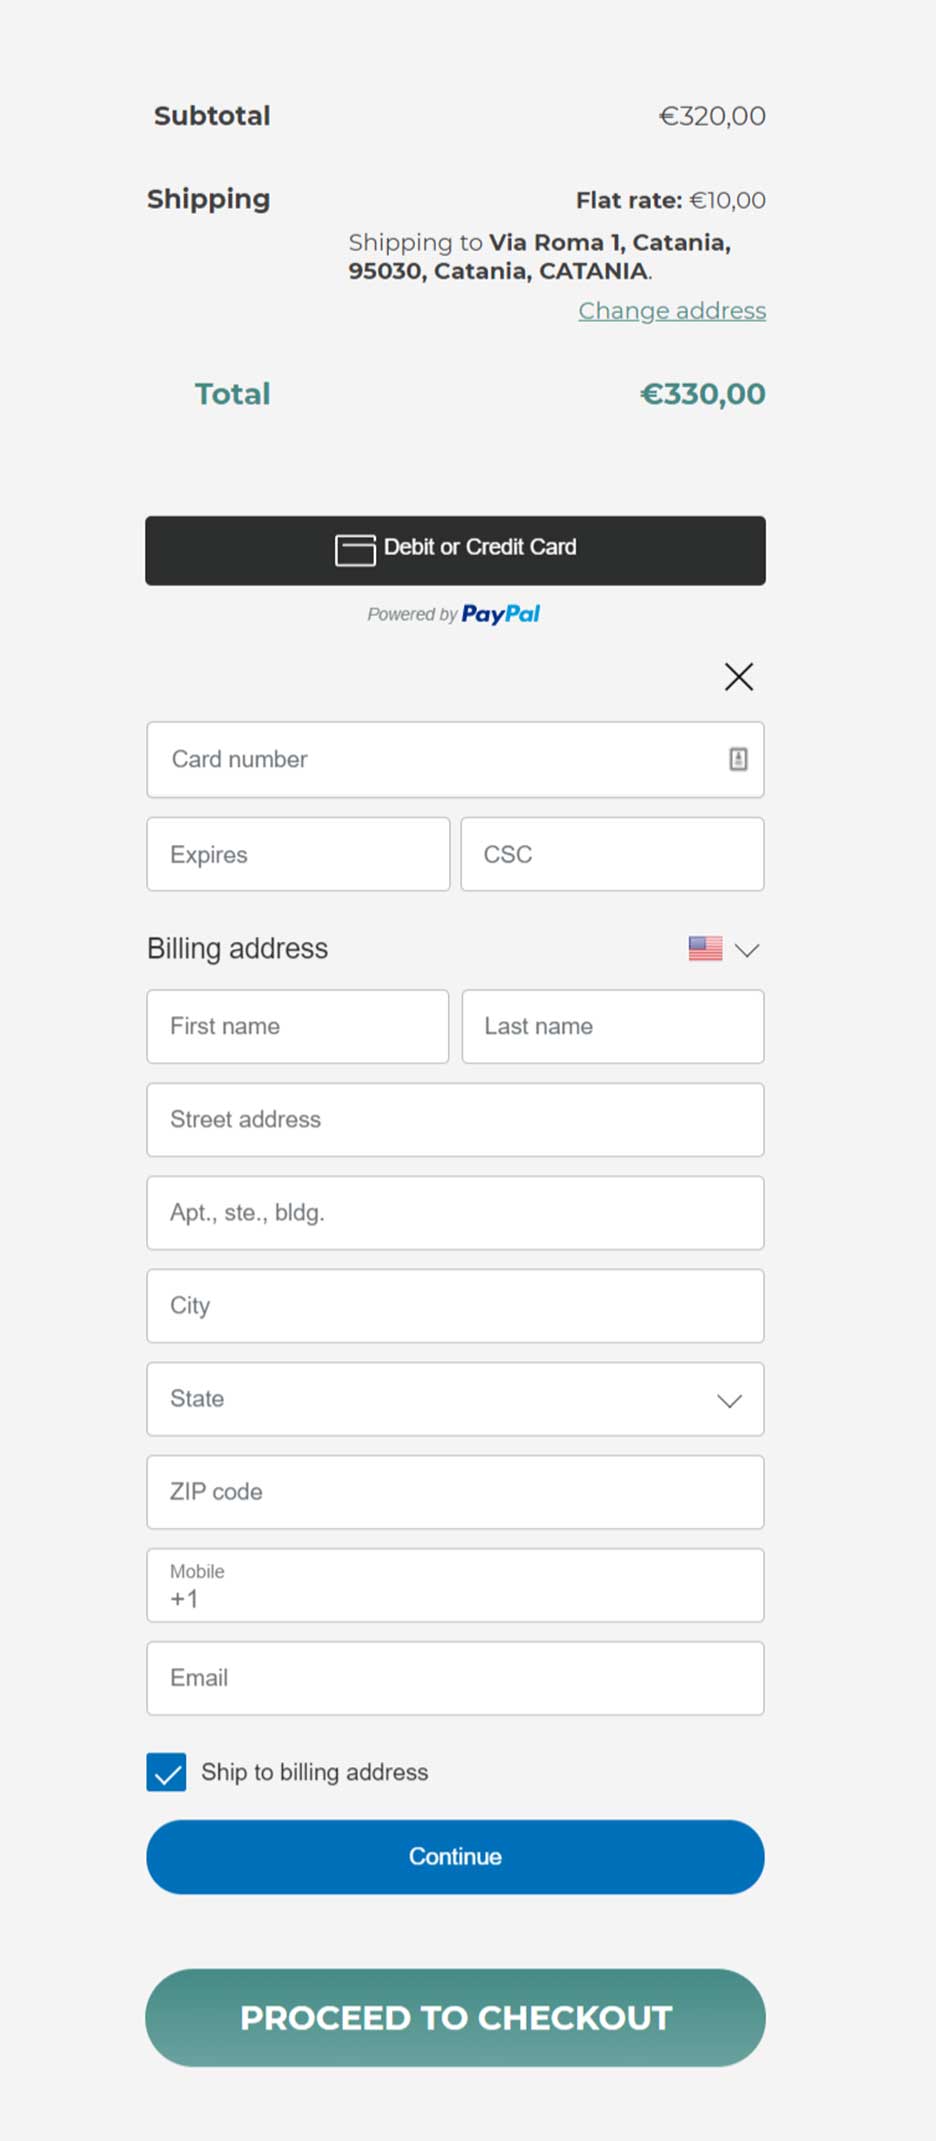
  • Title: give a name to this payment gateway.
  • Description: here you can enter a custom description of what your customer will see on the checkout page.

2. Connect a PayPal account

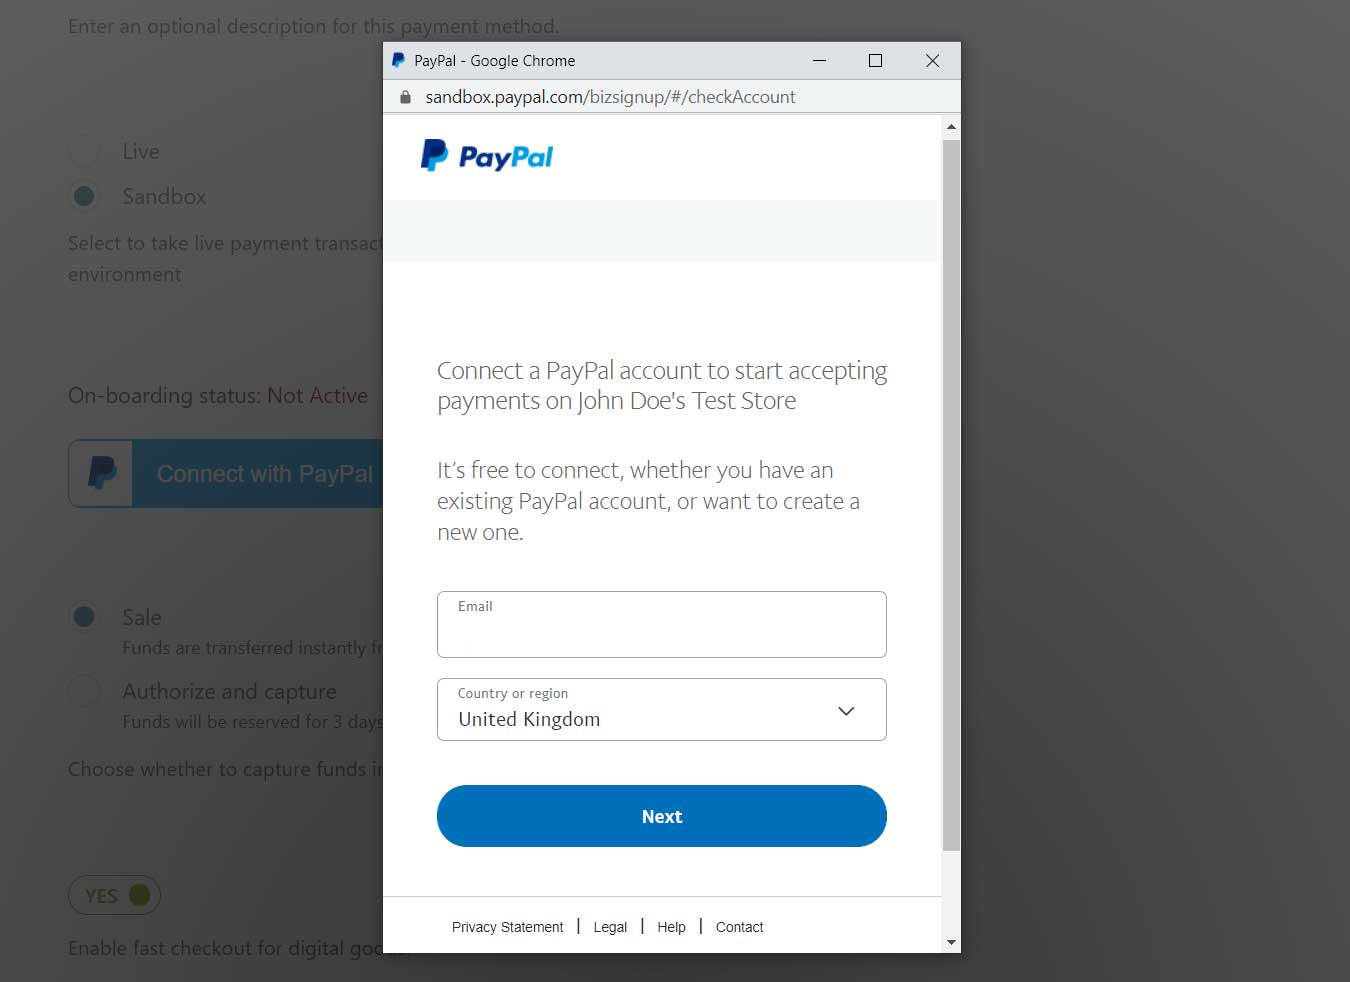
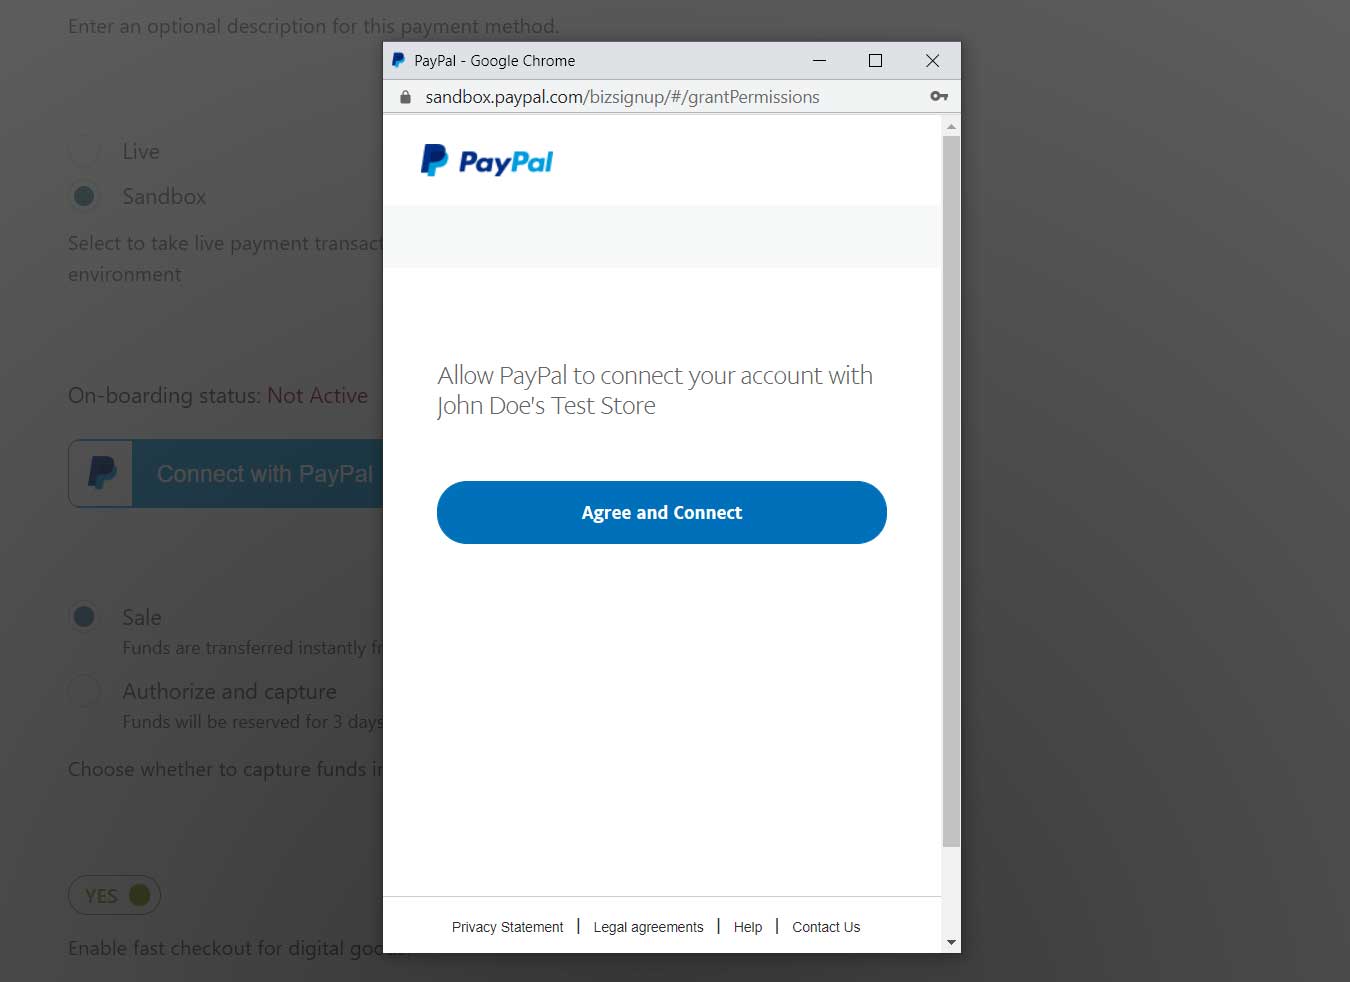
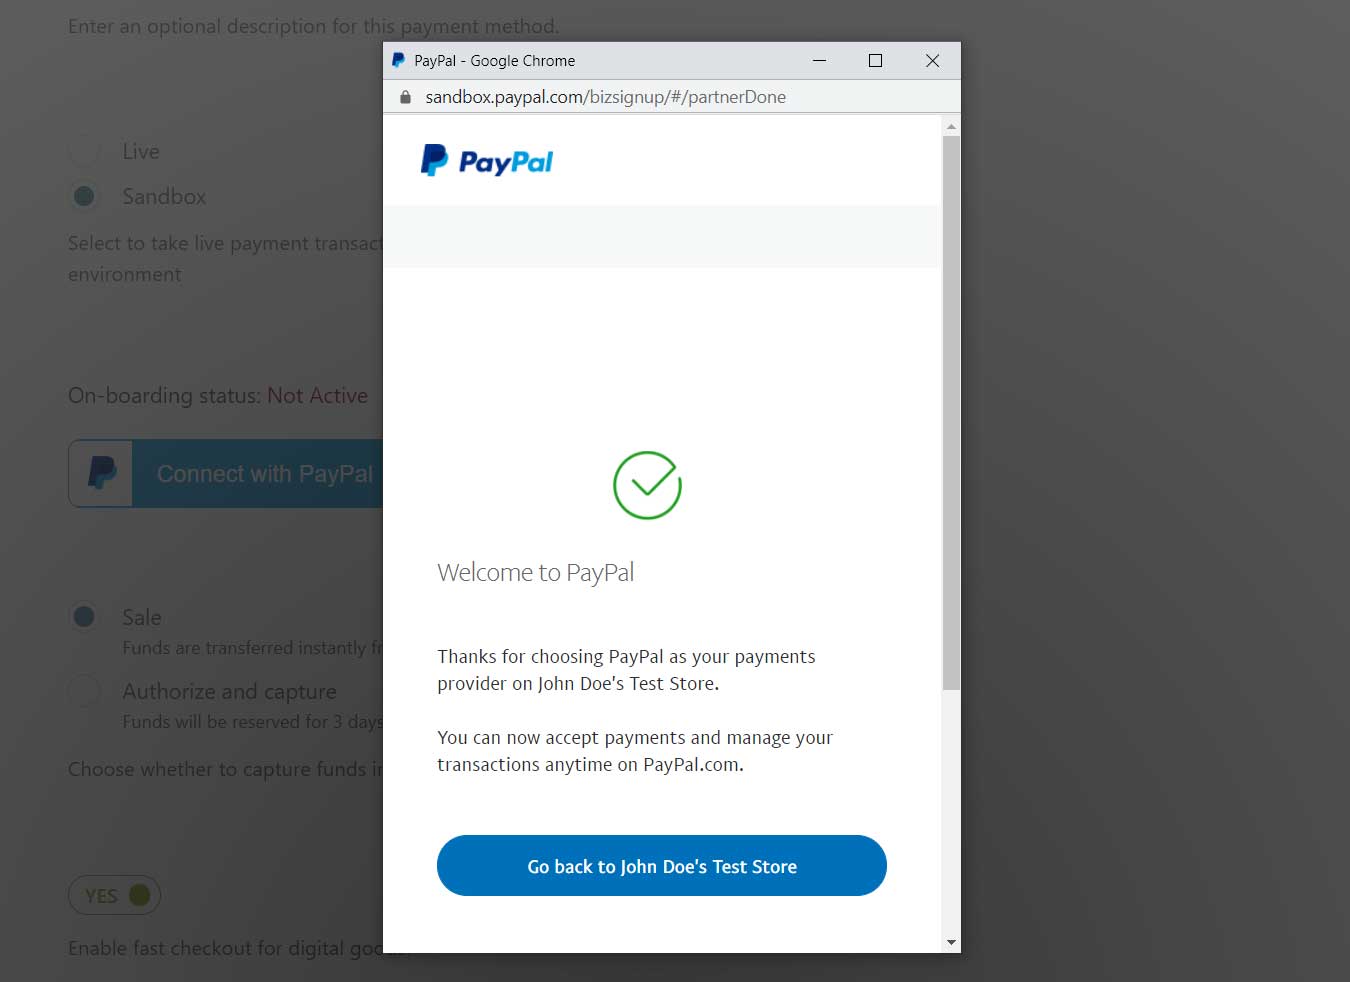
Now, you can connect the plugin to your PayPal account. Select first whether you want to use a live or a sandbox environment, then click on Connect with PayPal.

Please, note your PayPal account must be a business account. If it’s not, PayPal will suggest you to convert it into a business account. You can also create a new account from this popup if you don’t have any.

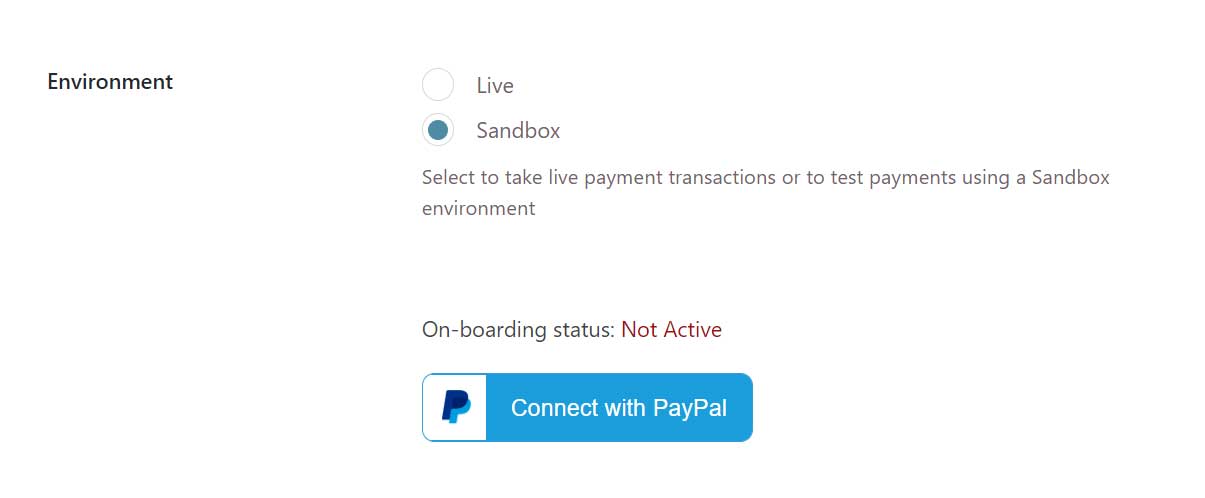
Once connected, this is how it will look like in the plugin panel:

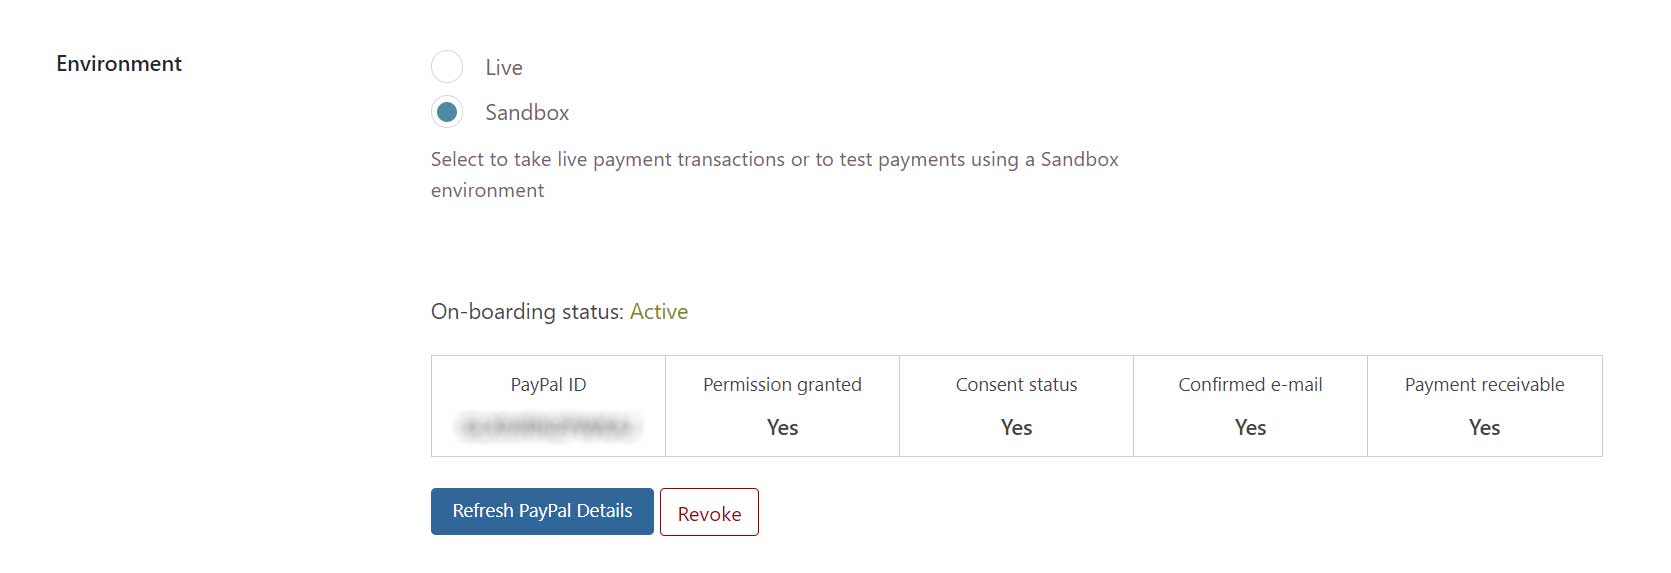
You can click on Revoke to disconnect it from the current PayPal account and start the process again.

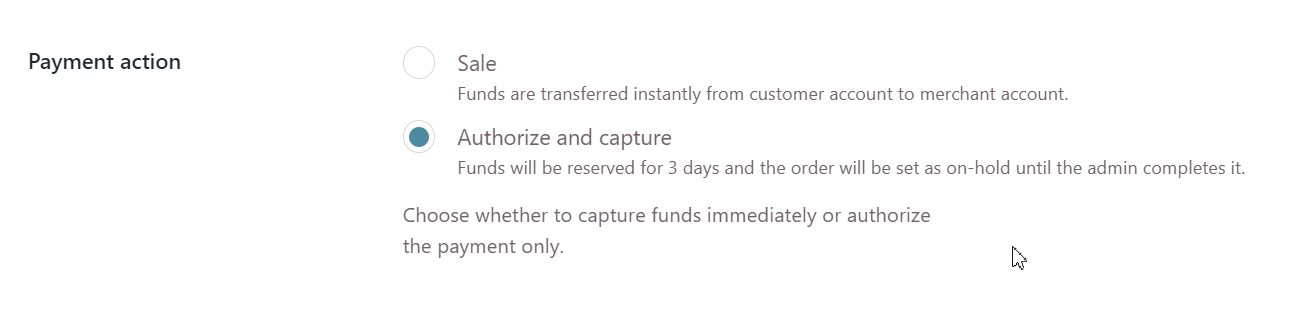
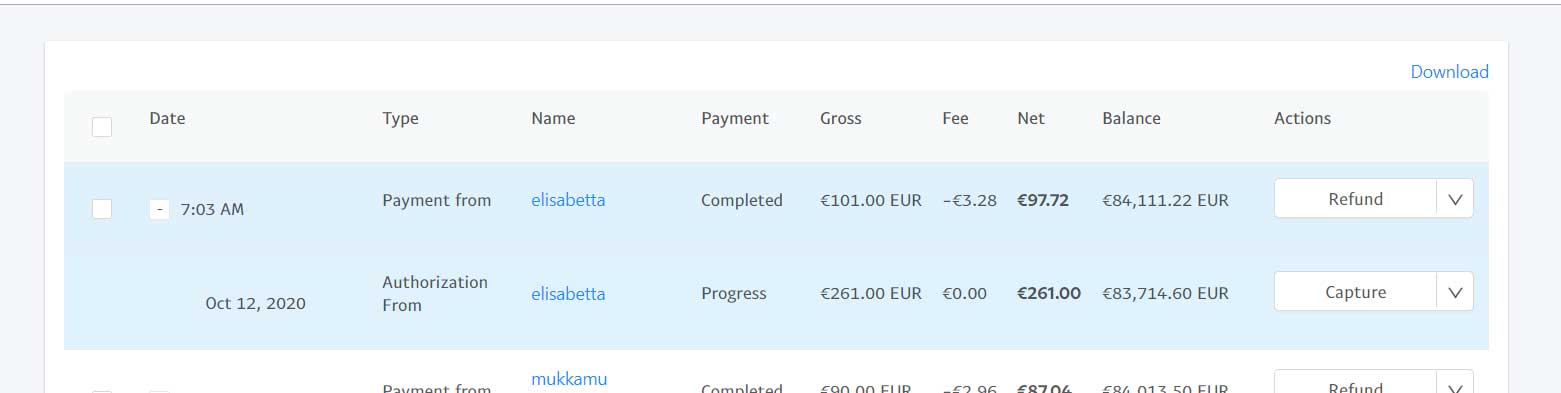
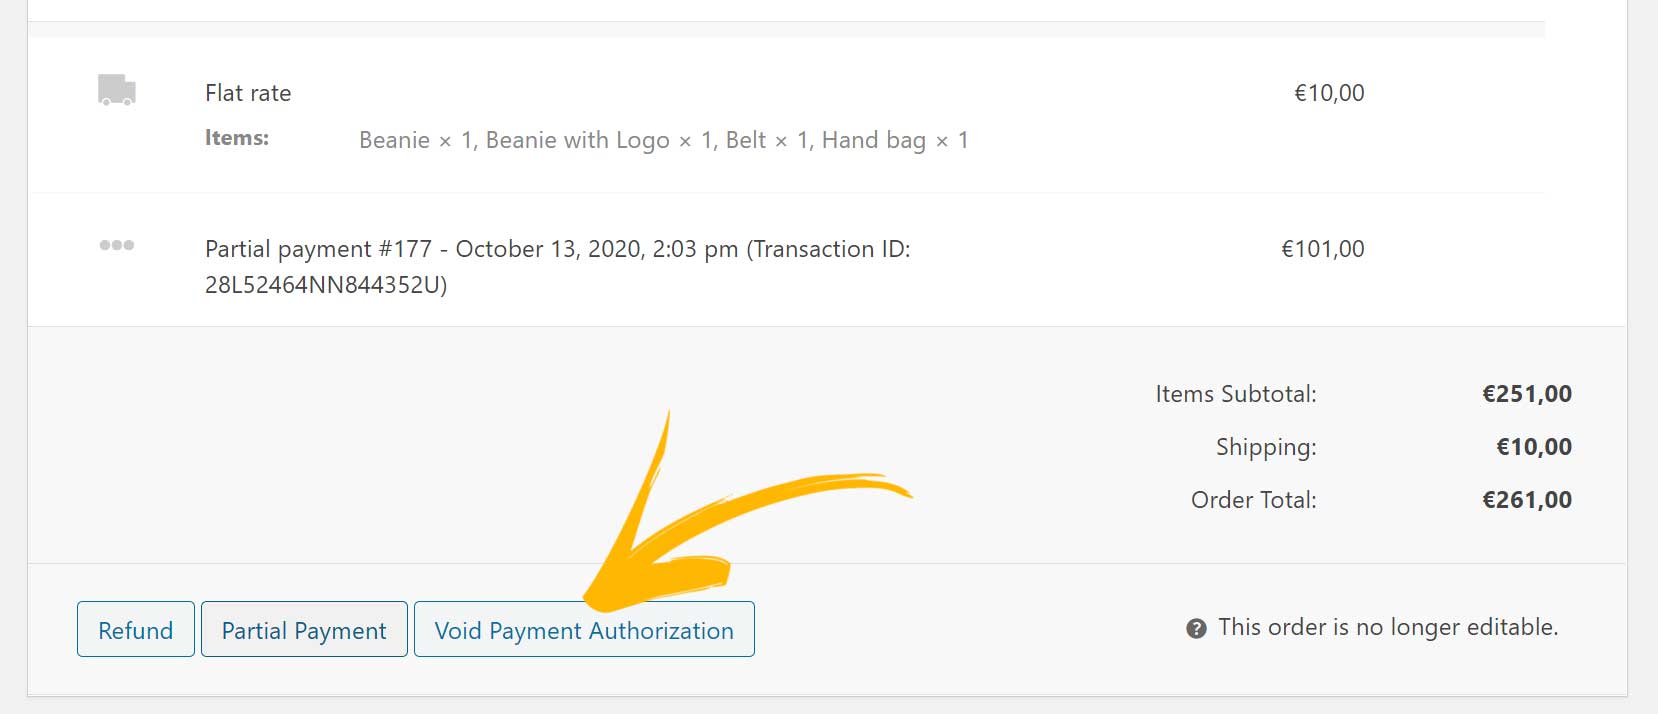
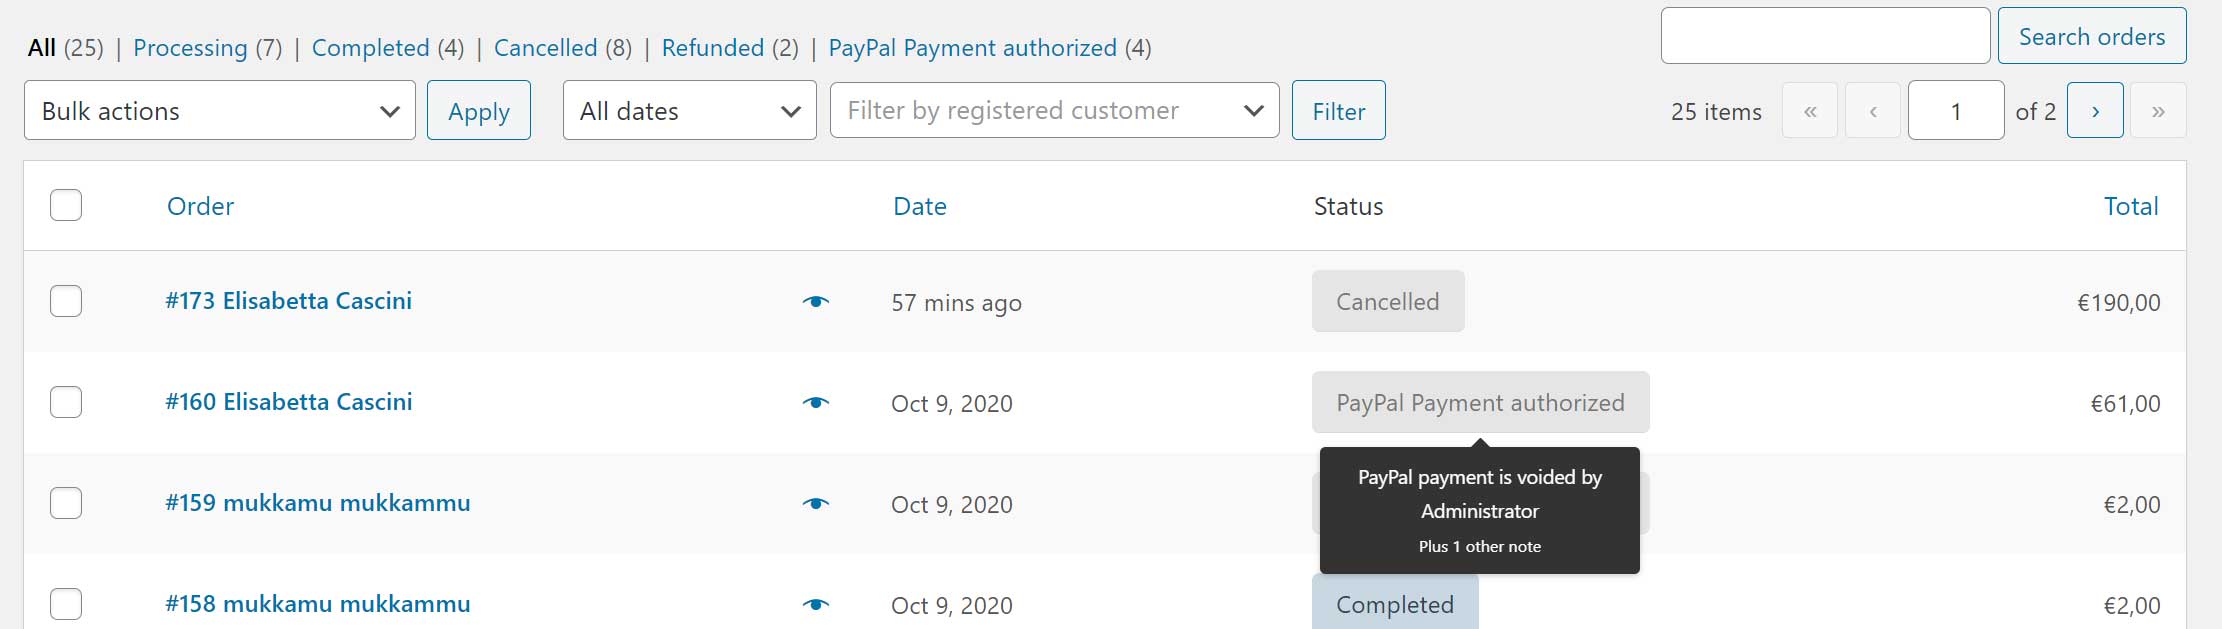
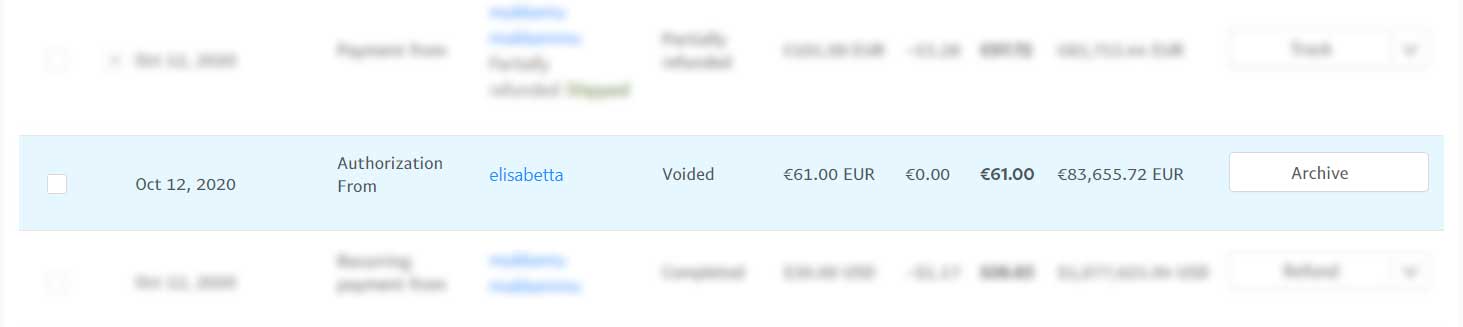
3. Sale or authorize and capture

Payment action: choose whether to capture funds immediately or authorize the payment only:

  • Sale: funds are transferred instantly from customer account to merchant account.
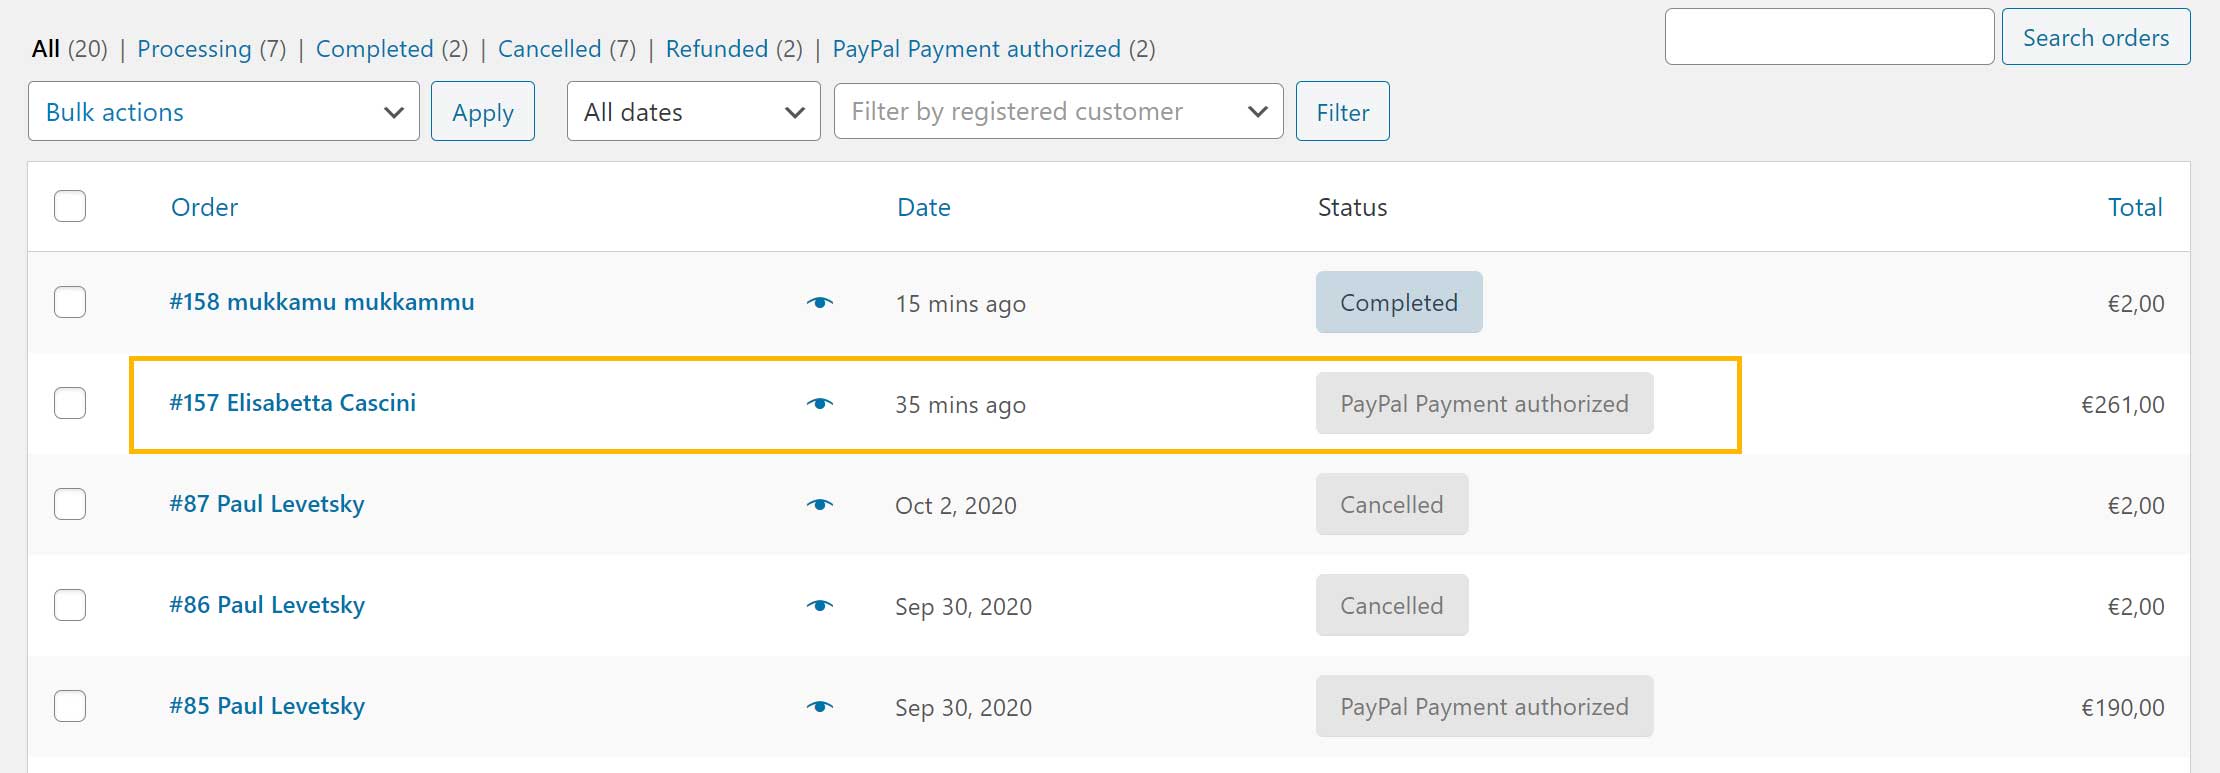
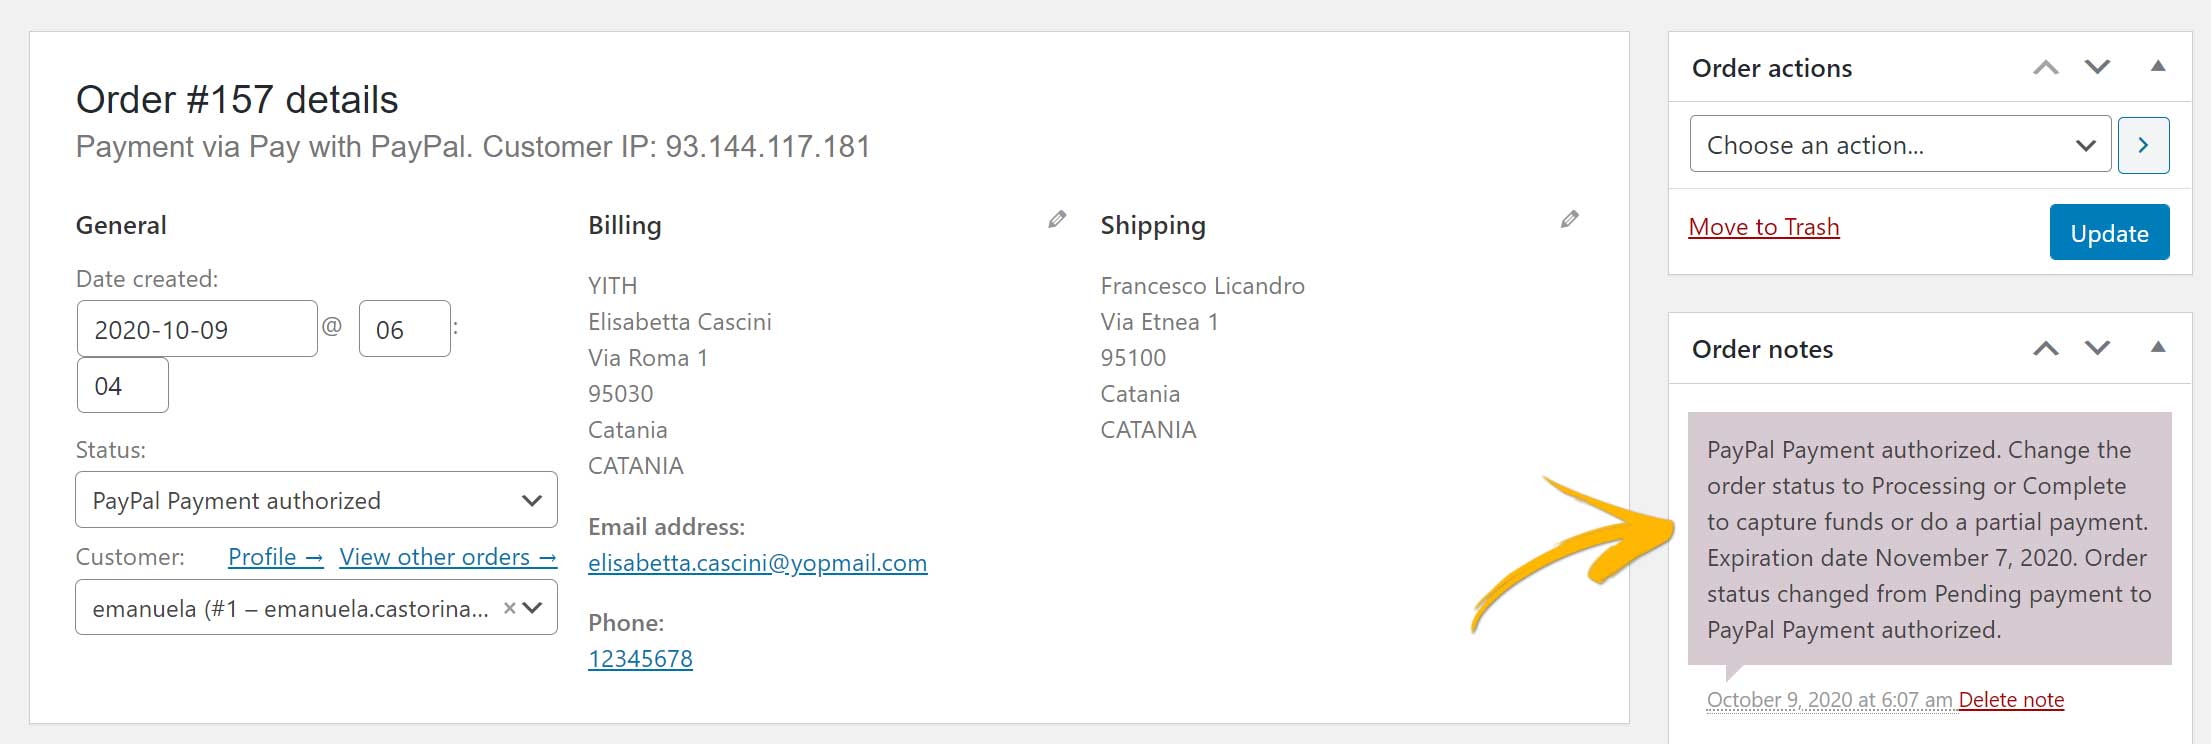
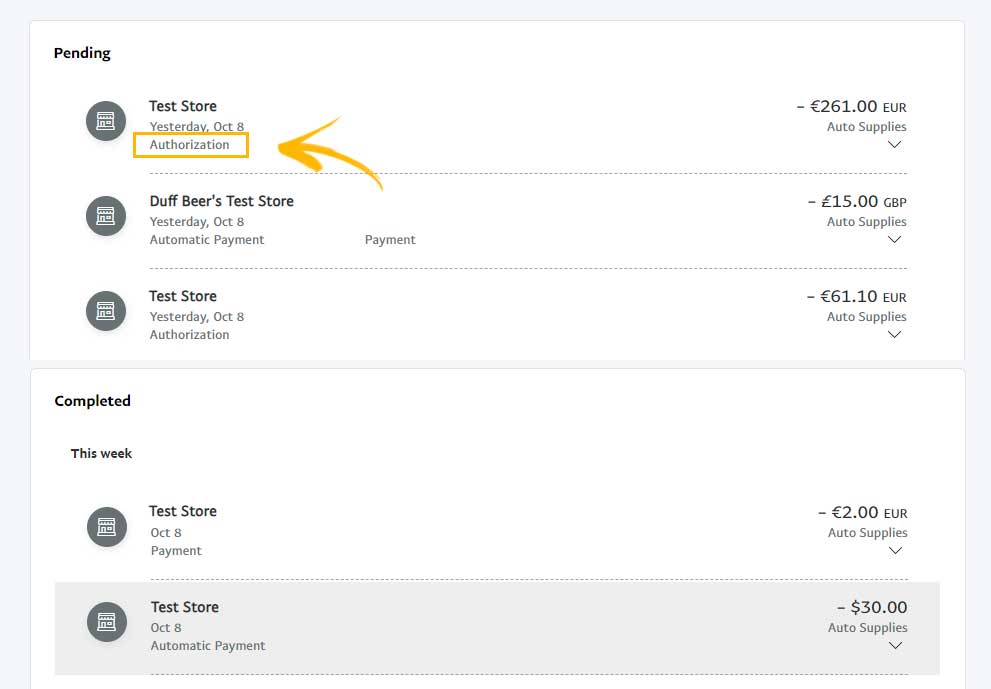
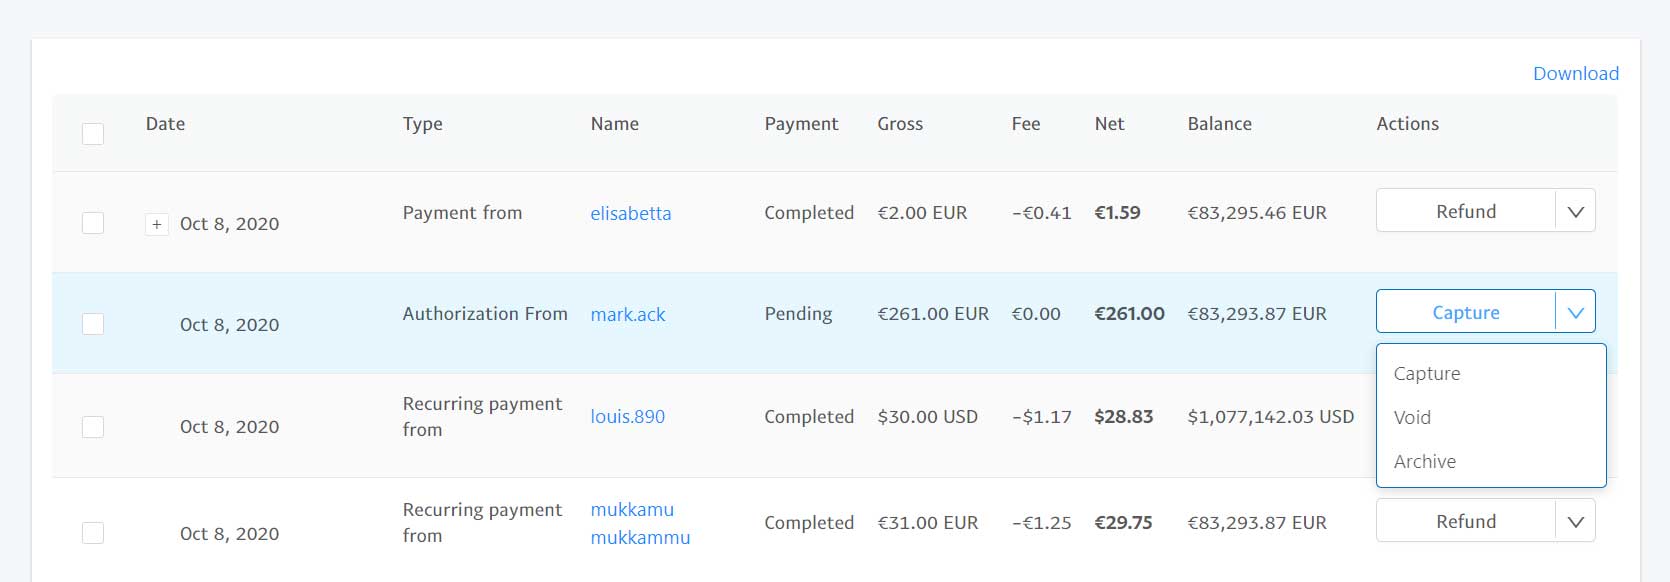
  • Authorize and capture: funds will be reserved for 3 days and the order will be set as on-hold until the admin completes it.
    Please, refer to this page for a more detailed explanation.
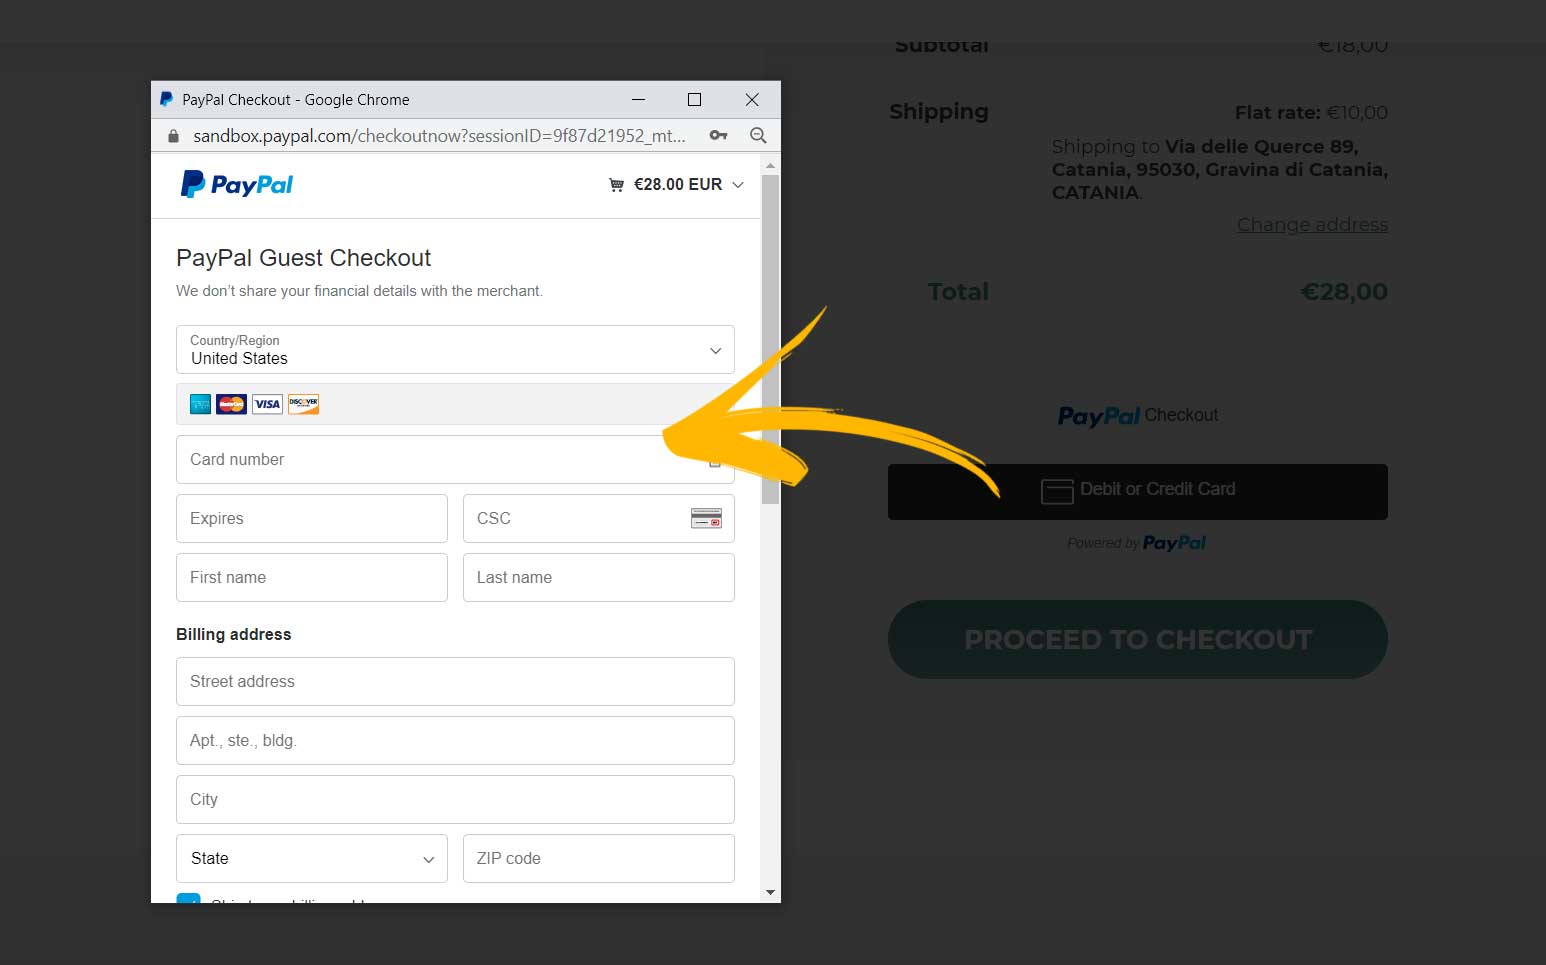
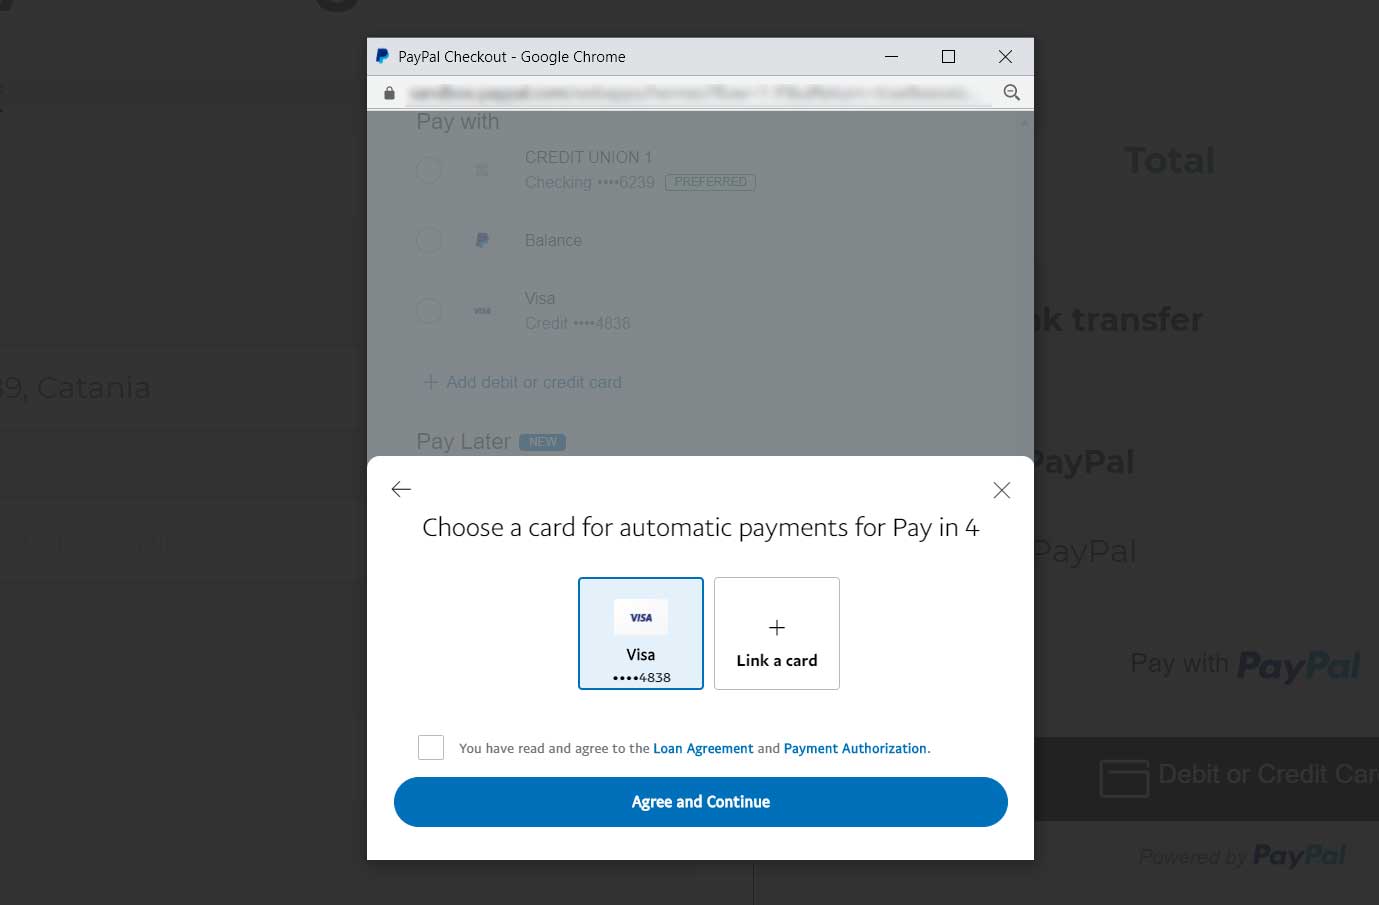
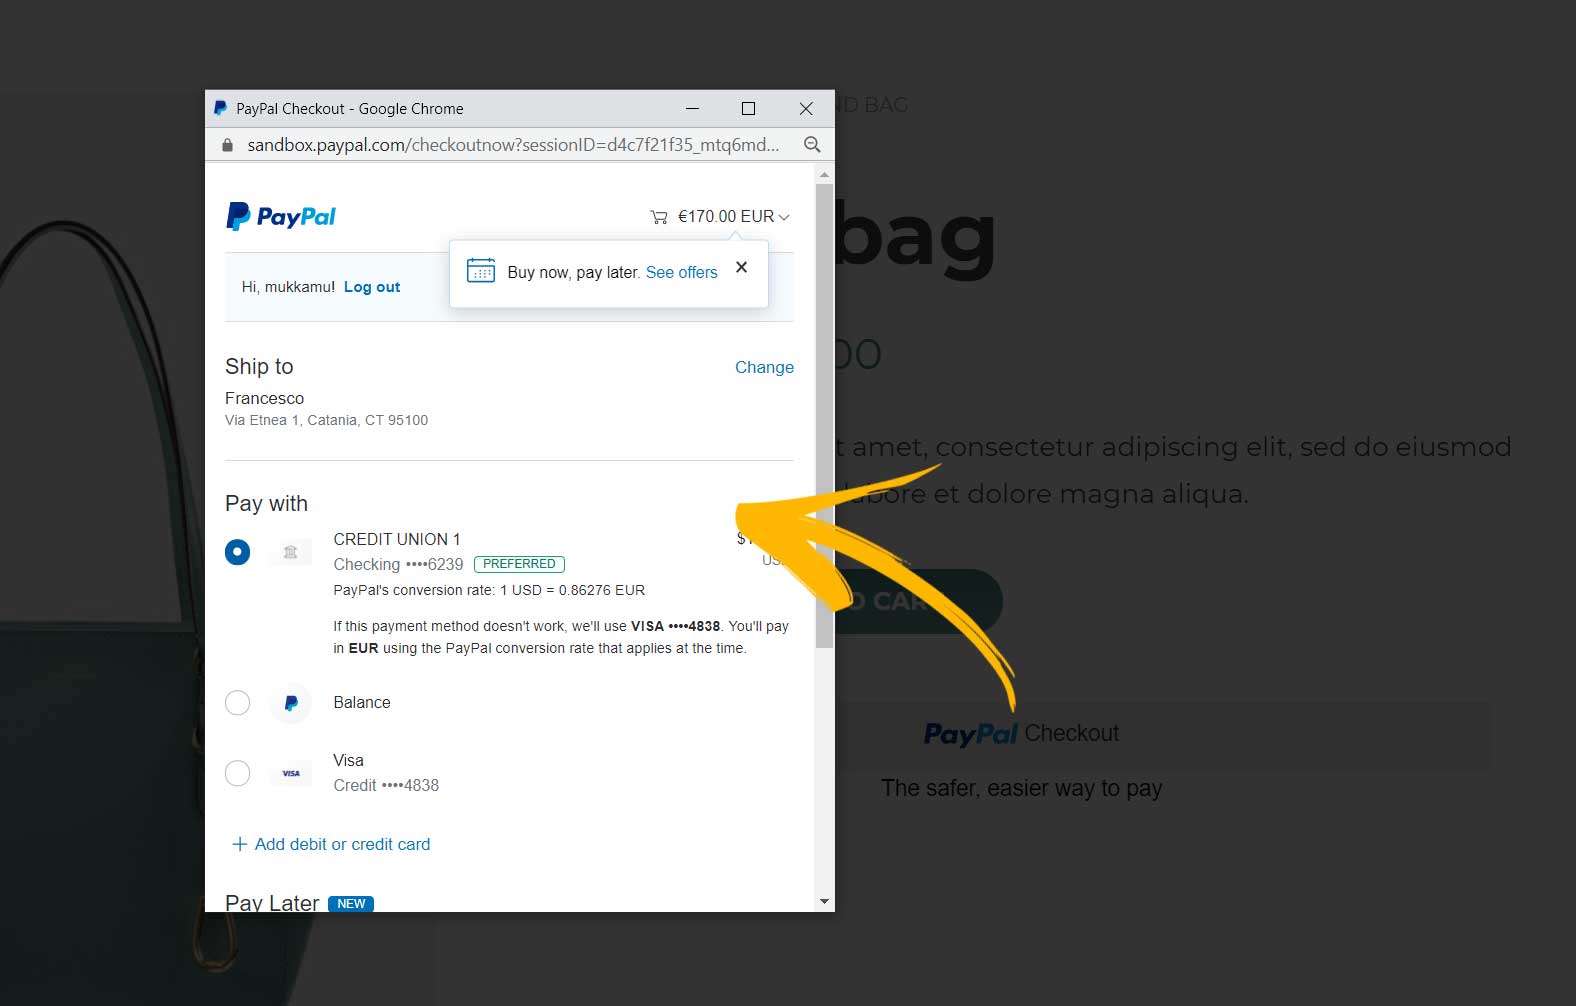
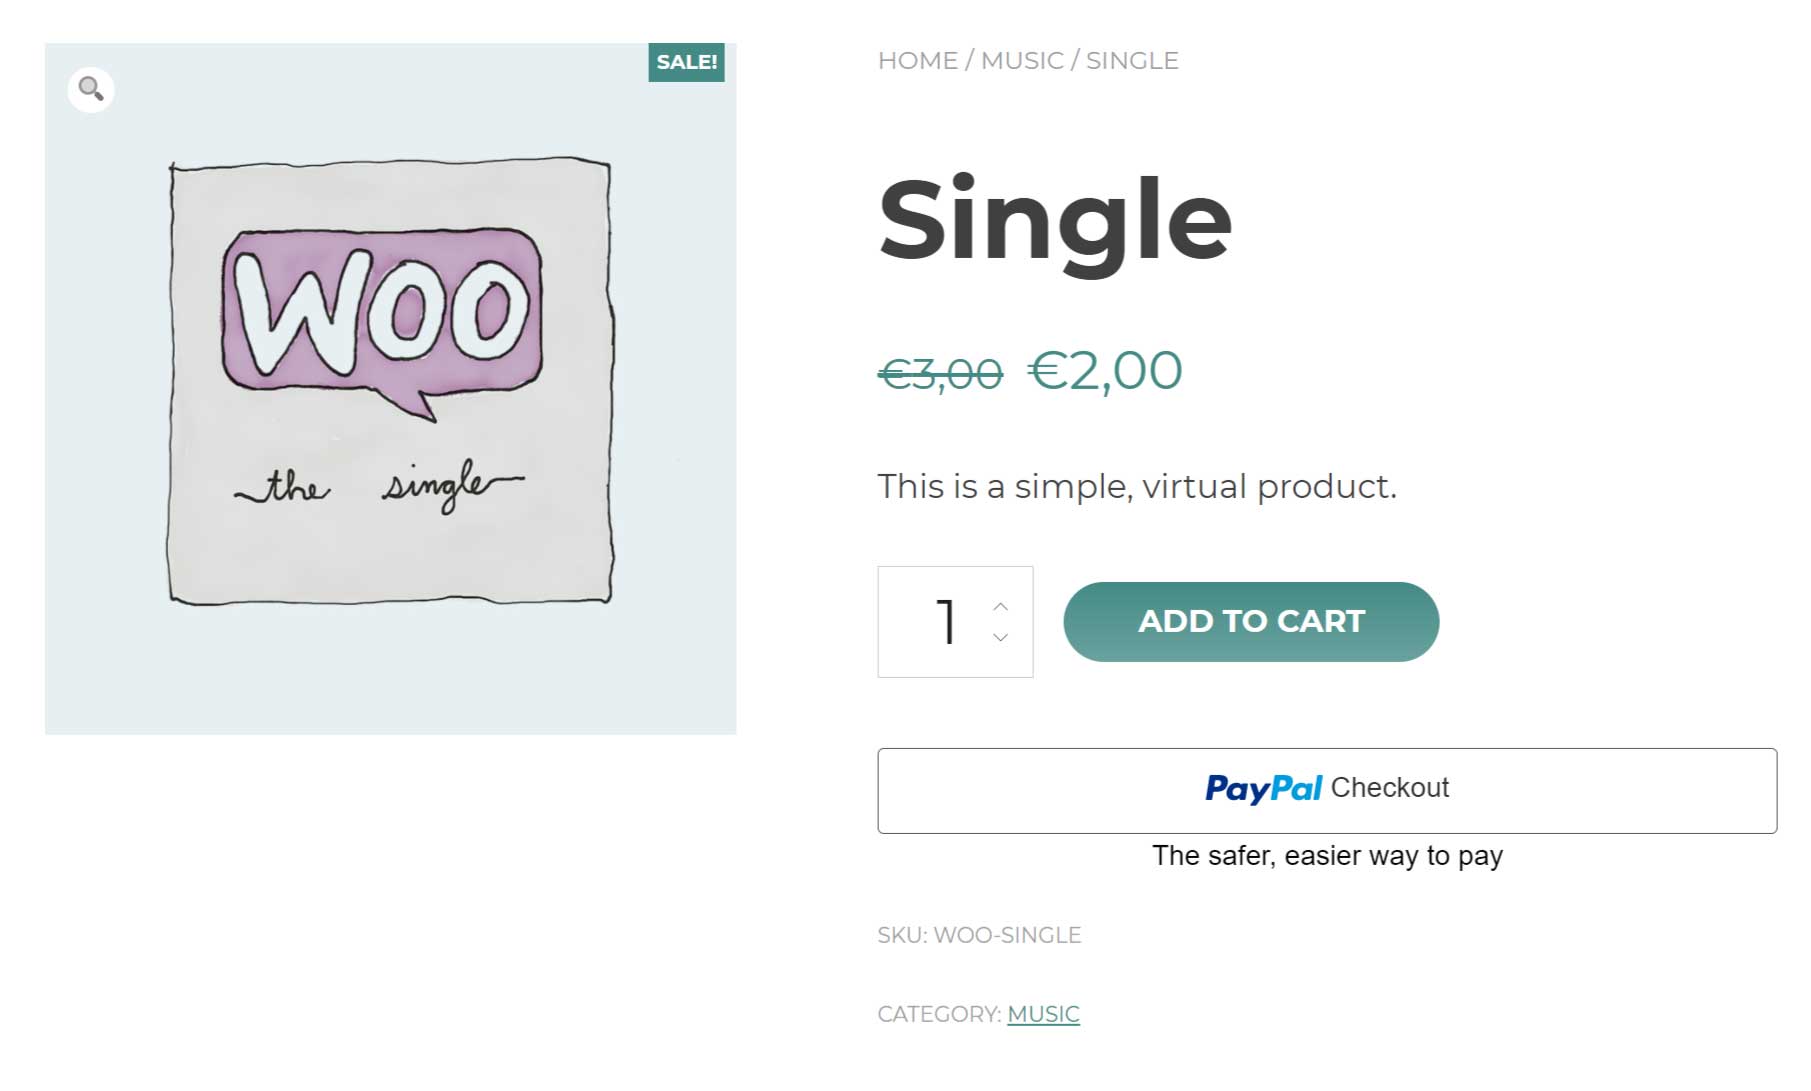
4. Fast checkout

Fast checkout: Enable fast checkout for digital goods and show a PayPal Checkout button on the product page. This option allows your customers to skip the Cart page and go directly to the checkout. If they have previously authorized PayPal, the payment will be immediately charged.
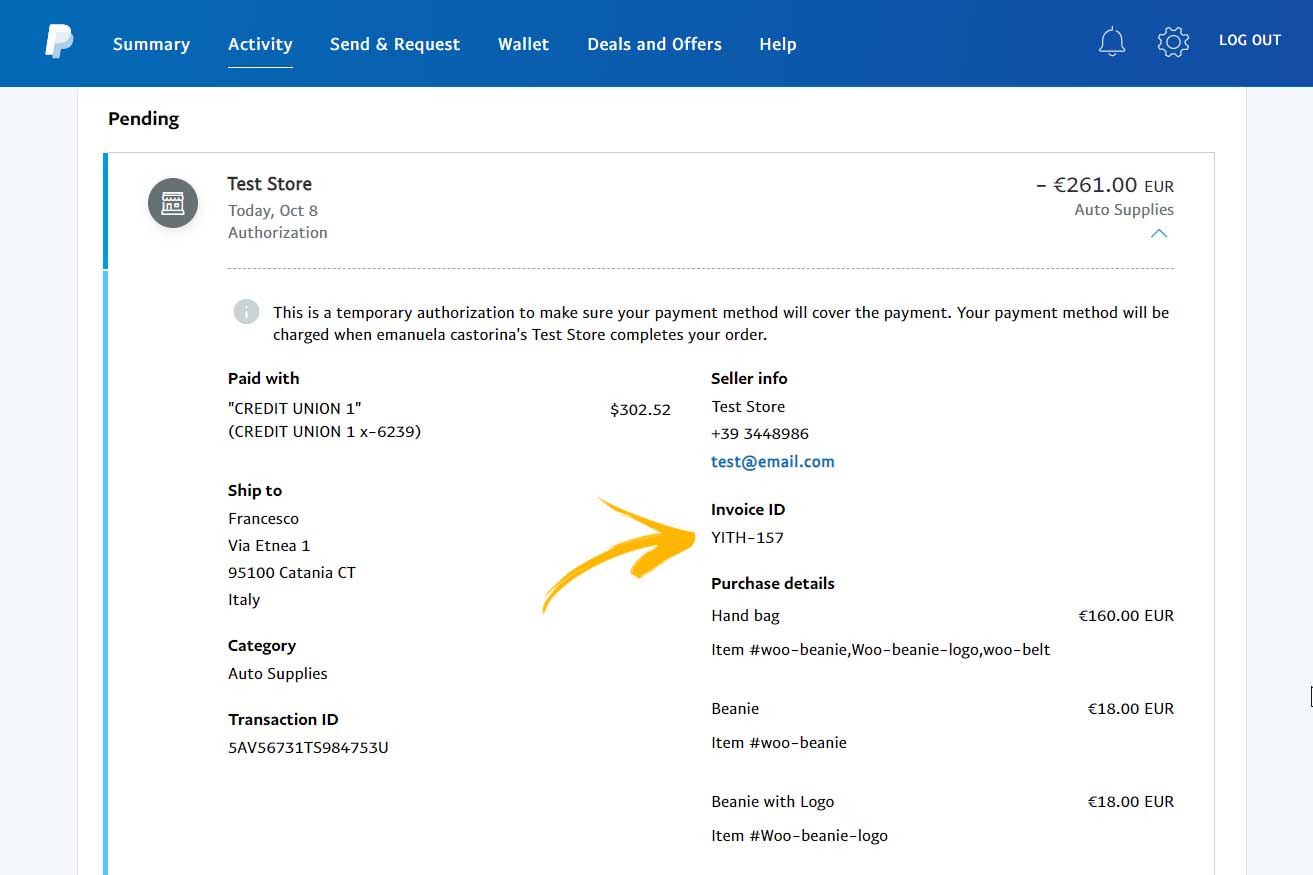
 

5. Invoice prefix

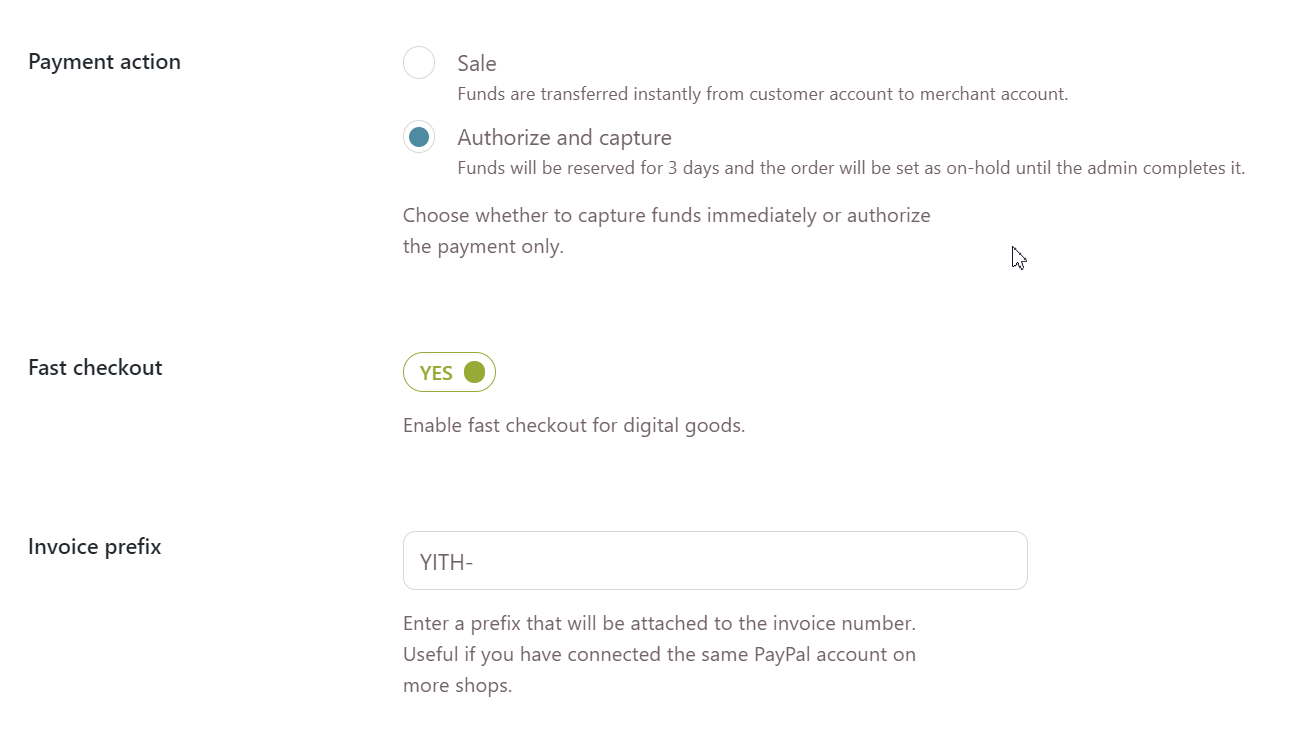
Invoice prefix: Enter a prefix that will be attached to the invoice number. Useful if you have connected the same PayPal account on more shops.

Pre-autorized payments

PayPal allows you to either charge your customers immediately on checkout or to pre-authorize the payment and charge the funds later.

You can choose this setting from the General options page in YITH > PayPal Payments for WooCommerce > Settings > Payment action.

Select Sale if you want that the funds are immediately transferred from the customer to the merchant account.

Select Authorize and capture if you want to authorize the payment first and charge your users at a later time. How does this work exactly?

Whenever your users place an order, it will be recorded with the status PayPal payment authorized.

When you’re ready to charge the funds, you can open the order page and set the order status to either Processing or Completed and the transaction will go through.

The amount agreed in checkout will be guaranteed for 3 days, but the authorization expires in 30 days, after which you will no longer be able to charge the user from this order, they will have to place a new one.

The order will appear as an Authorization both in the customer’s and merchant’s accounts, until it is completed.

Customer account
Merchant account

The merchant will be able to capture the authorized payment also from the PayPal account > Activities as shown in the screenshot above.

Button options

From YITH > PayPal Payment > Button options tab you can configure all the button options, let’s see them one by one.

Show PayPal button on: select if yo want to display the PayPal button on all or just some of the following:

  • Cart page
  • Checkout
  • Single product pages

The payment flow changes slightly based on where the button is placed. Please, refer to this page to learn more about the differences.

Button color: choose one of the available layouts.

Button shape: choose between Rectangular and Pill

Button container width: choose the size of the button. You can either set it in pixels or as a percentage.

Funding sources for the trasaction: select the funding sources that will be displayed in the checkout button. By default, funding source eligibility is determined based on a variety of factors, like for example the billing country of your customers.

So, for example if the funding source iDEAL is not available in Italy, even if it’s selected in this list, it will NOT show up to your Italian users.

The supported funding sources are:

  • Credit or debit cards
  • PayPal Credit
  • Bancontact
  • BLIK
  • eps
  • giropay
  • iDEAL
  • MyBank
  • Przelewy24
  • Sofort
  • Venmo
Please, note:
– PayPal is available on the product page, on the Cart page and in Checkout.
– Credit or debit card powered by PayPal is available only on the Cart and Checkout page.
– All the other available payments are only visible on the Checkout page.


Cards for the transaction: Select the cards that will be displayed in the checkout button. By default, card eligibility is determined based on a variety of factors, like for example the billing country of your customers.

So, for example if JCB is not available in Italy, even if it’s selected in this list, it will not be available for payments from Italian users.

The supported cards are:

  • Visa 
  • Mastercard
  • American Express
  • Discover
  • JCB
  • ELO
  • Hiper

Custom Credit Card

For stores based in the US, UK, Italy, Spain and France, the plugin will automatically show the additional tab Custom Credit Card.

Here you can set up a white-labeled, non-branded credit card payment method, so your customers will not see that it is handled by PayPal, set up its title and description as it will appear in the checkout.

Unbranded credit card

Please, note that if you activate this custom credit card, the Credit card option in the funding sources will not be visible, even if enabled.

Branded credit card

3DSecure and liability

Here you can also enable the 3DSecure option and its liability shift choosing among:

  • Liability might shift to the card issuer.
  • Liability is with the merchant.
  • The authentication system is not available.


Refunds

If you want to refund an order paid with YITH PayPal Payment, just open the order details and click on the Refund button that you find in the order recap metabox.

You can choose whether to refund the full amount or a partial amount.

The transaction number will appear in the order details and it will be automatically synced with your PayPal account, so, you will be able to see the refunded amount there as well.

Partial payments and void payment option

When you pre-authorize the transaction, you also have the option to charge the amount in multiple partial payments (but always within the 30-day expiration window) or to void the payment.

From the order details, scroll down to the order total section, where you will find the following two buttons:

  • Partial payments
  • Void payment

1. Partial payment

When the order is pre-authorized, you can also charge your users in steps and decide for partial charges. This is extremely useful, if you need to charge your users only when the item is shipped and you have more than one product in the same order that will be shipped at different times.

To charge a partial payment, just open the order details and click on the Partial payment button that you find in the order details:

Enter the amount you want to charge (for example the cost of the first product you are going to ship) and click on Pay via PayPal Payments.

A transaction will go through and will automatically appear in your PayPal account too. Every action from your WP or from your PayPal account will be synced.

2. Void payment authorization

When an order has been pre-authorized, you will also be able to void the authorization and make sure that no charges are made. This action is both available from the order details and from your PayPal account. The two systems will be synced immediately.

To void a payment authorization from the order details, just open the order and click on Void payment authorization.

This will be reflected in your PayPal account as well.

Payments in installments

Thanks to this plugin, you will also be able to use the new feature offered by PayPal that allows you to split a payment into multiple installments, right from the PayPal checkout popup.

If the order is too expensive to be fully paid upfront, you can scroll down and opt for a payment in 4 installments free of extra charge (0% interest):

PayPal will automatically calculate the amount of each installment and the date of the charge.

As it’s a scheduled payment, you will be asked to select the card from which the payment can be charged or add a new card:

Payment flow

Based on where you decide to show the PayPal checkout button, your users will see some slight differences in the payflow.

Let’s check how this works on every specific case.

1. Product page

If you enable the PayPal checkout on the product page, your users will only be able to pay with PayPal through the popup window of PayPal checkout. No additional payments are available for payments from the product page (like card payments, Sofort etc.).

Once you click on PayPal Checkout, you will be asked to log into your PayPal account and confirm the payment.

After that, you will be redirected to the checkout page to complete any extra missing fields and finalize the purchase.

2. Cart page

If you enable the PayPal Checkout button to appear on the Cart page, you will be able to see both the PayPal checkout button and the Debit or Credit Card button powered by PayPal.

No additional payments are available for payments from the Cart page (like MyBank, Sofort etc.).

1. If you choose the PayPal Checkout, a popup will open and the customer will be able to authorize the transaction.

Here they can import or edit the shipping addresses and also opt for a payment in installments.

Then, they will be redirected to the Cart page once again, where they can proceed to the checkout and fill out all the other missing checkout fields.

The checkout will be pre-populated with their details imported from the PayPal account, but can be changed here, if they want them to be different.

If the customer adds a new shipping address, it will be automatically saved in their PayPal account as an additional option as well.

2. If you choose Debit or Credit card, you will be able to enter your card details on the Cart page (in the embedded form), authorize the payment and then be directed to the Checkout page to fill out all the empty fields and finalize the purchase.

3. Checkout page

If you enable the PayPal Checkout button to appear on the Checkout page, you will be able to see both the PayPal checkout button and other payment methods available.

Authorize the payment by entering your details either in PayPal or using any of the other available payments, fill out the remaining checkout fields, and then finalize the purchase.