View Product Page

Requirements

In order use the plugin correctly make sure the following requirements are met

PayPal requirements

  • you need to own a Business kind of account
  • You need to have created a PayPal app
  • the PayPal Adaptive Payments service needs to be active on your account

Server Requirements

  • TLS1.2 Protocol
  • SHA-256 Encryption
  • HTTP1.1

YITH Paypal Adaptive Payments for WooCommerce doesn’t manage recurring payments.


Required app with PayPal Adaptive Payment service

This procedure needs to be done only in case you are using the plugin in a live environment, not a a sandbox one.

  1. Access at https://developer.paypal.com/ using your PayPal account credentials and access your dashboard


  2. Click on My Apps & Credentials -> Manage NVP/SOAP API
  3. Log in, as requested, and click on “New Application” .


  4. Assign a title to this app


  5. Open the Adaptive Payments section and enable the “Basic Payments” and
    “Chained Payments” methods. Without doing this, the plugin wouldn’t be able to work.


    In order to use the chance to apply a delay to the payment of commissions with the Chained method, enable “Delayed”.


  6. For the “Chained” type of payment, you need to specify the primary receiver and the secondary receiver

If you complete all of these steps, wait until PayPal confirms the correct activation of the service.

Sandbox

Sandbox

If you want to test the plugin in sandbox mode, take the followint steps.

  1. Access https://developer.paypal.com with your Paypal Business credentials.
  2. Access the Accounts section and click on the “Create account” button.

  3. Create the accounts you need to test the plugin: you are going to need a business account (representing the main vendor account) and at least another one of the personal type to associate to the recipient.

  4. once the test accounts are created, enter the plugin settings panel and enable the sandbox mode.

Recovery of the required credentials

Recovery of the required credentials

Now you are ready to recover the credentials required by the plugin within the settings panel, namely:

  • Paypal API username
  • Paypal API password
  • Application signature
  • Application ID

  1. In case you are using the Live version, access your PayPal Business account on https://www.paypal.com/; if you are testing the plugin in Sandbox mode, access https://www.sandbox.paypal.com with your Business test account credentials.
  2. Click on Profile
  3. Open the My Selling Tools
  4. Click on Update by the API Keys section

  5. Click on View API Signature

  6. Now you can copy the credentials and paste them in the plugin settings panel

To recover theAPP ID access the following address: https://www.paypal-apps.com/user/my-account/applications

In a sandbox environment, the APP ID is unique and you will find it at the link specified, at the bottom of the page, as shown in the screenshot.

Insert Recipients

Inserting recipients

Now that you have the required PayPal credentials, you can register all recipients you are going to share your store sales with.

Remember that any recipient must be a user that’s registered to your website and among the PayPal recipients address list, yours must not be entered, meaning the main vendor’s.

The receiver is not required to have an account PayPal Business.

  1. Access the Receiver Settings section in the plugin settings panel.
  2. Type in the user name of the recipient (in case of no results, make sure the user is registered in your store)
  3. For each recipient, specify the commission rate they are entitled to in case of sales and the email address associated to his PayPal account.

From now on, each of the users you entered, will receive a commission for each registered sale on your shop.

General information

General information

This plugins adds the PayPal Adaptive Payments payment method to the checkout page, when at least one product “with commissions” is present.

Only in this case, all other payment gateways will be automatically removed, once PayPal Adaptive Payments is active.

You can choose between two different payment methods: Parallel and Chained.
Whichever you pick, don’t forget to insert theemail address associated to your PayPal Business account.

For each commission, PayPal applies a fee which is automatically subtracted from the amount credited to the vendor user.

Parallel method

The Parallel payment method has the following features:

  • Payment is immediately split among main vendors and recipients
  • PayPal accepts up to a maximum amount of di 6 recipients (Including the admin). For further information, visit this page.
  • the purchasing user can see the complete list of vendors

Chained method

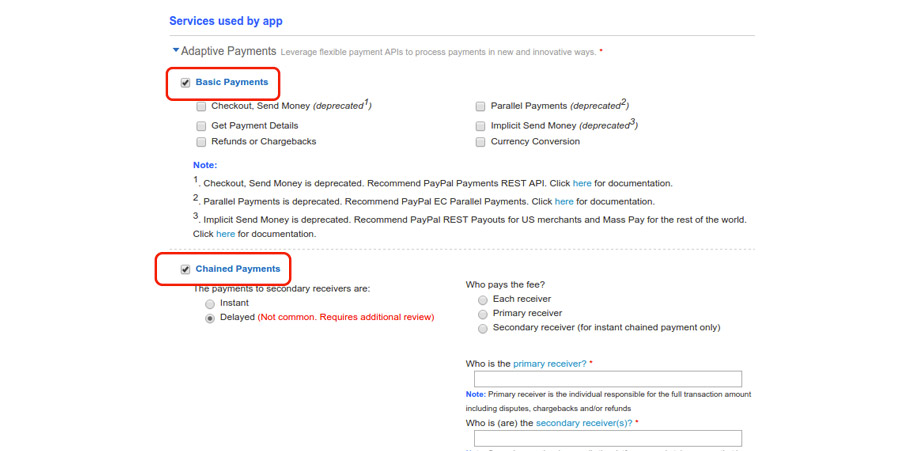
The Chained method offers you the chance to receive the payment from the user and to pay the commissions to vendors later.

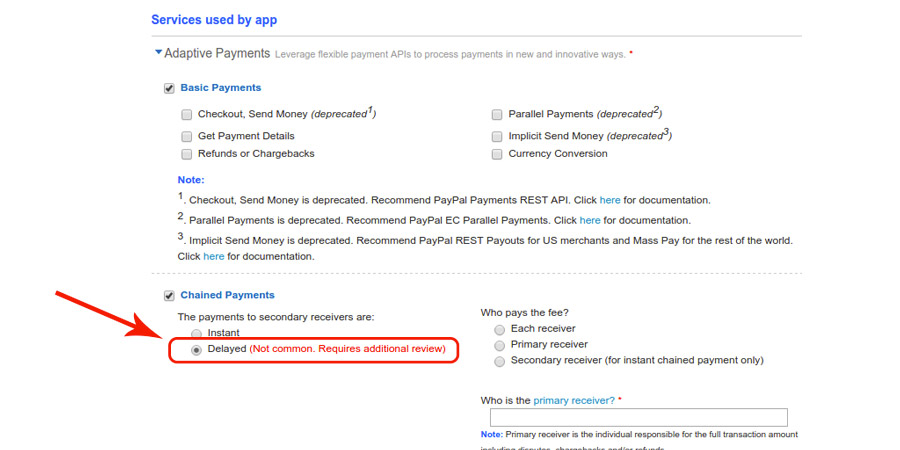
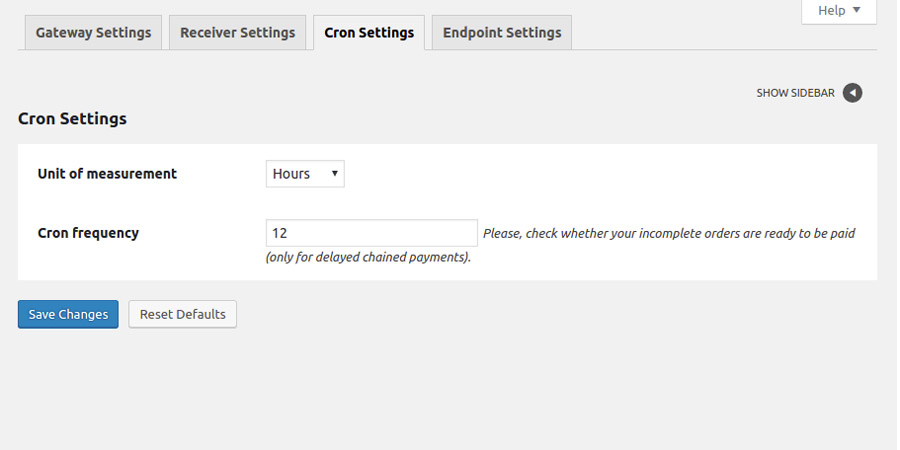
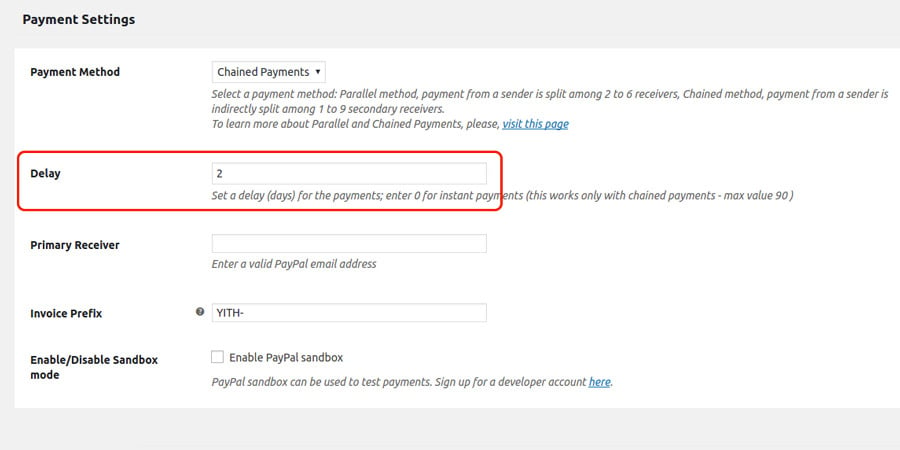
Commissions payment will occur automatically after x days from the moment the user performs the payment and the money will be taken directly from their PayPal account.

The system uses cron to automate payments using the Chained Delayed method.

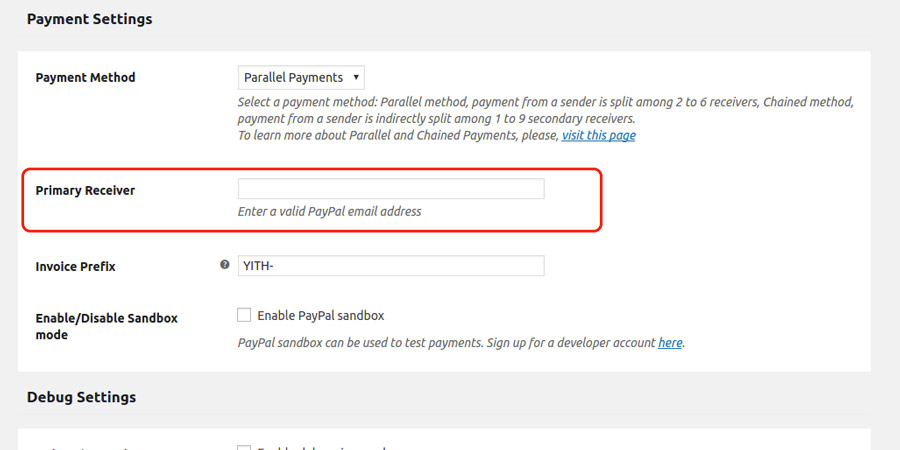
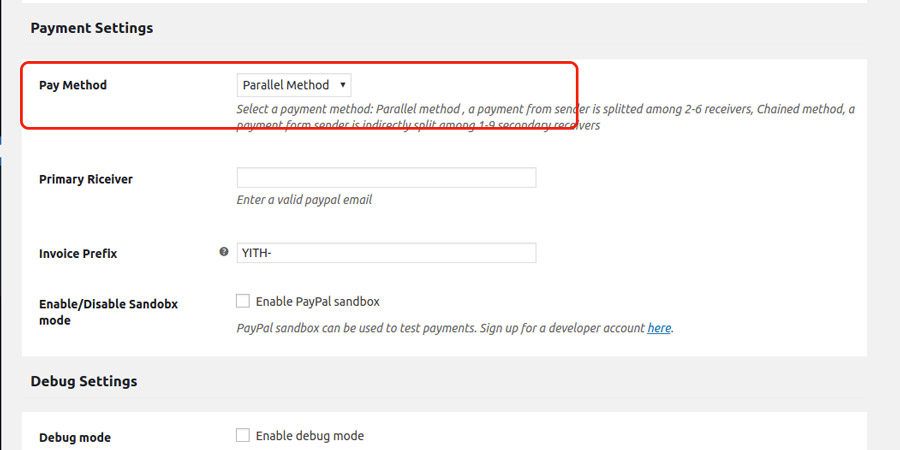
You can have at most one primary receiver and 1-9 secondary receivers.

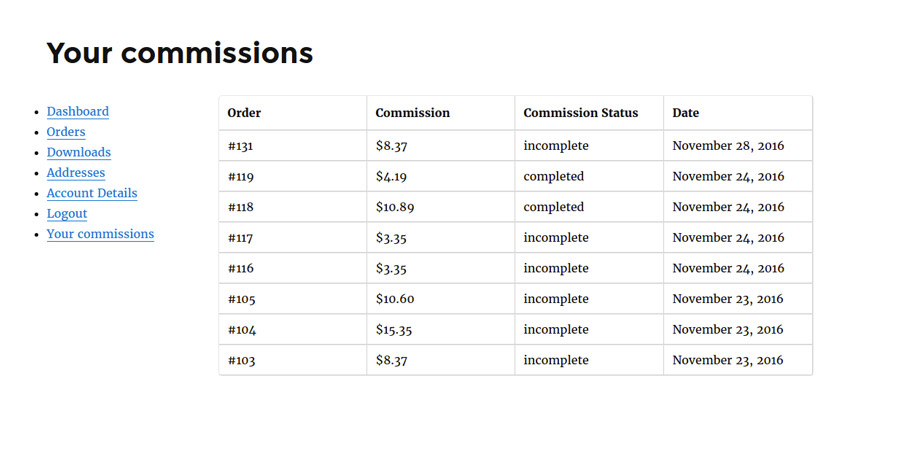
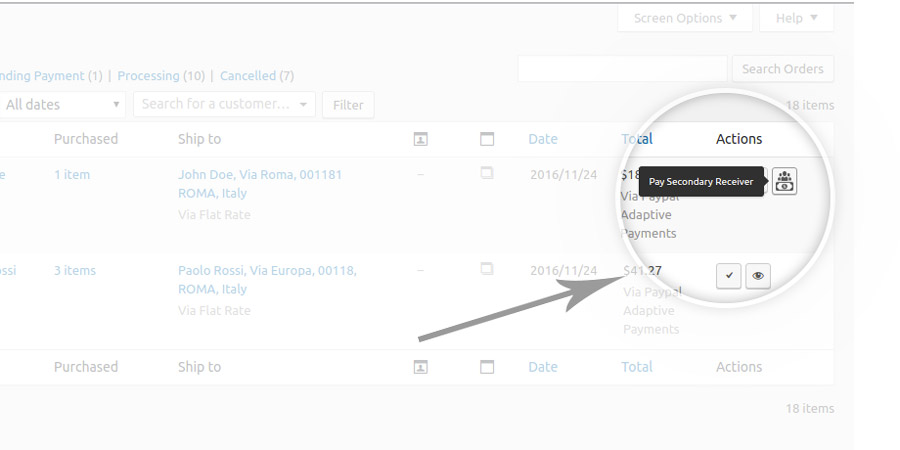
In the case of postponed payment (Chained Delayed), the payment of commissions can be manually forced by the dedicated button you find on Orders page.

In conclusion, the basic difference between Chained and Parallel is that by choosing the first one, the whole amount paid by the user is going to be credited to the PayPal account of the admin, and from there, commission payments are going to be automatically issued to the recipients.

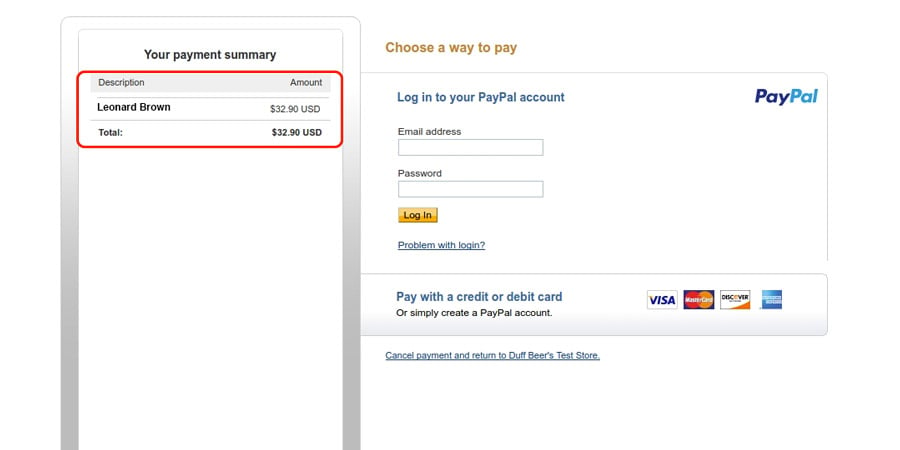
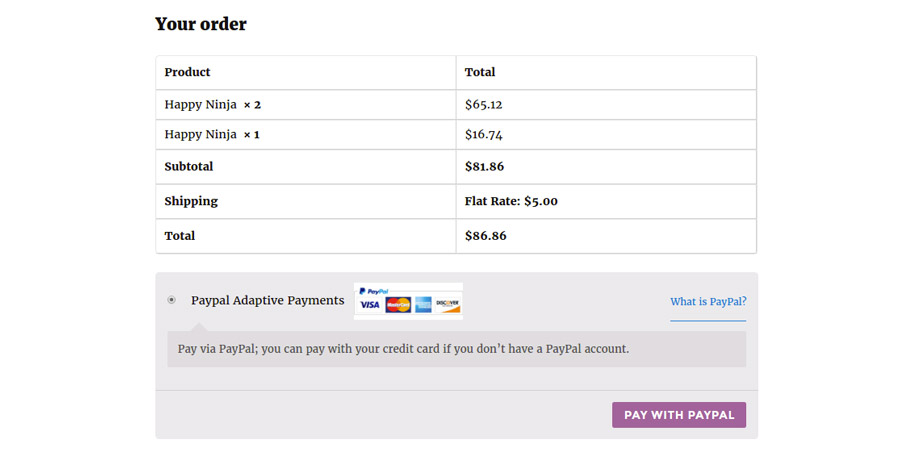
During payment, the admin name is going to be the only one displayed to users in the vendors list, contrarily to what happens with the Parallel payment method.

Cron settings

Cron settings

As stated earlier, WordPress’ cron are used to handle commission payments inChained Delayed mode.

According to what you set in the Cron Settings tab in the plugin settings panel, the plugin schedules a recurring check during which it verifies if it’s necessary to issue one or more payments.

Don’t forget to verify that your server server is enabled to use cron. This condition is required for the“Chained Delayed” method to work properly.

My Account page

My Account page

Each recipient can verify the state of their commissions by accessing the “Your Commissions” section in the “My Account” page.