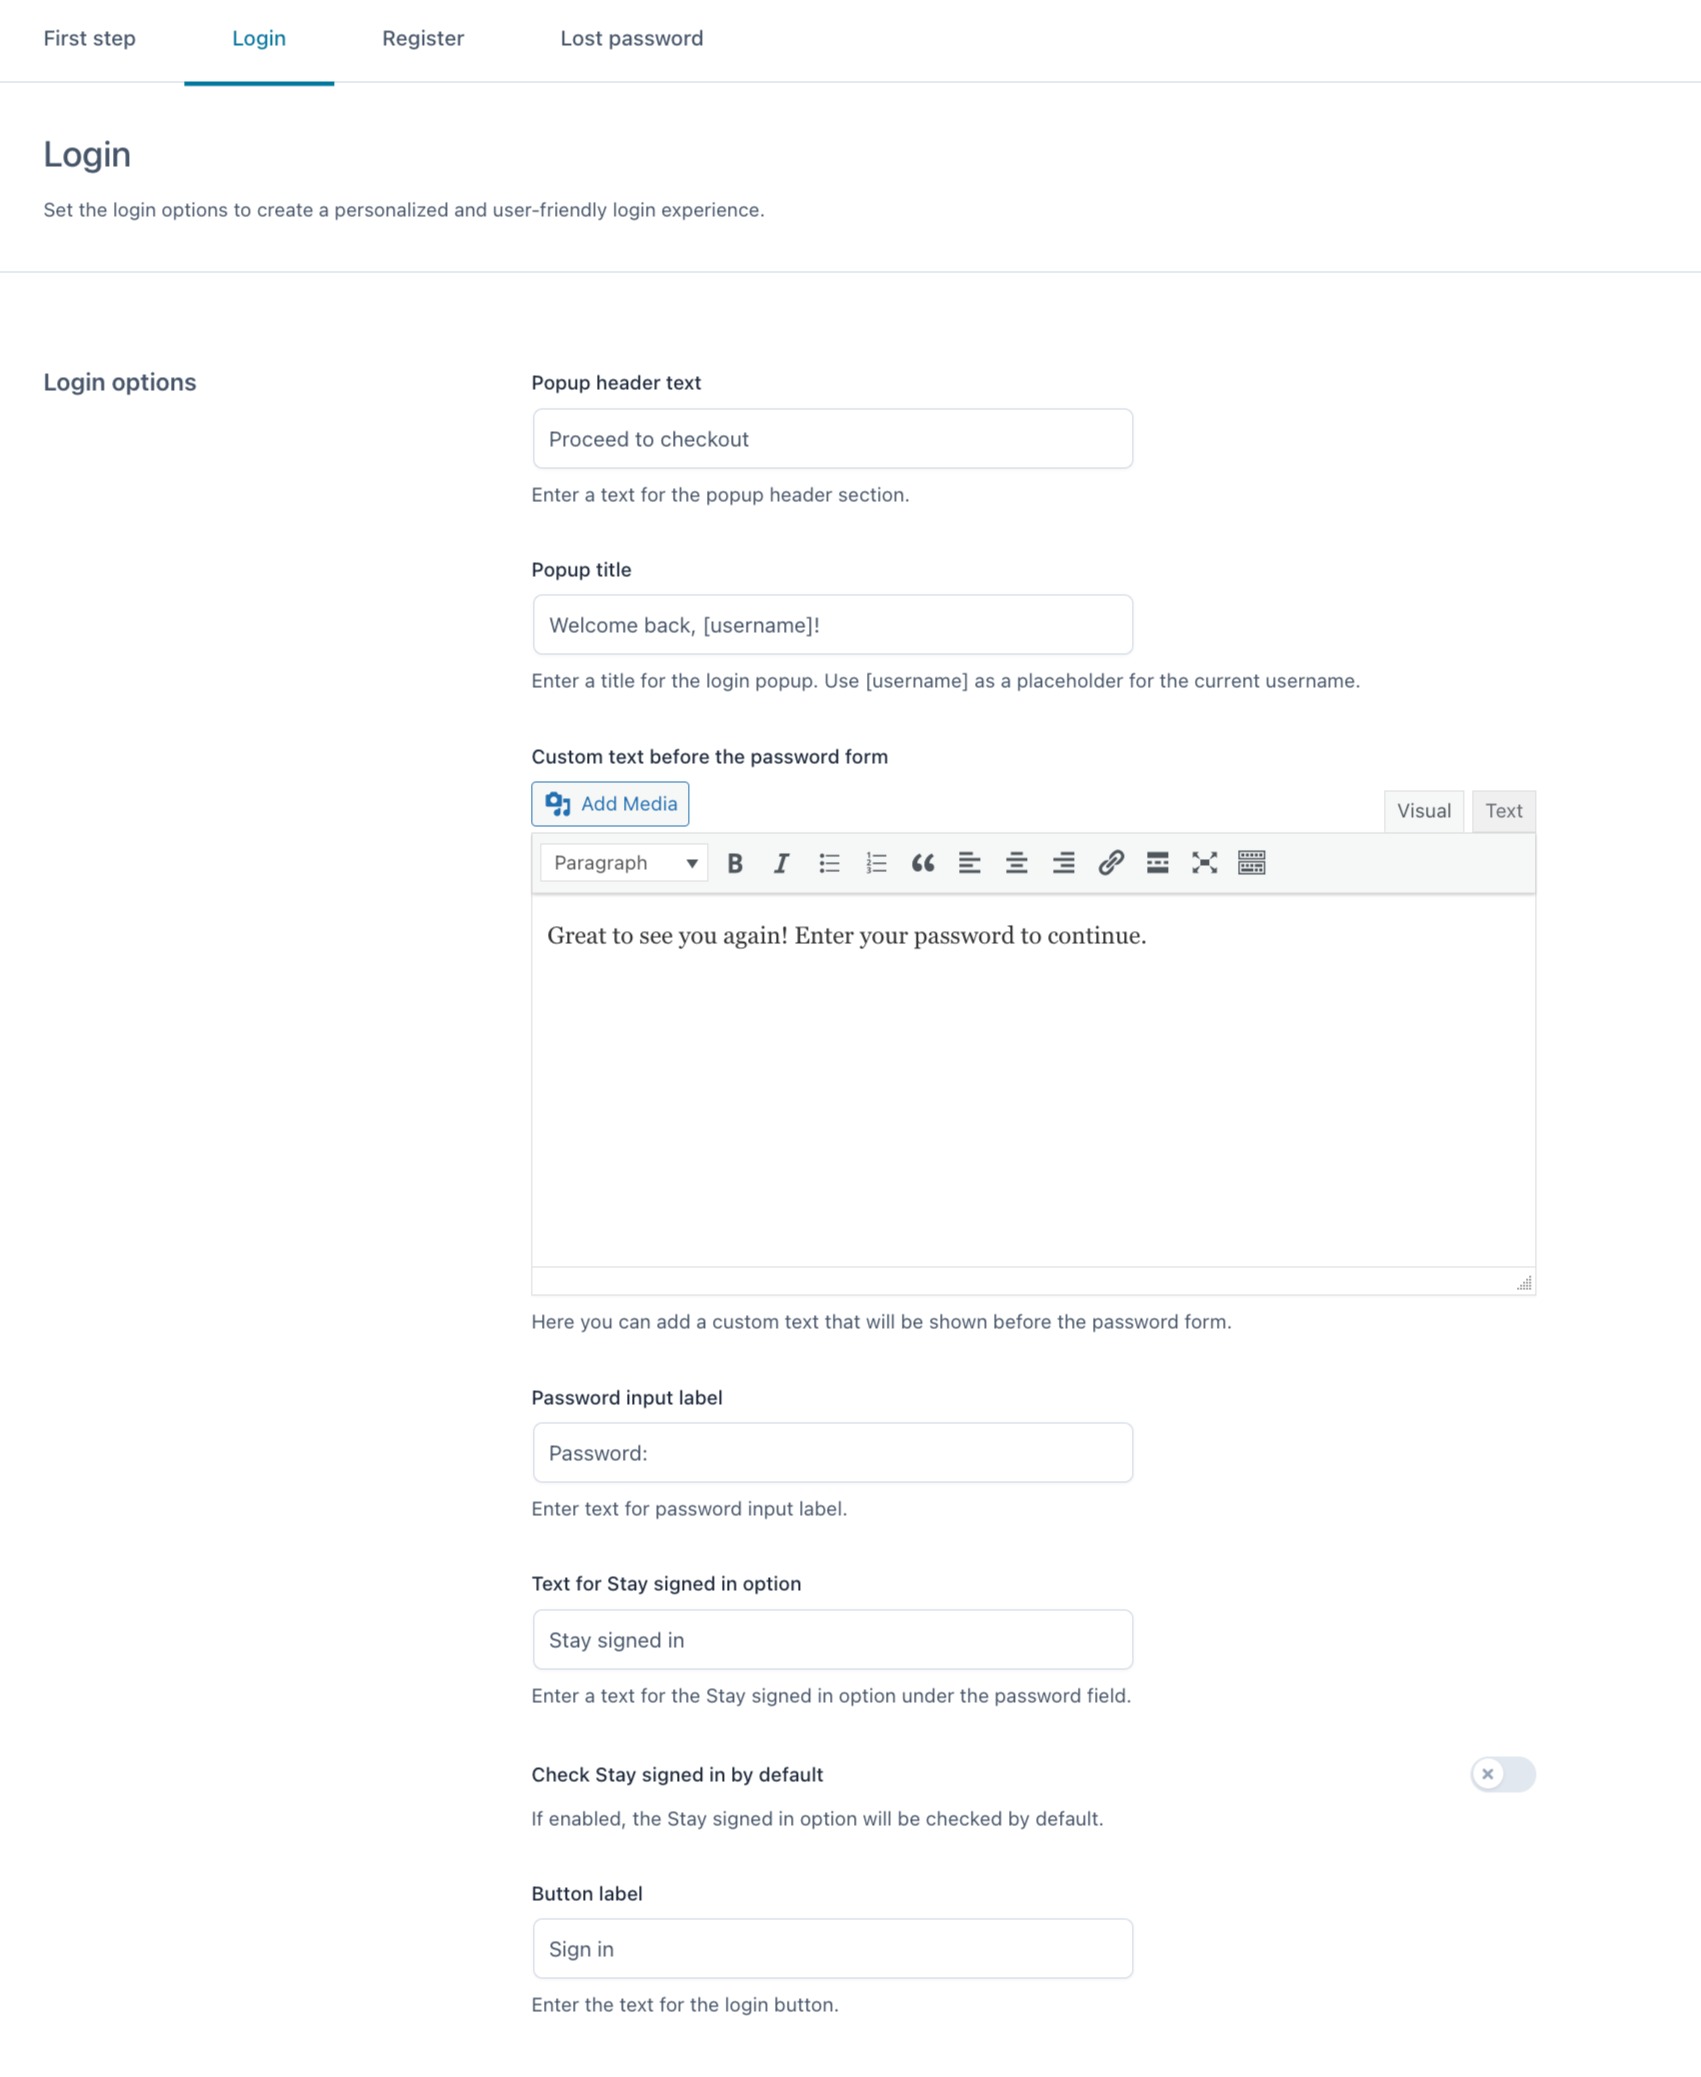
Here, you can find all the options for the first step and social login popups.
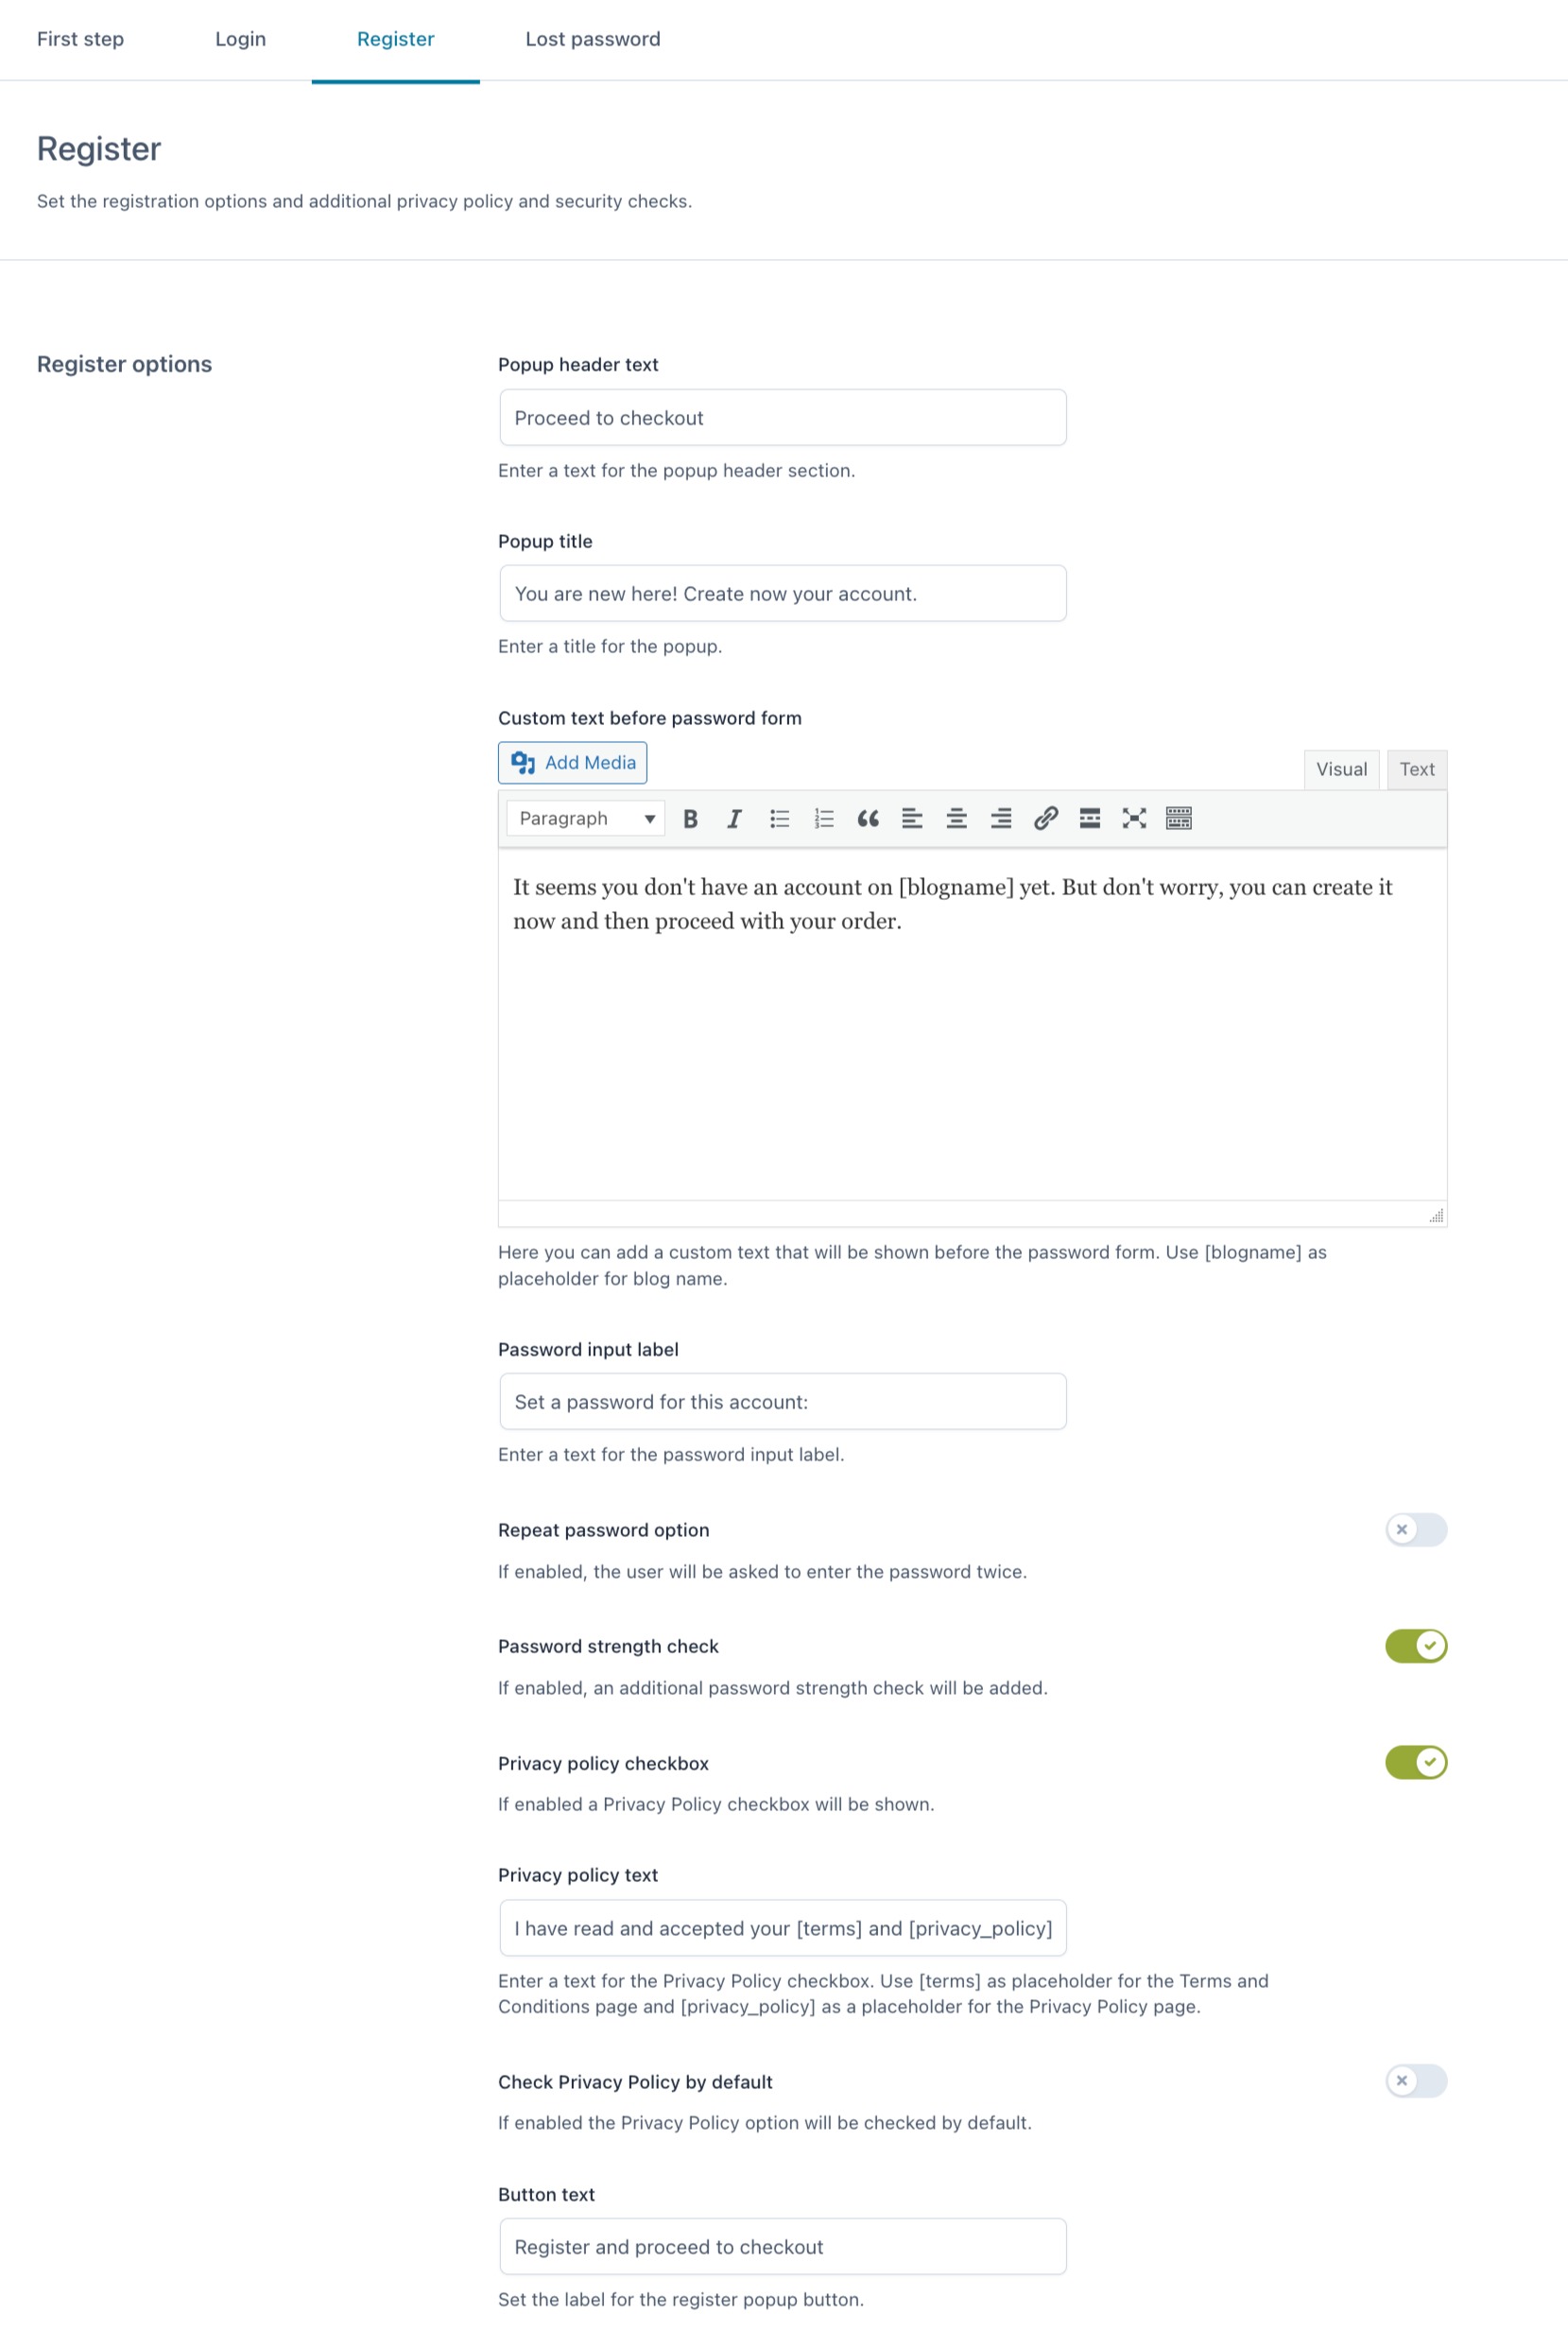
First step options
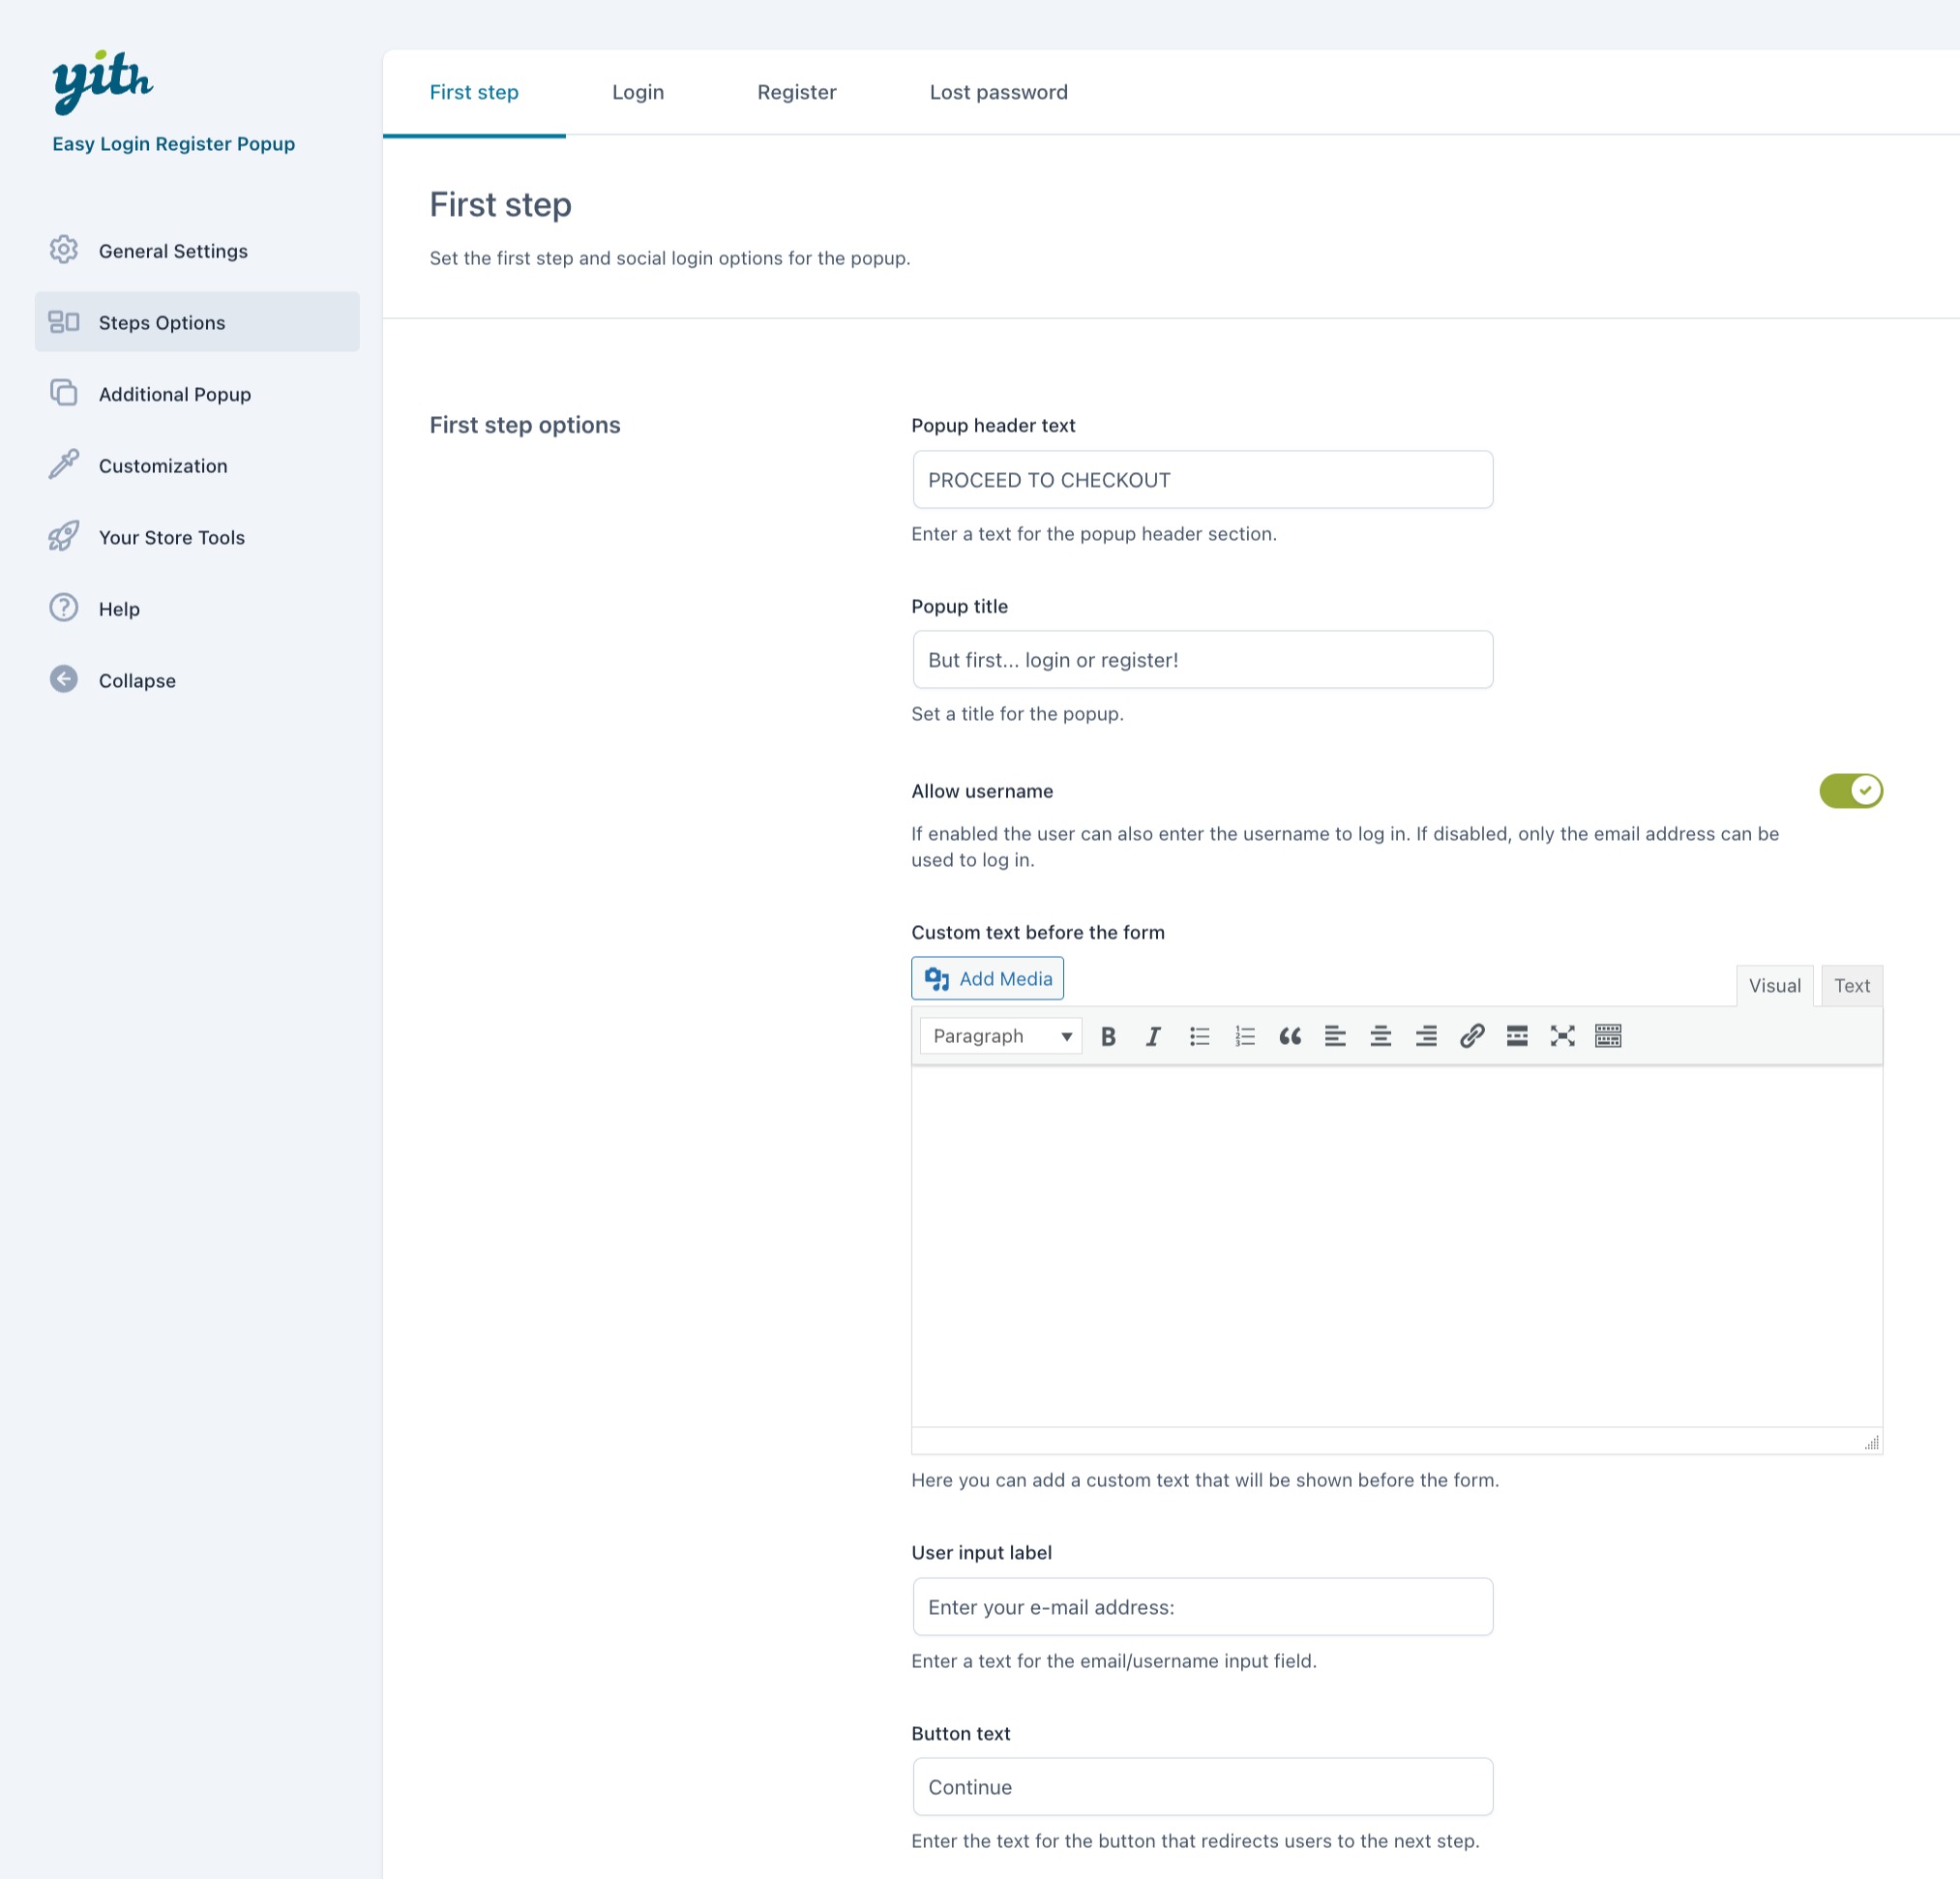
- Popup header text: use this option to customize the text shown in the top section of the popup.
- Popup title: use this option to customize the text shown as title of the popup.
- Allow username: enable to let your users login with their username. Keep it disabled if only the email address is allowed.
- User input label: use this option to set up a custom title for the email input box. Default text: ‘Enter your email address or username‘.
- Button text: use this option to customize the text of the action button. Default text: Continue.
Social login options
Here, you can set up the social login options through Facebook and Google, which will be added to the popup as an alternative to the standard login through email address or username.
Facebook login
IMPORTANT: as of February 1, 2024, Developer Platform requires Business Verification for Advanced Access. So, this is necessary also for creating a social login app.
To verify your Meta Business account, please, check this page.
To set up the Facebook login, you’ll have to create a Facebook app. Please, refer to this page for details about how to do this.
Once finished with the app configuration, you will be able to find the Facebook App ID and Facebook App Secret in the app and copy and paste them into the plugin settings.
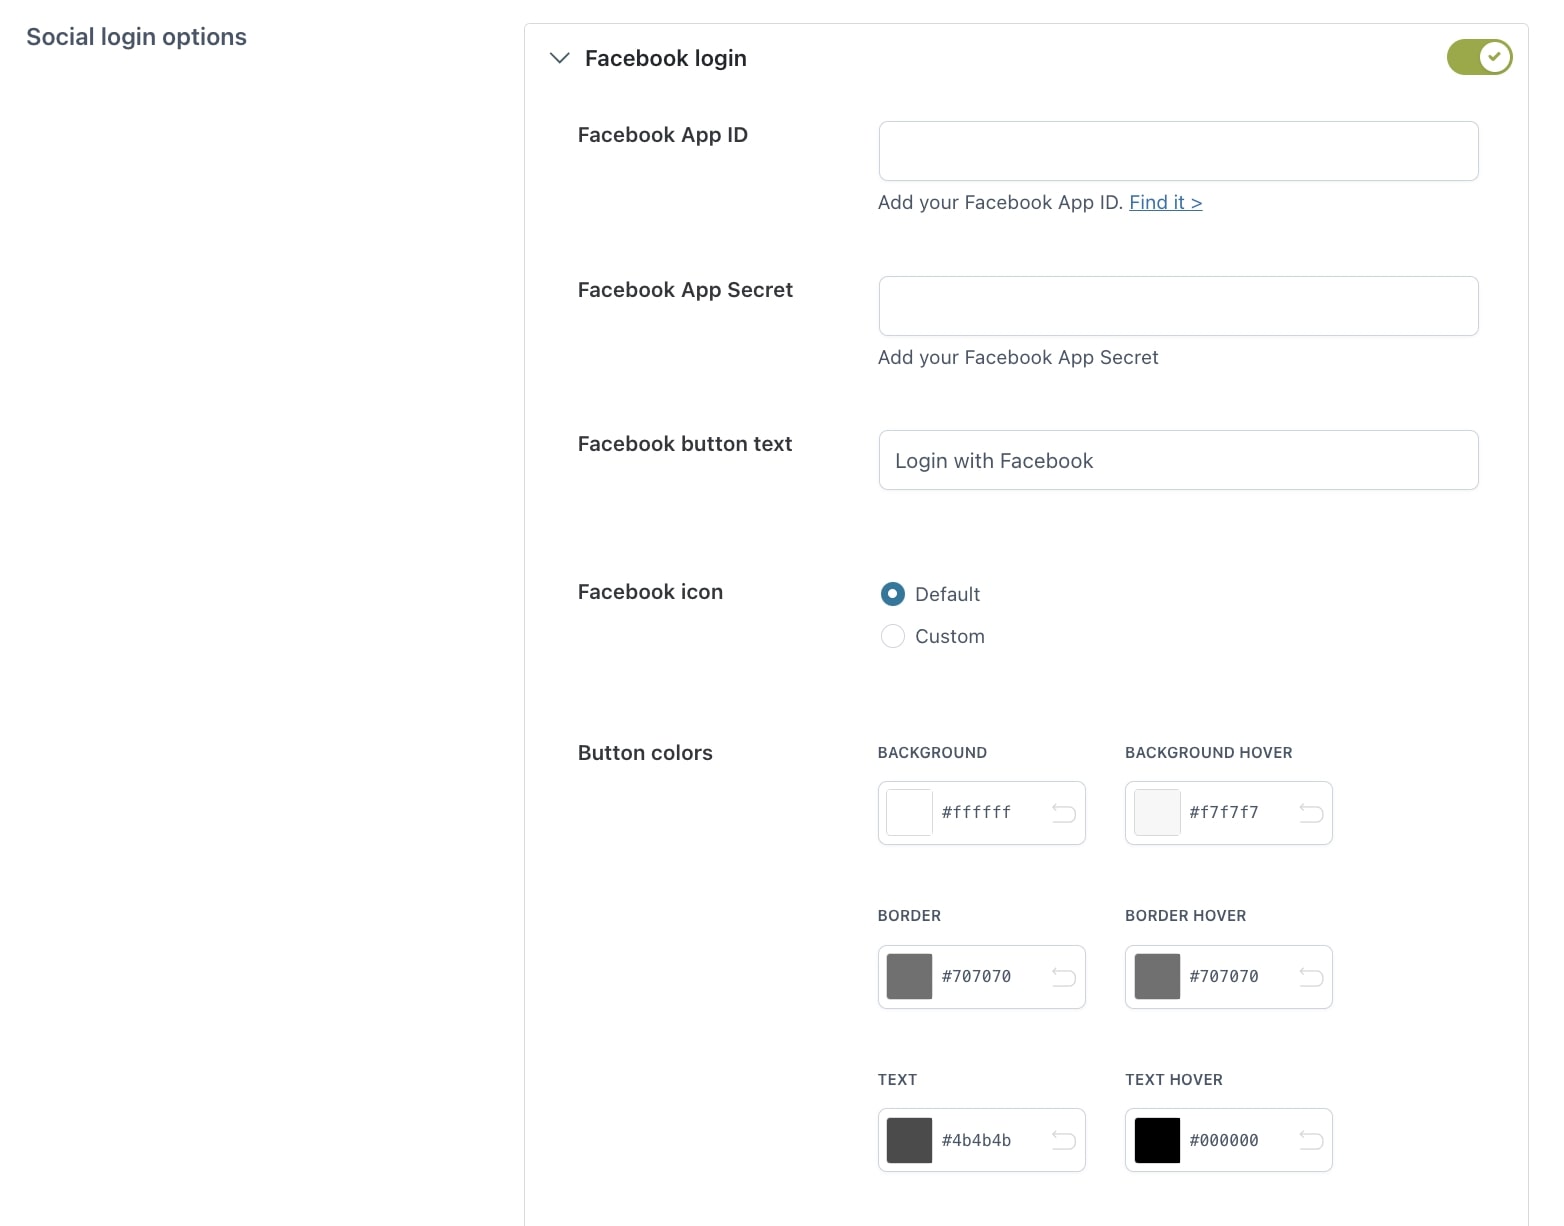
Now, you can customize also the following options:
- Facebook button text: use this option to enter the text to show to users to log in through Facebook.
- Facebook icon: choose the icon to show from
- Default
- Custom: upload your custom icon (recommended size is 20×20 px).
- Button colors: set button, border, and text colors (default and hover).
Make sure you enable the toggle when you’re ready to show the login button.
Google settings
To connect Google login, you first need to create a Google app. Please, refer to this page for details about how to do this.
Once finished with the app configuration, you will be able to find the Google Client ID in the app and copy and paste it into the plugin settings.
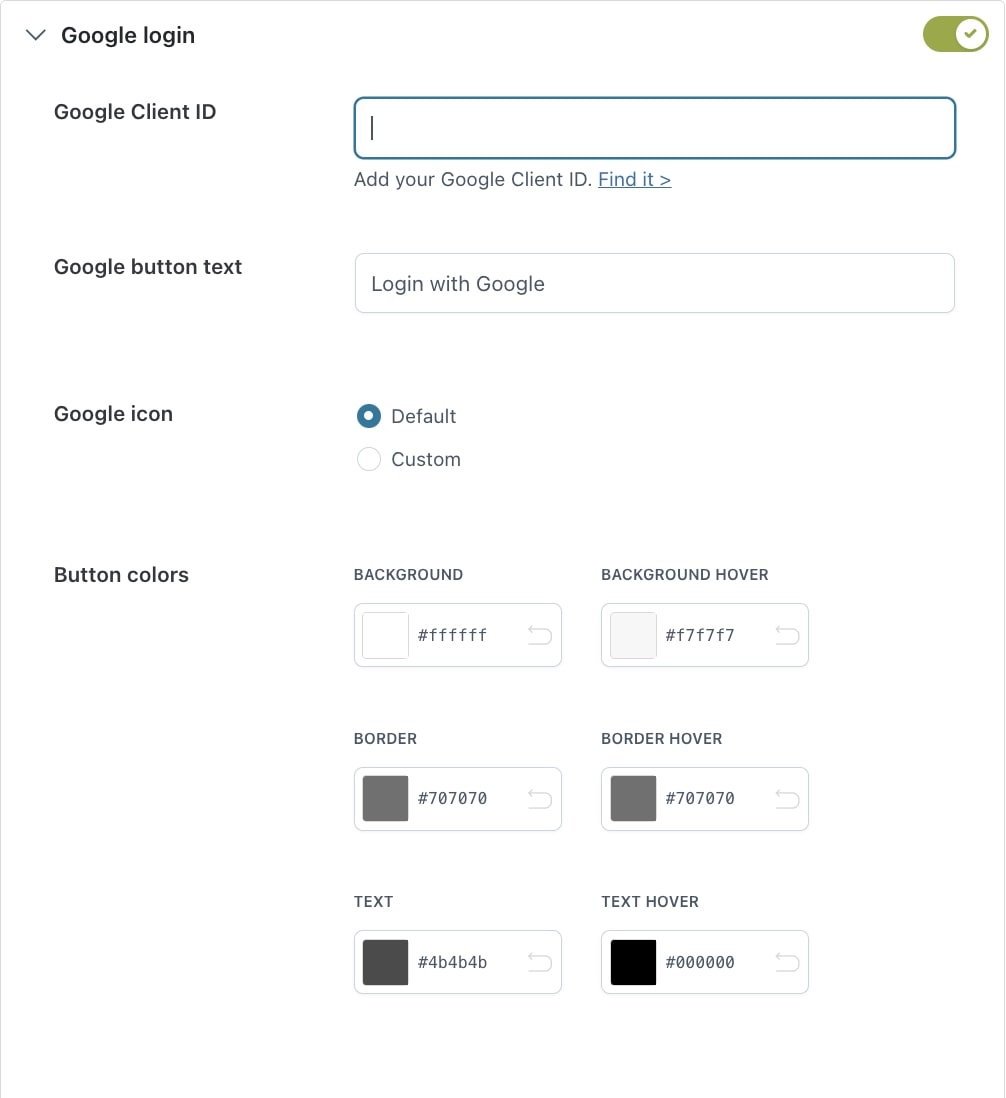
Now, you can customize also the following options:
- Google button text: use this option to enter the text to show to users to log in through Google.
- Google icon: choose the icon to show from:
- Default
- Custom: upload your custom icon (recommended size is 20×20 px).
- Button colors: set button, border, and text colors (default and hover).
Make sure you enable the toggle when you’re ready to show the login button.

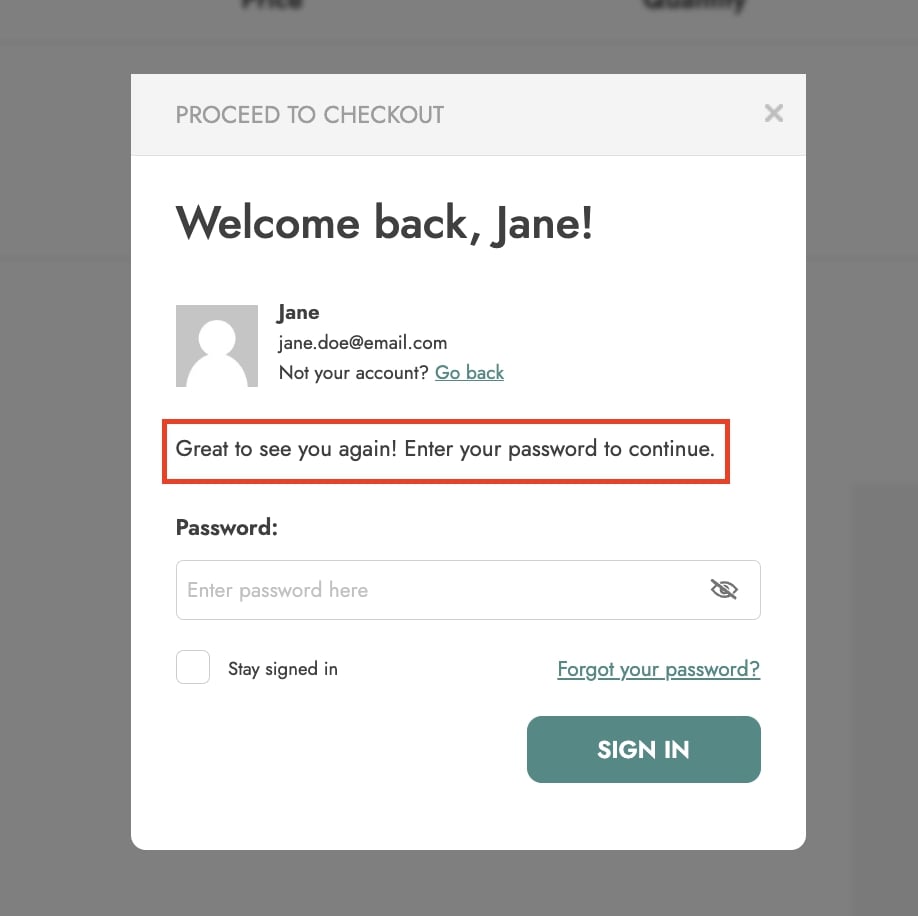
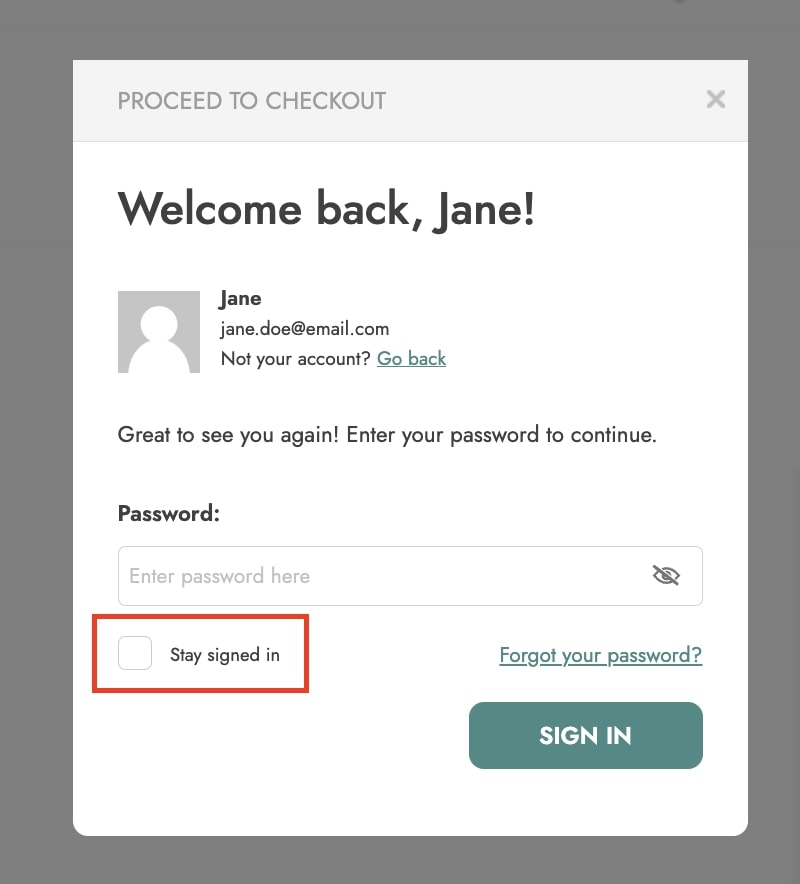
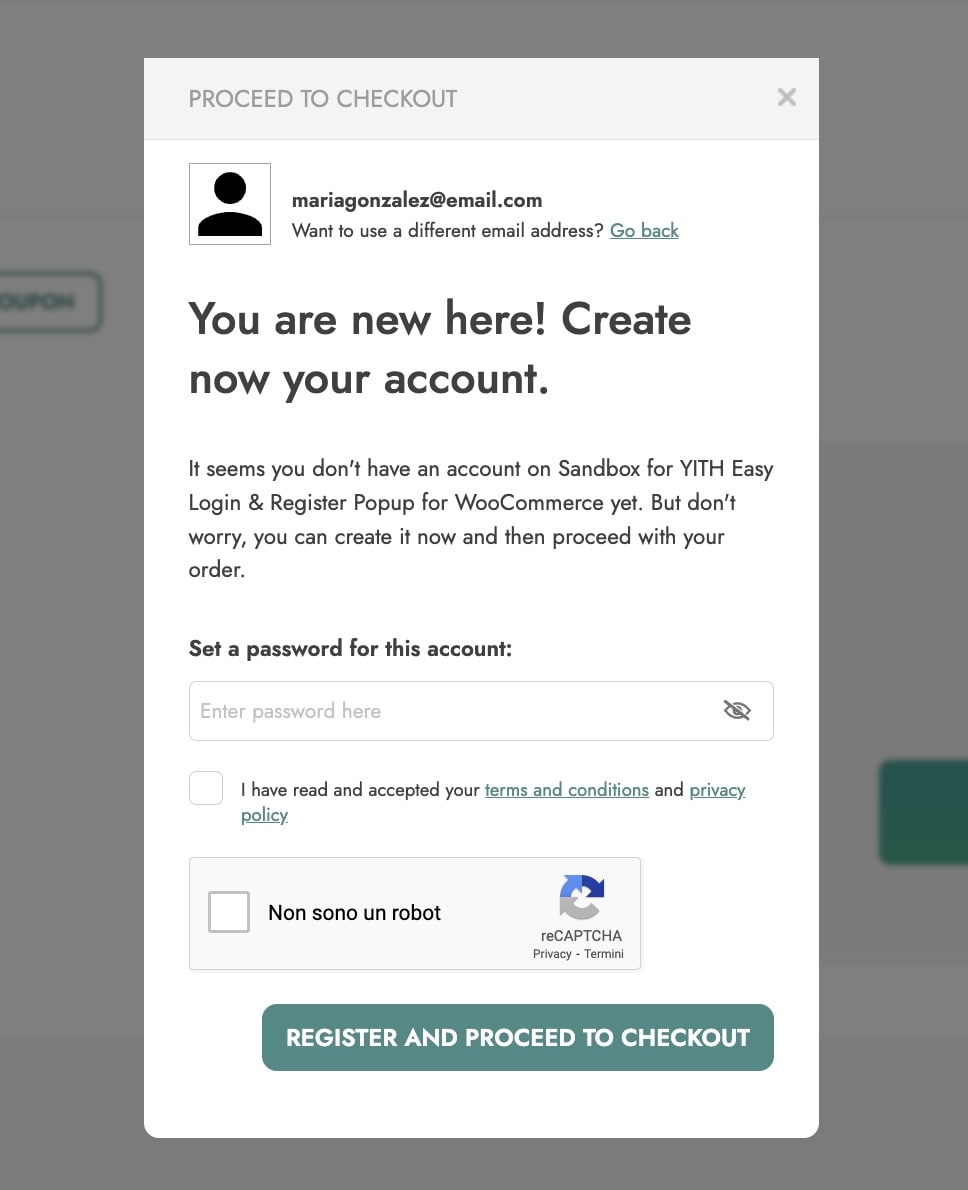
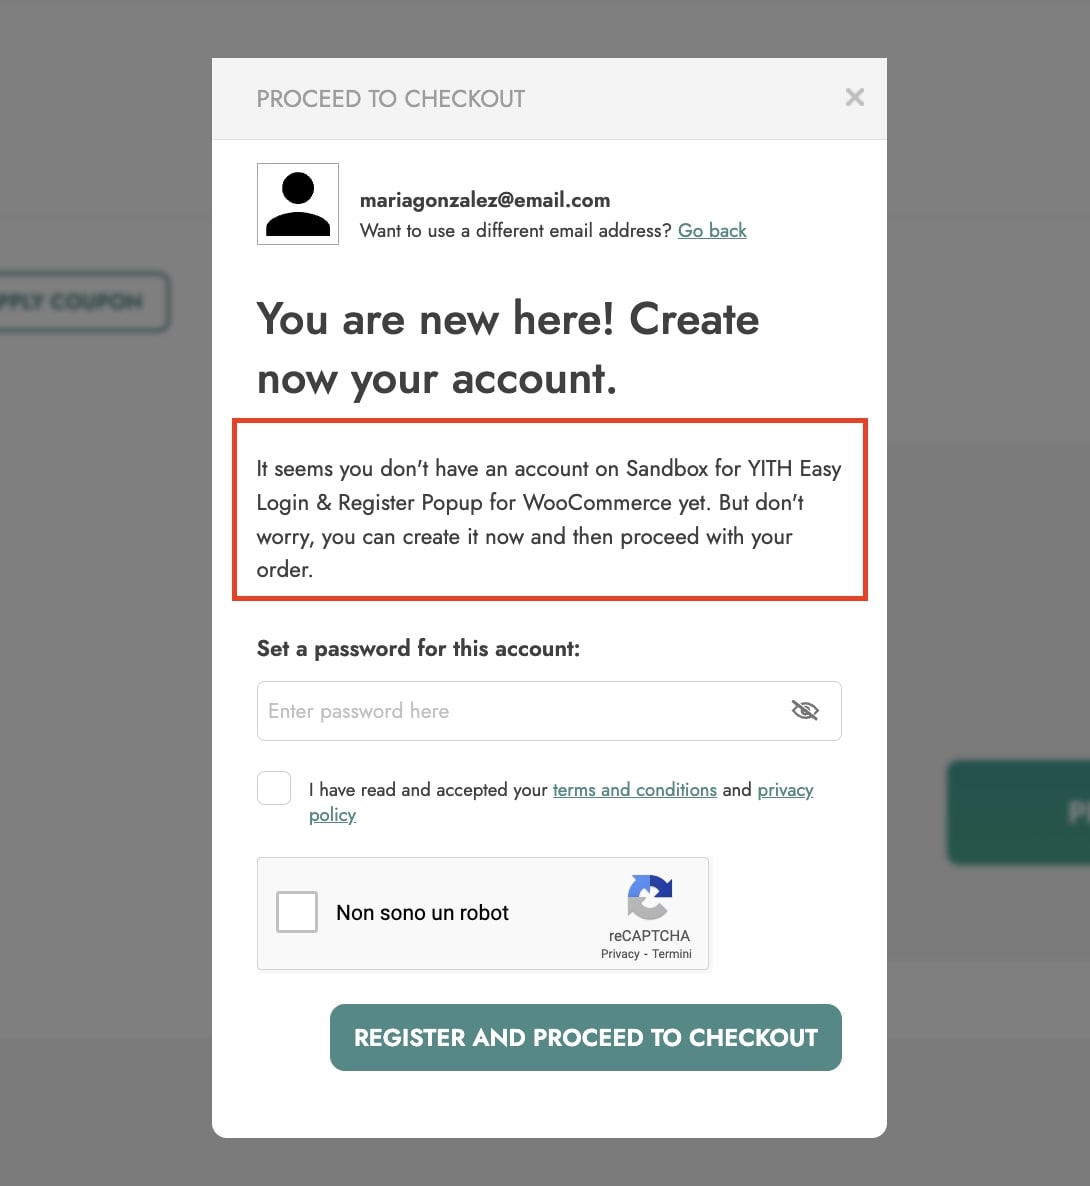
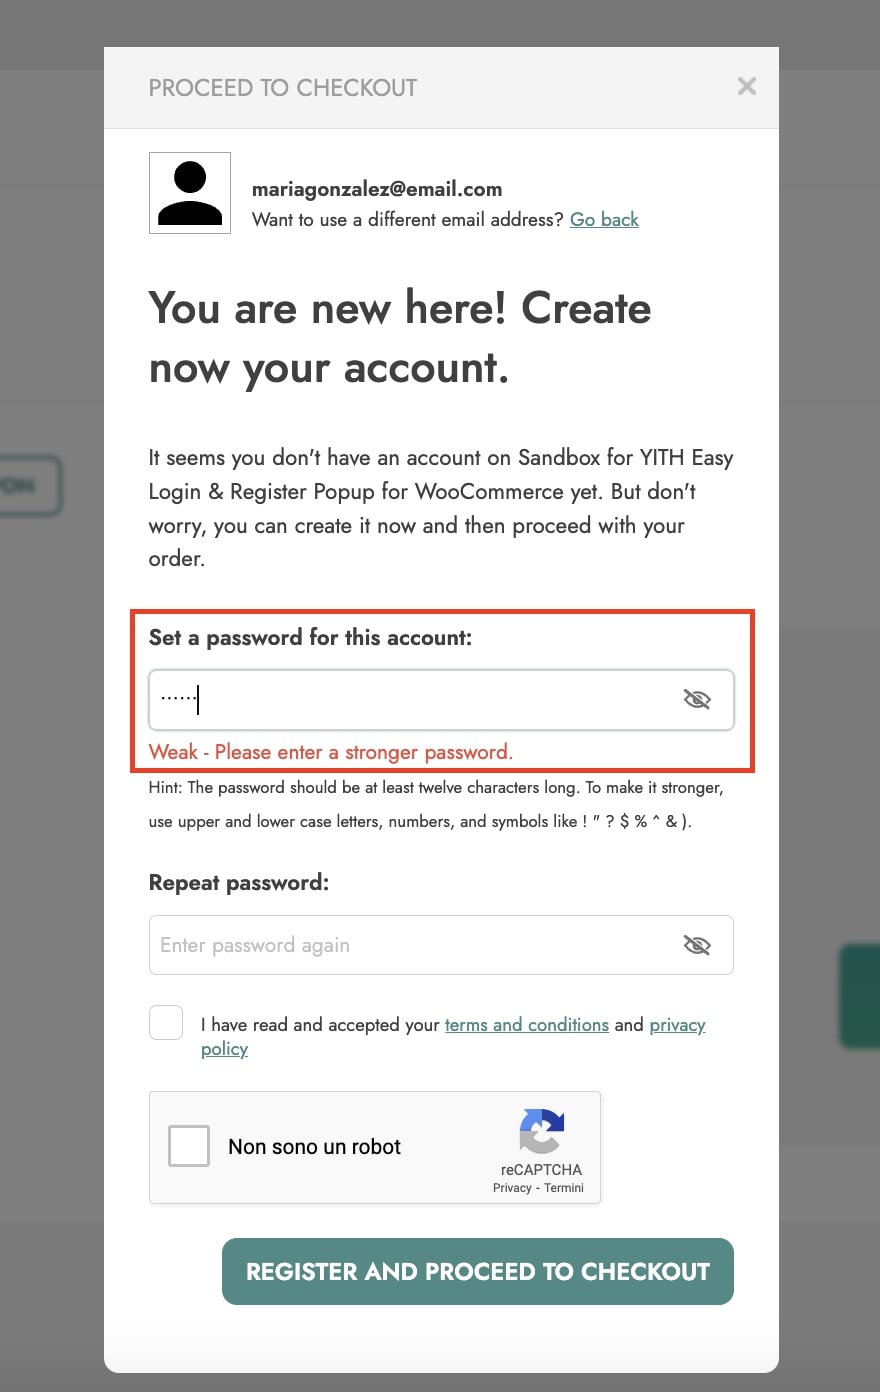
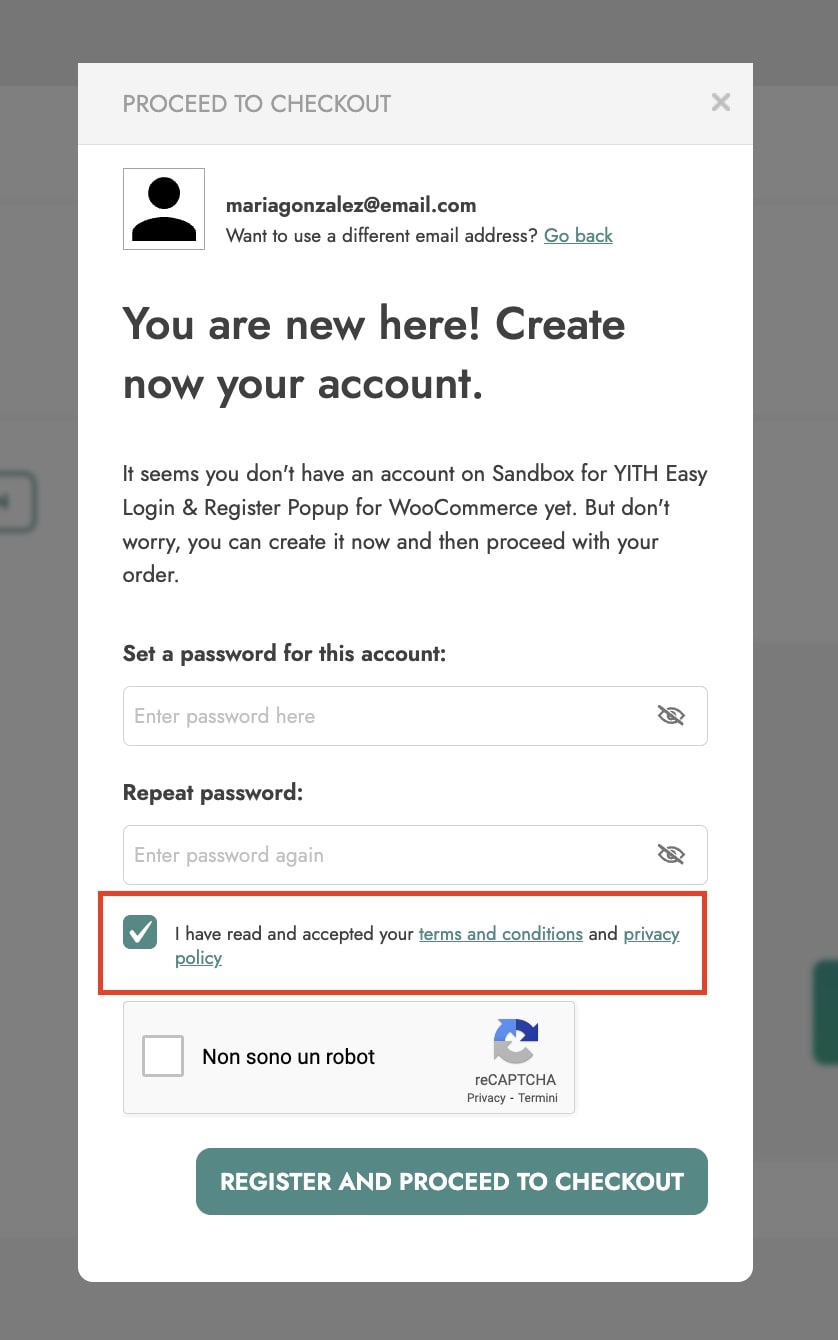
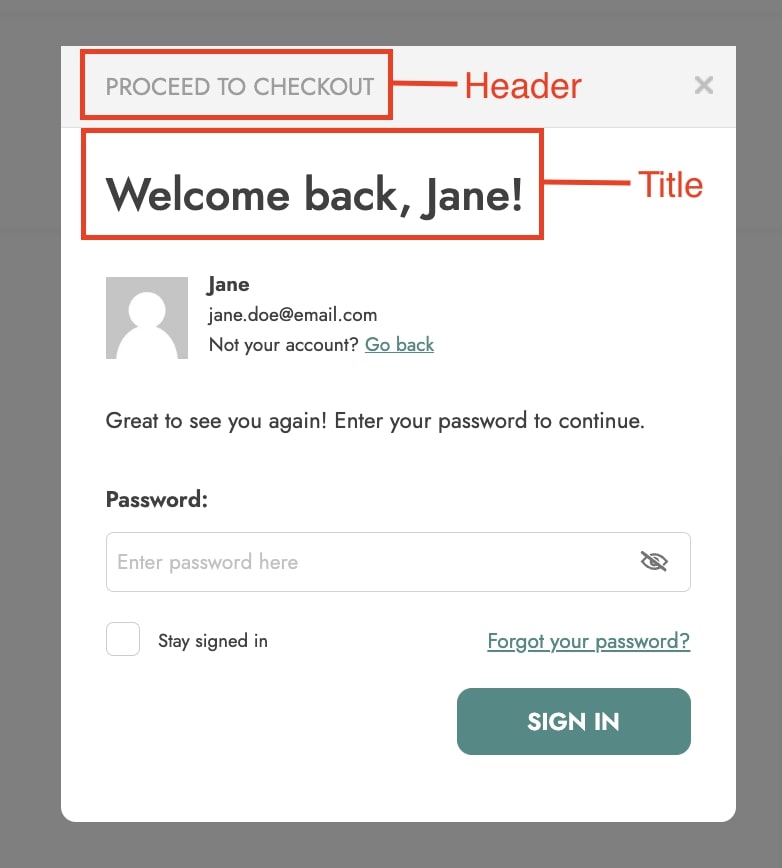
What happens next?
Based on what your customers enter here, they will be either shown different content.
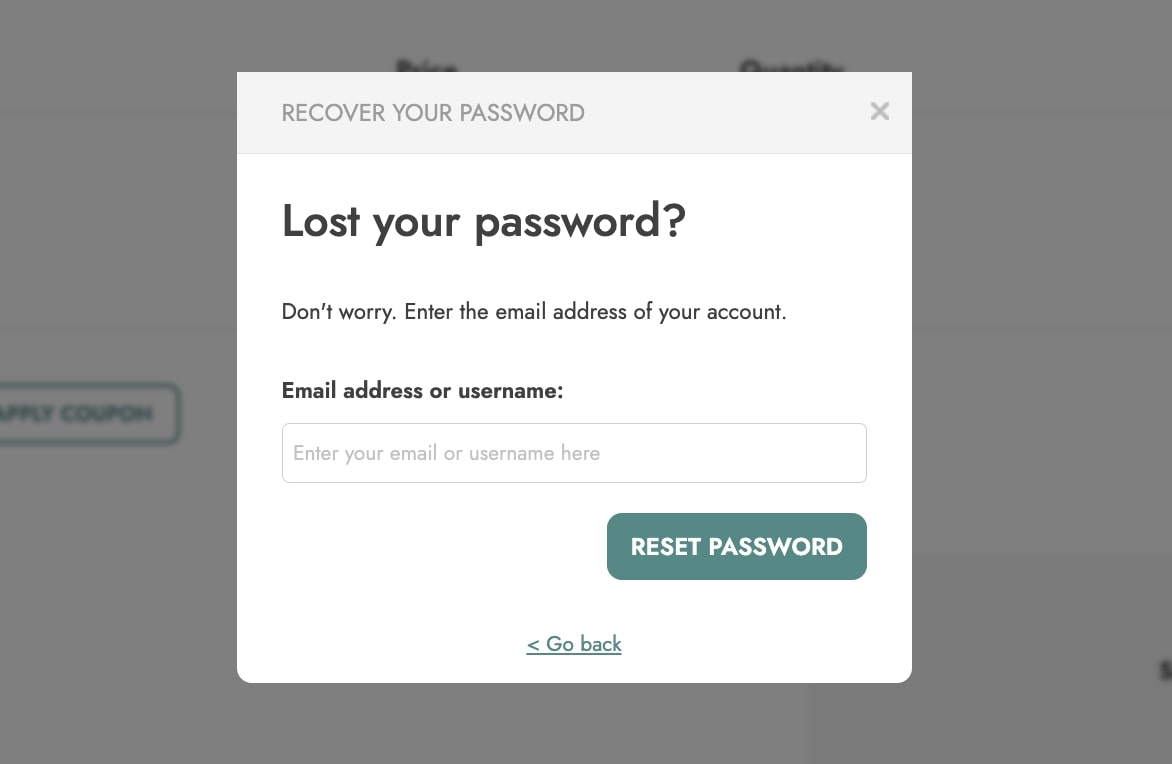
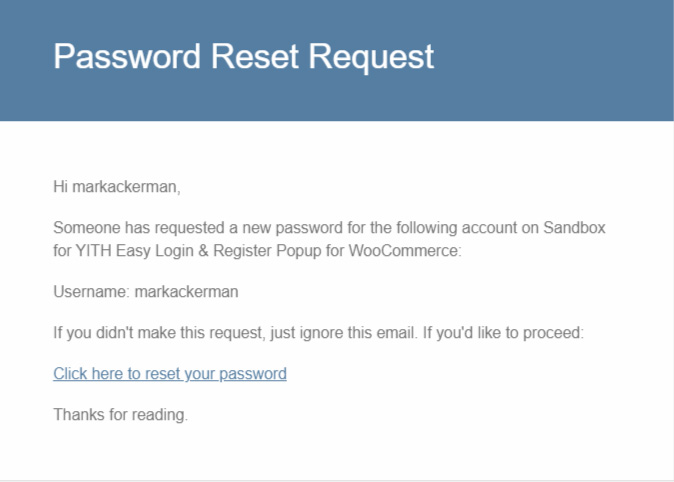
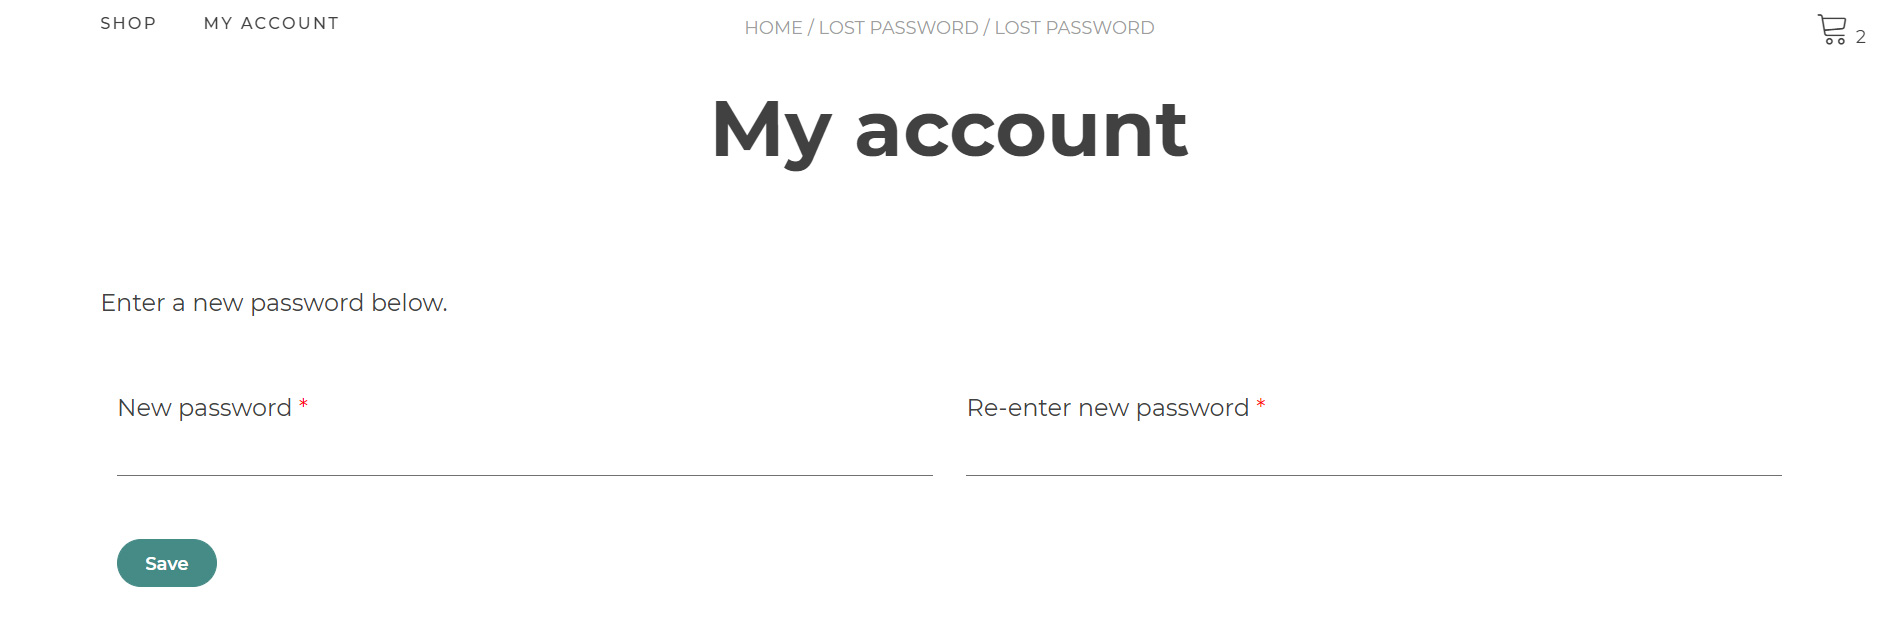
- If they enter a valid username or an email address linked to an existing account on your website, they can complete the login and enter their password. Please, refer to the Login options page for more details about the content of this step.
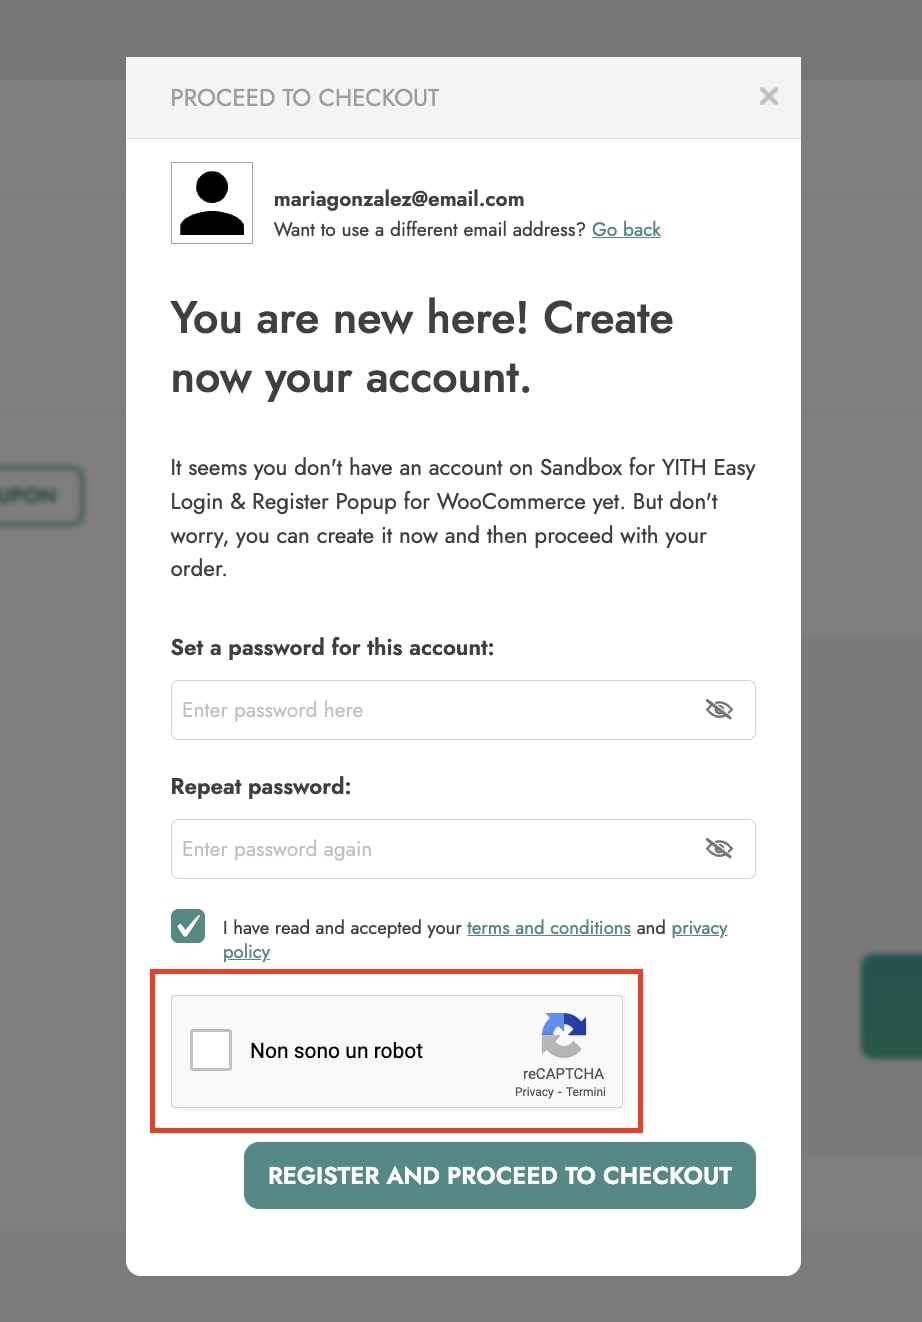
- If they don’t enter a valid username or email address, they can register using that address or by entering a new one. Please, refer to the Register options page for more details about the content of this step.