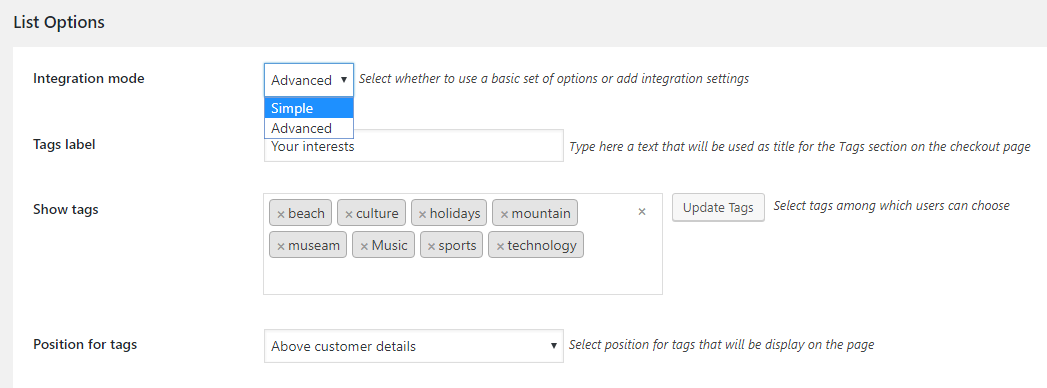
In List options, you have two integration modes. You can select “simple” if you want to send a general newsletter to your customers or “advanced” to let the customer choose their interests among pre-set tags.
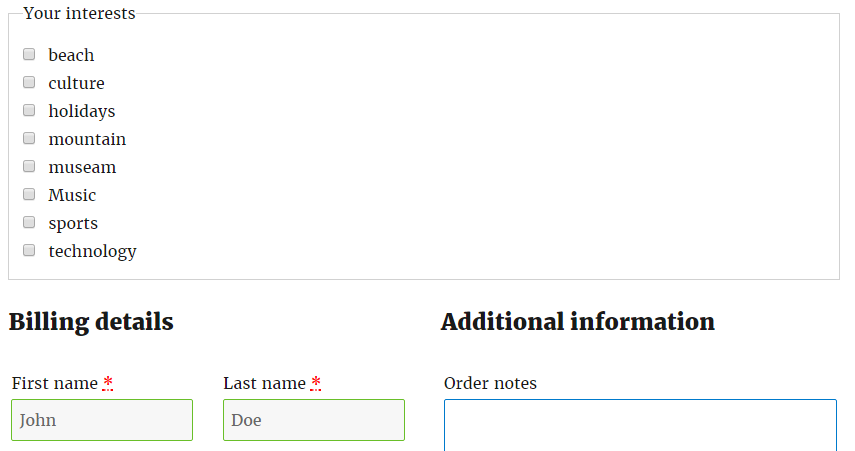
Based on the customers´ interest, you are able to send a matching newsletter.
- Tags label: you can enter a text that will be shown above the tag list in the Checkout page, for example, “Your interests”.
- Show tags: to make it easier for customers, you can add tags so they can choose what they are interested in.
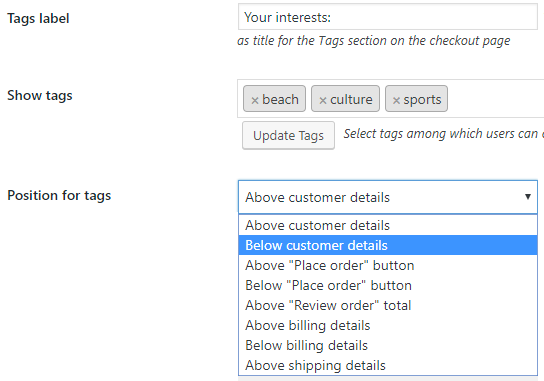
- Position for tags: you can select the position where the tags will be shown on the Checkout page.
Advanced integration modality
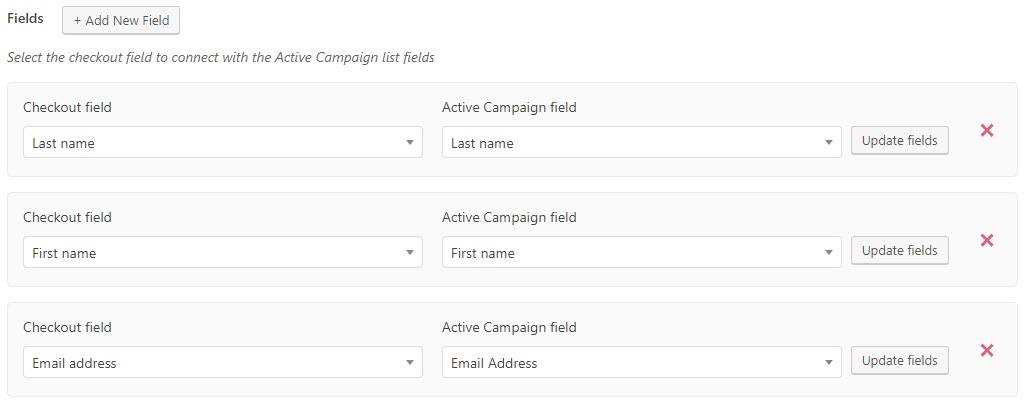
With Active Campaign, you can connect the fields that are in Active Campaign with those you have in Checkout, including the default ones.
The advanced integration modality allows creating a specific set of options: as an administrator, you can register users to different lists and possible interest groups depending on specific conditions.
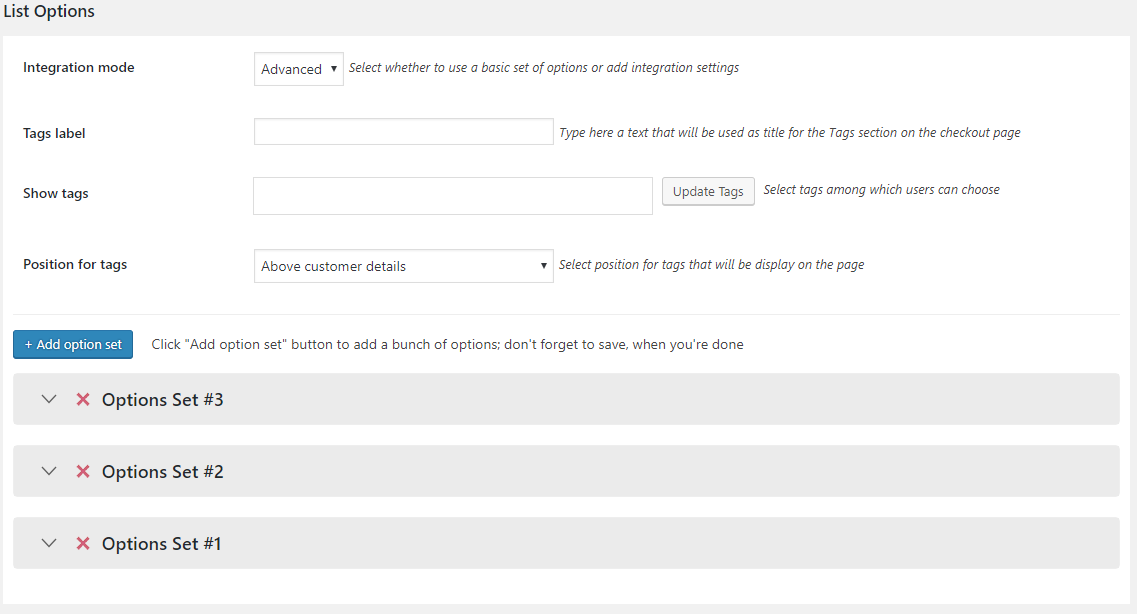
Now, let’s see how to configure the set of options. First of all, make sure you select the same list in the plugin as in Active Campaign.
Fields
As previously mentioned, the plugin allows you to connect the checkout fields to Active Campaign: for each registration, you can save further information, in addition to the classic “First name”, “Last name”, and “Email address”. You can also reuse them later to create new forms through Active Campaign.
By default, the plugin is already suitable to associate three fields “First name”, “Last name”, “Email address”.
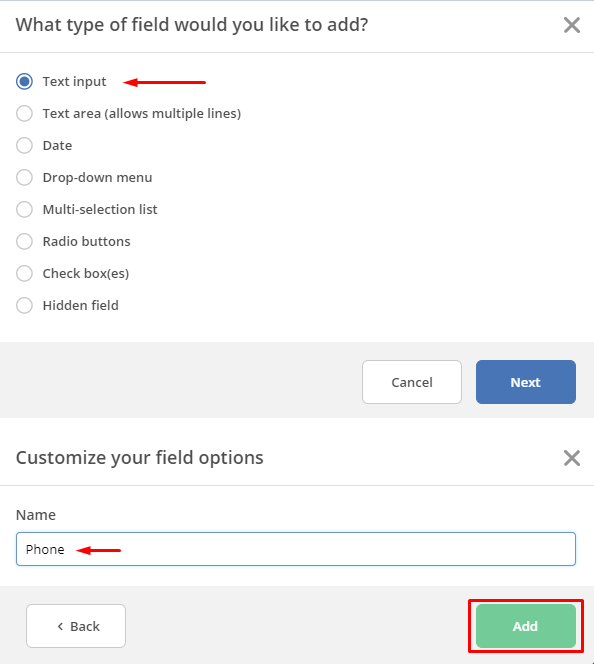
The first thing you need to do when you want to associate a new field is to create a new field on Active Campaign. Go to “Lists” -> “manage fields” and add a “new custom field”. For example, let’s add “Phone”.
Open the plugin again and update the fields by clicking on the “Update fields” button. Now, the new field will be shown in the Active Campaign Field list.
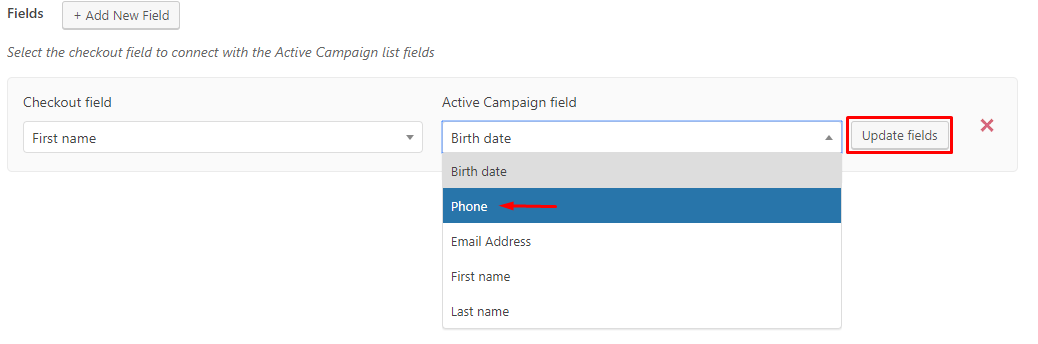
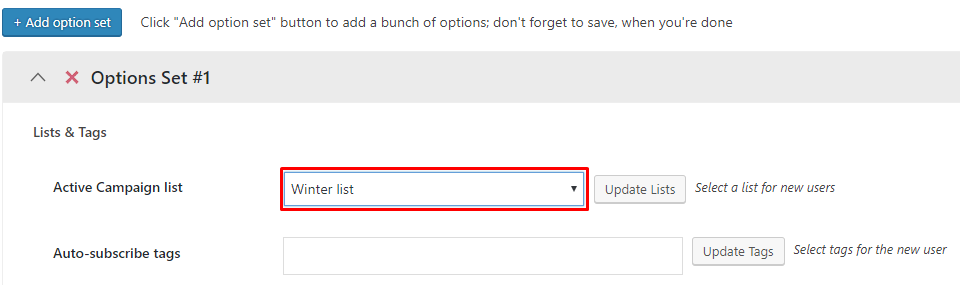
PLEASE NOTE: make sure the list you have selected is the same in the plugin and Active Campaign.
Conditions
To have a smart registration to your Active Campaign lists, you can insert an unlimited number of conditions that will be checked during the purchase.
Users will be registered to the lists and/or interest groups only if all the conditions are met.
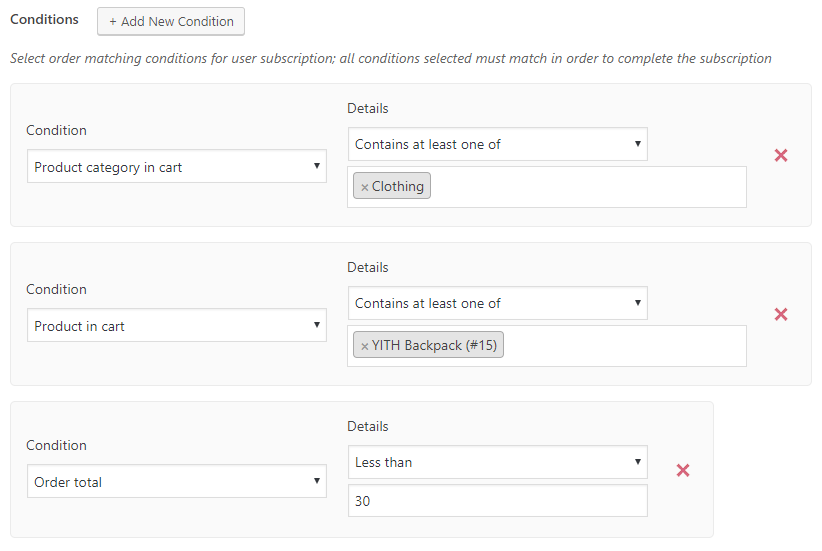
As you can see in the image above, the user will only be registered if the next conditions are met:
- the order includes at least one “Clothing” category product;
- the order includes at least one “YITH Backpack”;
- the order amount is lower than 30$.
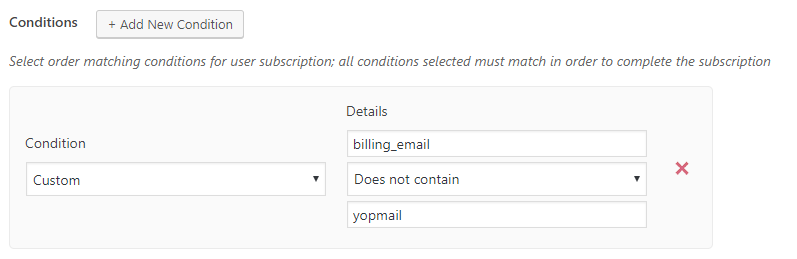
Custom condition
You can also check the value of a specific checkout field. To locate the field, you must specify the value of the “name” attribute (the value that will be sent to the $_POST variable at the checkout). The data can be easily recovered by opening the browser console and selecting the specific field.
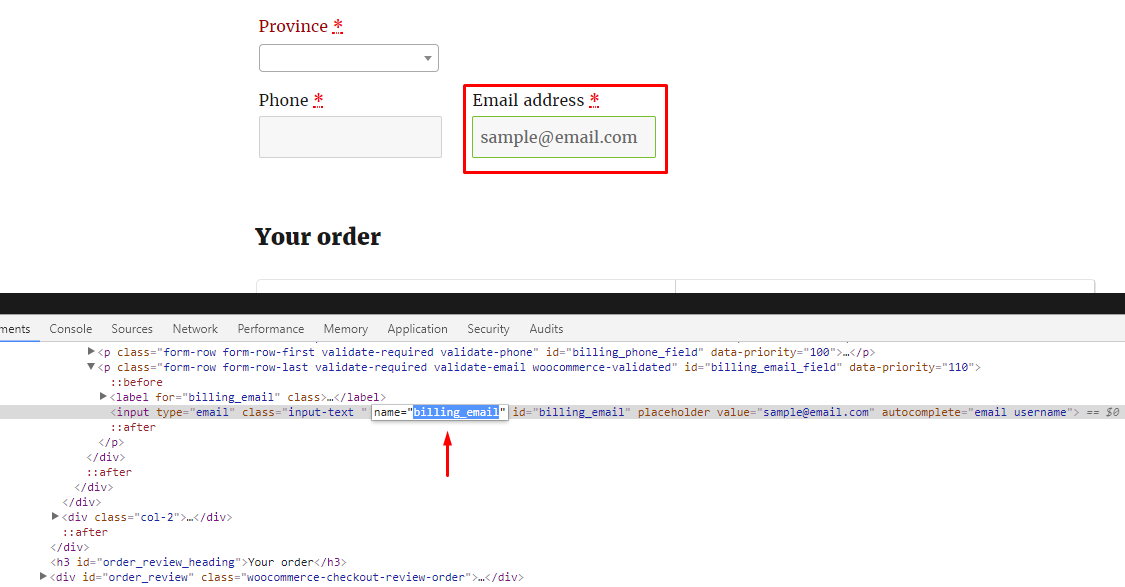
For example, we want to make sure that the email field does not include the word “yopmail”. We recover the value of the “name” attribute in the email field.
We insert the condition and save the options set.