The first section of the Settings tab would allow you to include some additional information to the totals table visible in Reports as well as to the report itself.
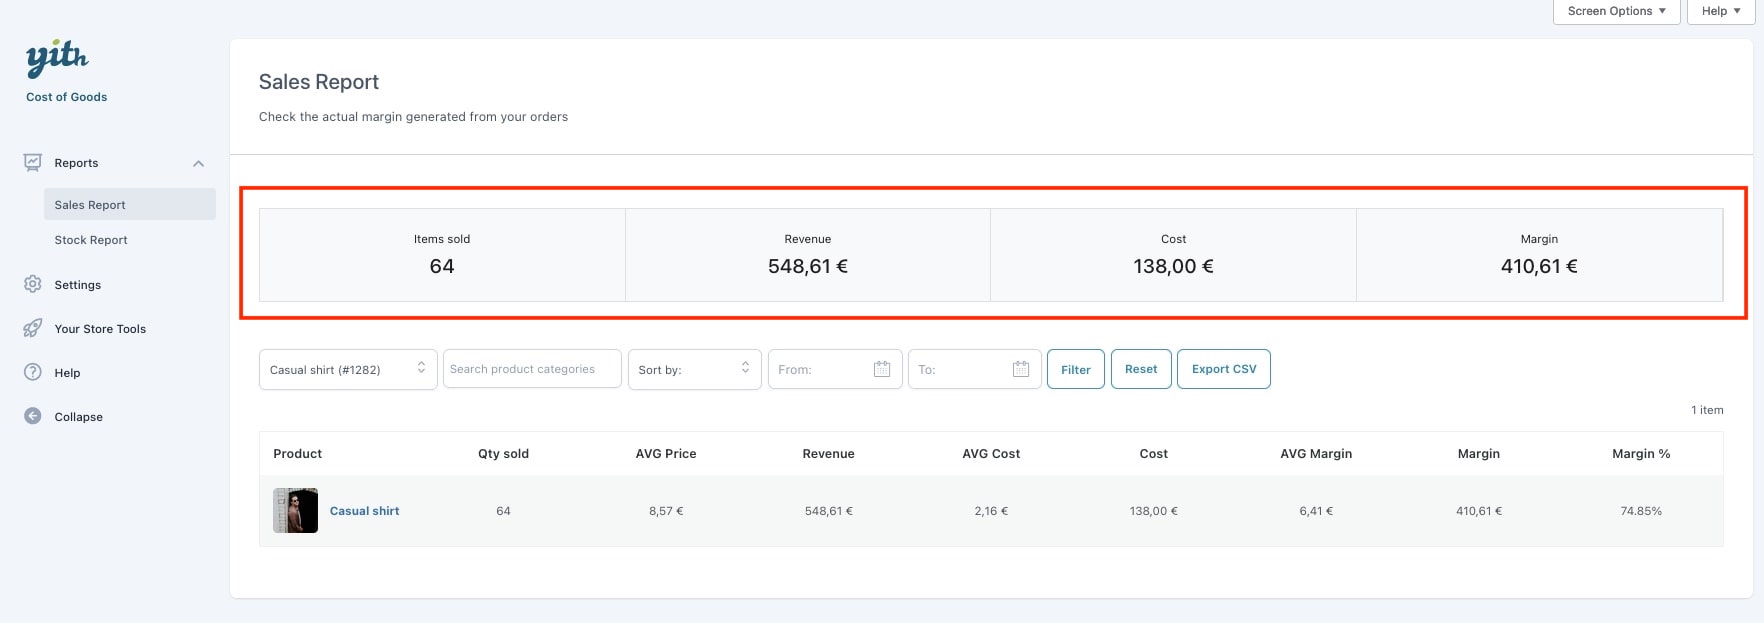
Let’s review what additional information we can add to the totals and to the report only.
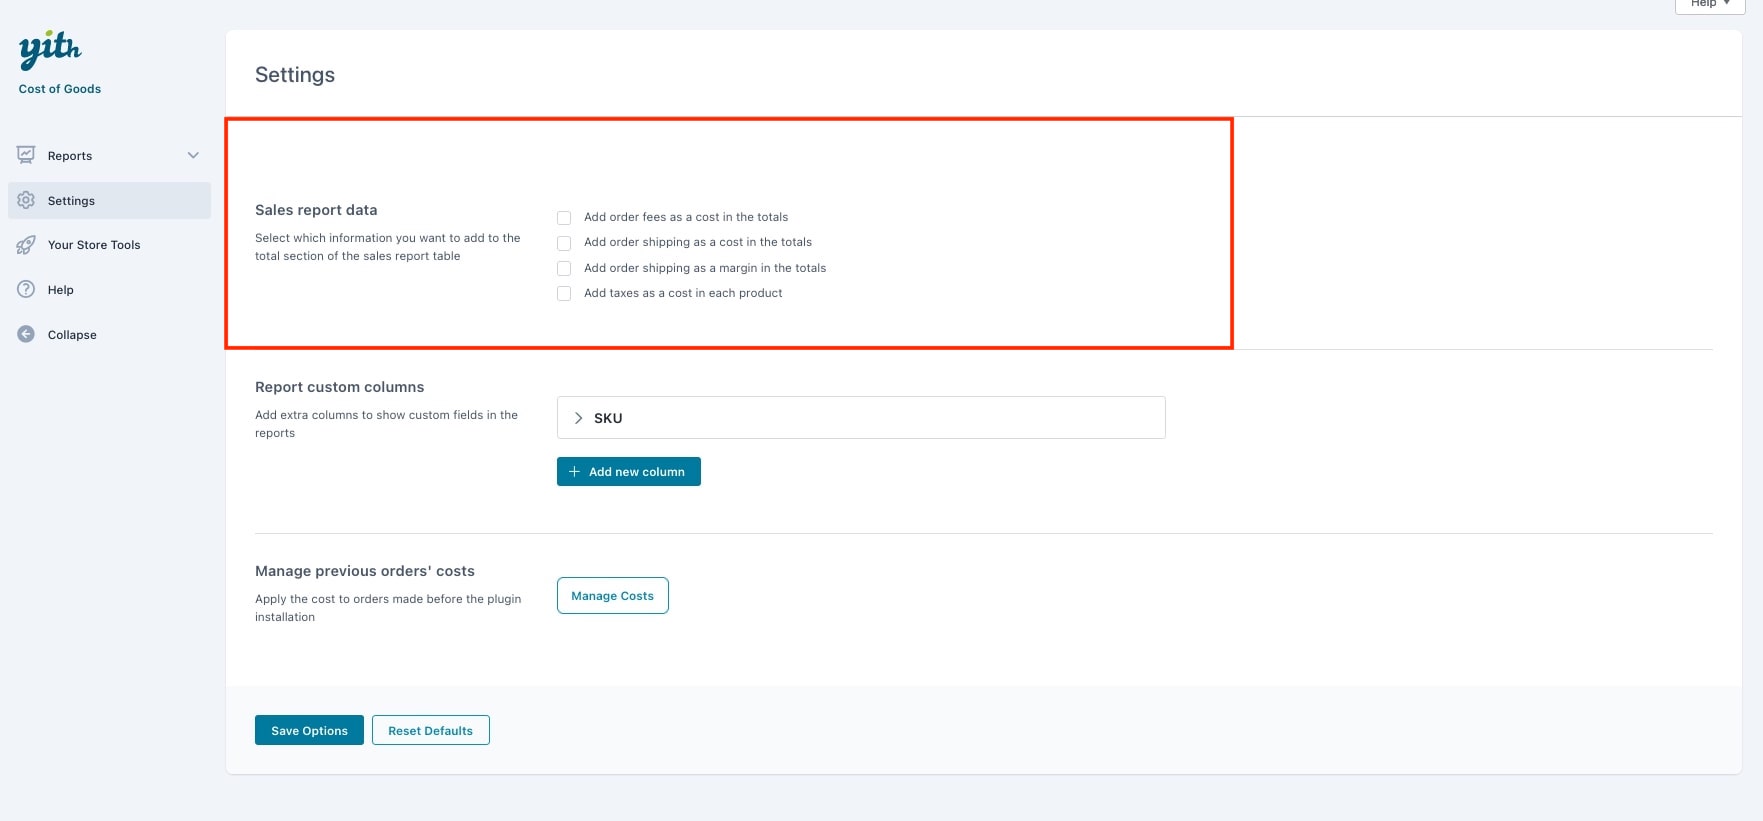
- Add order fees as a cost in the totals
- Add order shipping as a cost in the totals
- Add order shipping as a profit in the totals
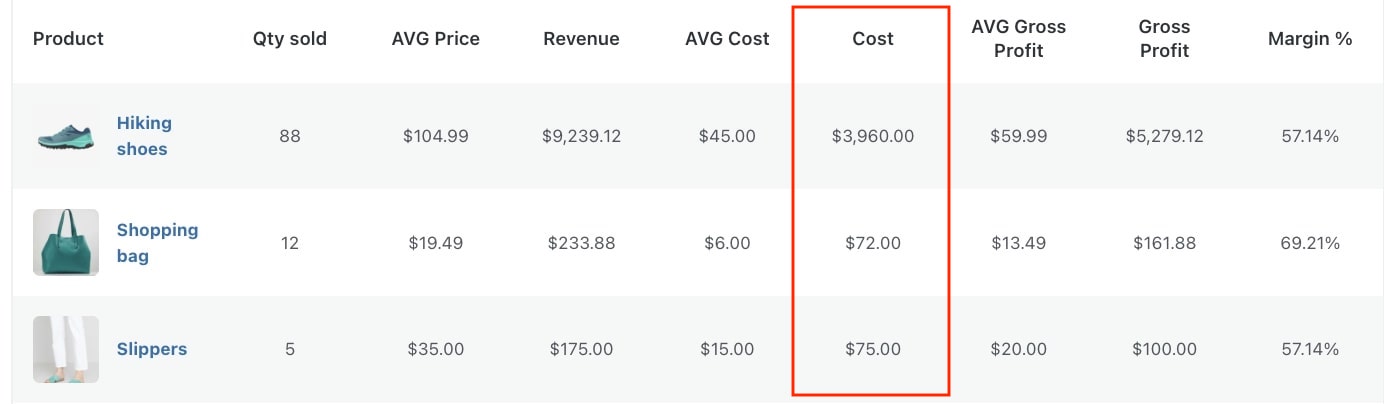
- Add taxes as a cost in each product
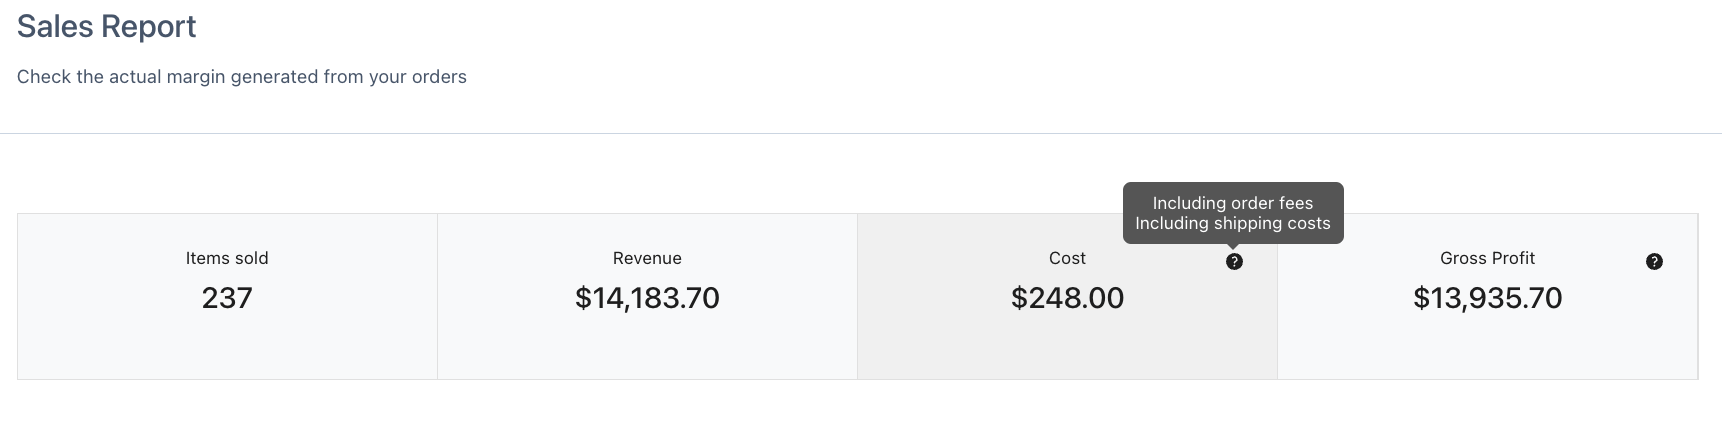
Once any of the three options have been checked, the total table will reflect it and tooltip will be visible to advise that additional costs have been added.
Note: Only the last option ”Add taxes as a cost in each product” can be added to the report table in the cost of the product.