View Product Page

Configure a new status

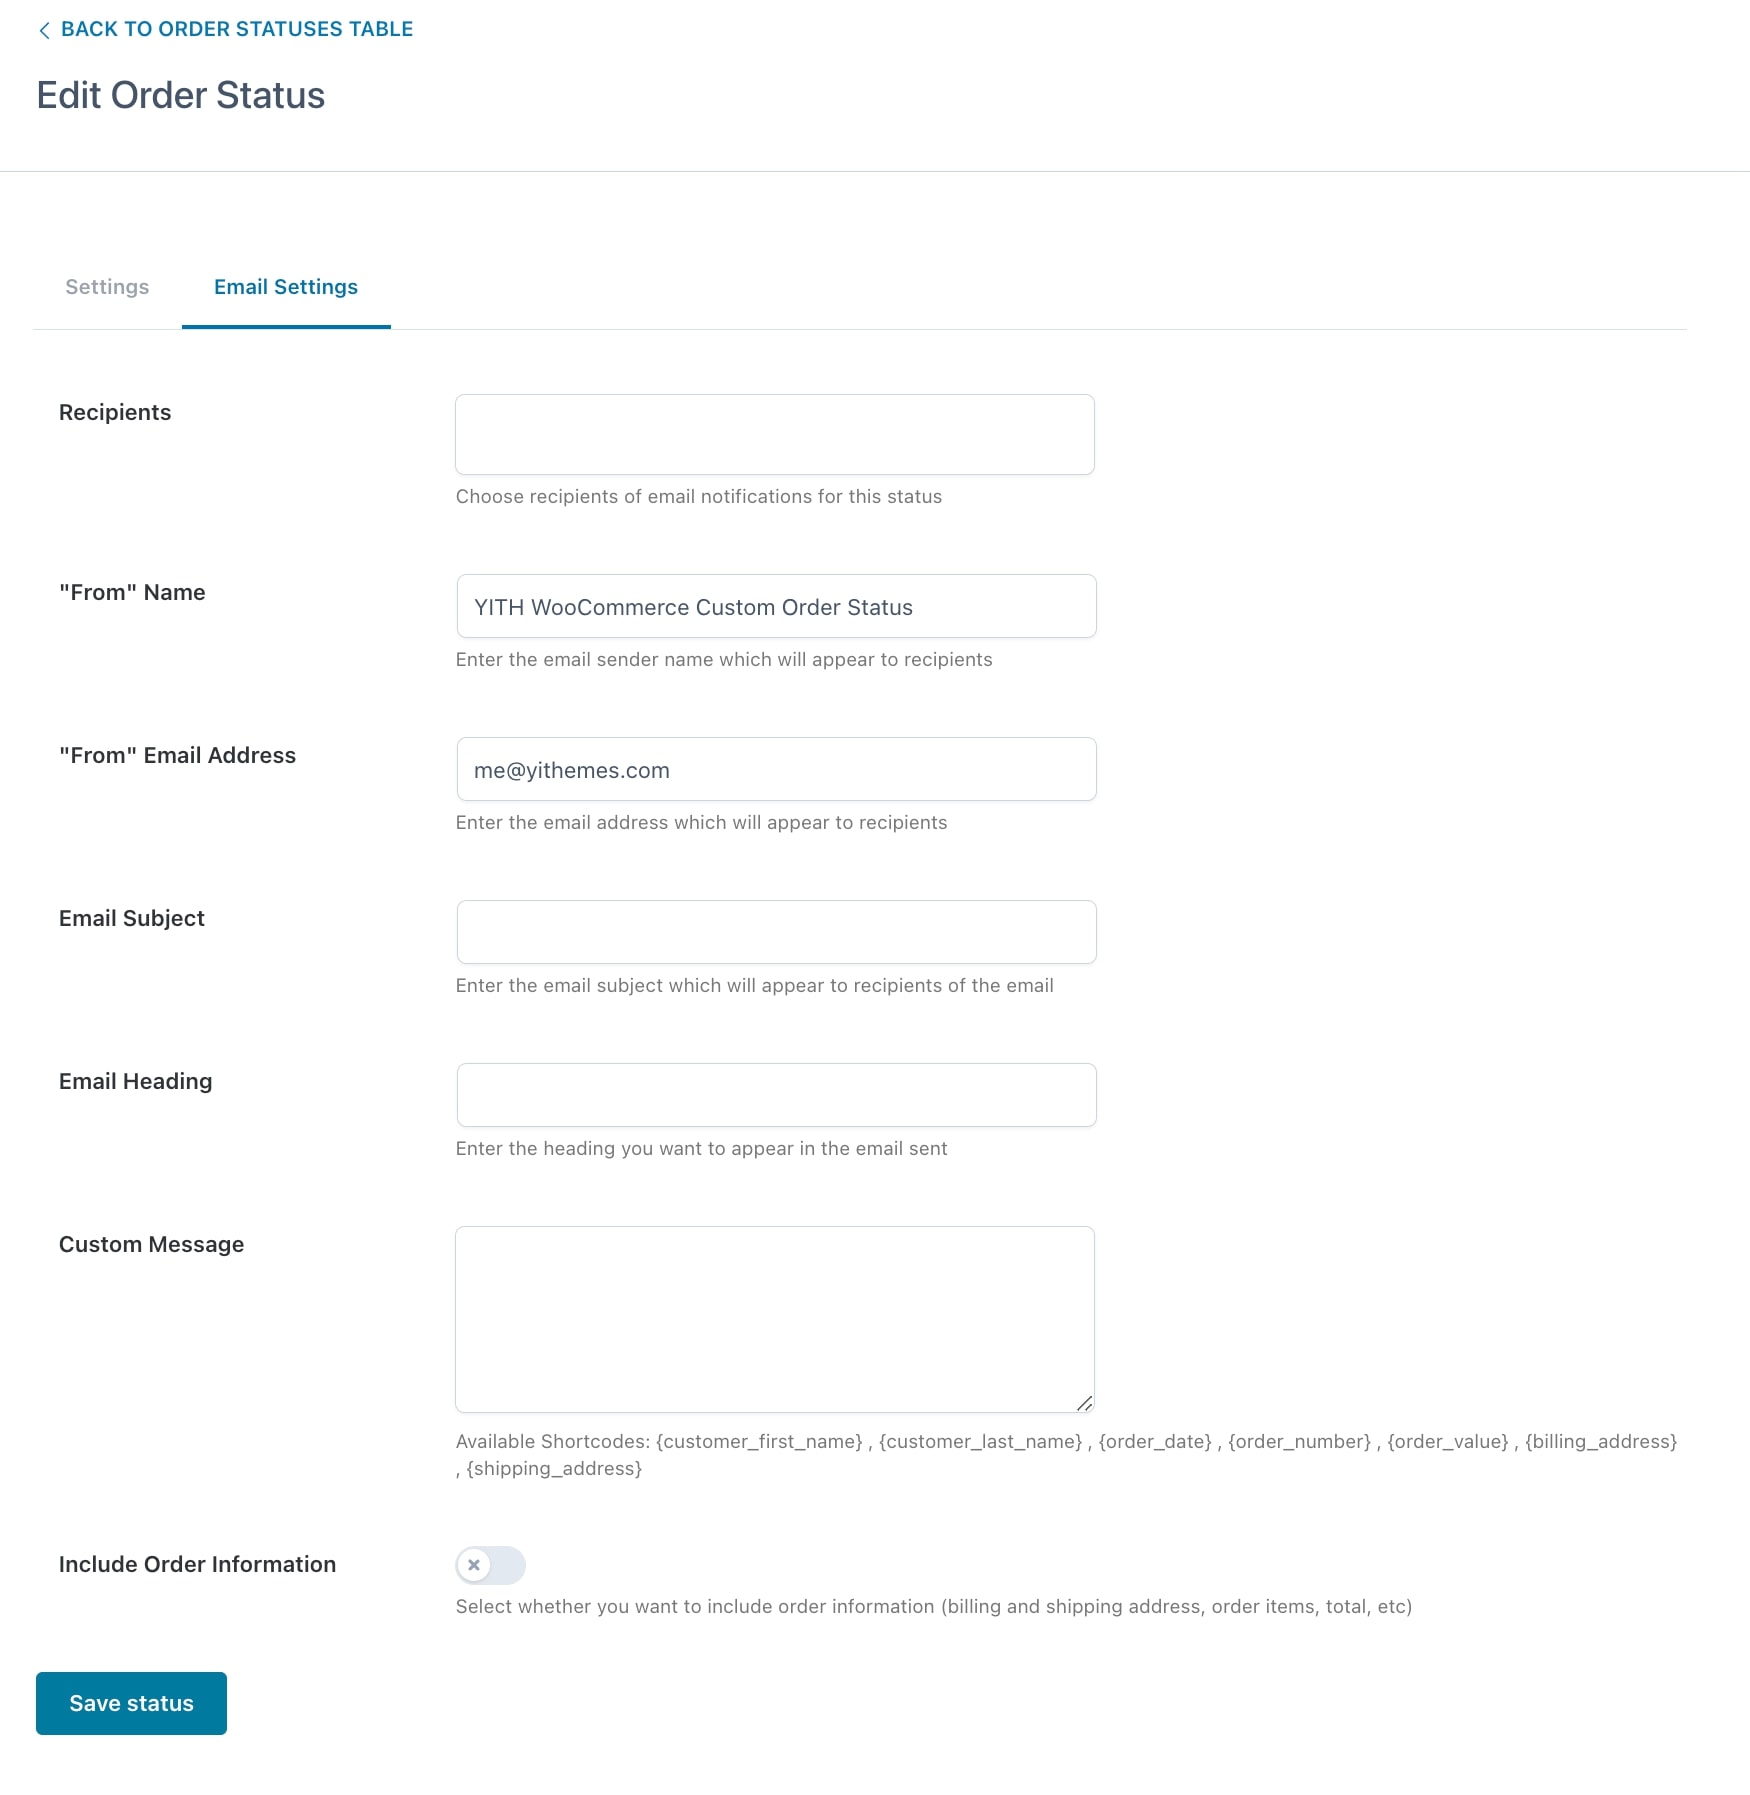
To start creating new order statuses, go to YITH > Custom Order Status > Order Statuses tab and click on Add Order Status.

Add Order Status

Once you click on it, you can configure the options of your new order status from the Settings tab:

General options

General order status options

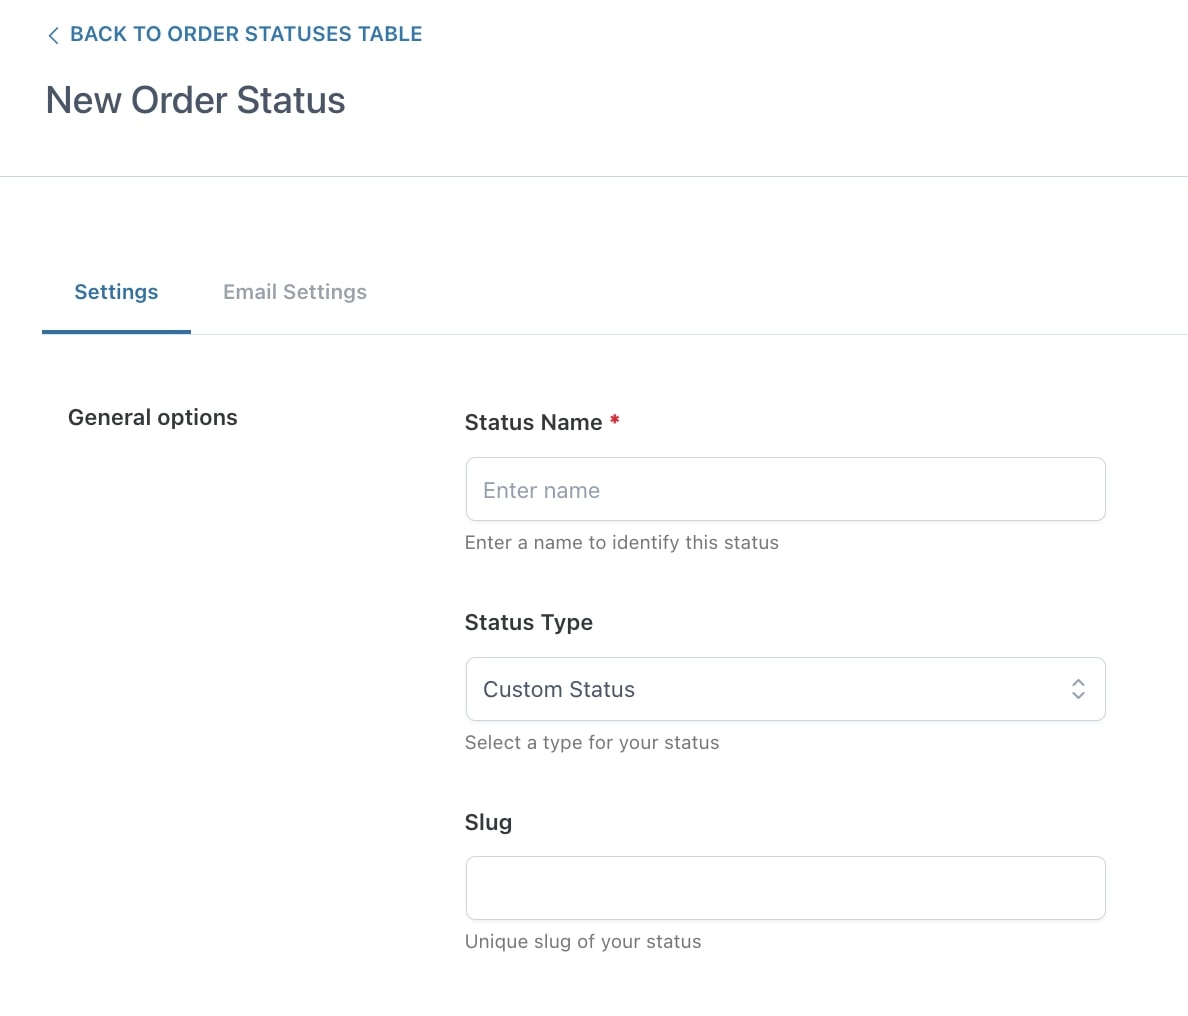
Below you’ll find the complete list of the options:

  • Status Name: add a name that identifies the status.
  • Status Type: the type of the new status. You can create a new status by choosing Custom Status, or overwrite a WooCommerce status by selecting one of the other entries of the list.
  • Slug: enter a unique slug that defines the status.
Order name, status type and slug

Style

Style options
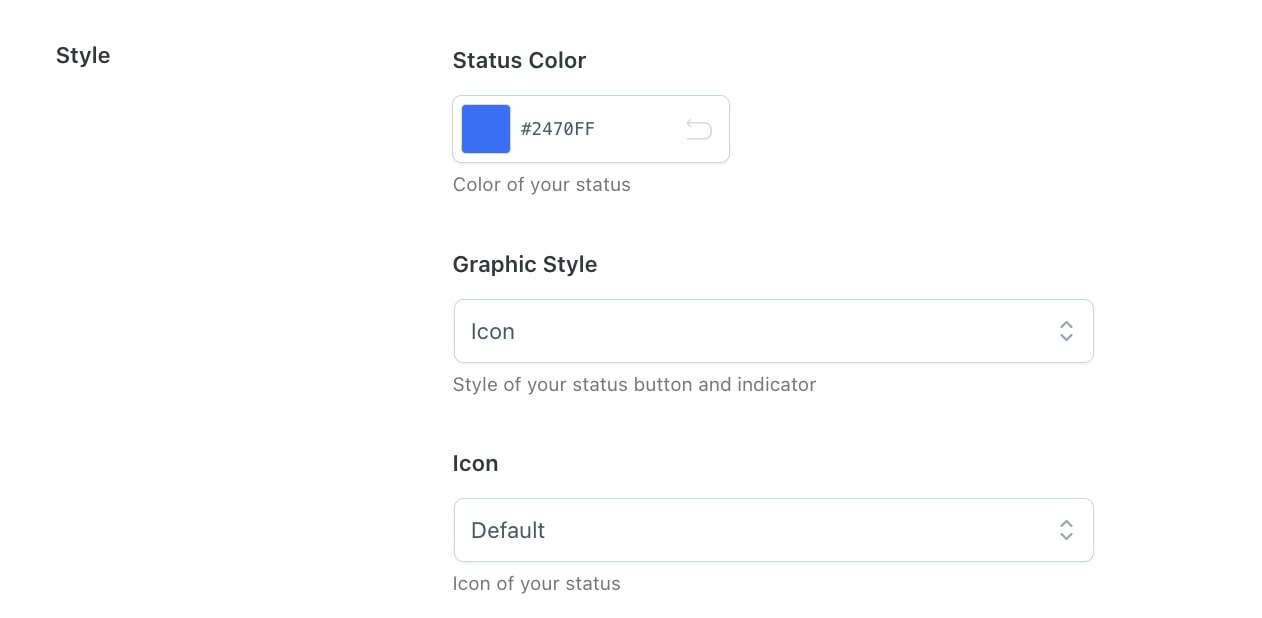
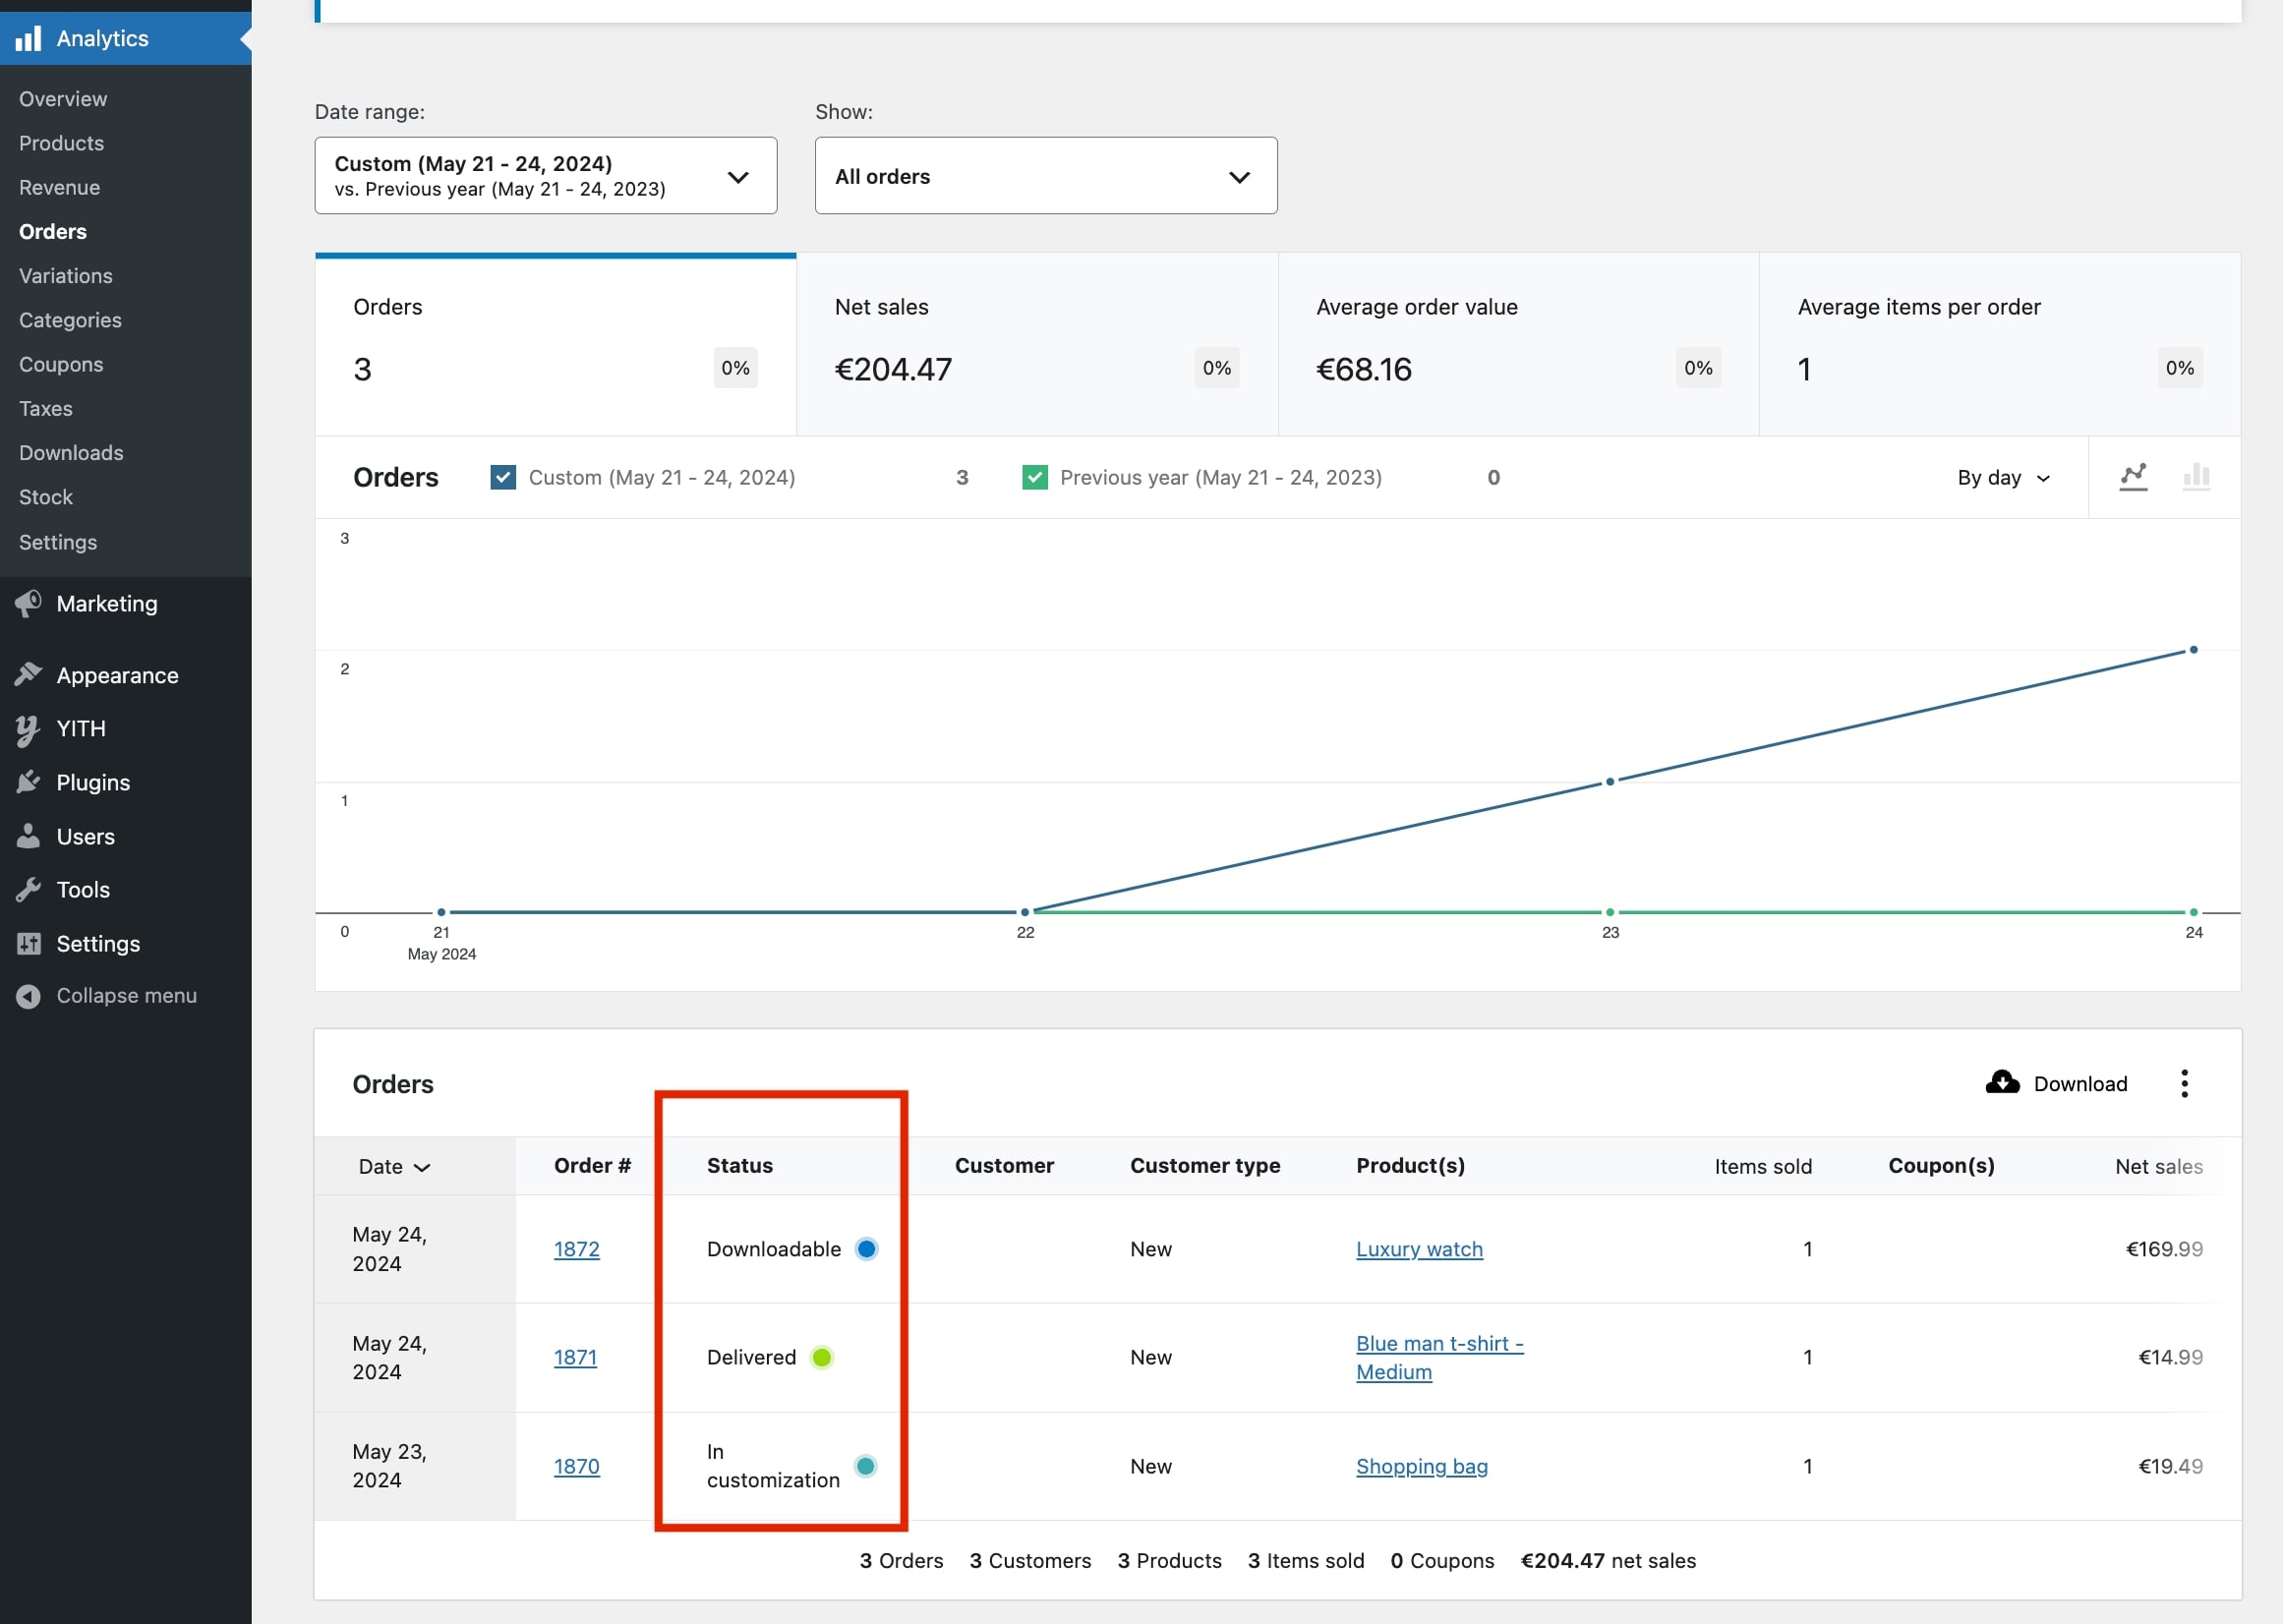
  • Color: the color for the status. The color you set here will show in WooCommerce > Analytics > Orders as in the example below:
Order analytics status
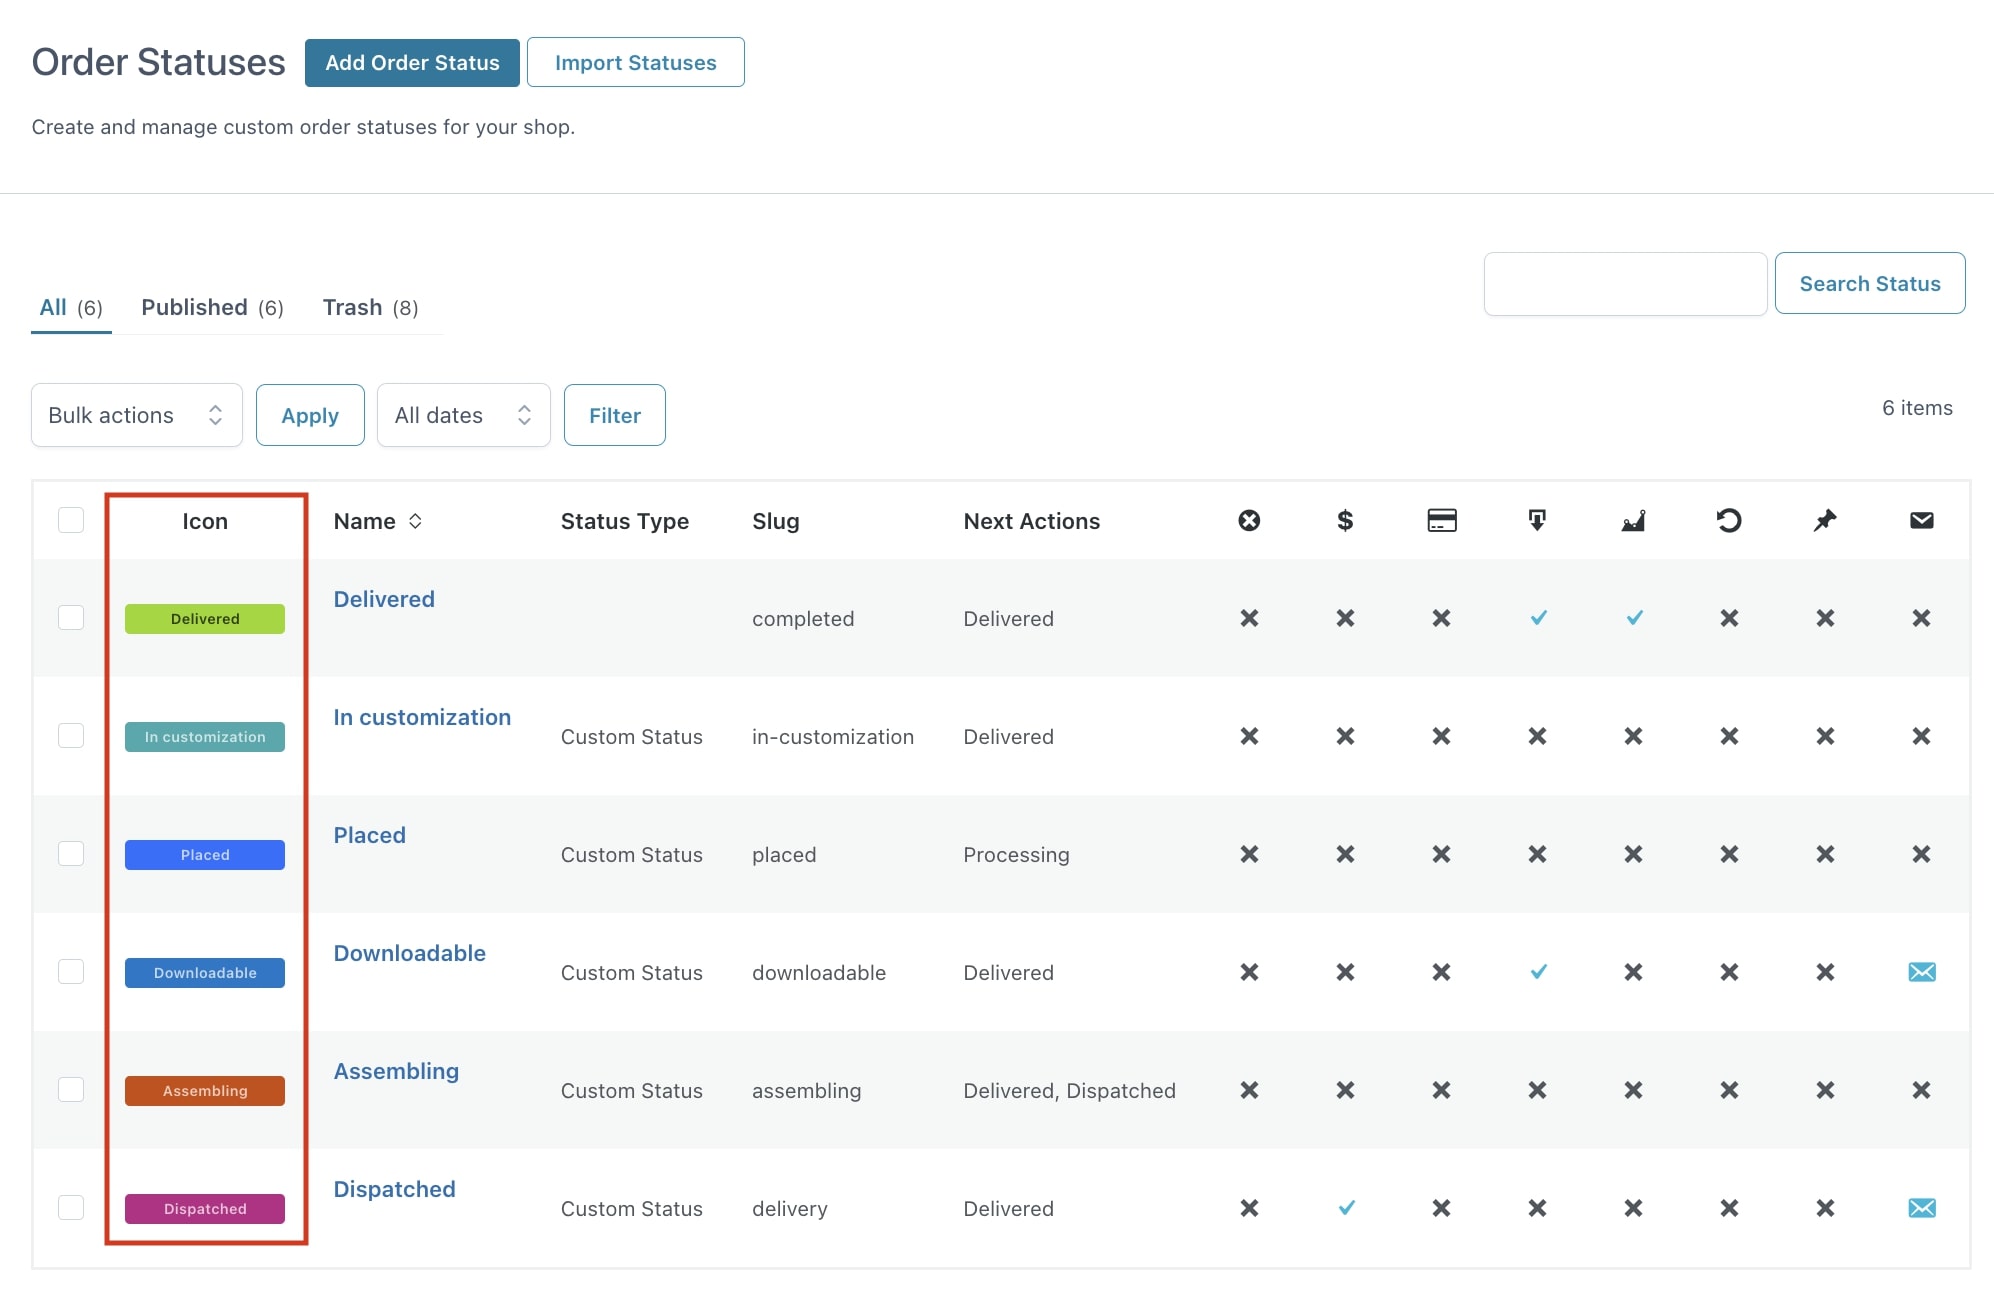
  • Graphic Style: choose between icon or textual label. For the latter, the label will be also the name of the status.

Icon:

order status icon

Textual label:

order status text
  • Icon: the icon for the status. Choose between the default one or the complete list of Font Awesome icons.
font awesome icons

User permissions

User permissions
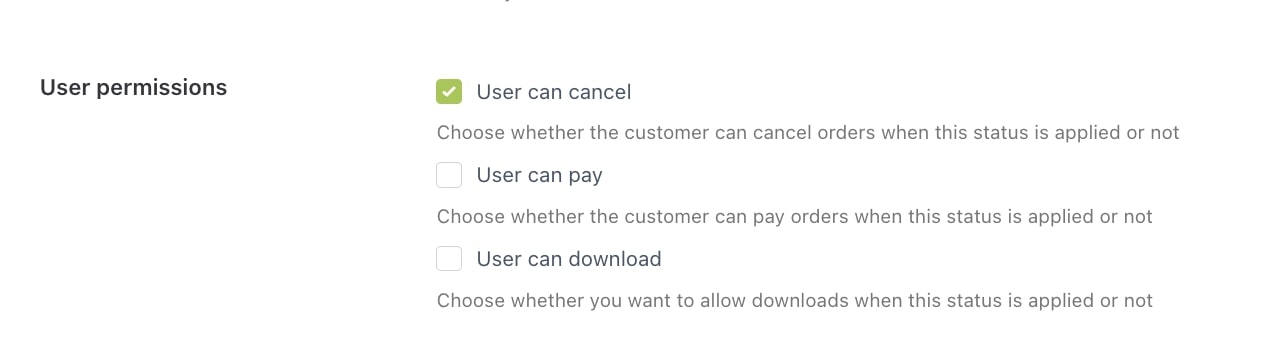
  • User can pay: enable this option if you want that users can pay the order when this status is set. Leave it disabled if no payment is allowed with this status.
  • User can cancel: enable this option if you want your users to be free to cancel the order when it has the status you are configuring.
  • User can download: this option allows users to download the file assigned to the order when it has the status you have created.
My Account page

Extra options

Extra options
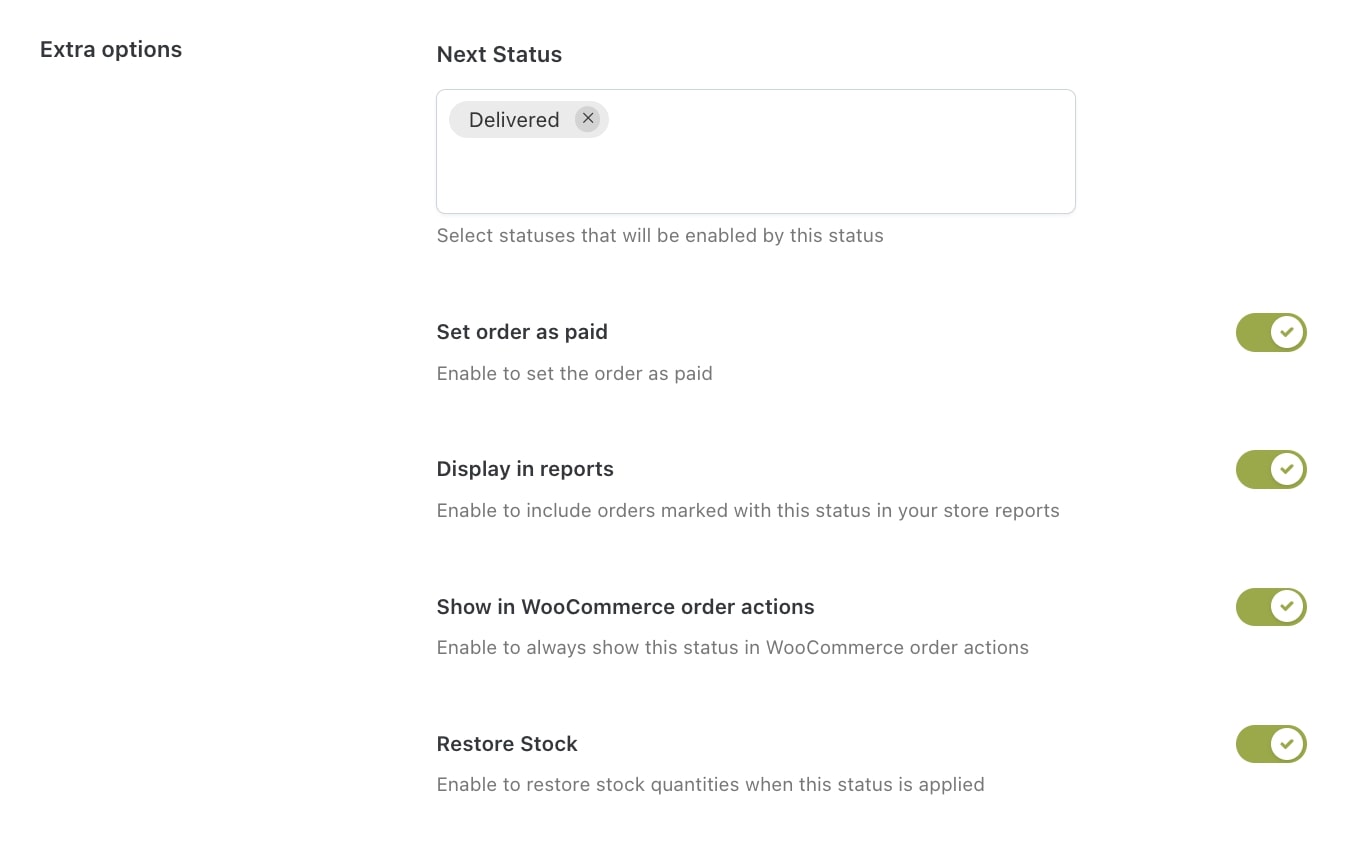
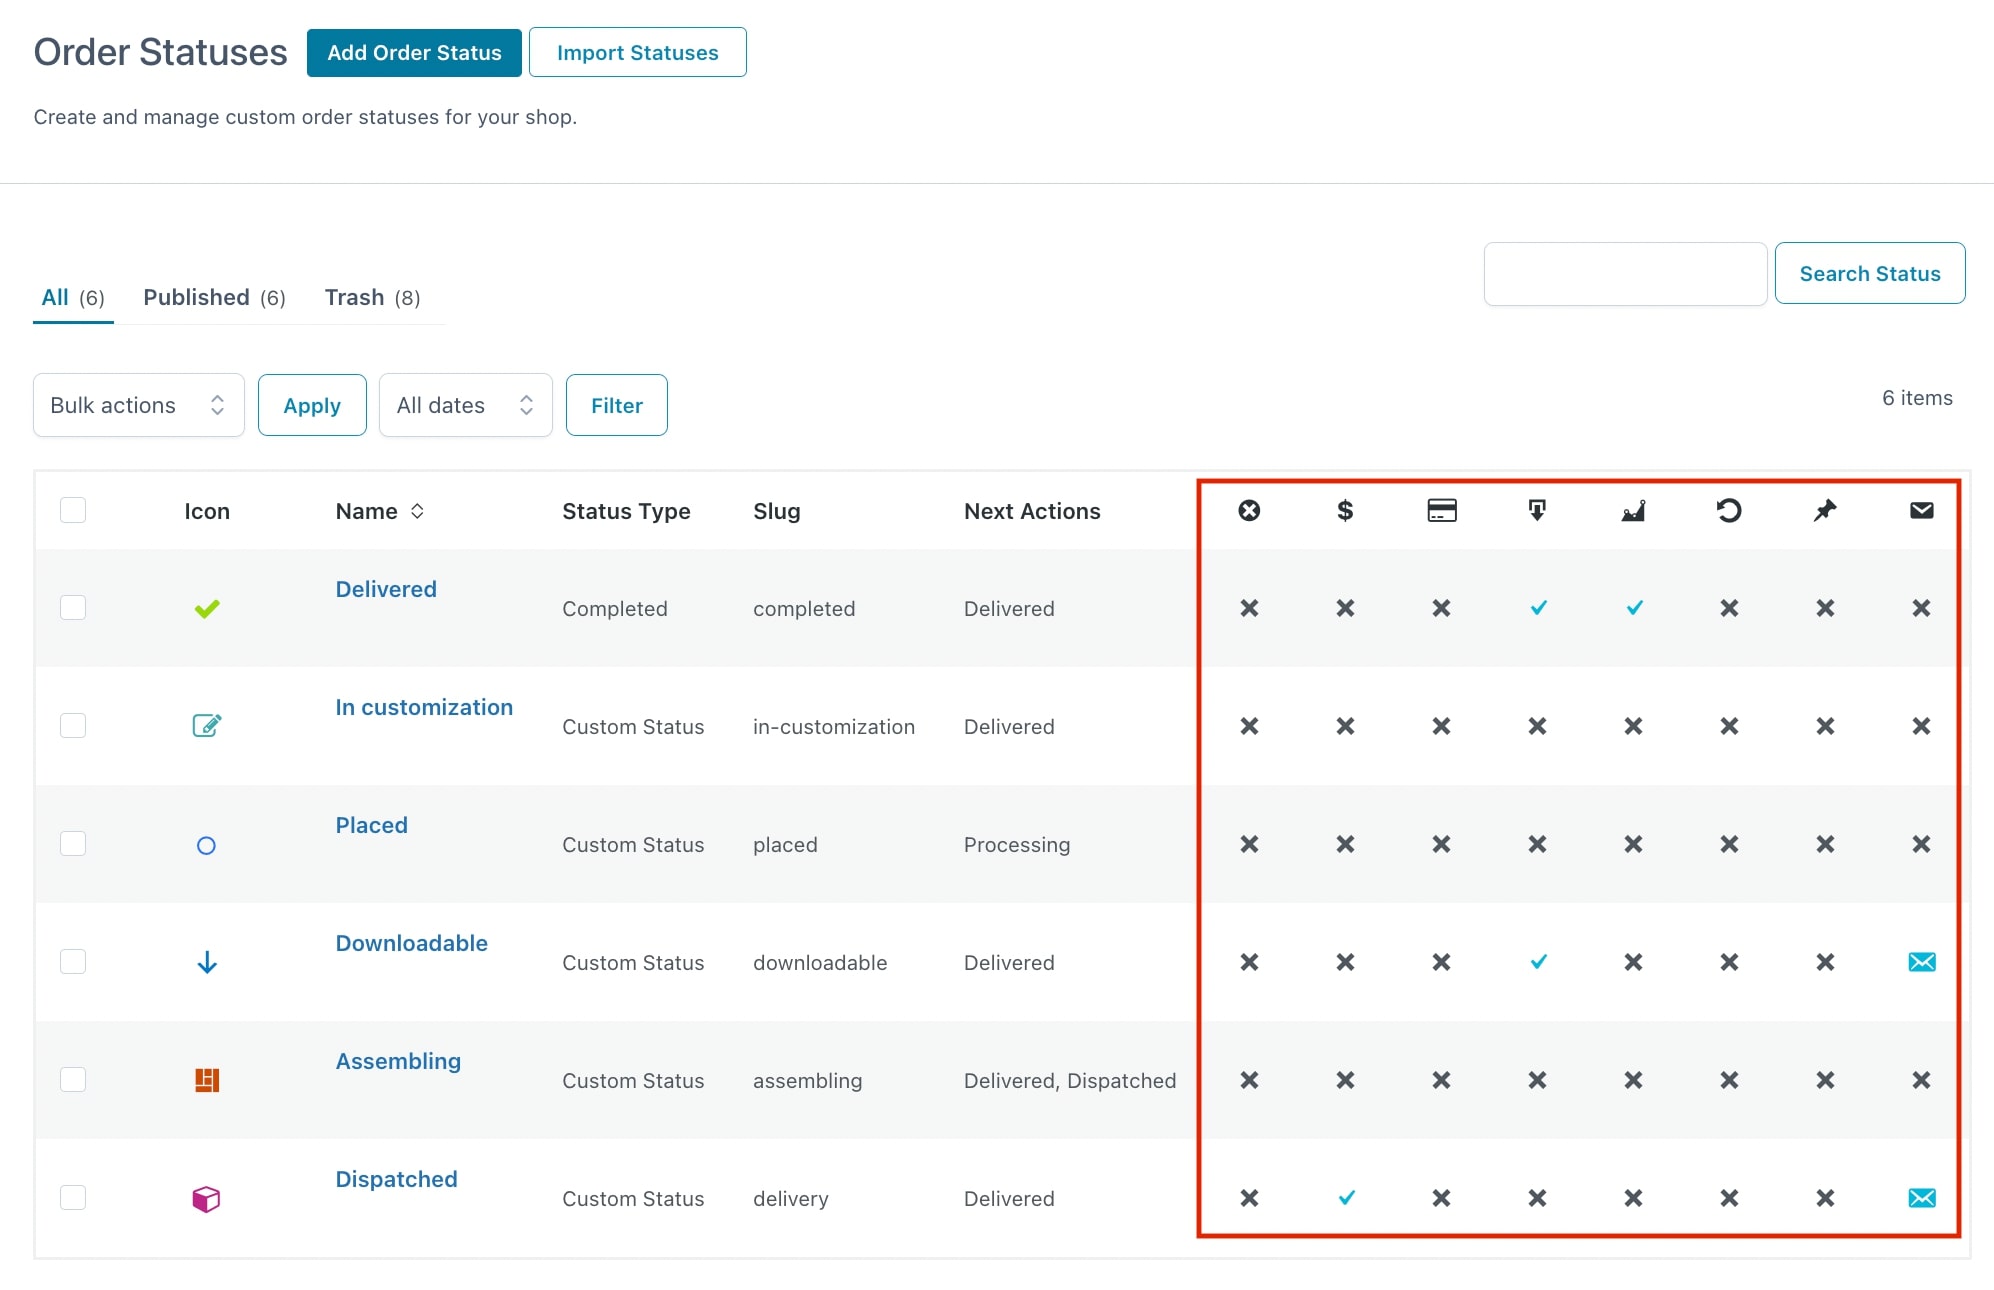
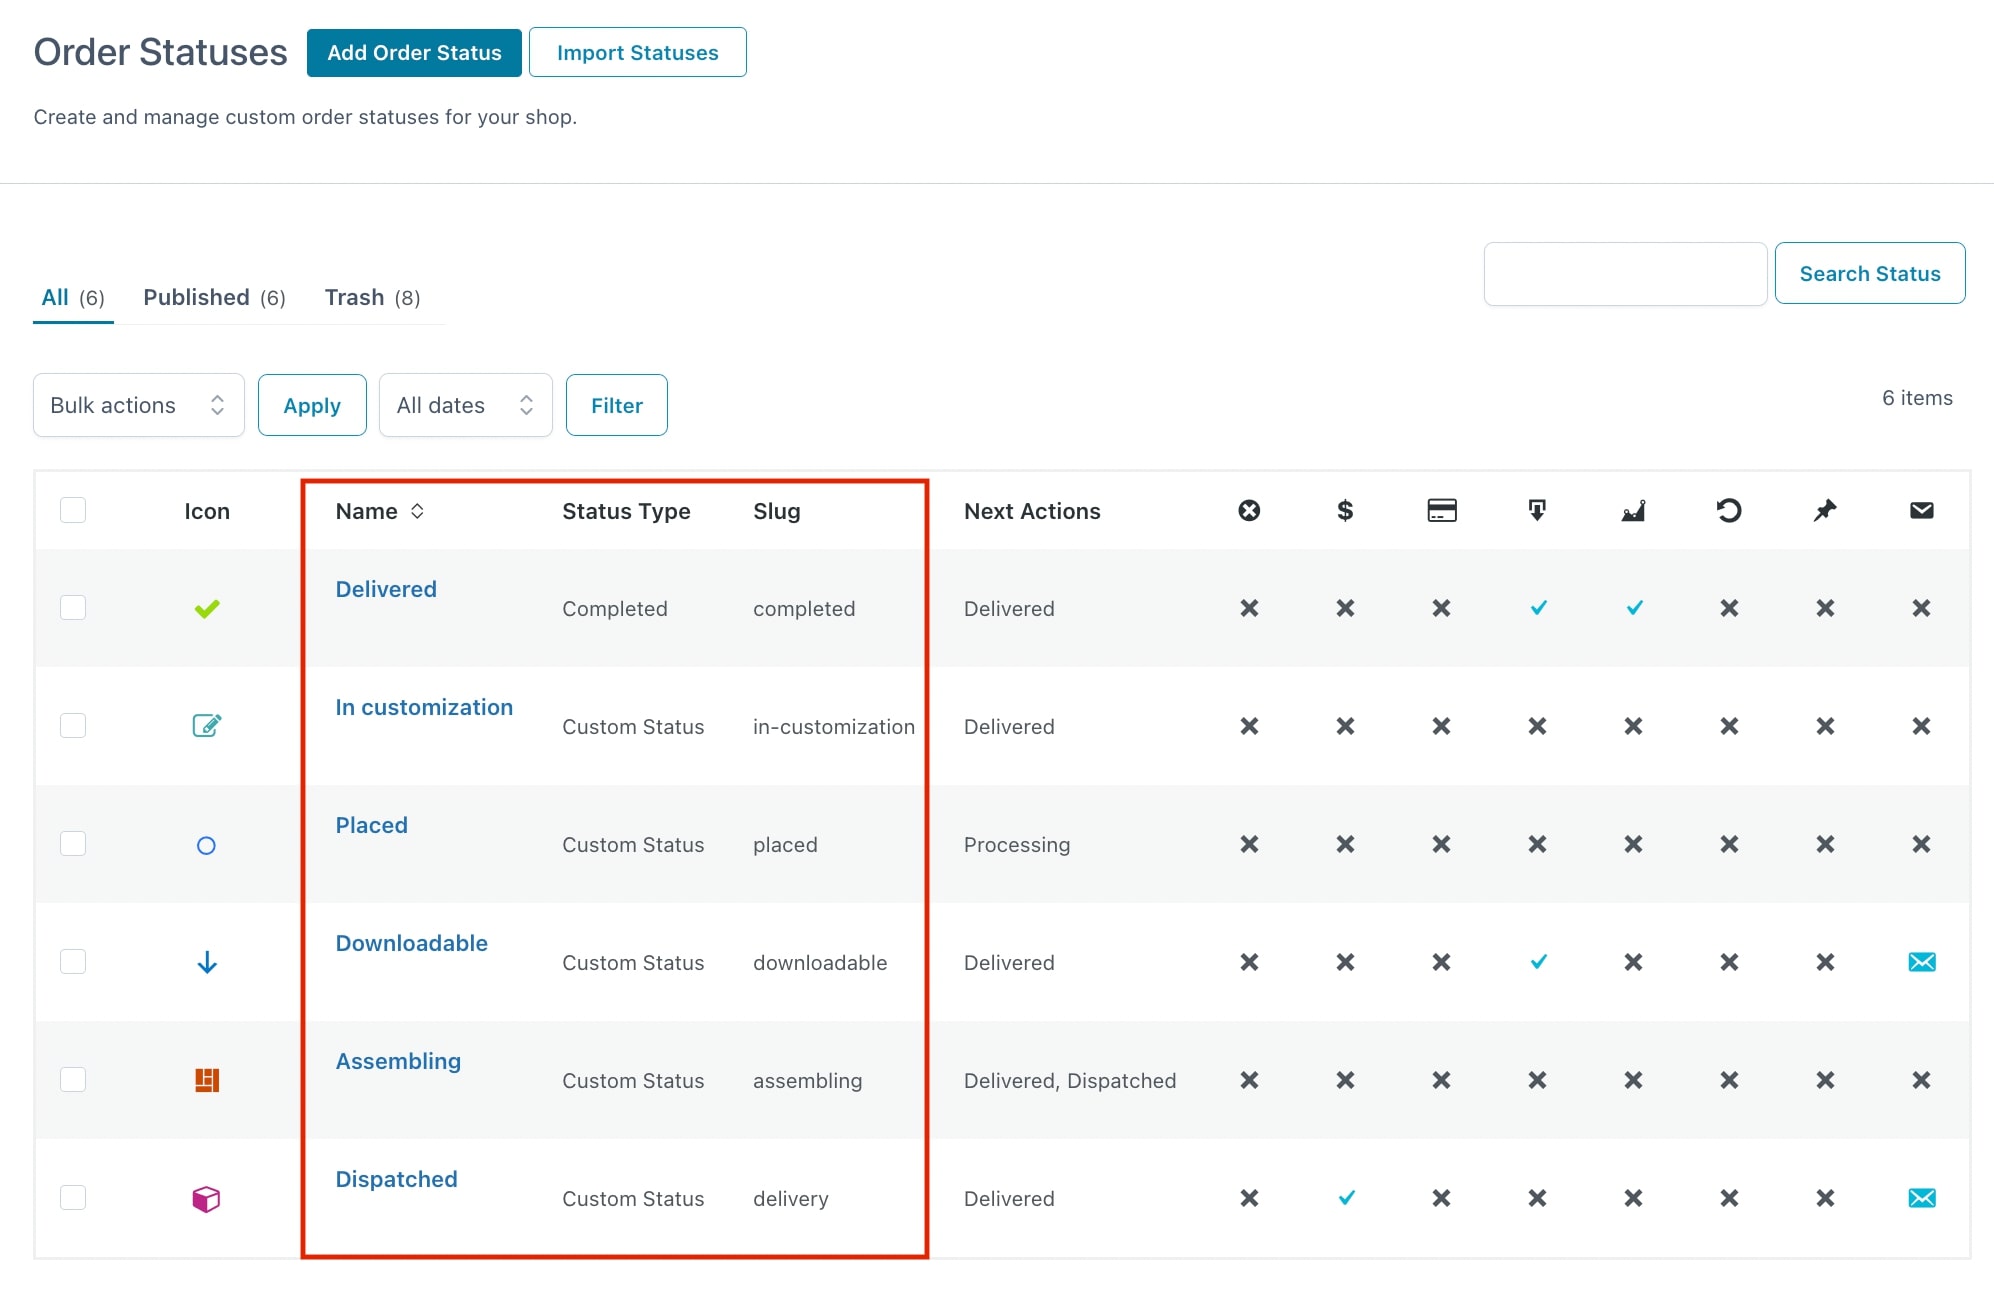
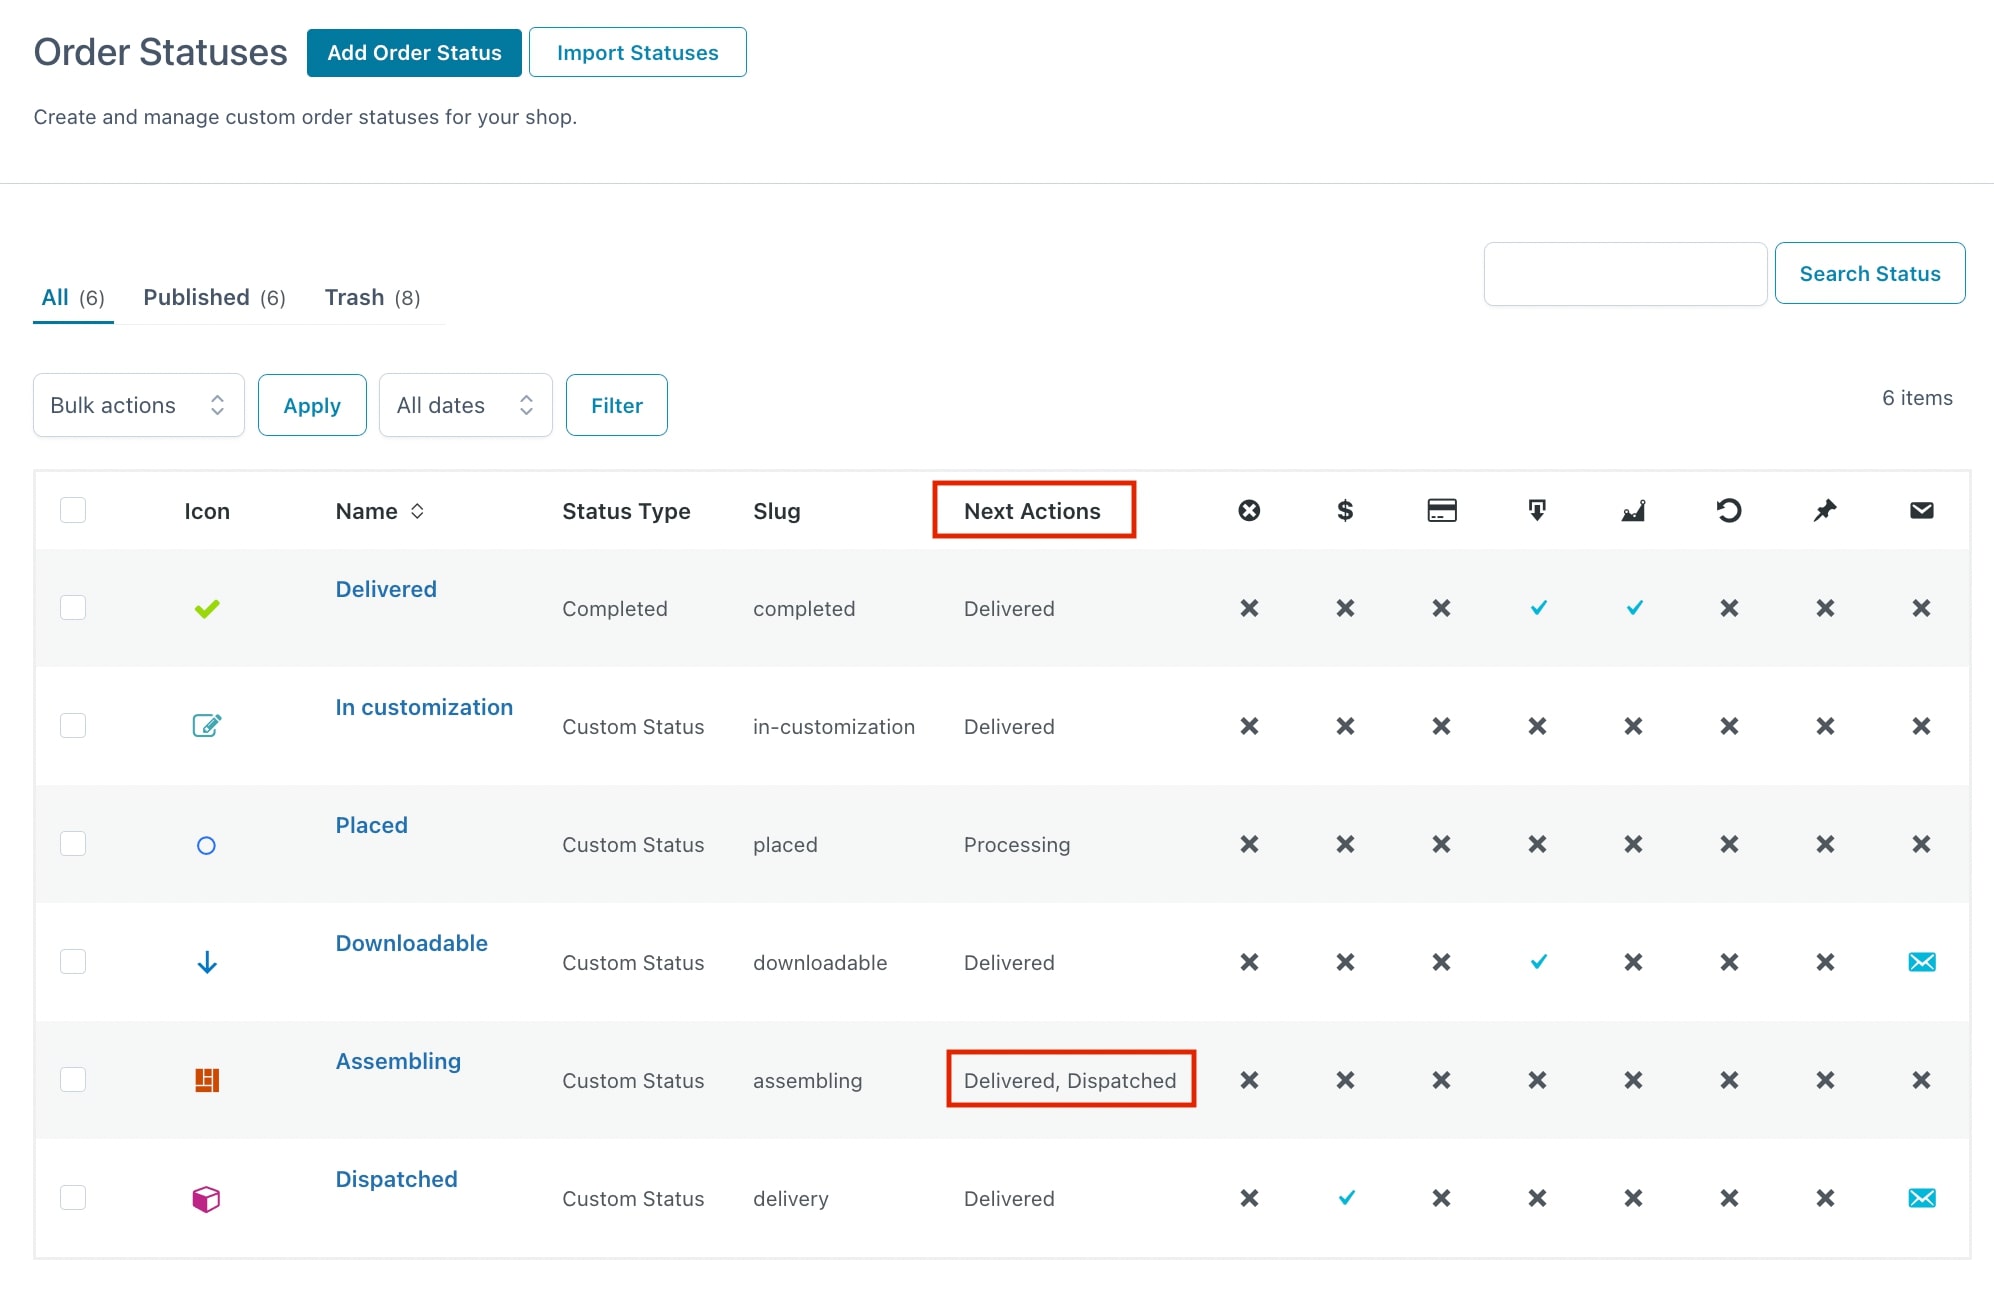
  • Next Status: these are the actions that you can apply to the order when it has the status you have created. You can choose among the default WooCommerce actions and those you have previously created. These will be shown in the Next Actions column from the Order Statuses table.

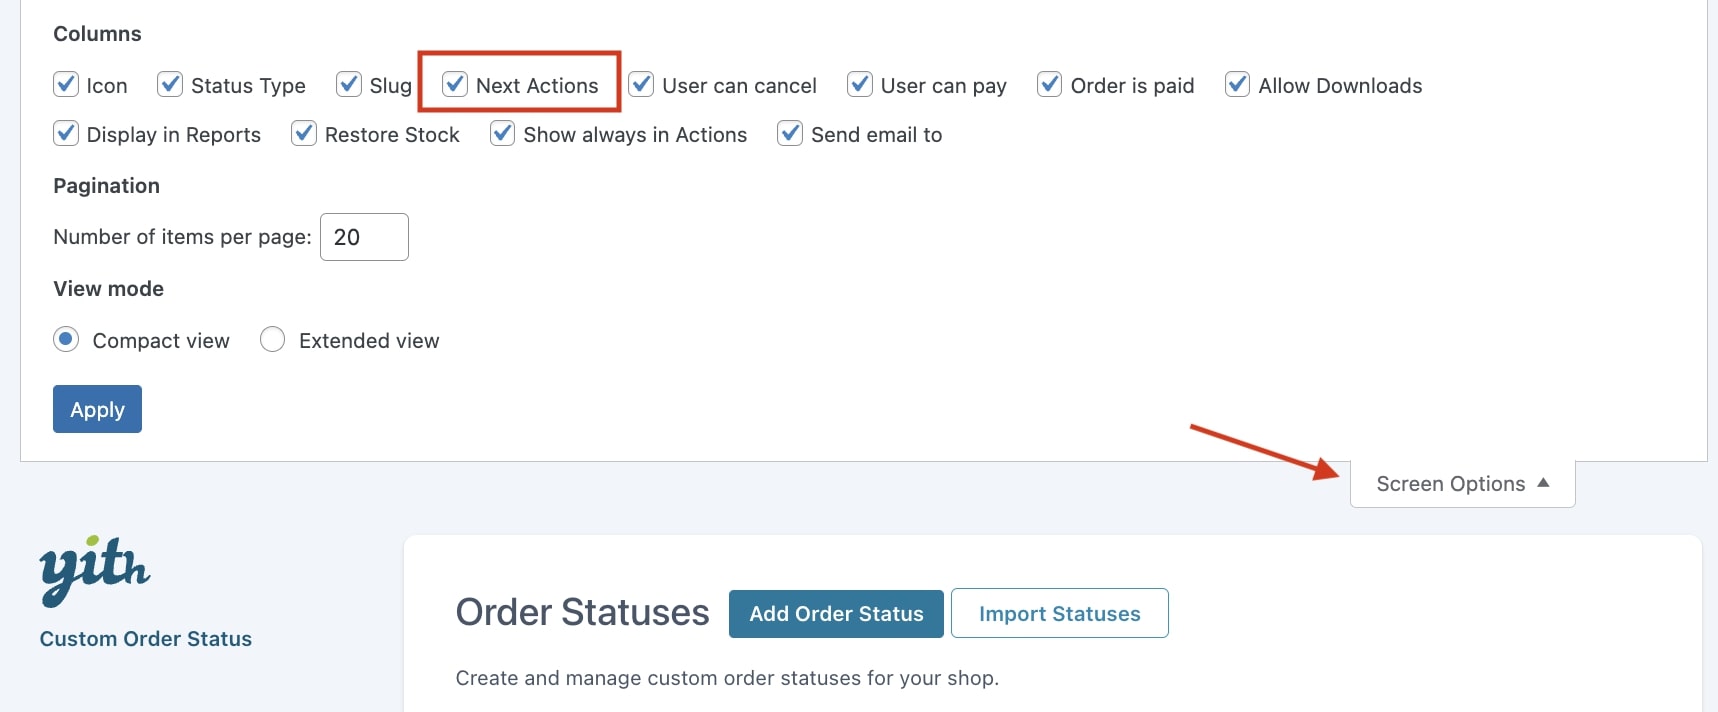
If you are not able to see the Next Actions column in the oversight, click on “Screen options” and enable it:

Screen options


Below is an example in which Delivered and Dispatched are selected as next actions of the status Assembling.

Next actions
  • Set order as paid: WooCommerce statuses include an option to consider them paid or not. Processing and Completed are considered paid, whereas the others aren’t. Enable this option if you want to consider your custom status as paid as well.

Tip: we suggest enabling this option if your custom status follows a Processing or Completed status.

  • Display in reports: activate this option to include all the orders with the status you are configuring in the WooCommerce report (WooCommerce > Reports).
  • Show in WooCommerce order actions: enable this option to always show this custom status in the Actions column in WooCommerce > Orders.
Order actions

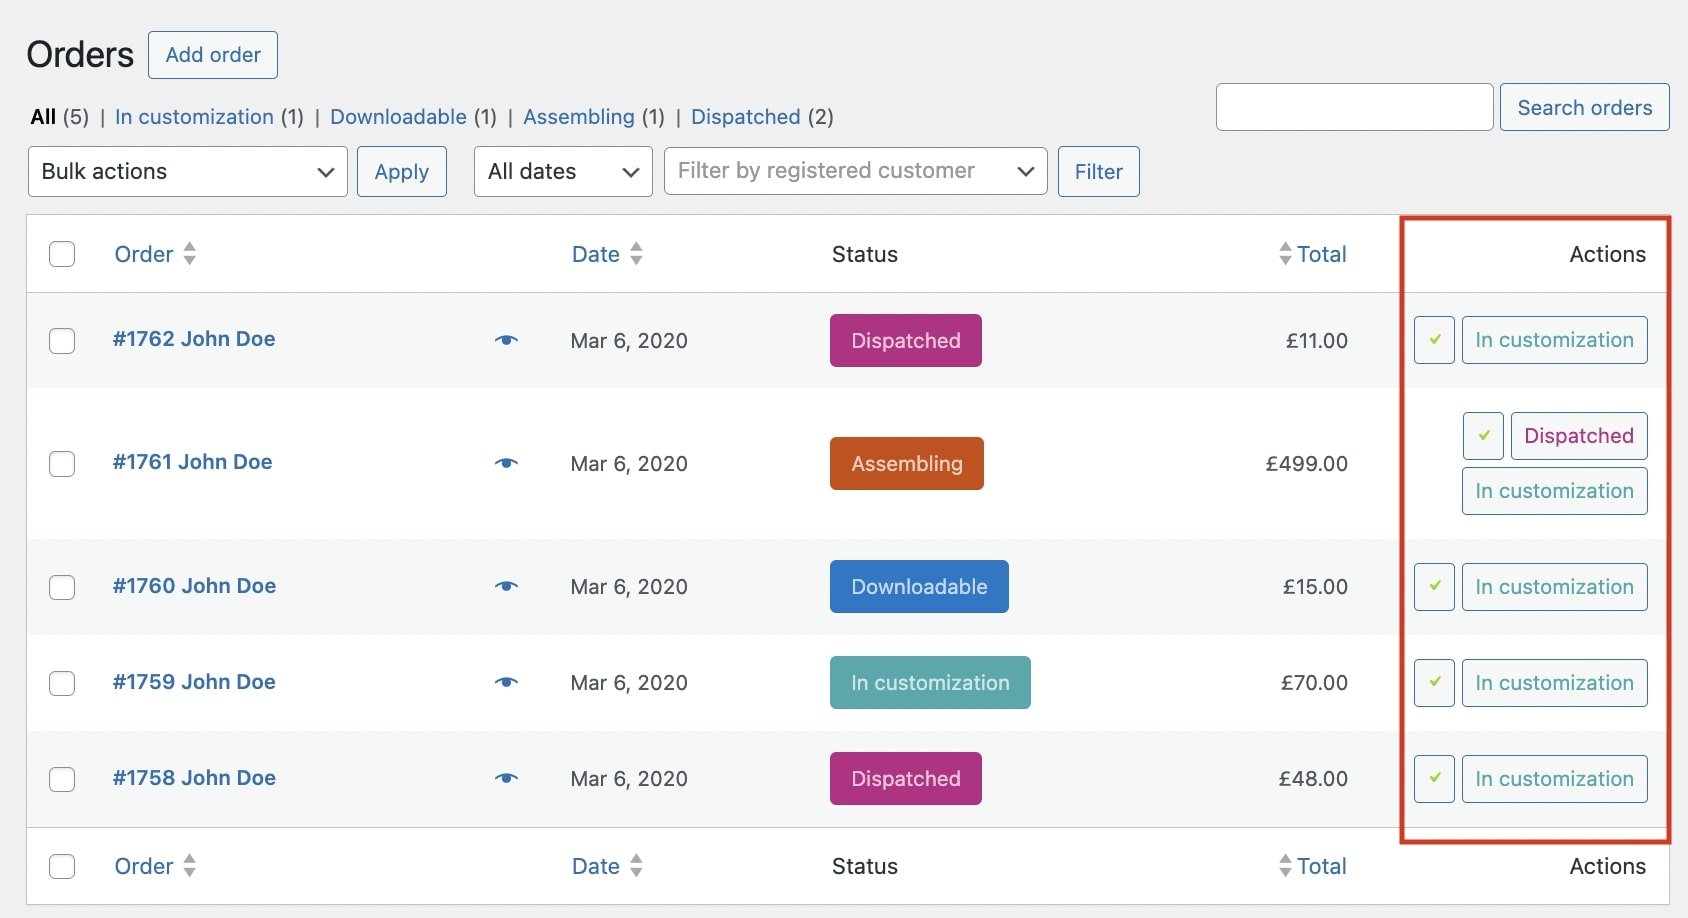
If you don’t see this column, make sure you enable it from the Screen Options in the Orders page.

  • Restore stock: enable this option if you want to restore the order stock items when this custom status is applied.

You will be able to see all options you did or did not apply to the created order status in the custom order status list table.

Order status actions

Email settings

The Email settings tab will be available when you create a custom status, so you can configure the email that will be generated when the order gets the status you are creating.

Emails settings

Below are all the options you can set:

  • Recipients: Choose the receivers of this order status notification. You can select:
    • Administrator
    • Customer
    • Custom email address
  • “From” Name: the sender name that will be shown to the recipients.
  • “From” Email Address: the email address of the sender that will be shown to the recipients.
  • Email Subject: the subject of the email.
  • Email Heading: the text shown ahead of the body of the email.
  • Custom Message: in this field, add the text of the email taking advantage of the placeholders the plugin offers to dynamically recover some of the order information that you want to show in the email content. These are the available placeholder:
    • {customer_first_name}: the user name.
    • {customer_last_name}: the user surname.
    • {order_date}: the date on which the order has been made.
    • {order_number}: the order number.
    • {order_value}: the total amount of the order.
    • {billing_address}: the billing address of the user.
    • {shipping_address}: the shipping address of the user.
    • {billing_country}: the billing country of the user.
  • Include Order Information: this option lets you add the list of the products in the order, the billing address and shipping address in the email.
Custom status email example

Import statuses

Do you have custom status set up in a .CSV file and need to import them? No problem, it’s easy and will take just one click.

Go to the plugin settings panel YITH > Custom Order Status > Order Statuses and click on the Import Statuses button.

Import statuses

This will automatically import all statuses created with third-party plugins into your custom statuses and will be then visible in the main plugin panel from the Order Statuses table, so you can start customizing them as explained in this page.

Please, note, before applying the import, you must make sure that the plugin with which you have previously created the statutes is installed and activated, otherwise, this import will produce no effect.

Settings

From the Settings tab in the plugin you can decided whether to allow or not shop managers to manage custom order statuses:

General settings: enable shop managers

If enabled, shop managers can create and edit custom order statuses from the Order Statuses tab, as explained in this page.