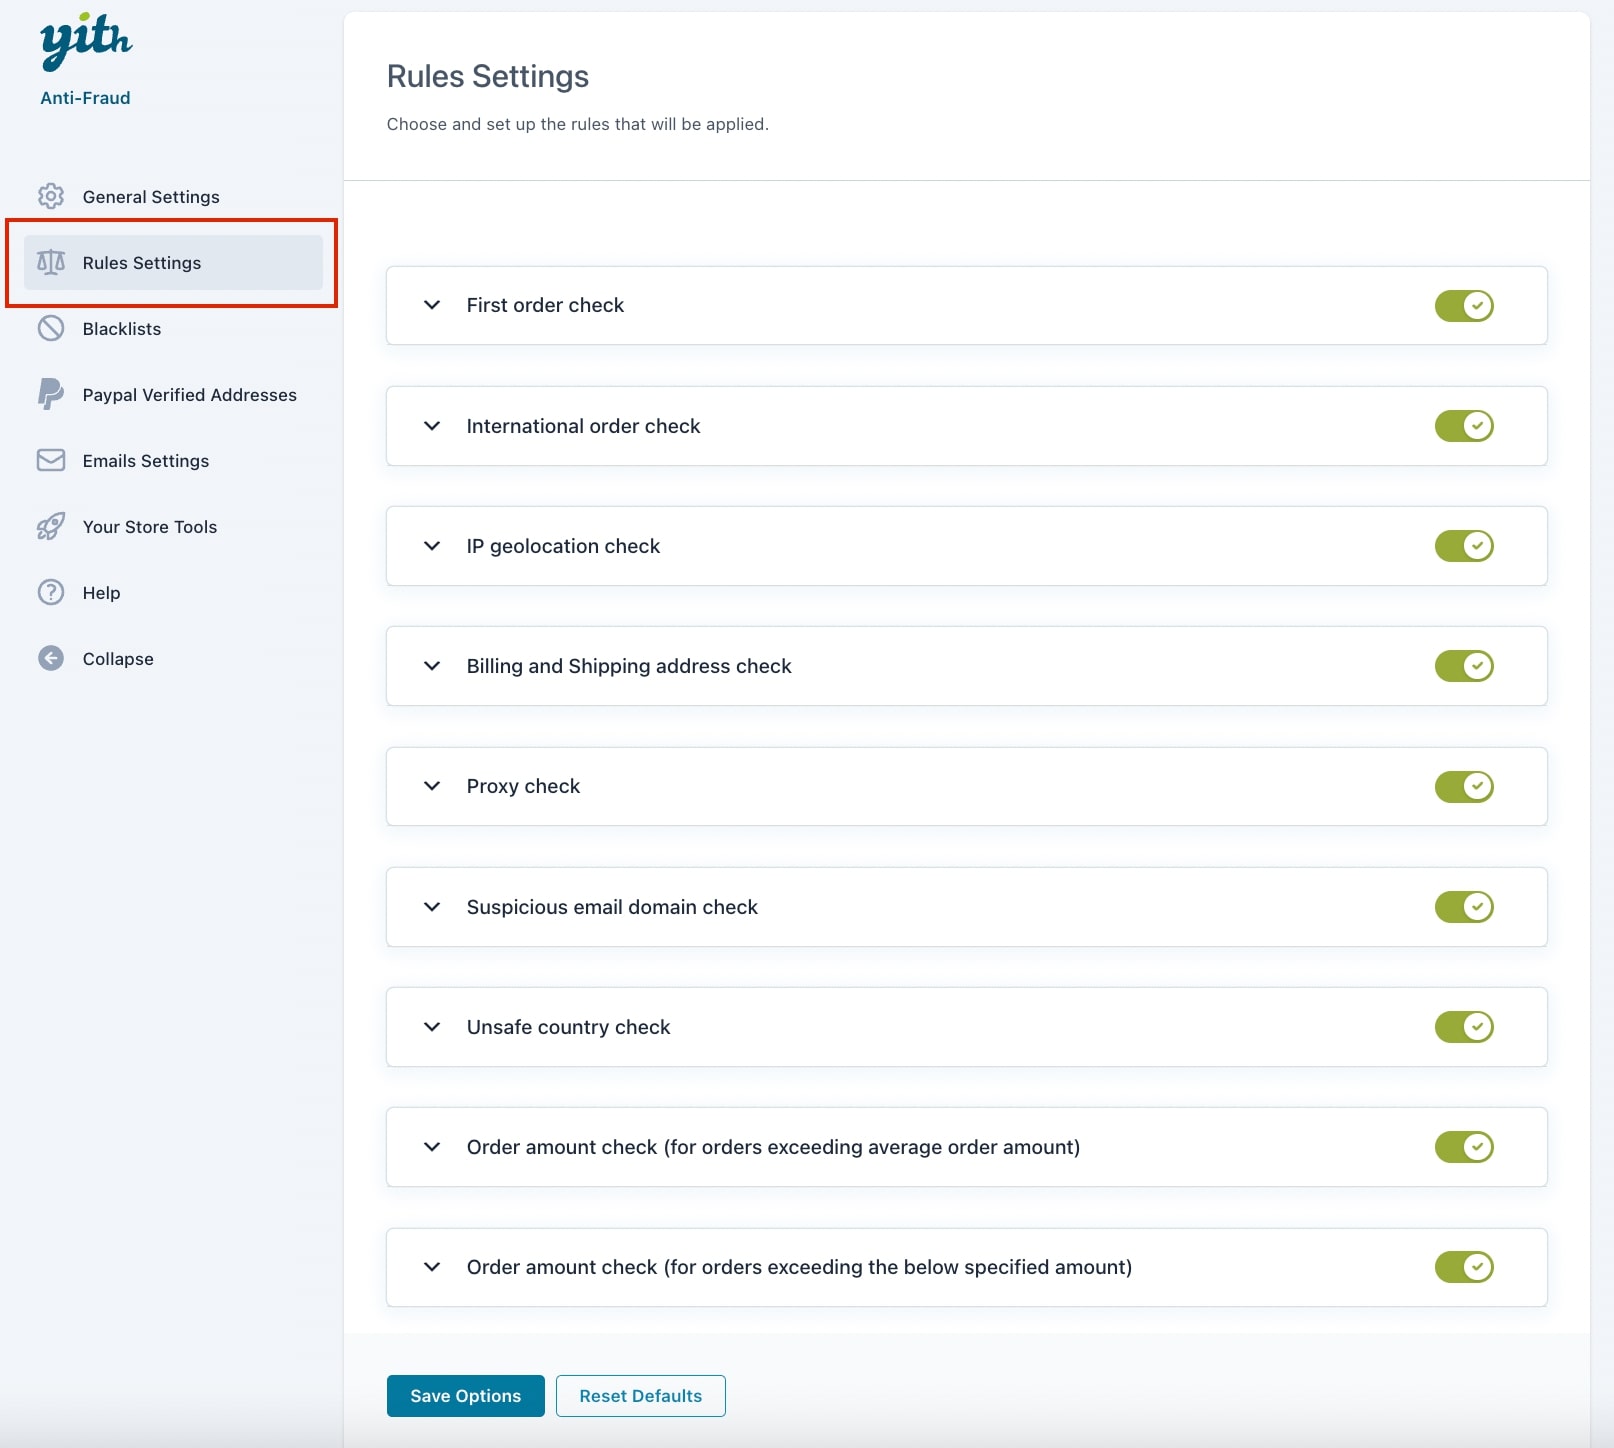
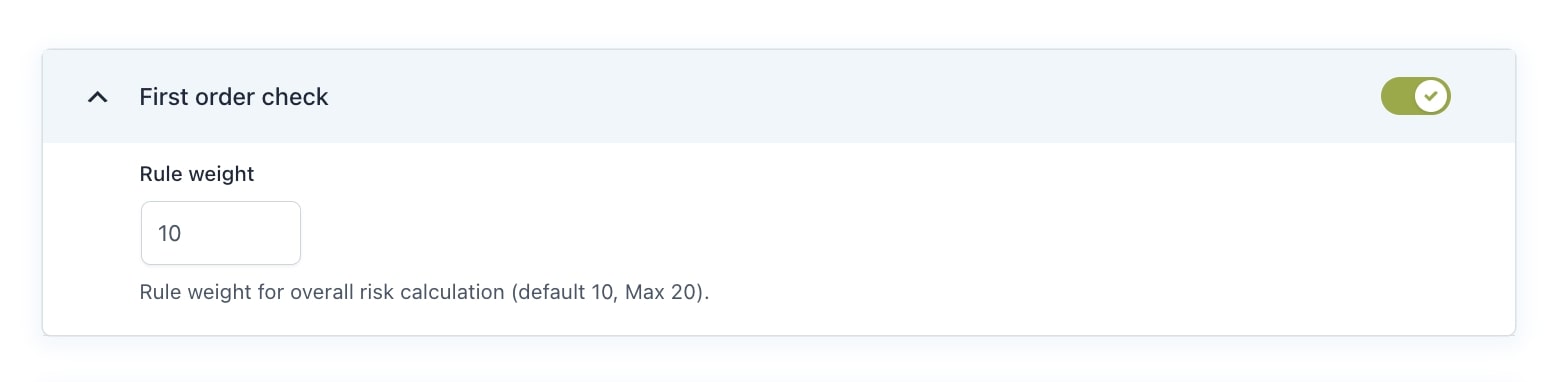
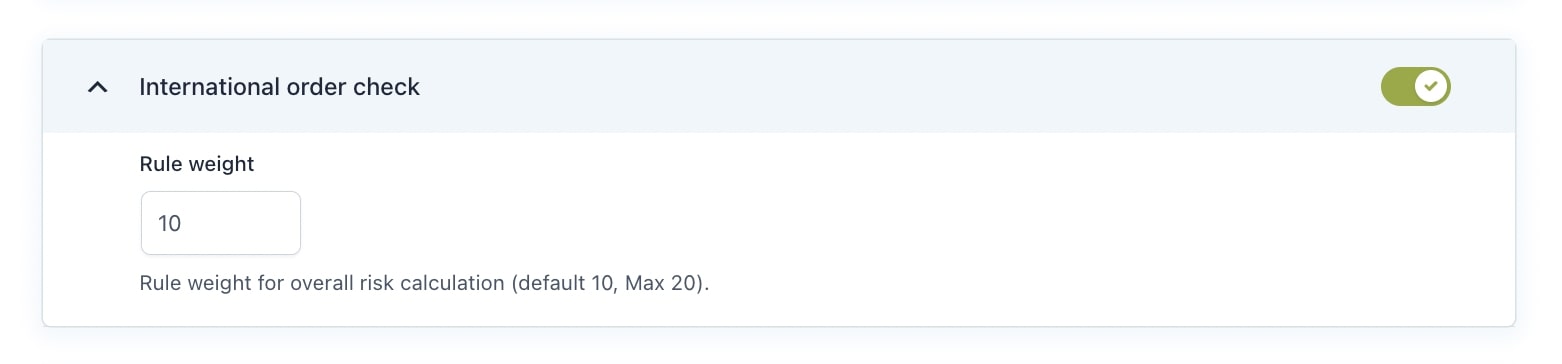
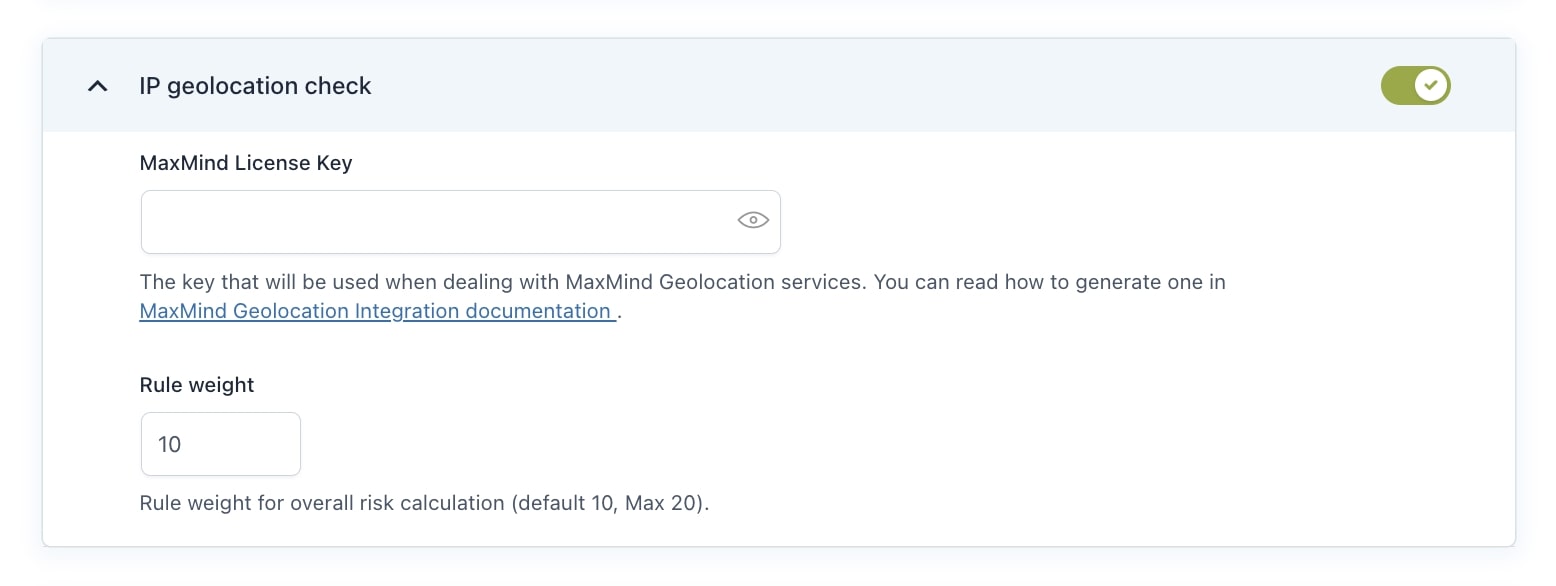
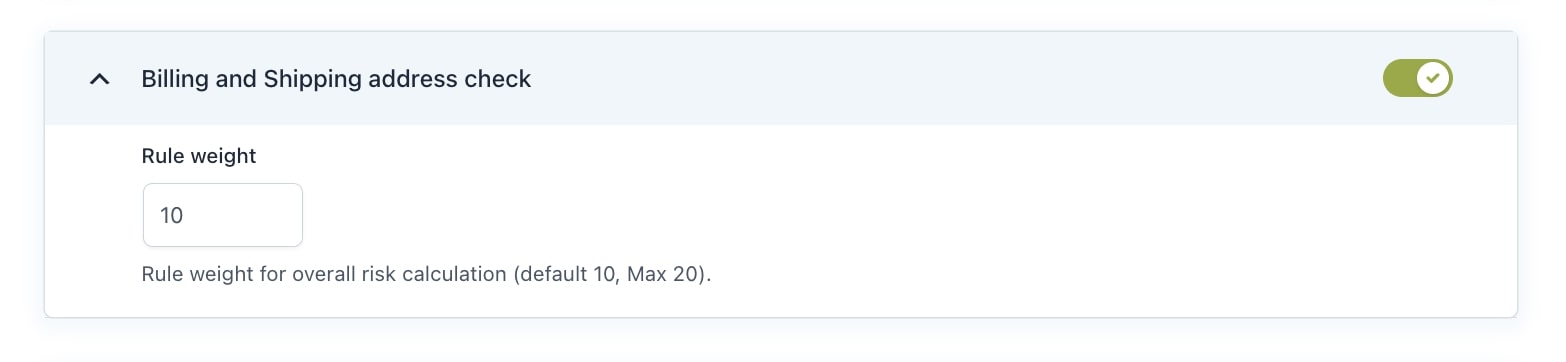
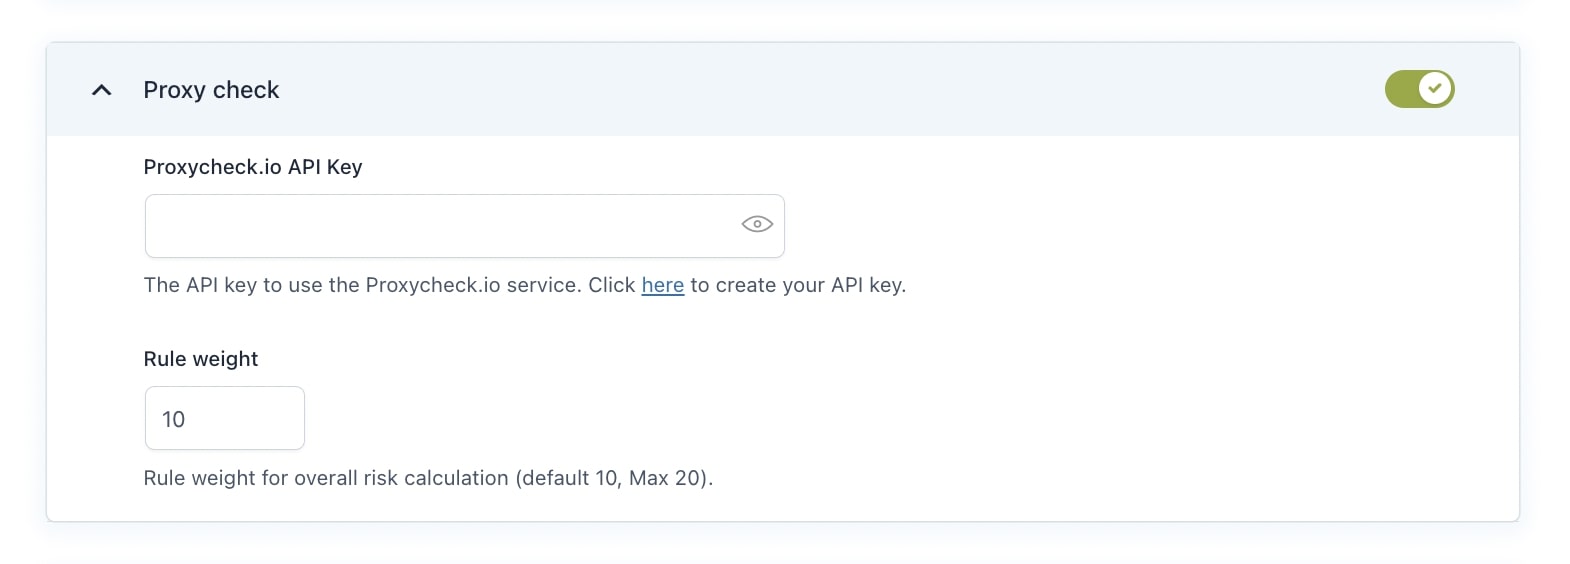
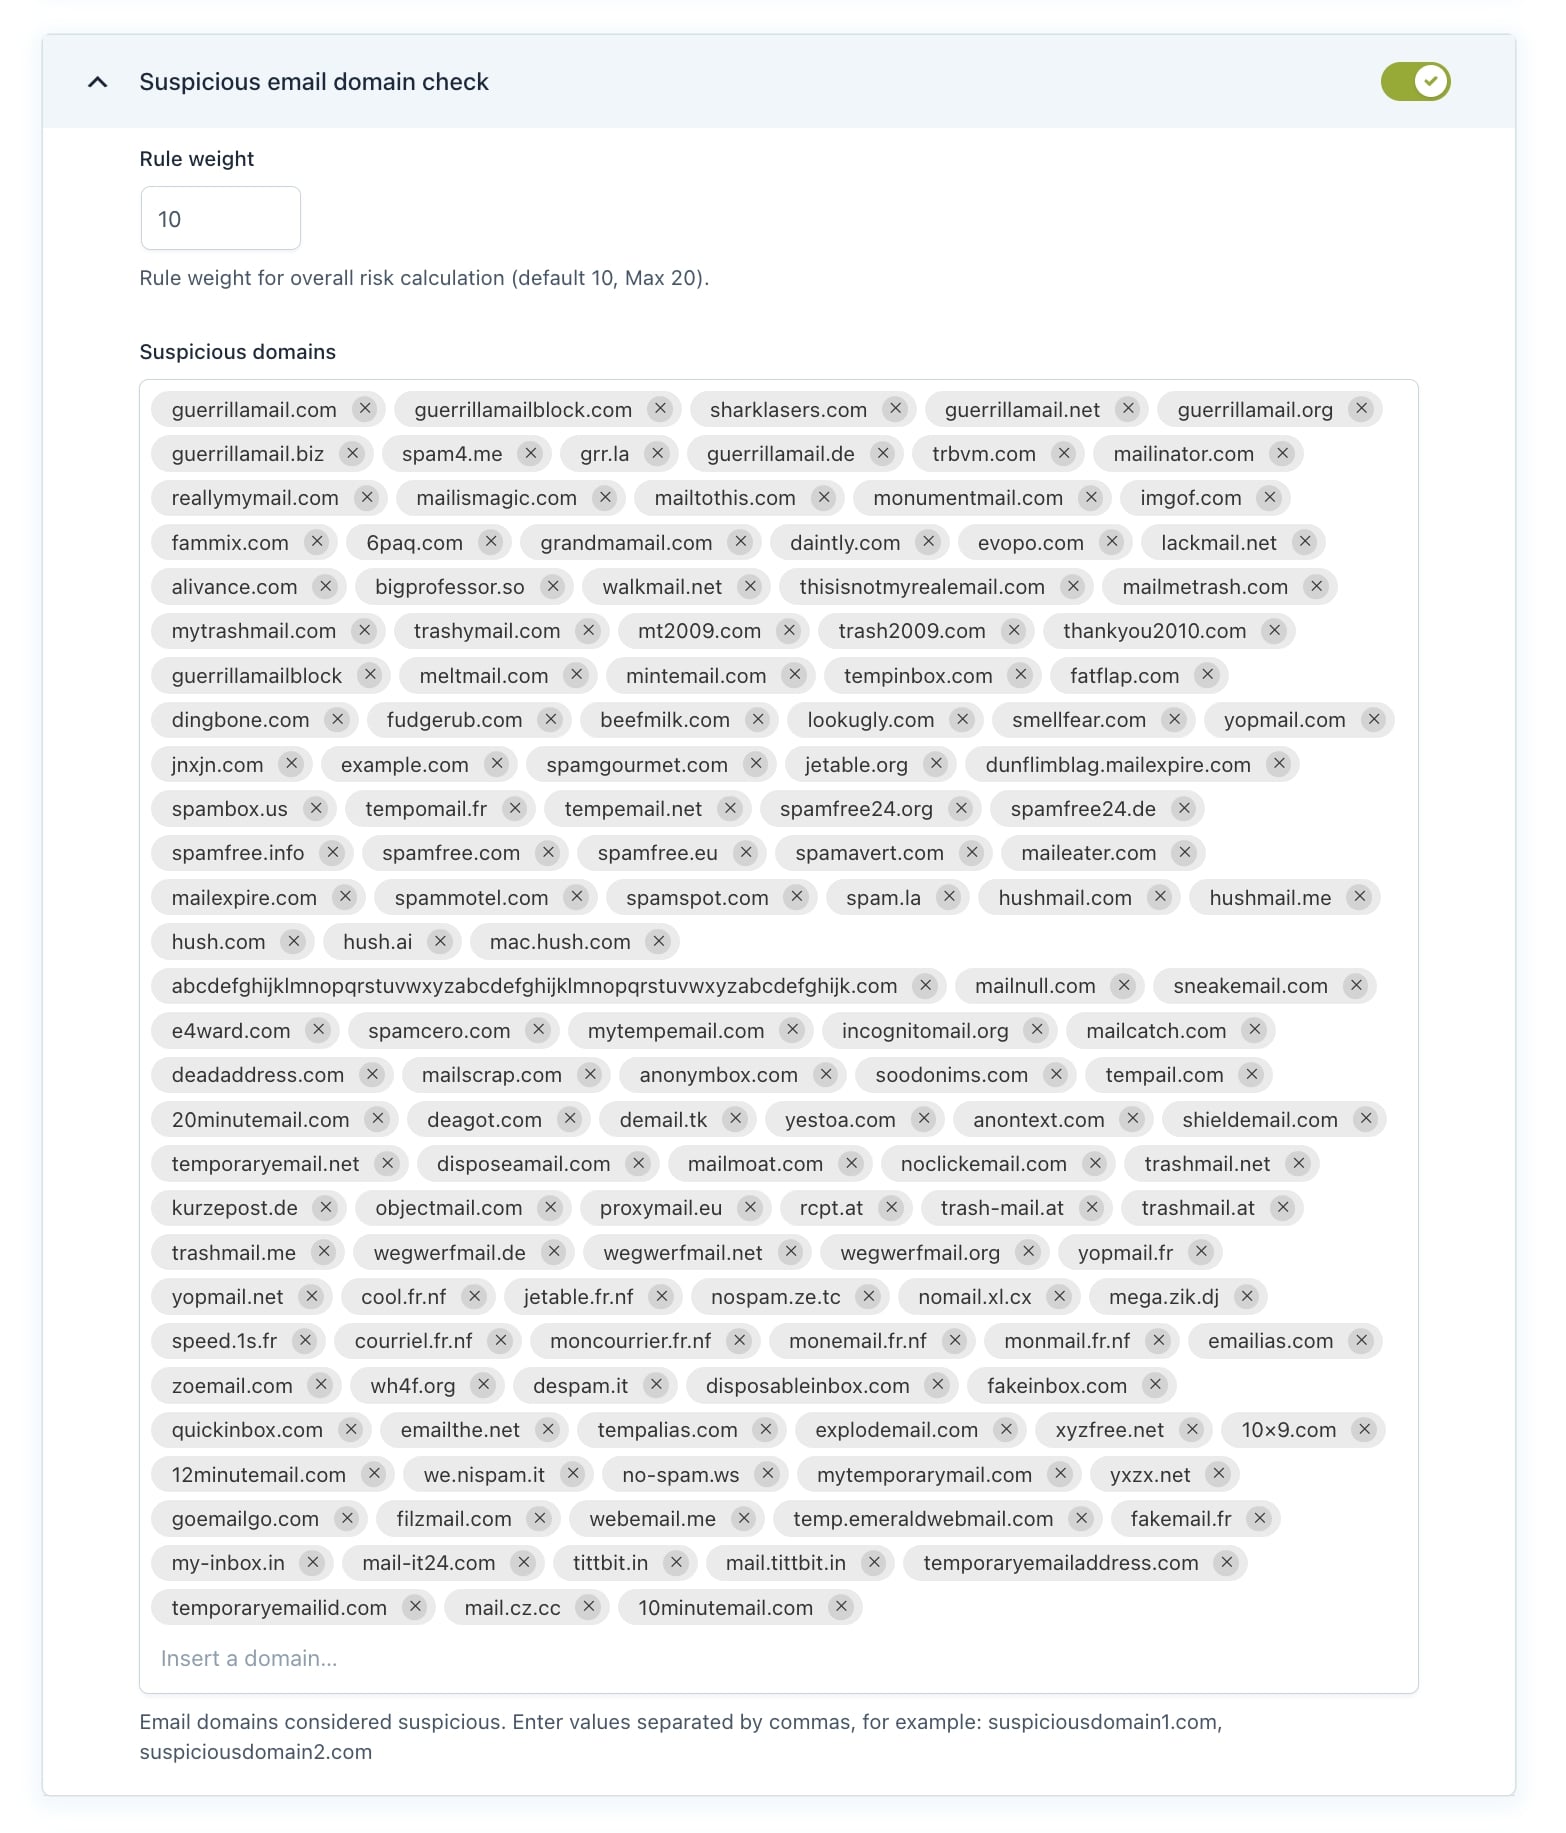
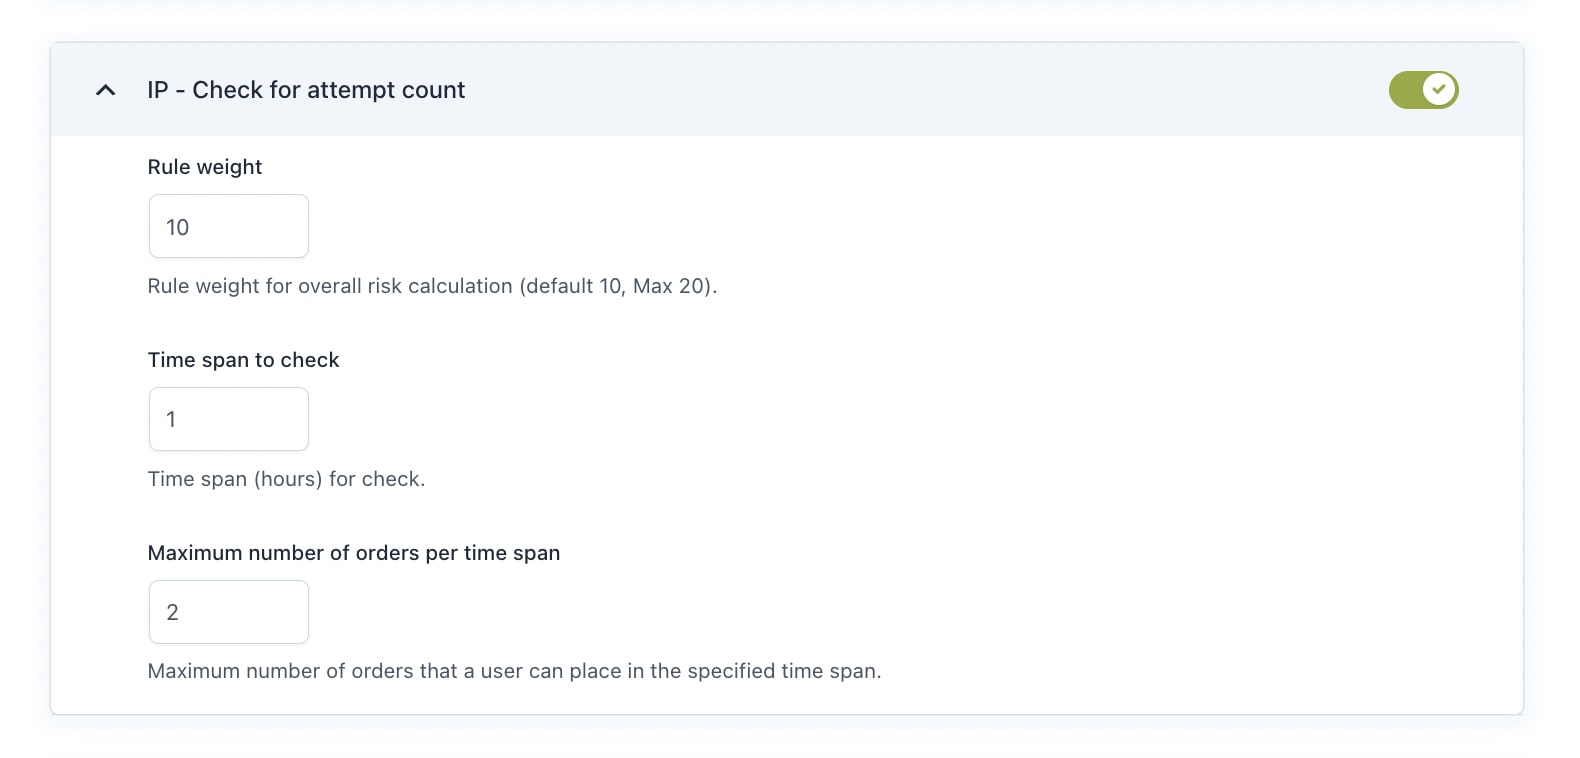
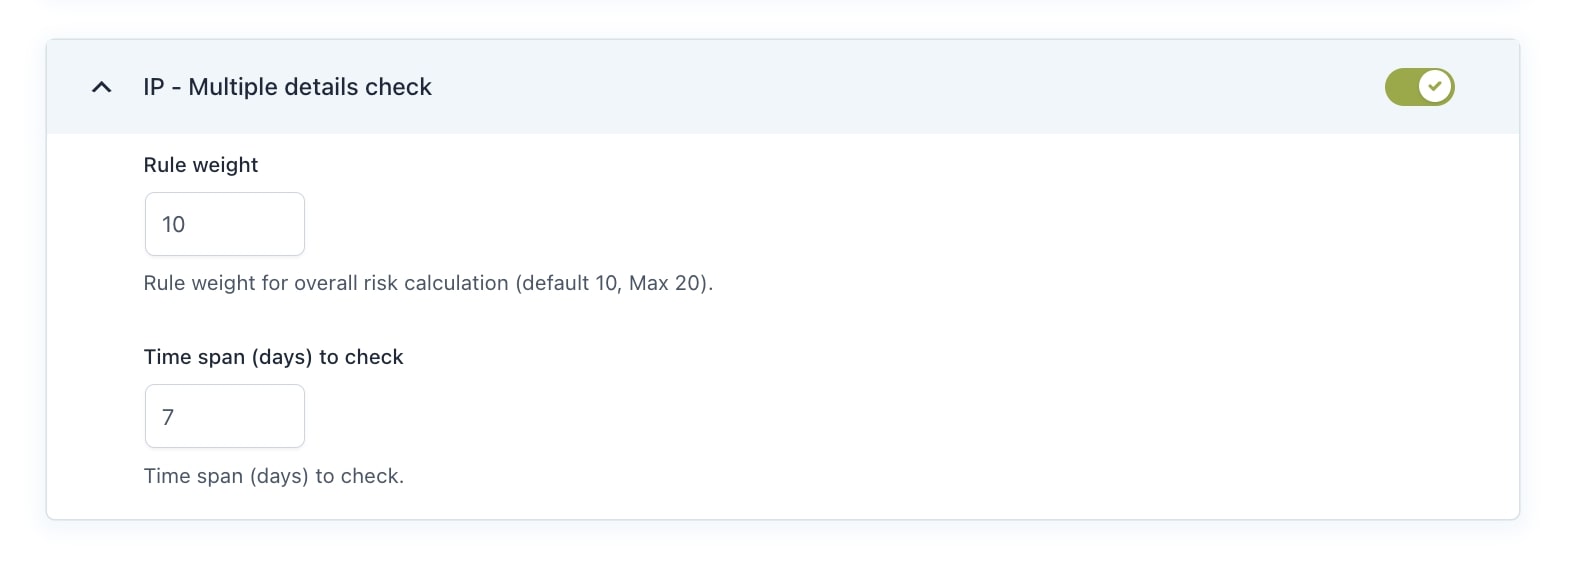
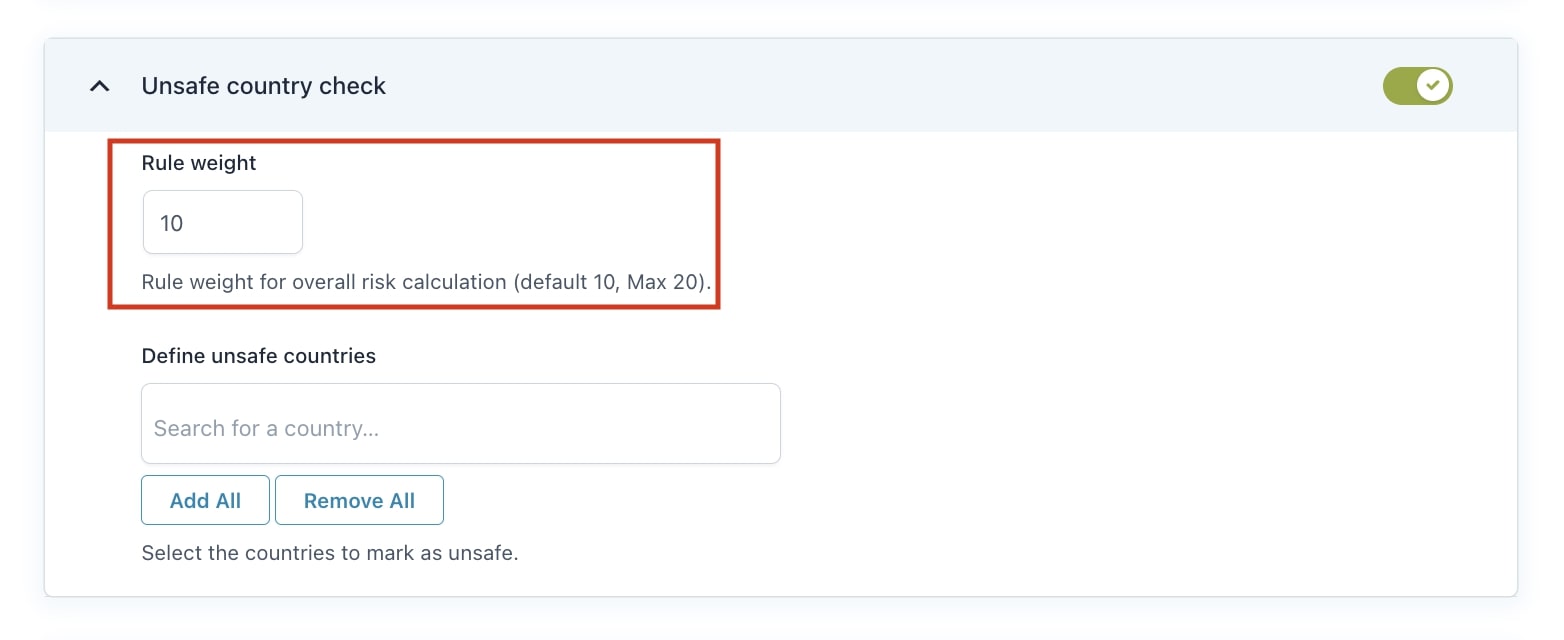
First of all, you can enable the YITH Anti-Fraud plugin rules:
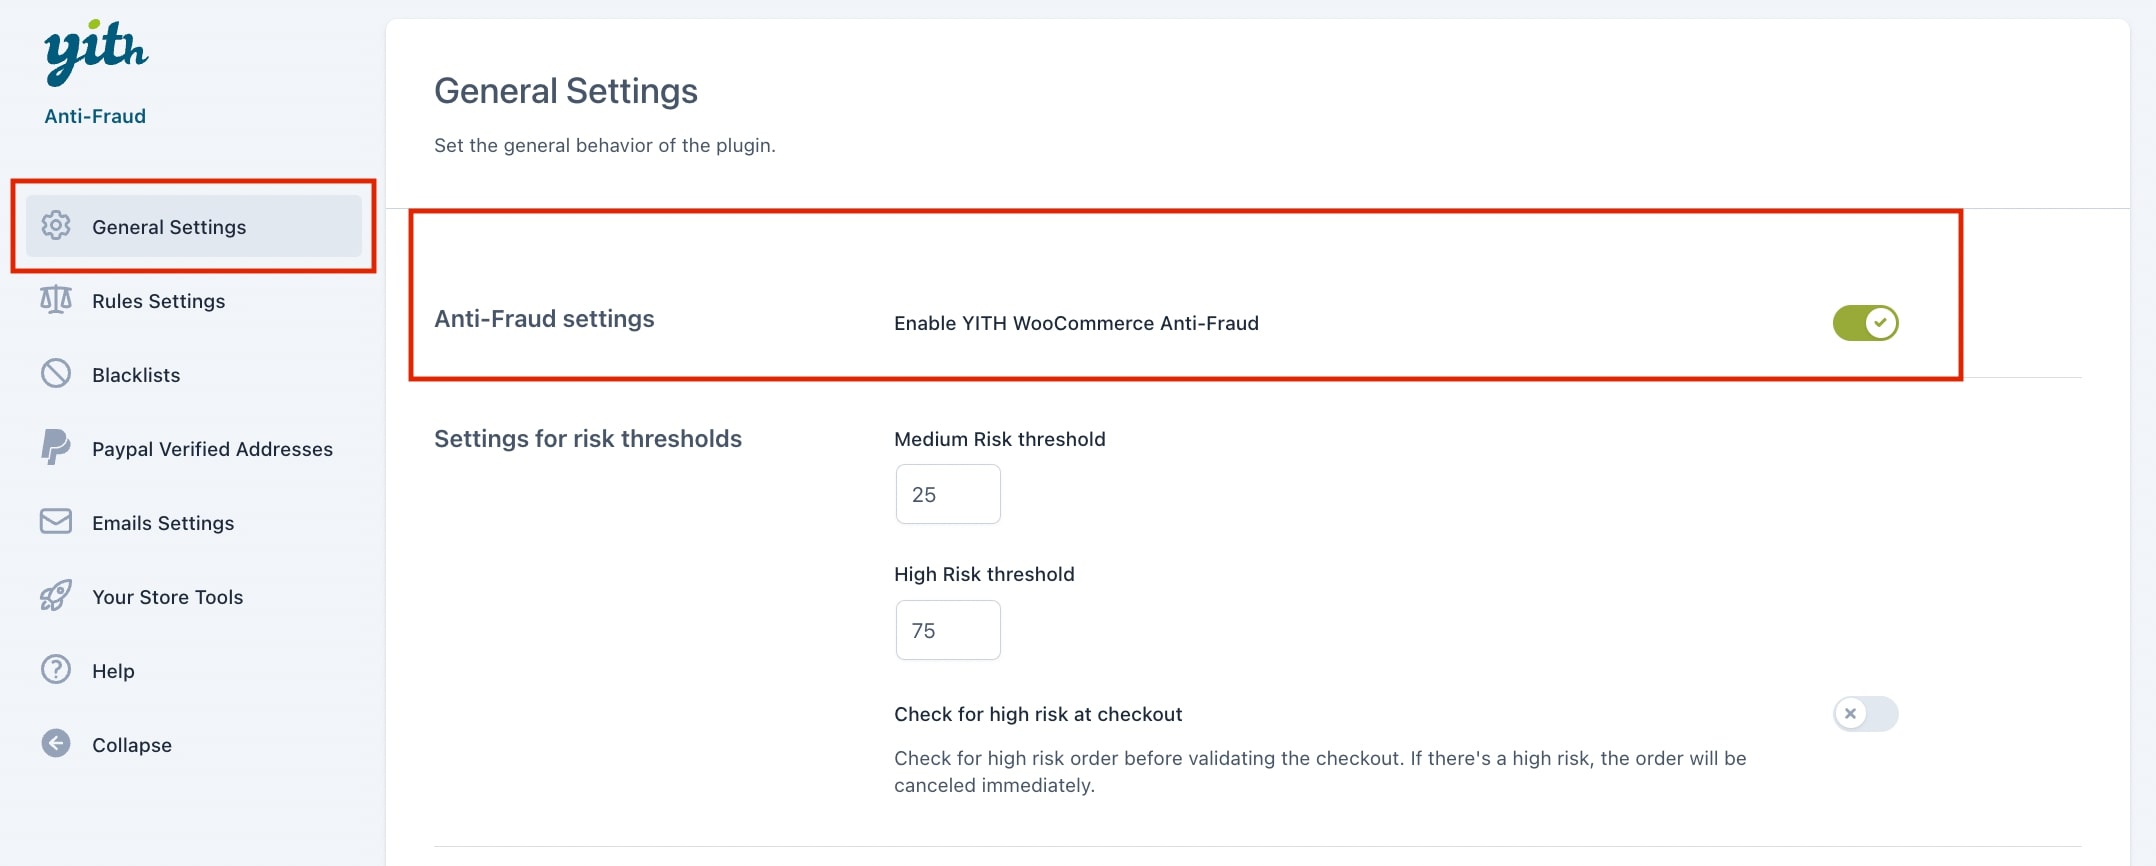
Then, from the General Settings you can start configuring:
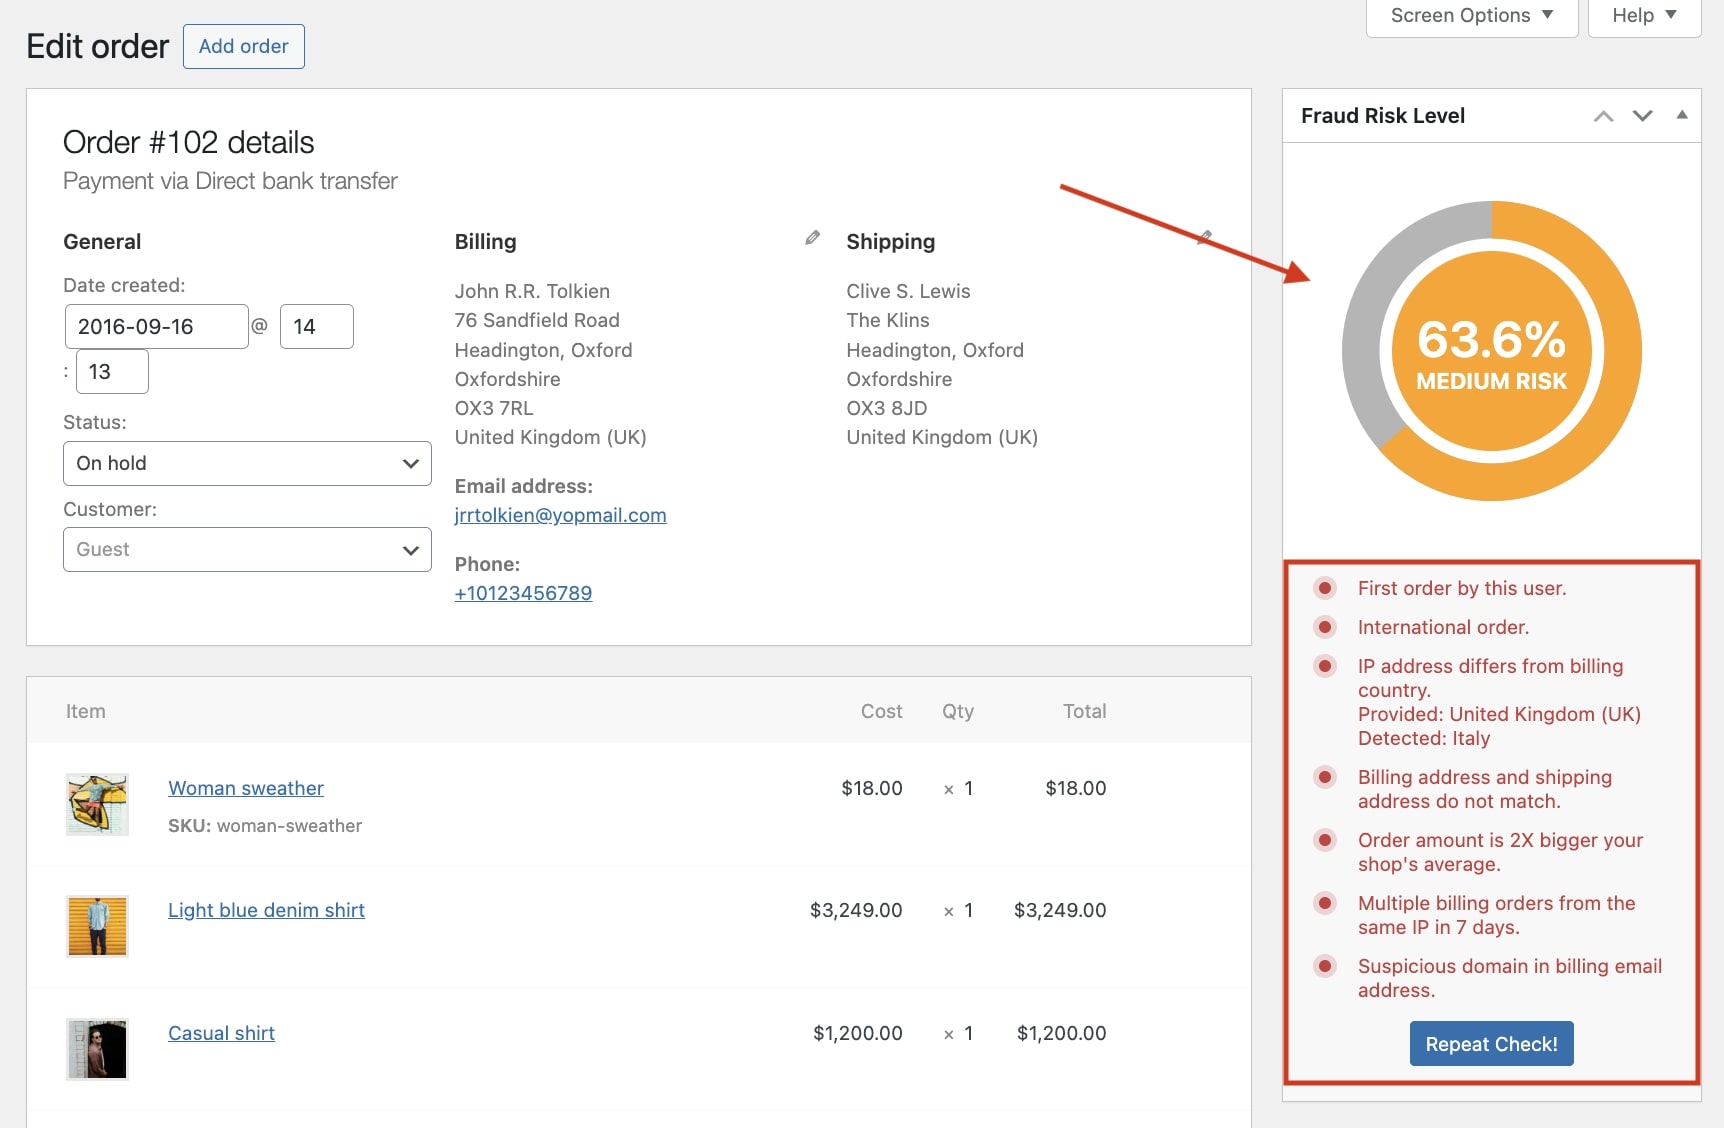
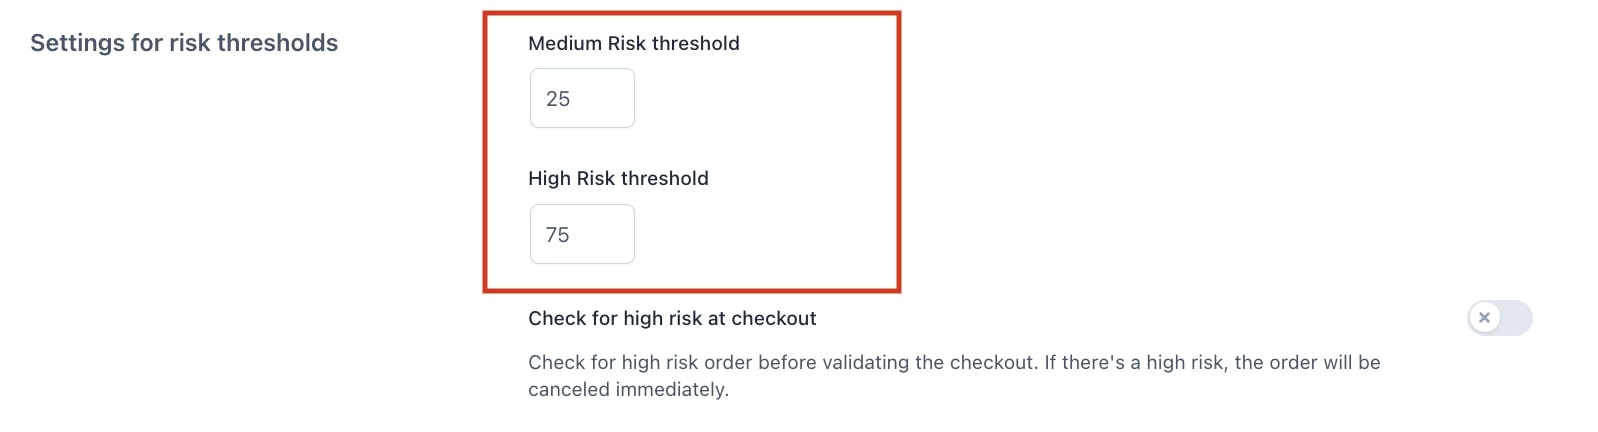
Settings for risk thresholds
In this specific section from the General settings, you can set the thresholds of fraud risk to mark an order as medium or high risk.
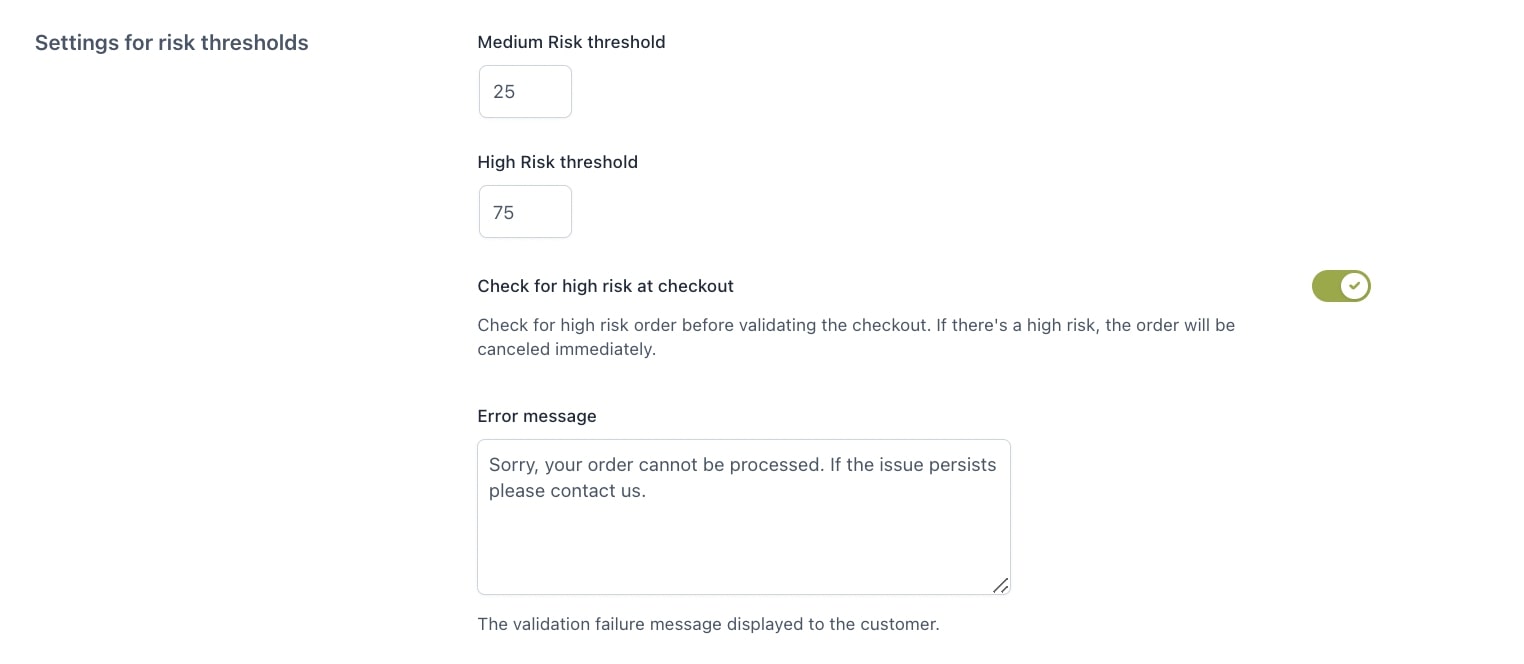
- Medium Risk threshold: orders that get this value will be marked as “medium risk”.
- High Risk threshold: orders from this value up will be marked as “high risk”.
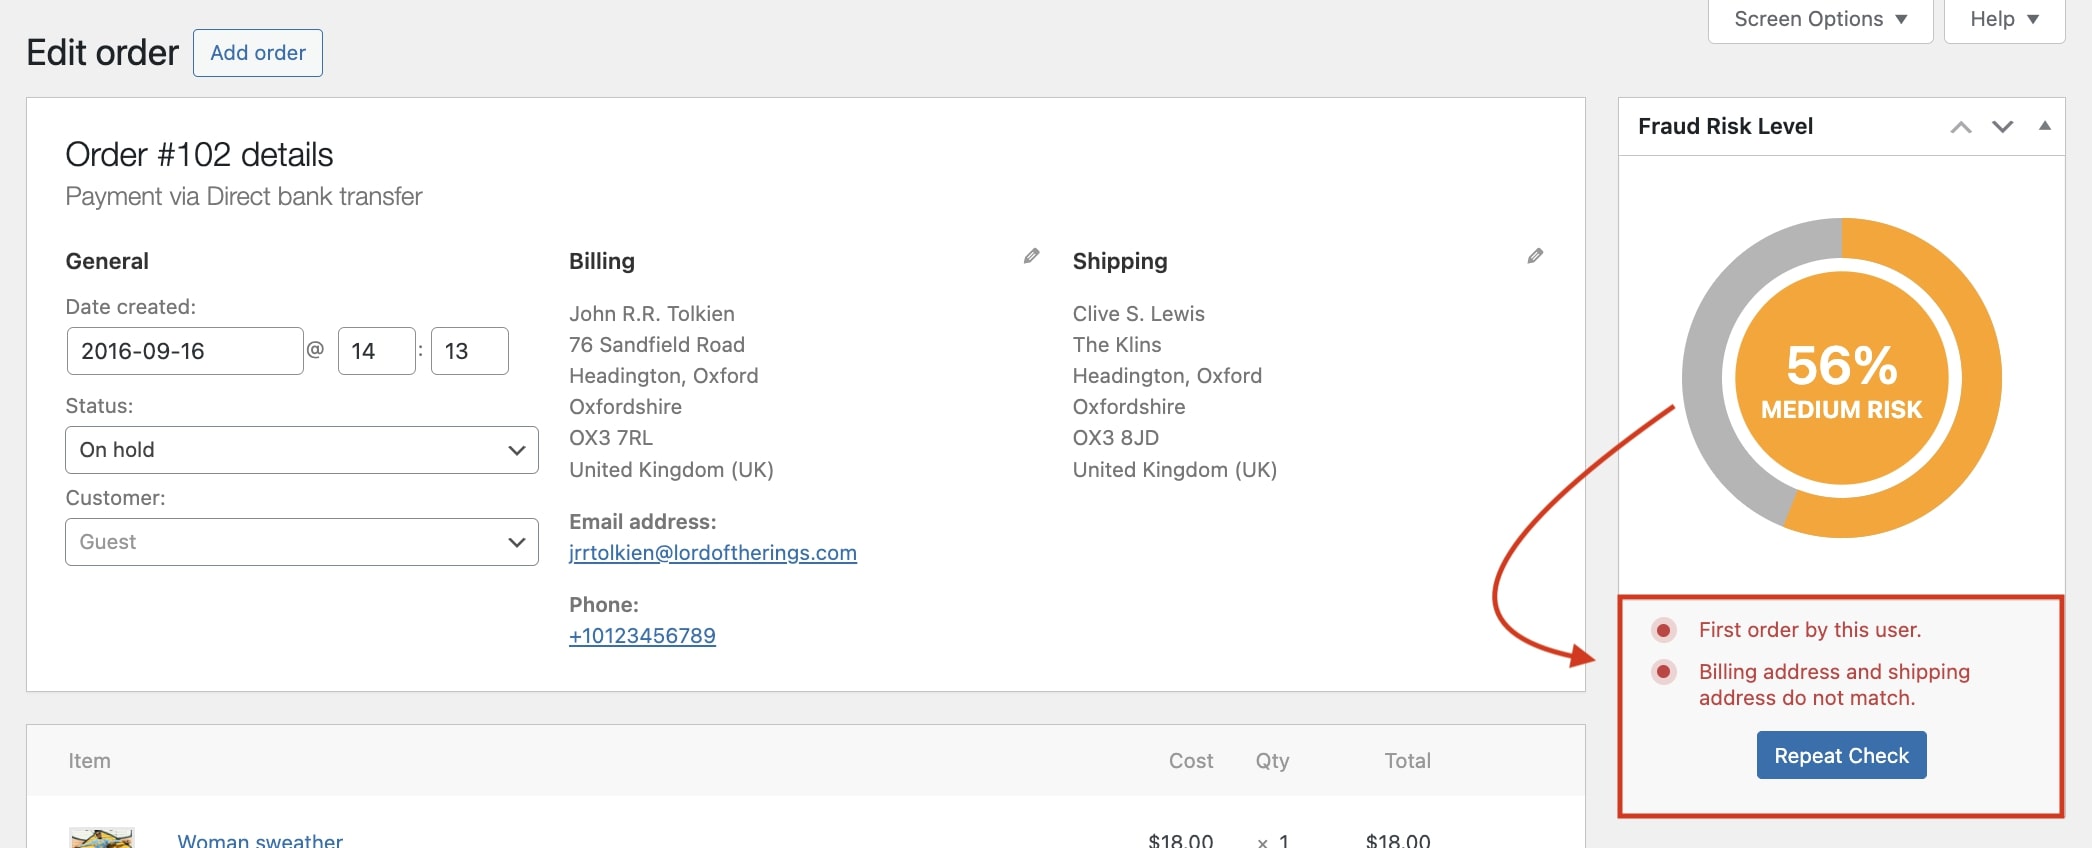
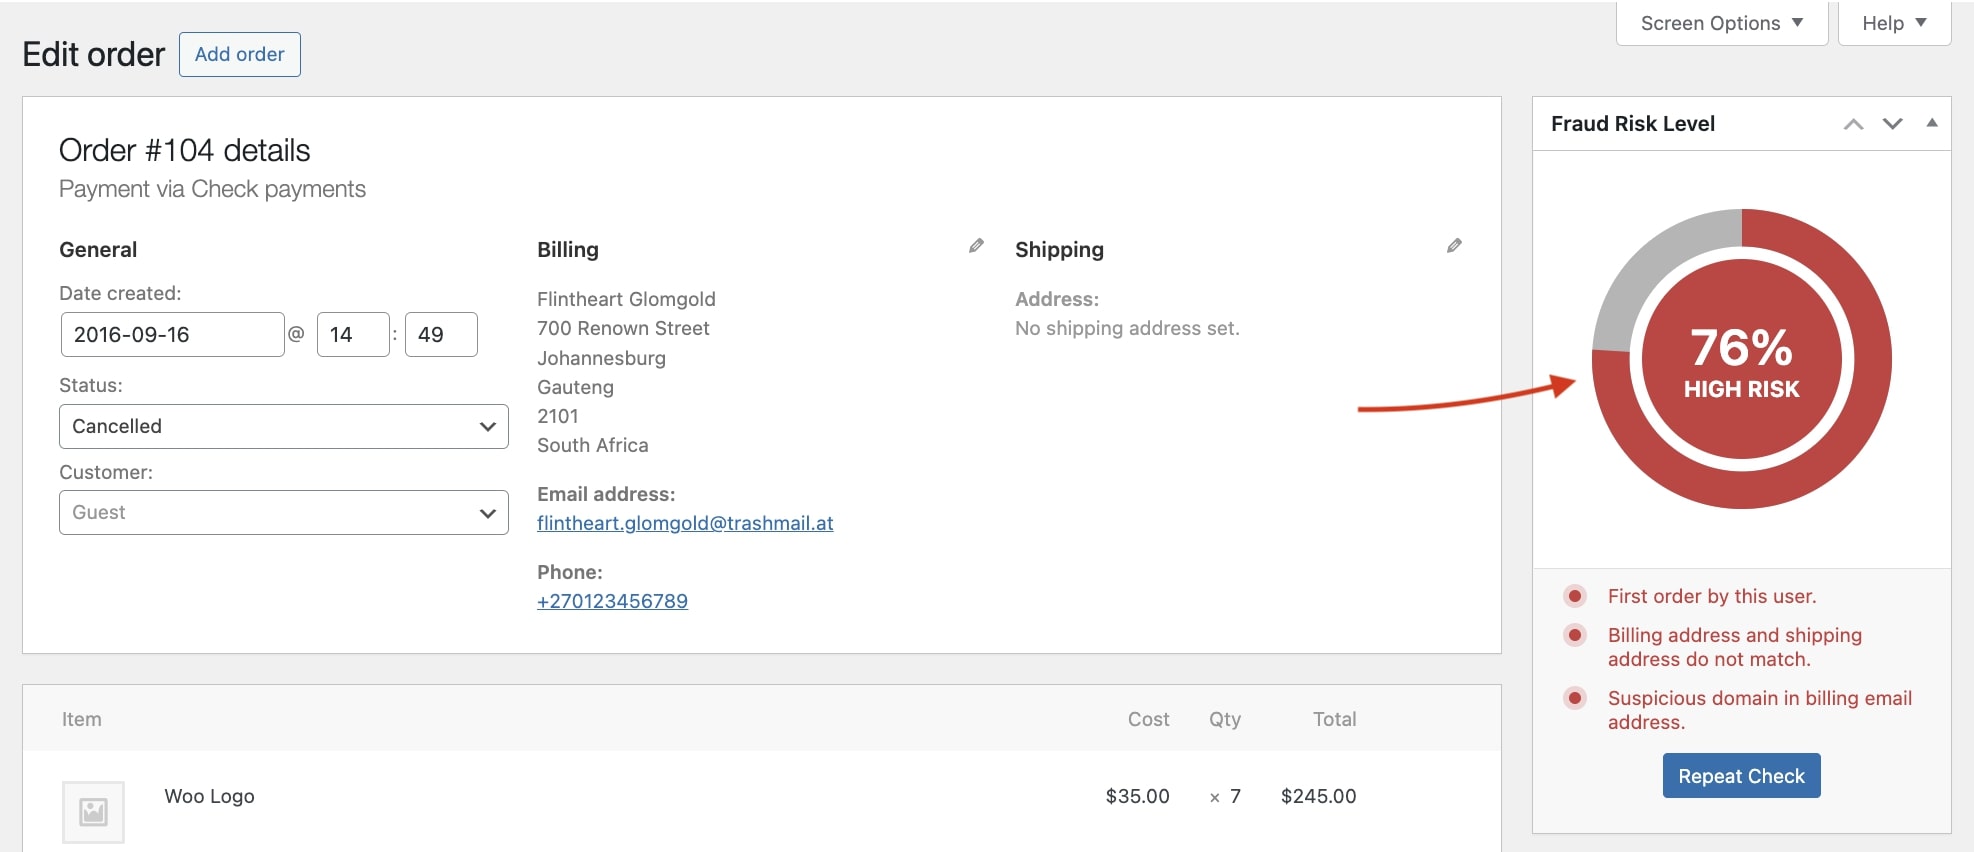
So, based on the image above:
- orders that get 0% to 24% > low risk
- orders getting 25% to 74% > medium risk
- orders getting 75% to 100% > high risk
Whatever the risk threshold, by default, the plugin does not block any order, and the payment will be processed anyway. Yet, if you want to prevent payments from orders with a high risk only, you can enable the Check for high risk at checkout option and automatically cancel orders that get the “high risk” label.
- Check for high risk at checkout: enable this option to calculate the risk at checkout and automatically cancel the order if it gets the “high risk” label.
Please note: this option calculates the risk before processing the payment. However, some payment gateways bypass WooCommerce validation, preventing the plugin from performing the check before the payment is through. WooCommerce plugins like Stripe, WooPayment, and PayPal are currently not affected.
- Error message: configure the custom message that you want to show at checkout when the order is cancelled for “high risk”.
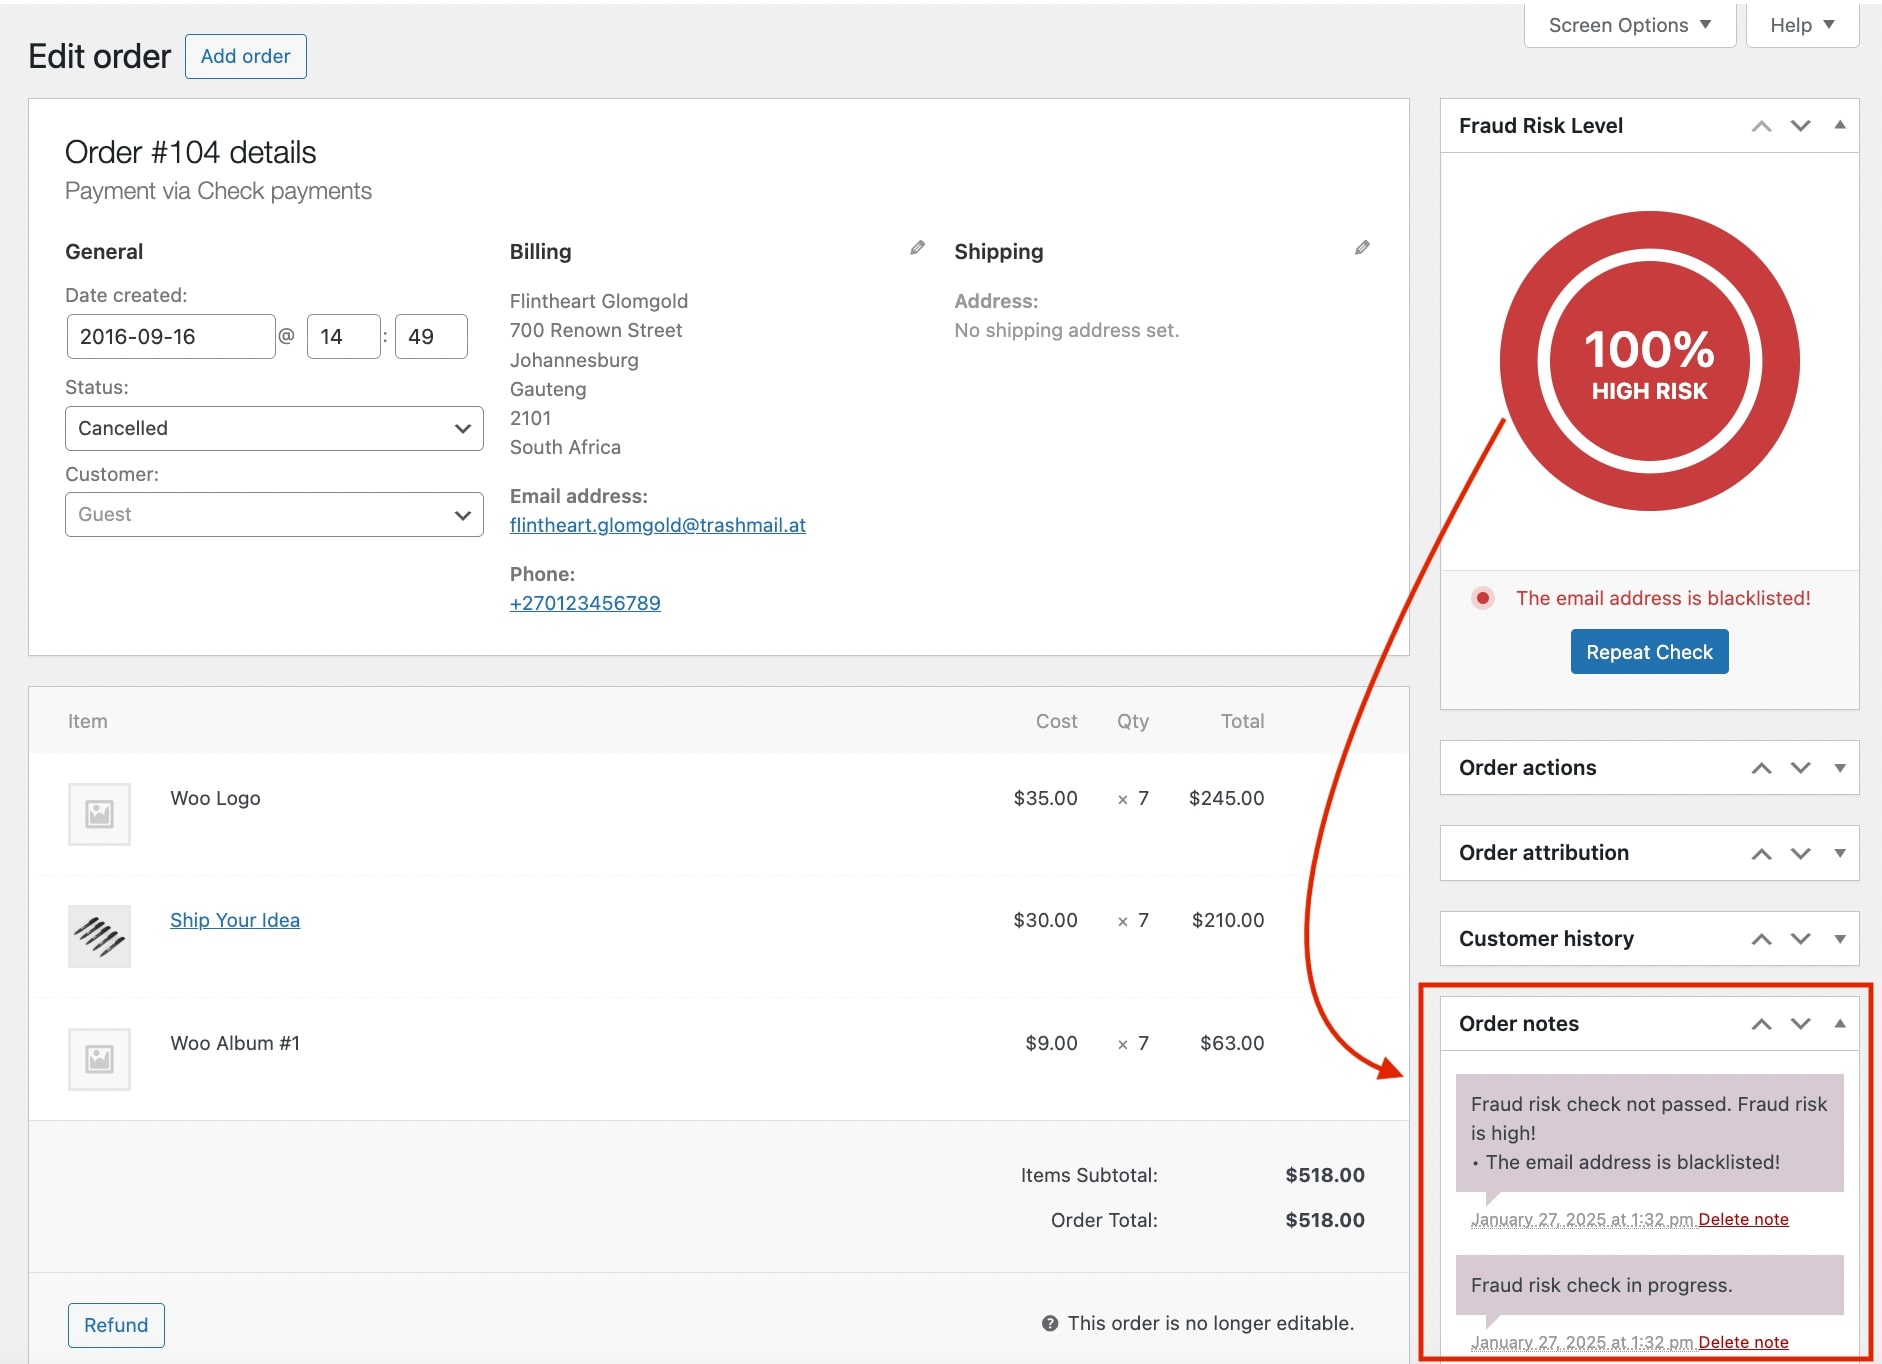
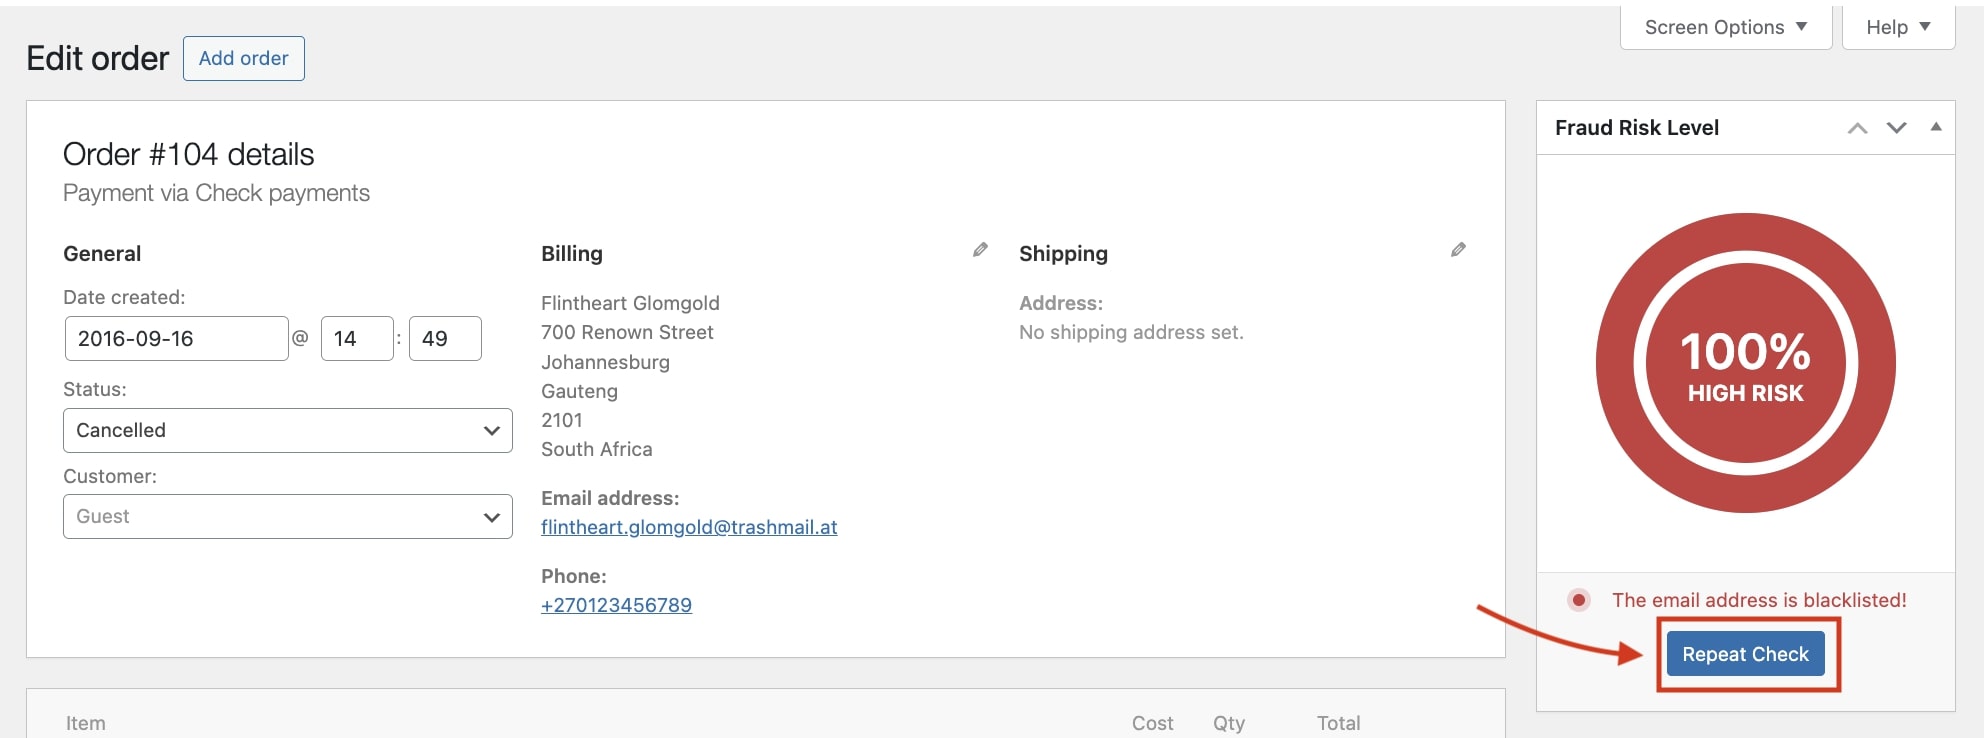
The risk is calculated based on the weight of the plugin rules. You can refer to this page to read more information about how the risk is calculated.
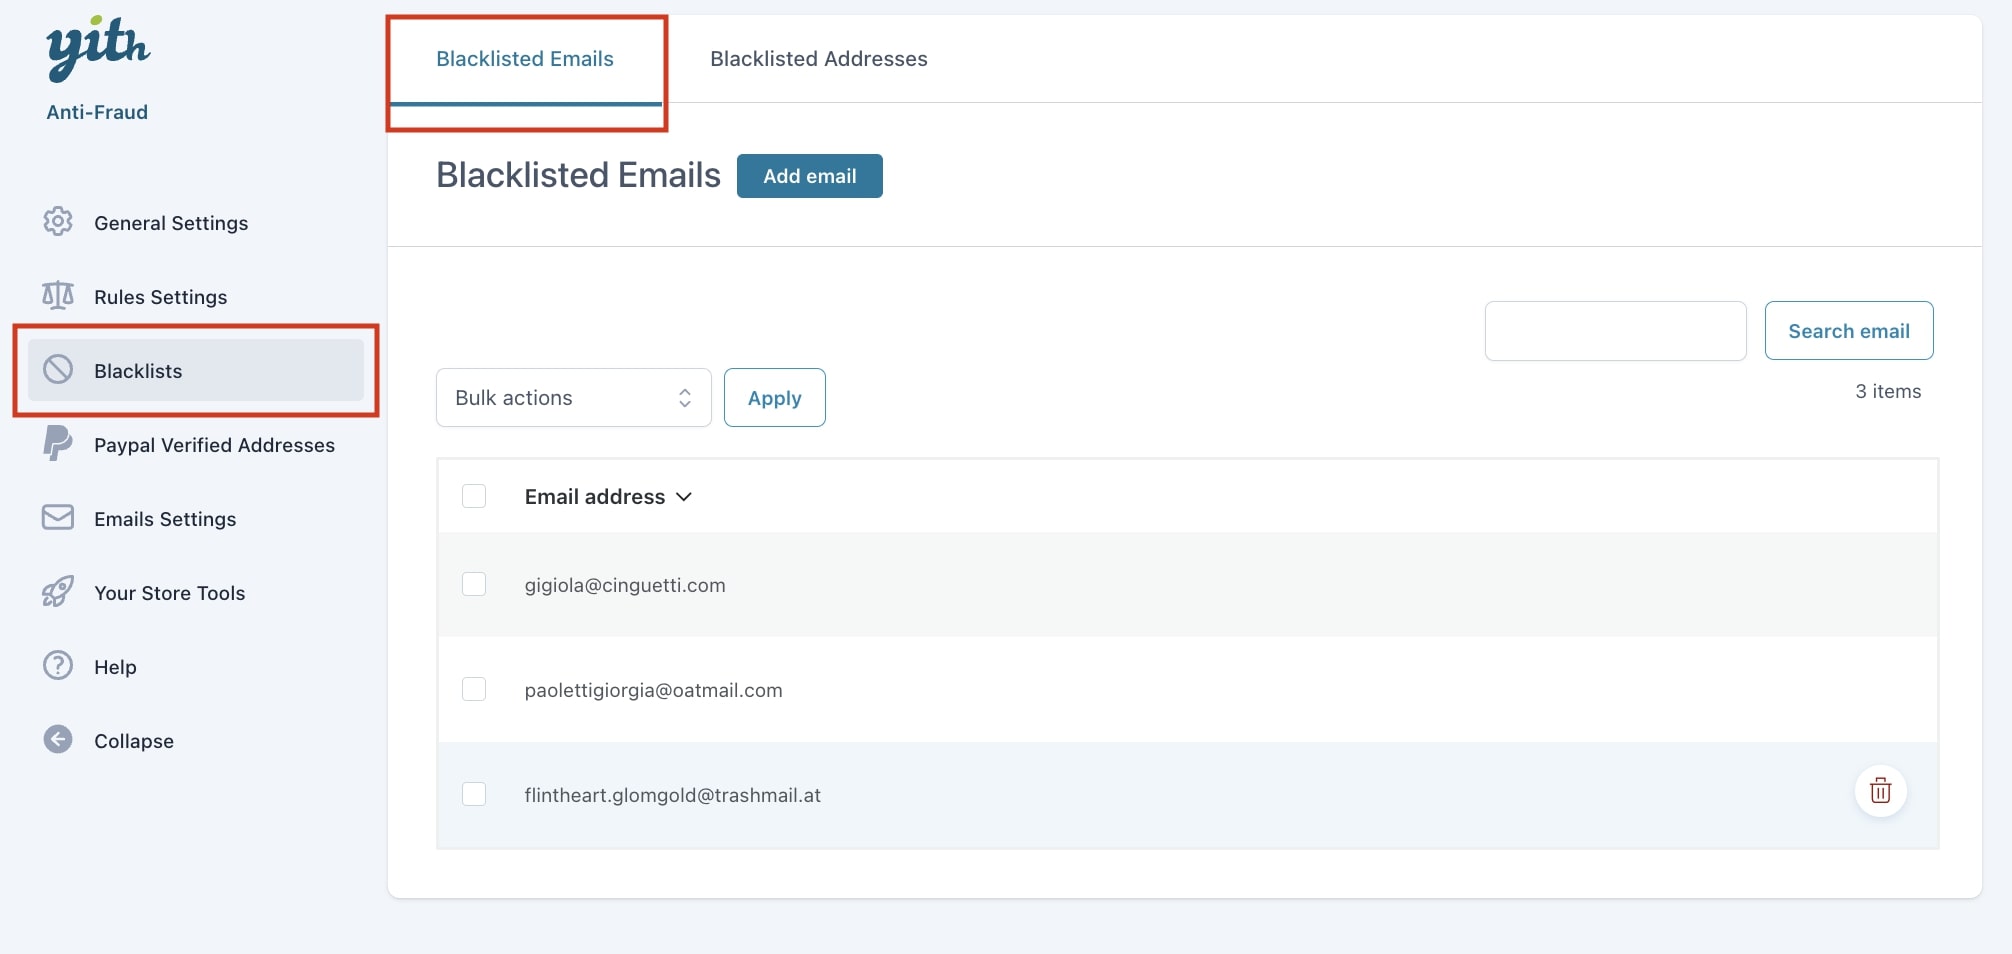
Email blacklist settings
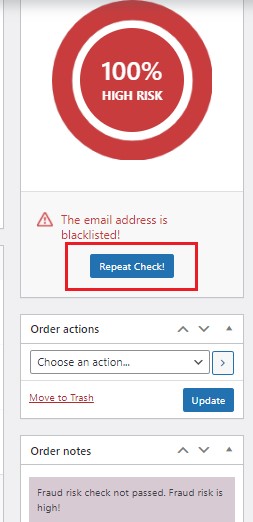
From this section you can Enable the email blacklist, so you can block automatically all orders coming from specific emails you have added in the Blacklist.

The plugin also allows to automatically add an email address to the blacklist, if it’s considered high fraud risk. You only need to enable the option “Enable automatic blacklisting”.
To read more information about the Blacklist, you can refer to this post.
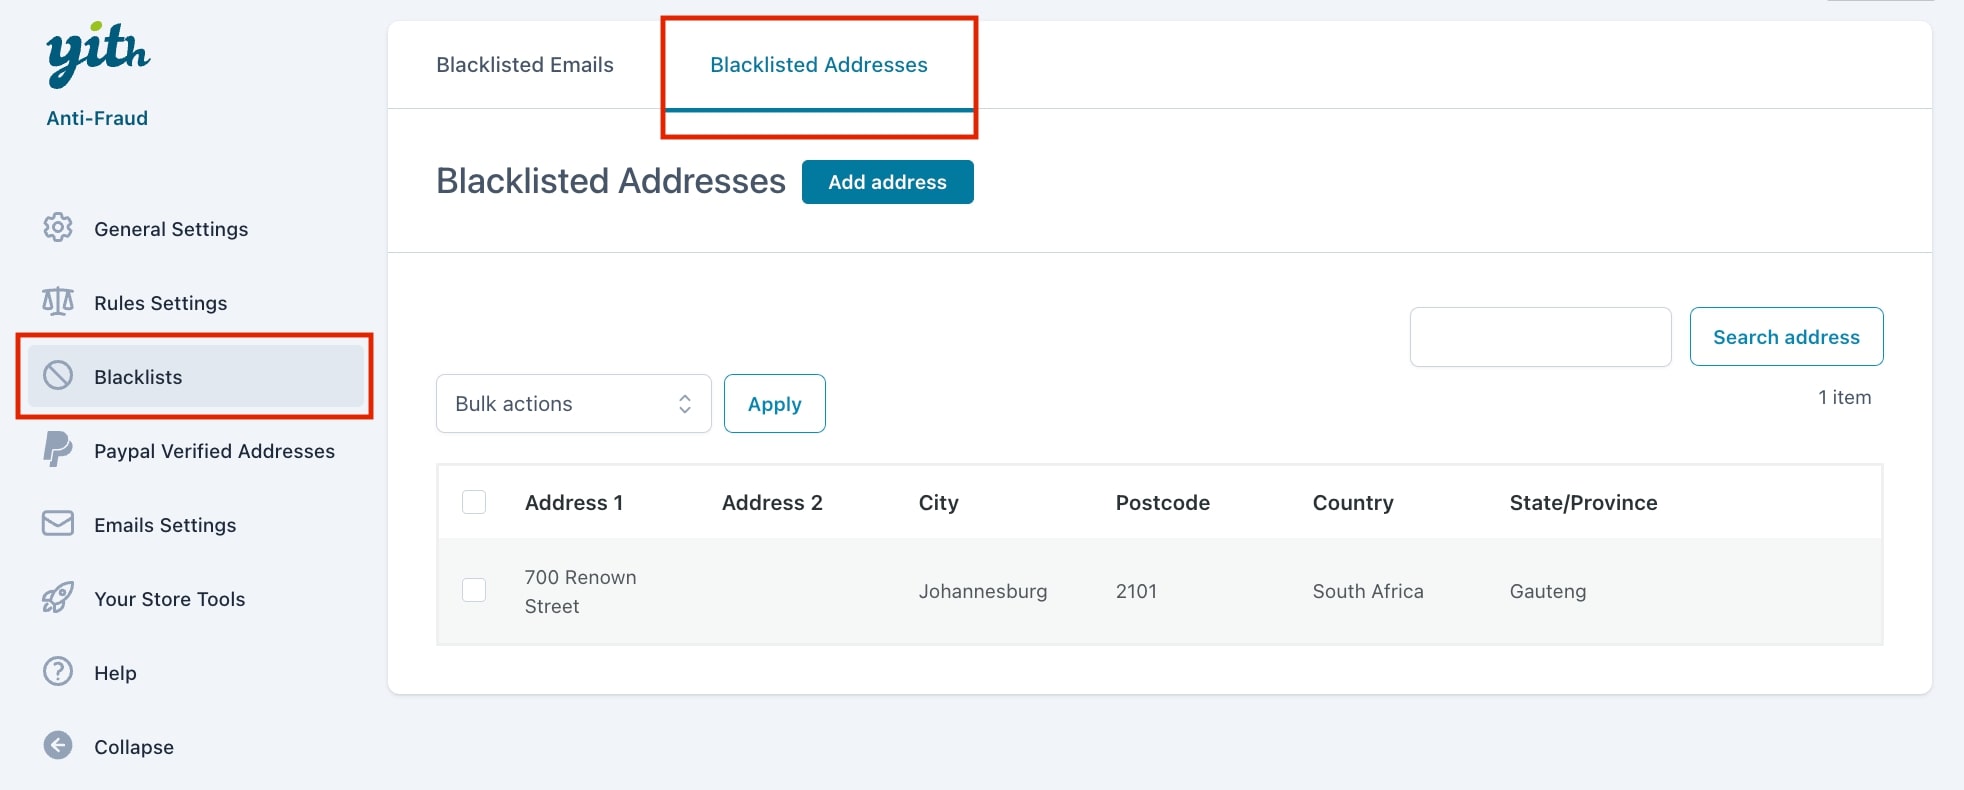
Addresses blacklist settings
With the option Enable address blacklist you can automatically block all orders coming from one or more billing and shipping addresses you have added in the Blacklist .
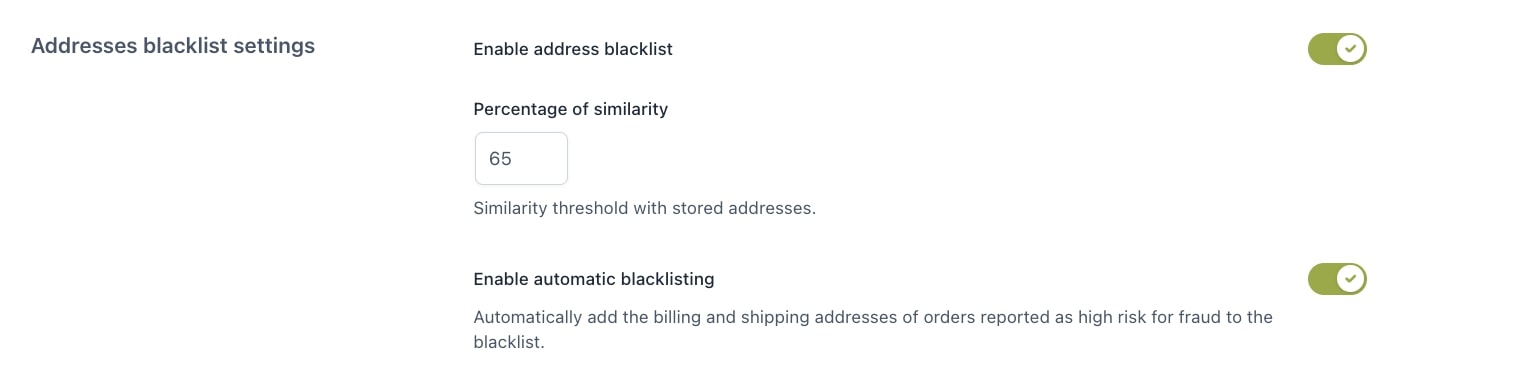
Make sure you set also the Percentage of similarity: this determines how closely an email must match those on the Blacklist to be flagged as high risk and result in the order being canceled. The lower this value, the stricter the check will be. If you want this check to pass only with a perfect match, set this to 100%.
The plugin also allows you to automatically add a billing or shipping address to the blacklist, if it’s considered high fraud risk. You only need to enable the option “Enable automatic blacklisting”.
To read more information about the Blacklist, you can refer to this post.
PayPal settings
From the PayPal settings you can Enable PayPal verification, which allows you to check if the payment request coming from a specific PayPal account is completed by the actual owner of the account, and by no one else that could have stolen the account or the account credentials.
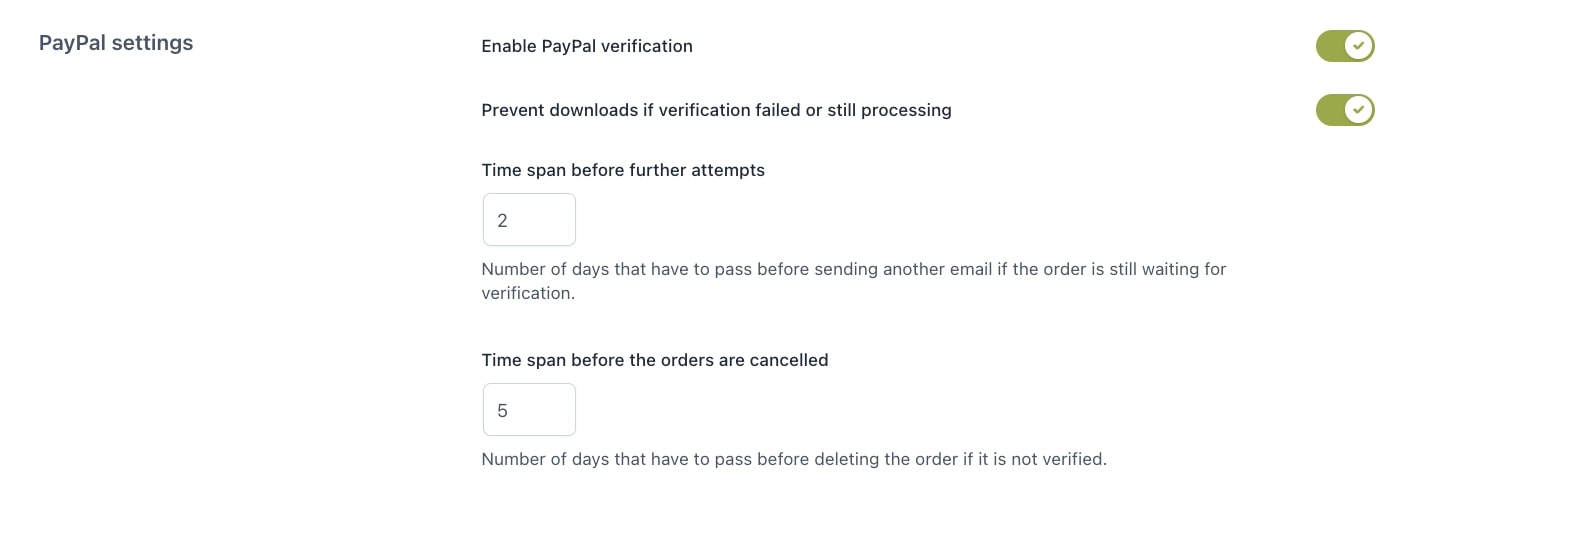
- Prevent downloads if verification failed or still processing: activate it if you wish to prevent downloads of digital products if the PayPal verification is not completed successfully.
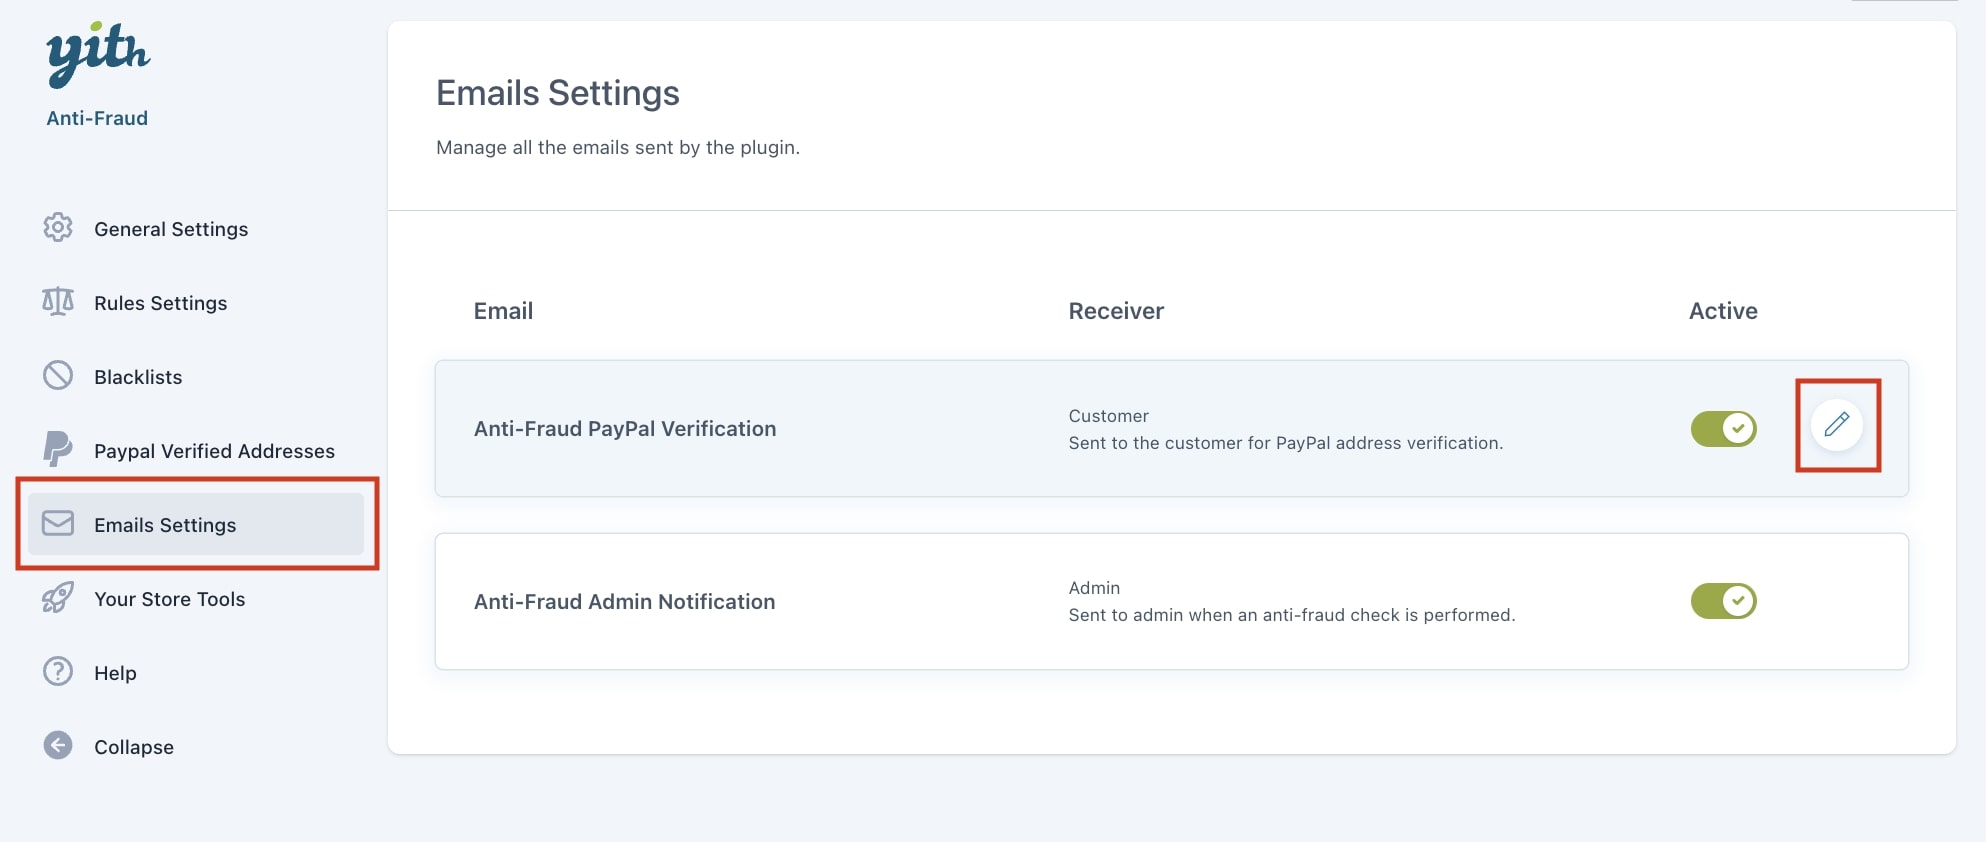
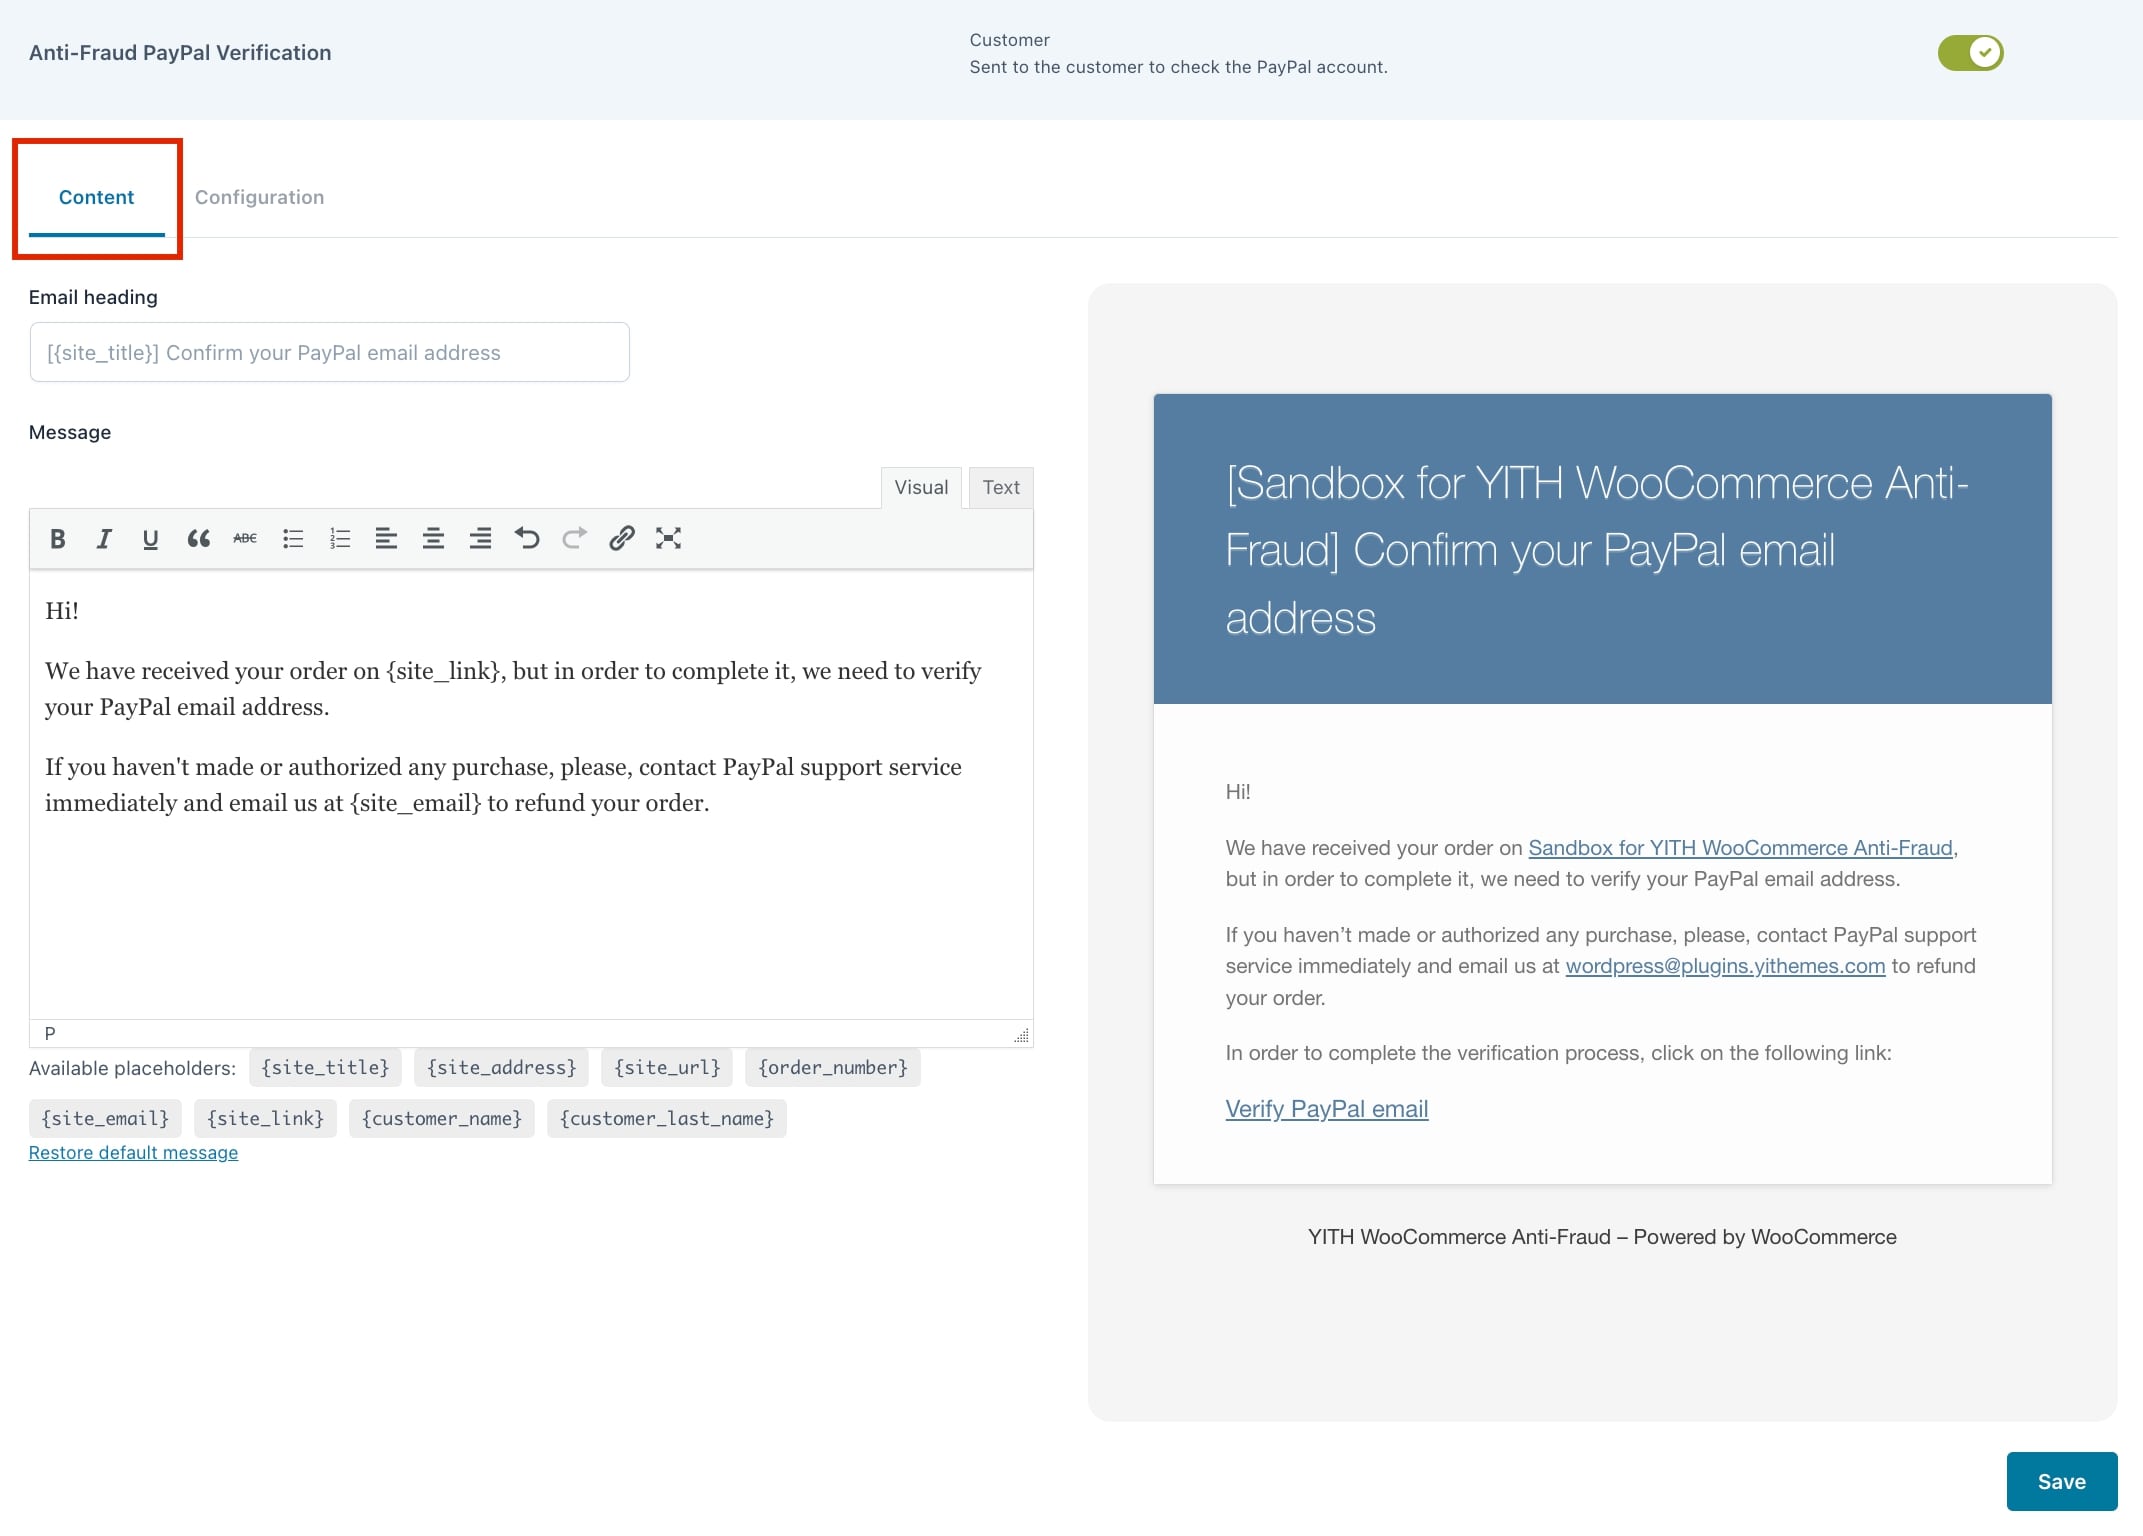
When there is a new payment request, the plugin will automatically send an email to the PayPal address entered. The order is completed only if the user confirms the account by clicking on the verification link sent in the email.
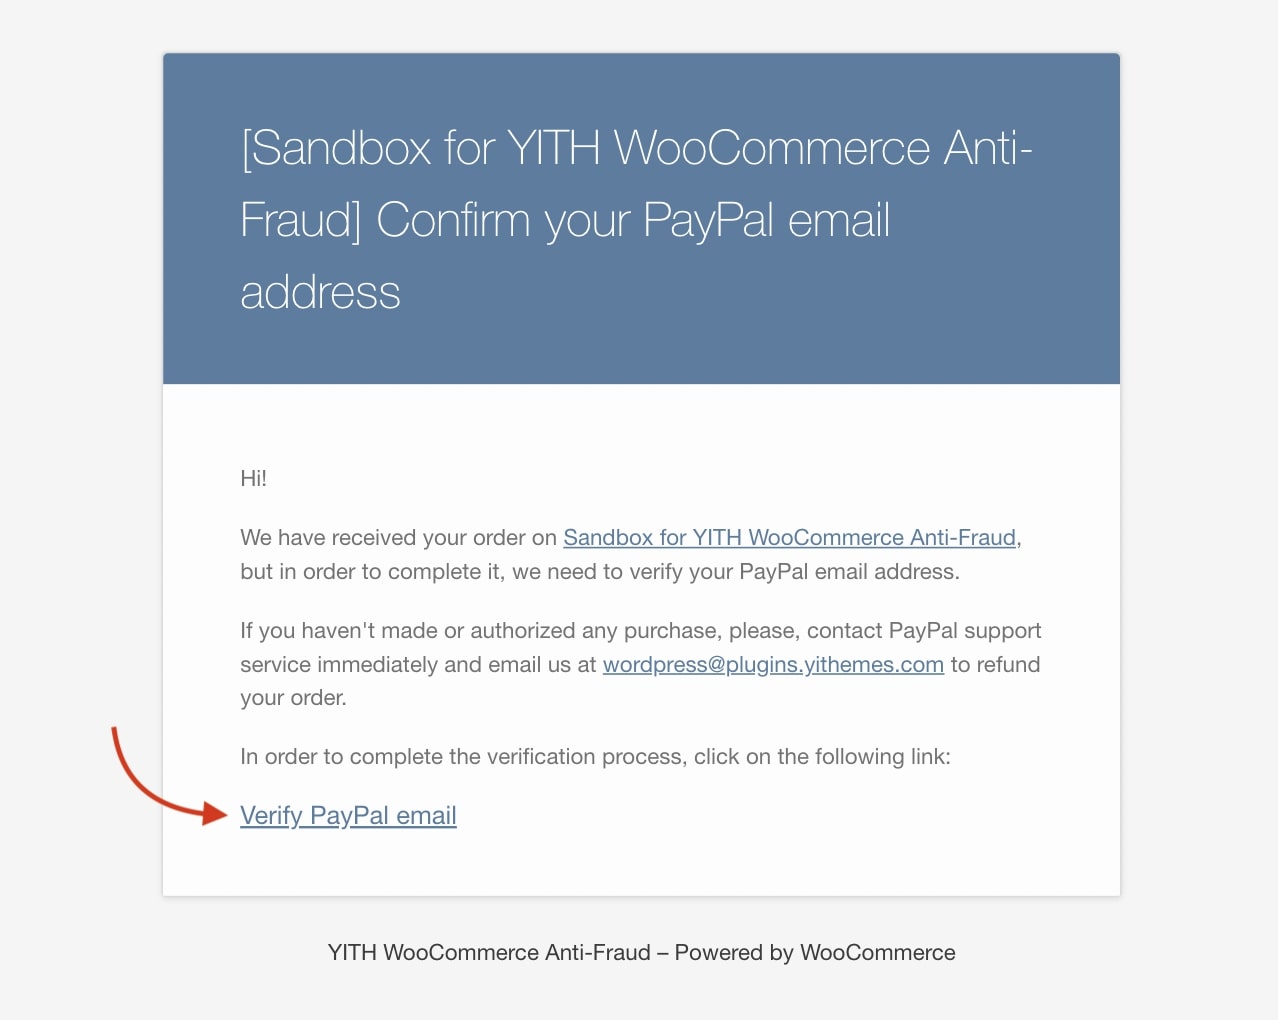
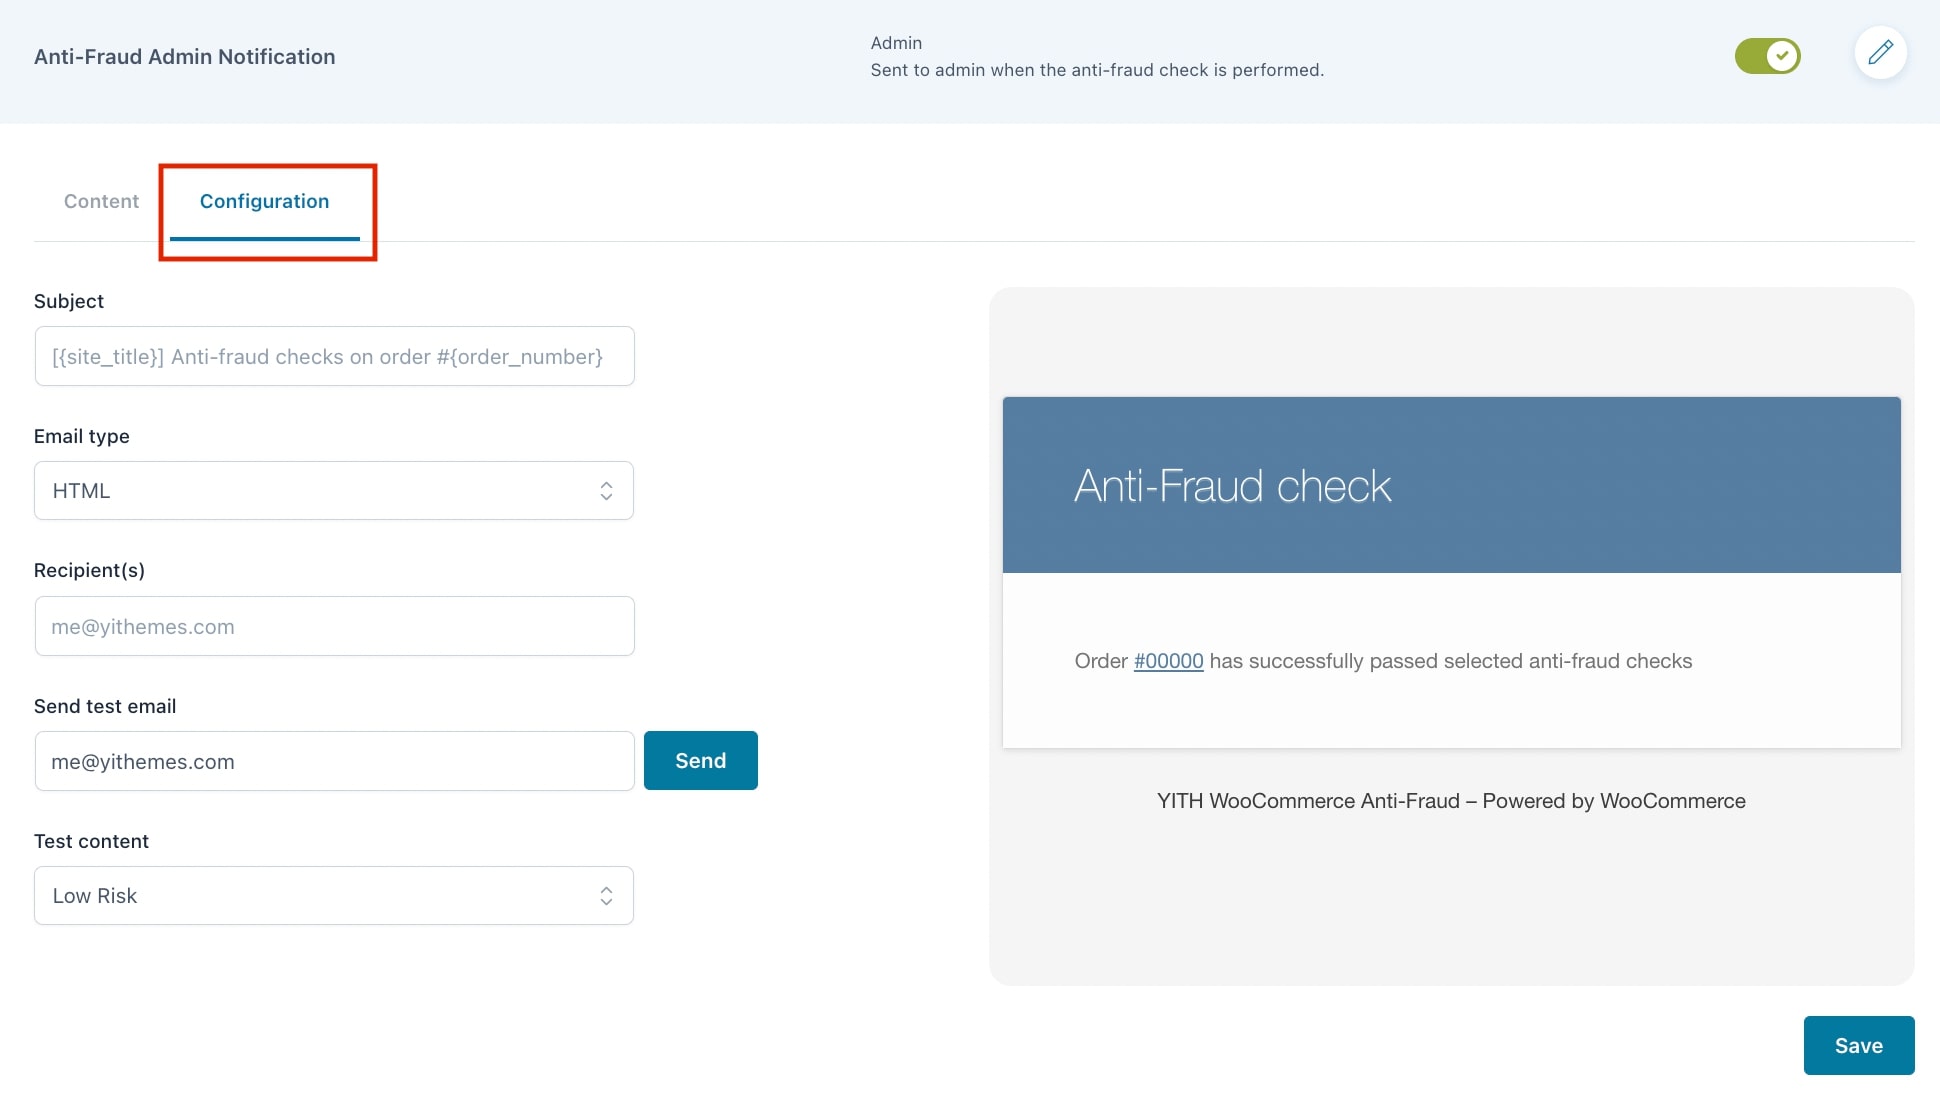
You can configure this email notification from the Email Settings, click here to read more information about it.
In case the account is not confirmed after the first email has been sent, the plugin will send a new email after a specified number of days. You can set the number of days with the option Time span before further attempts.
The order is automatically canceled if the account still isn’t verified after a specified number of days that you can set in Time span before the orders are cancelled.
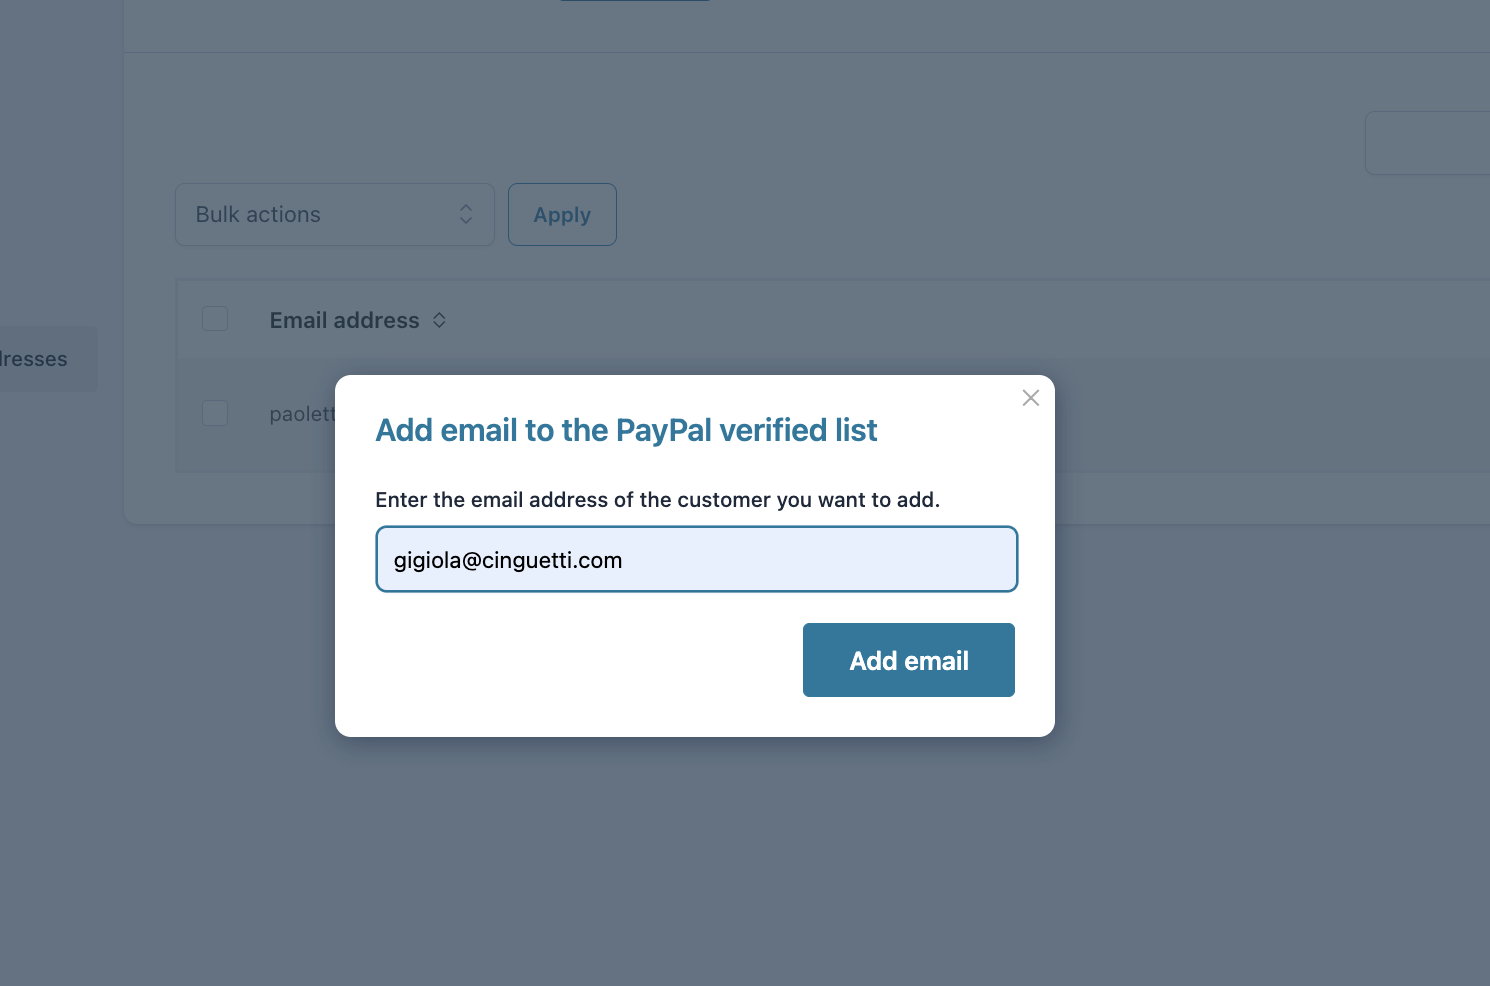
Once you’ve verified the email address, it will be added to the list with verified email addresses automatically. The verification process will no longer be repeated for that email address with orders that follow. You can also add a new PayPal address manually from the PayPal Verified Addresses tab.


