By selecting the Default form, you will be able to configure many advanced fields and ask your users any type of information.
To add a new field, click on Add field and configure the options included in the popup.

- Name: this is the field name as it will appear on the backend, this must be a one-word name (if you enter spaces they will be converted into underscores).
- Type: choose the type of field, based on the selection, the available field options will change:
- Text: a small text field
- Email: email field
- Phone: only numbers can be entered here; this field includes a validation check.
- Textarea: a bigger text can be entered here.
- Radio: users can choose only one option among the ones you upload.
- Checkbox: users can either check or uncheck this option.
- Select: users can choose one of the options from a drop-down menu.
- Country: user can pick a country among all the available ones.
- State: user can pick a state or region. If the Country field is has been entered and a country has been selected, the list of available states/regions for that country will automatically show up.
- Upload: user can upload files. You can limit the file formats and extensions that can be uploaded.
- Multi select: user can pick one or more options among the ones you enter.
- Date: user can pick a date (Set the date picker format in
“Default form options”). - Time: user can pick a time (Set the format in “Default form options”).
- Acceptance: option to add for example a “Privacy Policy” checkbox that customer must accept before sending the request. It supports the shortcodes [terms] and [privacy_policy].
- Heading: add a heading line among your fields, to make your advanced form look better.
- Class: here you can enter your own CSS rules to edit the style of the field.
- Label: enter here the field name as it will appear on the frontend.
- Label class: here you can enter your own CSS rules to edit the style of the label of the field.
- Placeholder: enter here the placeholder text to show in the field box. This will help your users understand how to use this field.
- Position: you can choose between First, Last and Wide. First will place the field on the left side, Last on the right, Wide will make the field take the whole width of the form.
- Options: this field, available only for specific types, will let you enter the options among which your users can choose.
- ID: (state field) select if the state depends on the shipping or billing country.
- Allowed extensions: (upload field) enter a list of the only allowed extensions. Separate values with a comma or leave it blank to allow any type of file.
- Max file size (MB): (upload field) enter a maximum size allowed for the uploaded files. Leave it blank to allow files of any size.
- Connect to: A very important option, because it lets you match the fields of the quote request form with the checkout fields. This way, the information entered here by your users during the quote request will automatically populate the ones in the order and on the checkout page if they complete the purchase.
Please, note: to make this field work the right way, you have to select the option Override shipping and billing info in the quote details. You can pick any WooCommerce field:
- billing_first_name
- billing_last_name
- billing_company
- billing_country
- billing_address_1
- billing_address_2
- billing_city
- billing_state
- billing_postcode
- billing_phone
- billing_email
- shipping_first_name
- shipping_last_name
- shipping_company
- shipping_country
- shipping_address_1
- shipping_address_2
- shipping_city
- shipping_state
- shipping_postcode
- Validation: choose among three validation options for your fields:
- Phone: checks if all entered characters are numbers
- Email: checks if an email address format ([email protected]) has been entered
- File: checks if the file extension and size match the ones specified by the admin
Edit Request a Quote email
If you choose the default form, you will also be able to edit the content of the email that is sent to the admin every time a new quote request is sent. You’ll be able to edit the settings from WooCommerce > Settings > Email > Email to request a quote. For more details about this email, please, check this page.
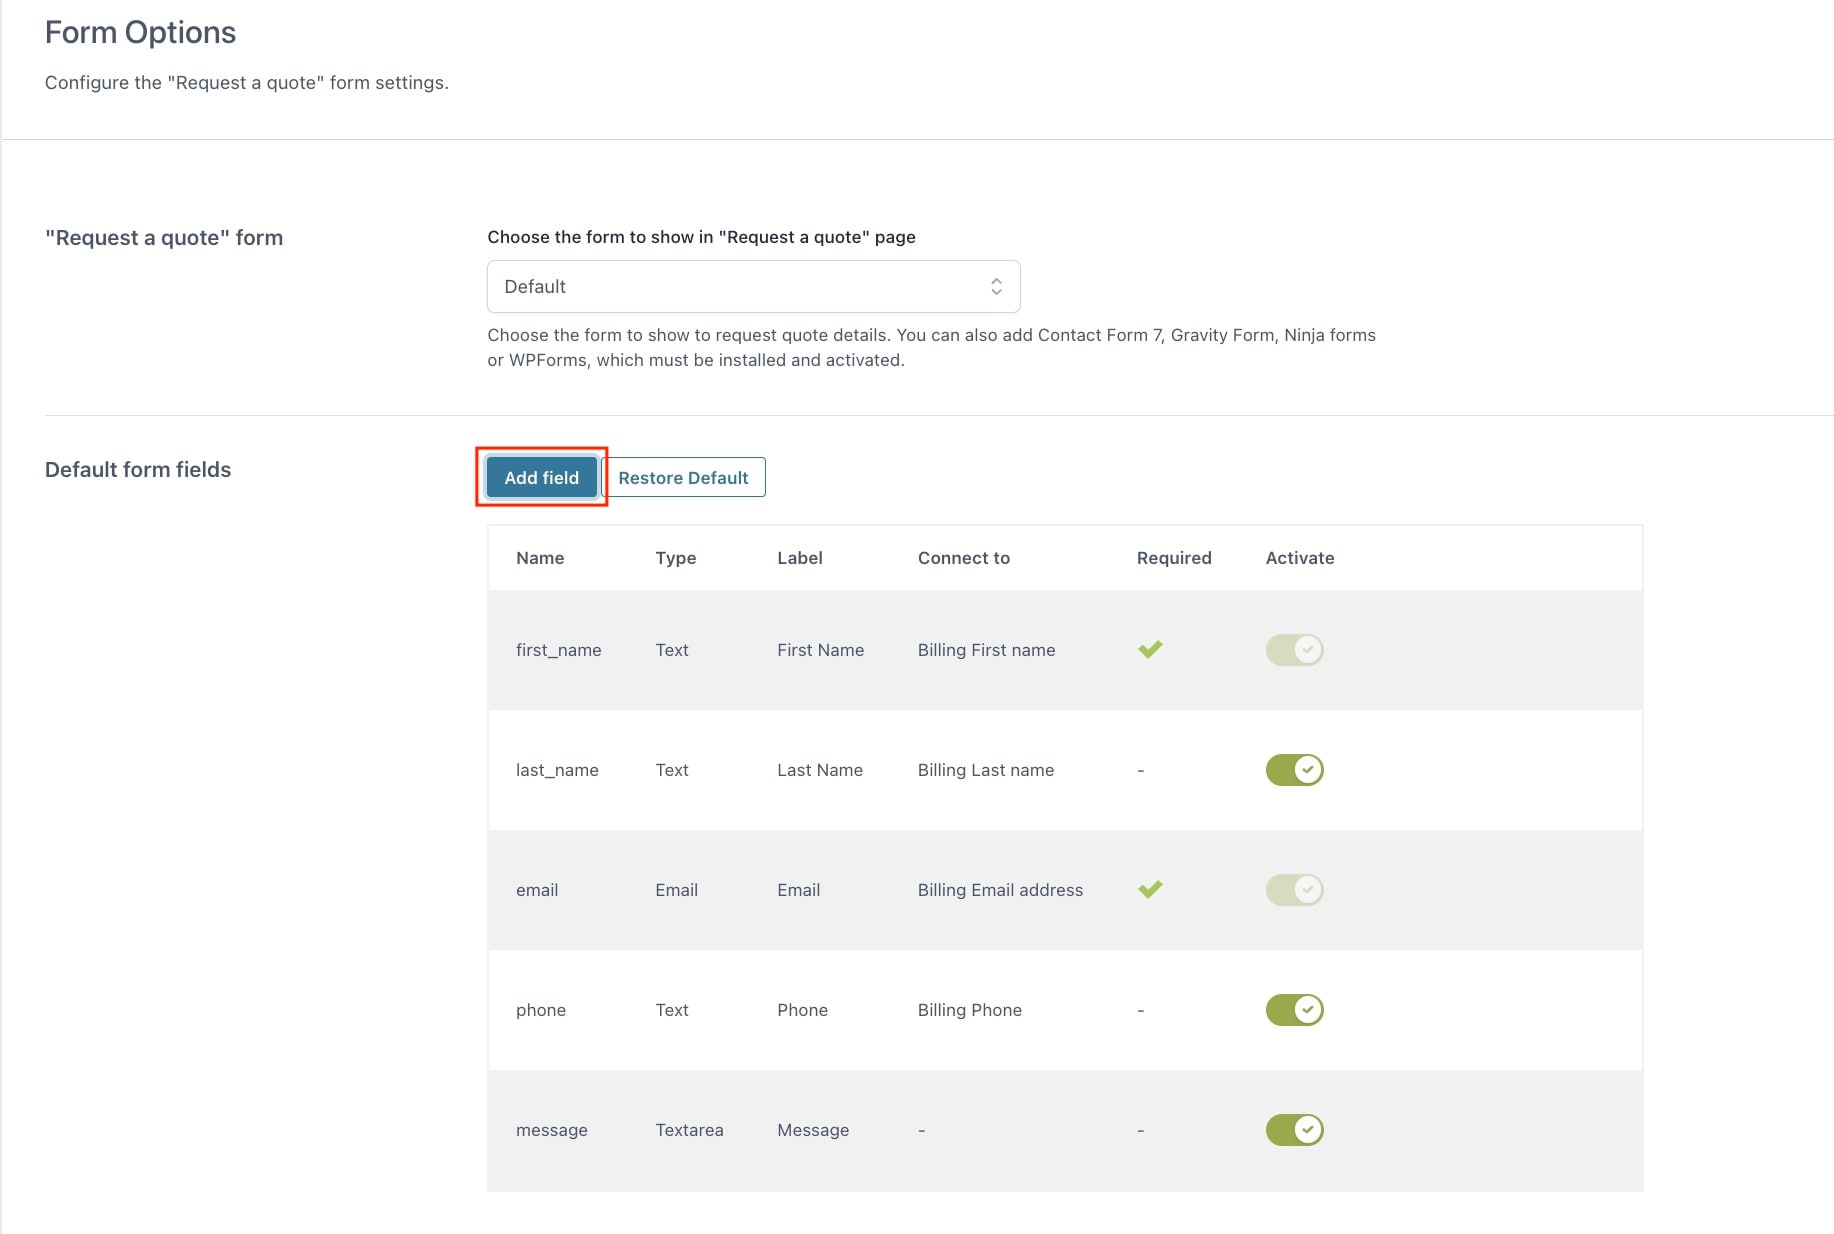
Default form fields
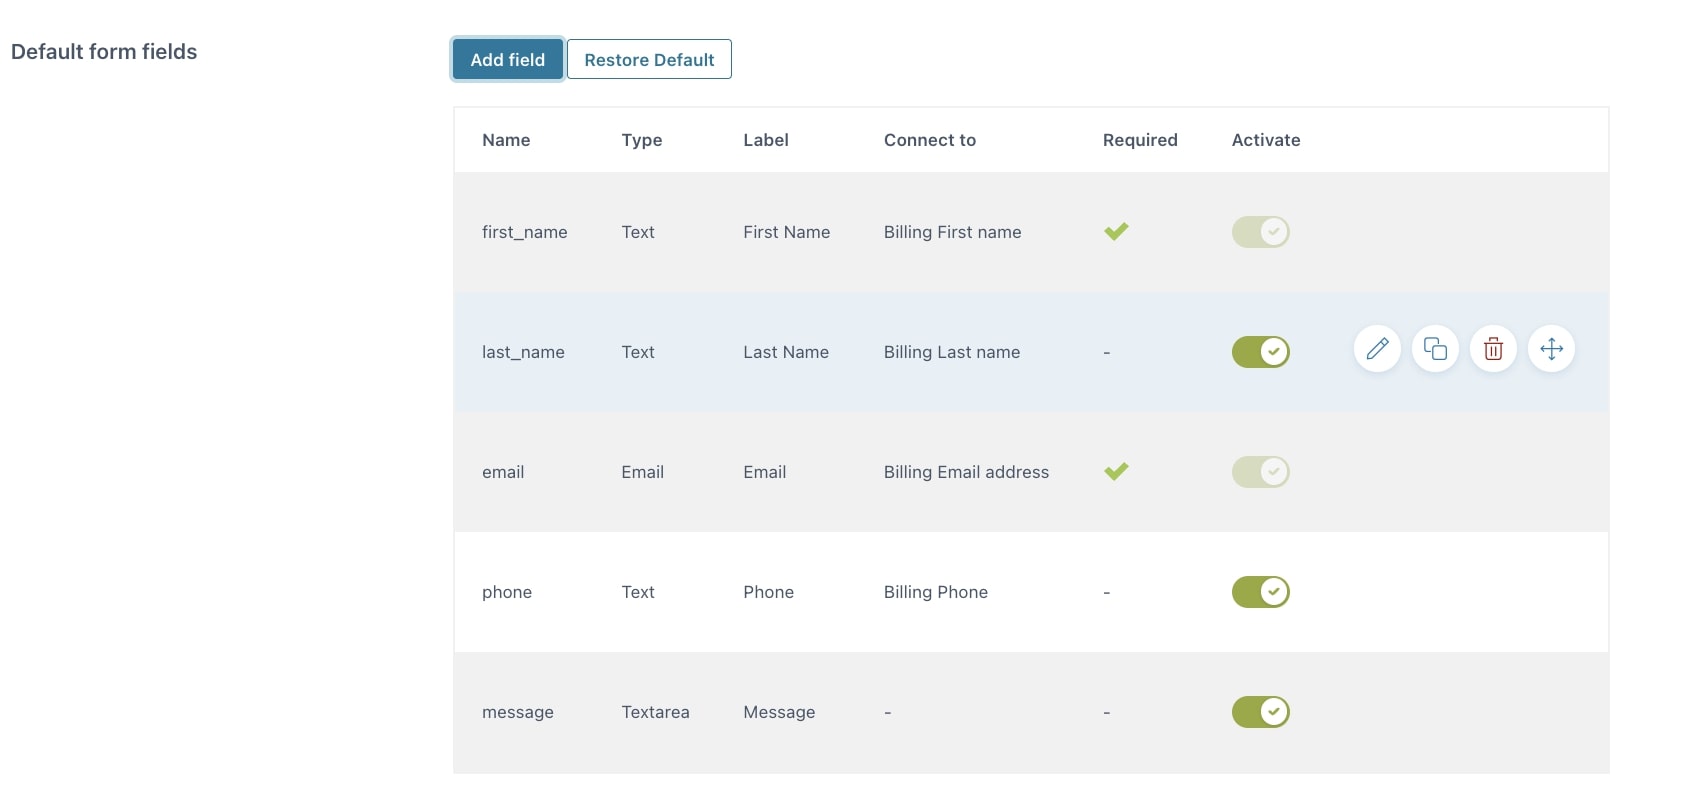
All the fields will show in the Default form fields section where you will be able to enable/disable each field, except for first name and email which are fields required to be able to send the email to users sending a quote request. In the same section, you can edit, duplicate, and remove every single field and sort them by drag & drop.
Default form options
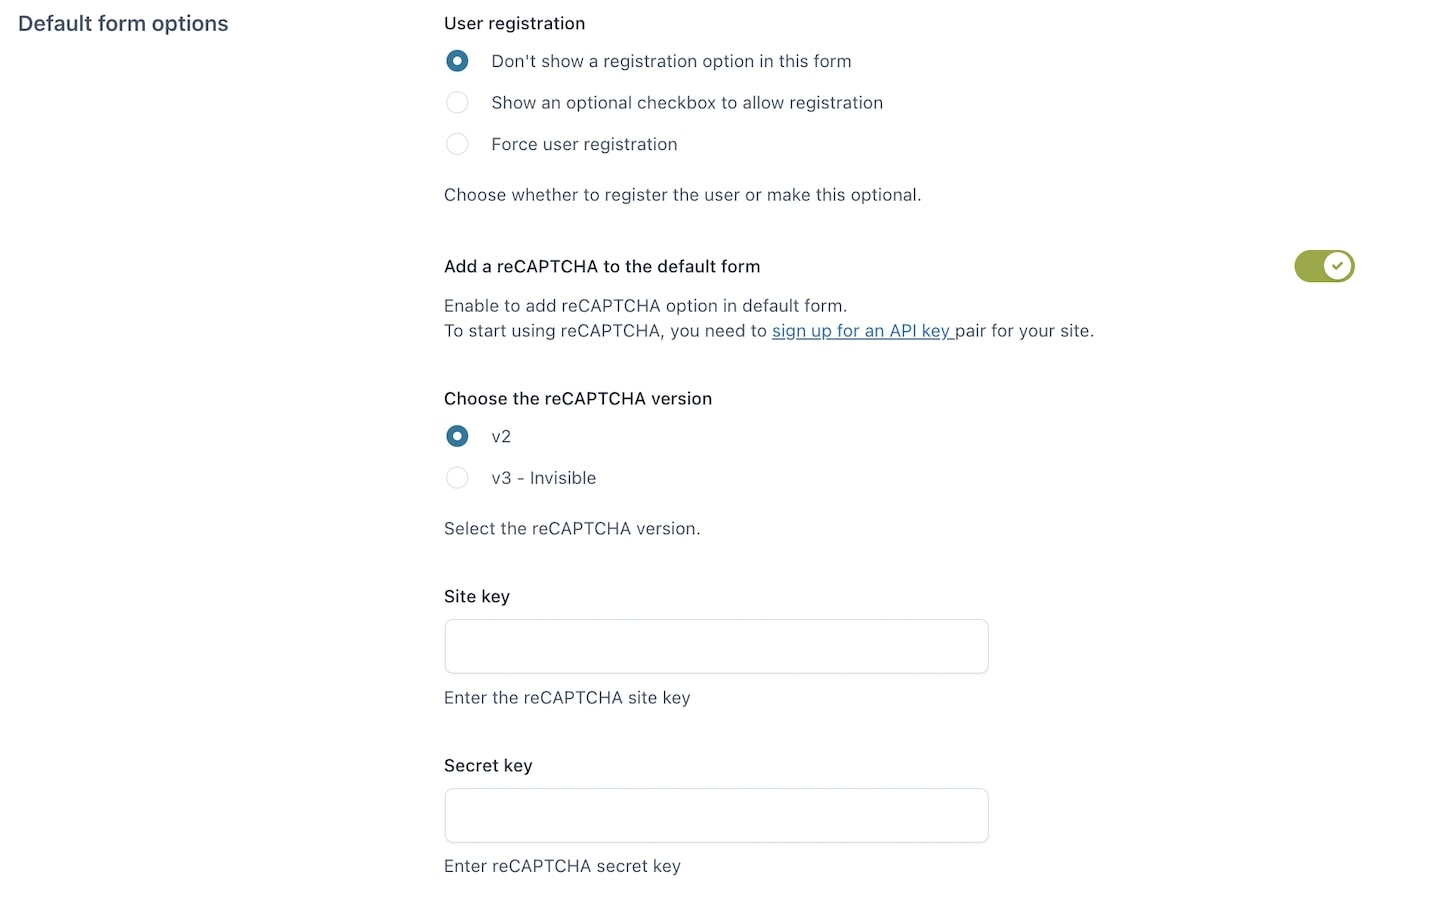
- User registration: give your users the option to proceed as guests, register an account optionally or register mandatory when submitting a quote request.
- Add a reCAPTCHA to the default form: receive only quote requests from real users and bot requests cannot be placed. Check this page for the complete installation information.
- Choose the reCAPTCHA version: select the version by choosing from v2 and v3.
- Site key: insert the reCaptcha site key.
- Secret key: insert the reCaptcha secret key.
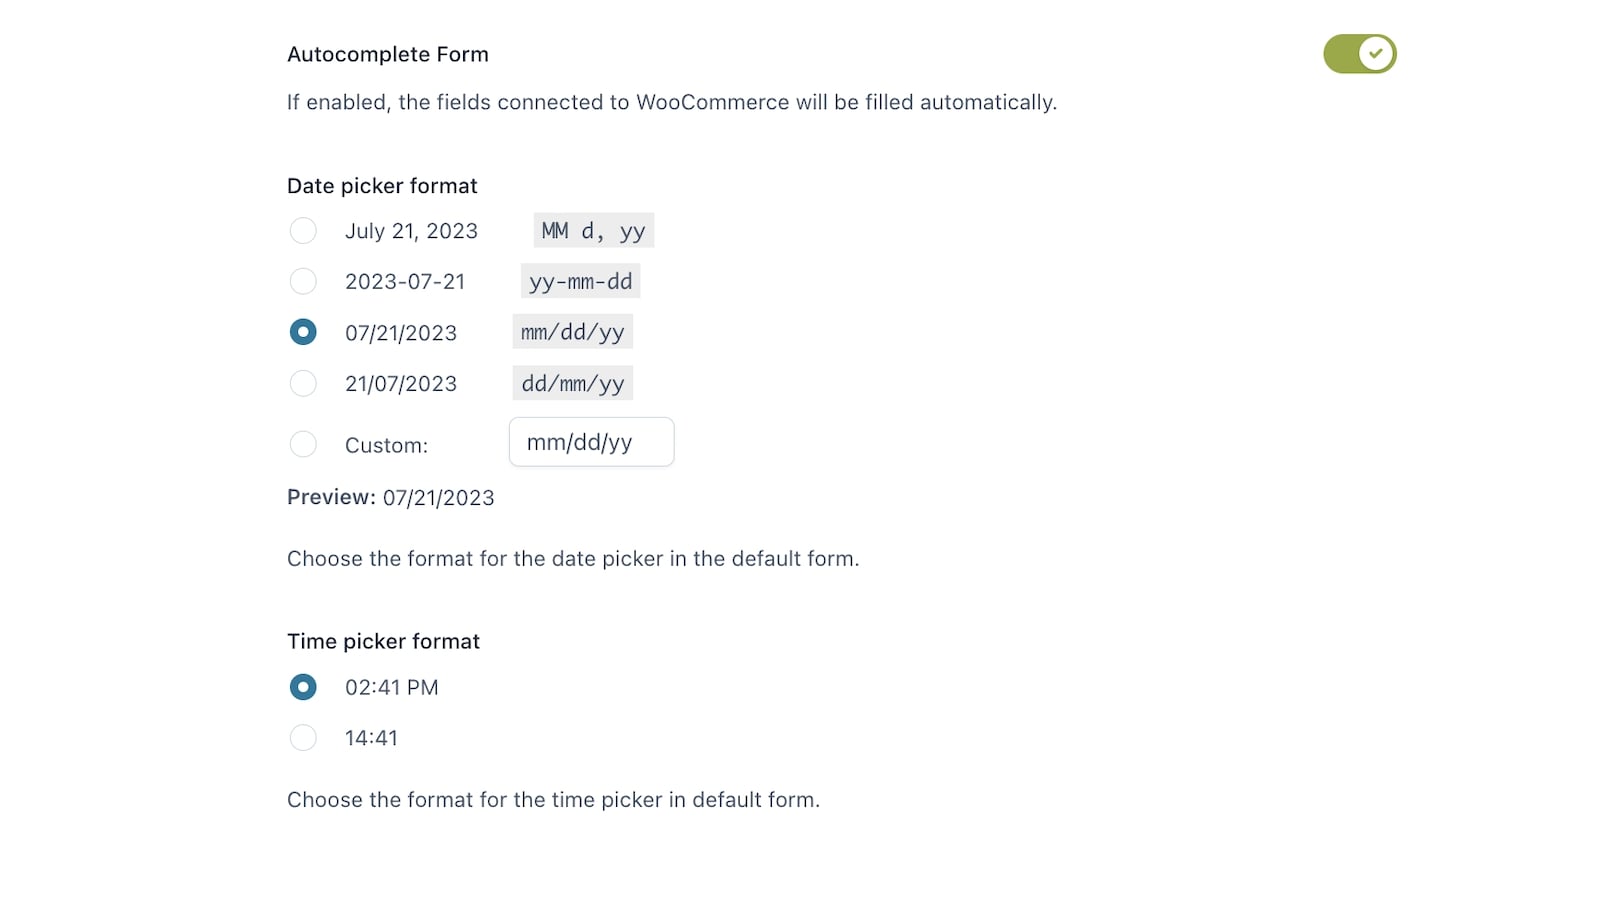
- Autocomplete form: the fields connected to WooCommerce will be filled automatically.
- Date picker format: choose the date picker format.
- Time picker format: choose the 12-hour or 24-hour format.