The first step in plugin configuration consists in creating a Firebase account (skip to the next step in case you already have one)
Create a new application, so that you can get the parameters required by the plugin.
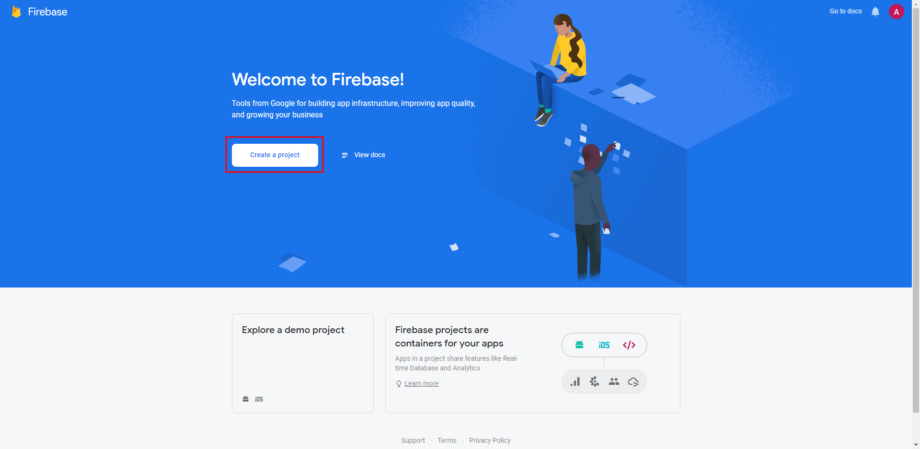
1- Go to https://console.firebase.google.com/ and click on the “Create a project” button.
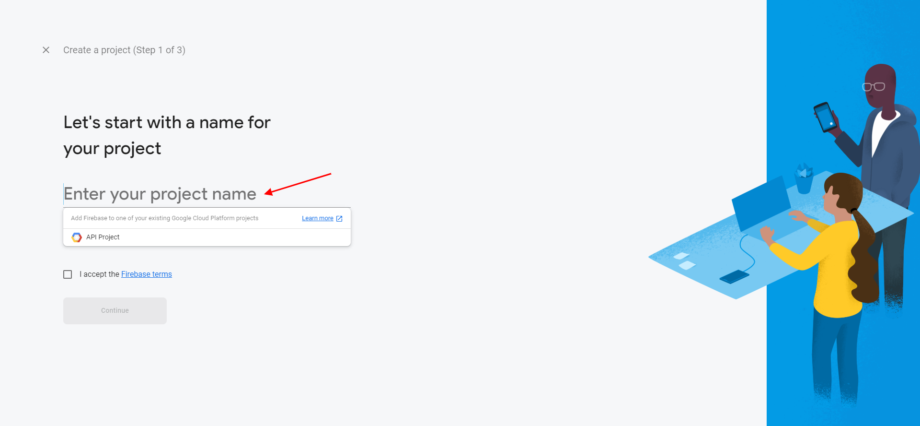
2- Now give a name to your project by entering it to the related field.
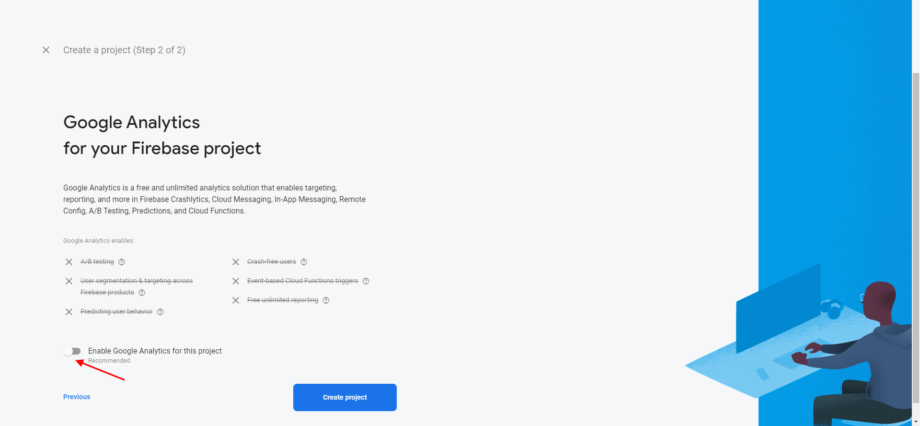
3- Deactivate Google Analytics for your Firebase project by disabling the option Enable Google Analytics for this project and click on Create project.
4- Wait until your project is created then click on Continue.

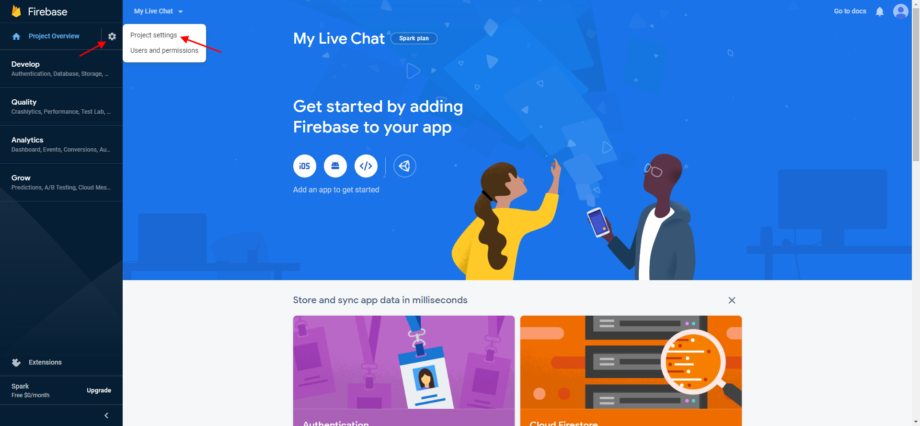
5- Now go to Firebase settings and select Project settings like in the image below.
6- In the tab General > Your project of Firebase settings, you will find the project ID. Copy it…
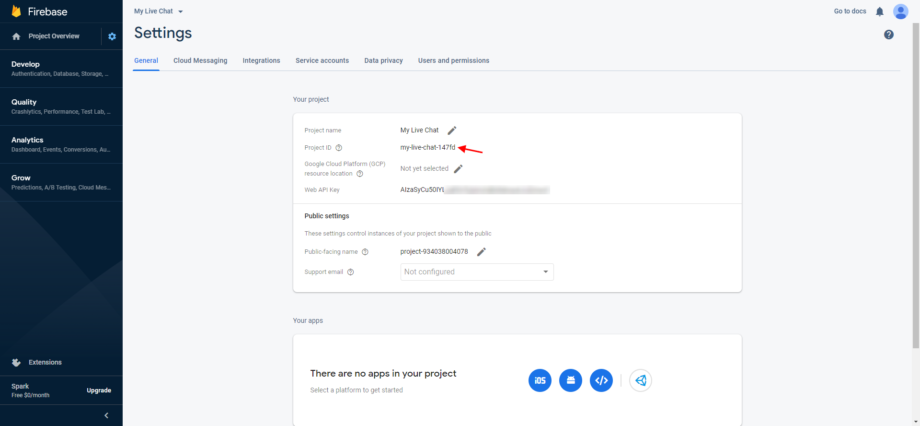
7- …add the -default-rtdb suffix to the project ID (this is not necessary if your Firebase instance was created before 1st December 2020) and paste it in the field Firebase project ID that you find in the plugin General settings.

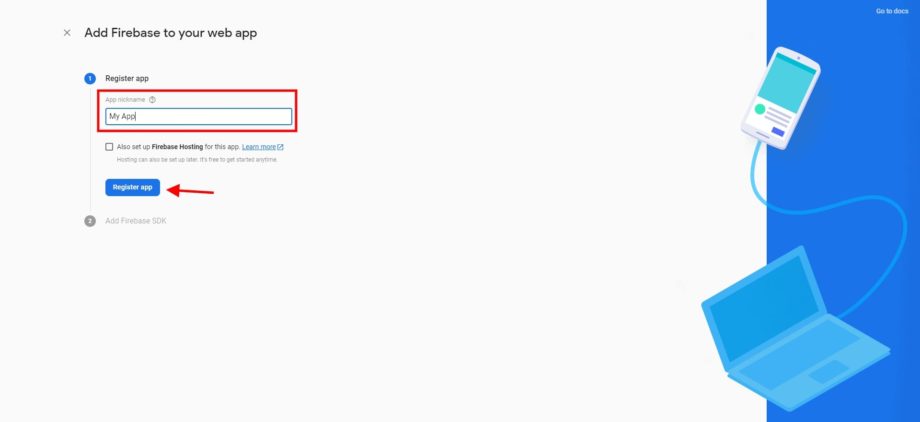
8- Go back to the tab General > Your project and click on the icon as shown below…

…then enter a nickname and click on “Register App”
Now copy the value without selecting the quotation marks (as highlighted in the image below) and click on “Continue to console“…

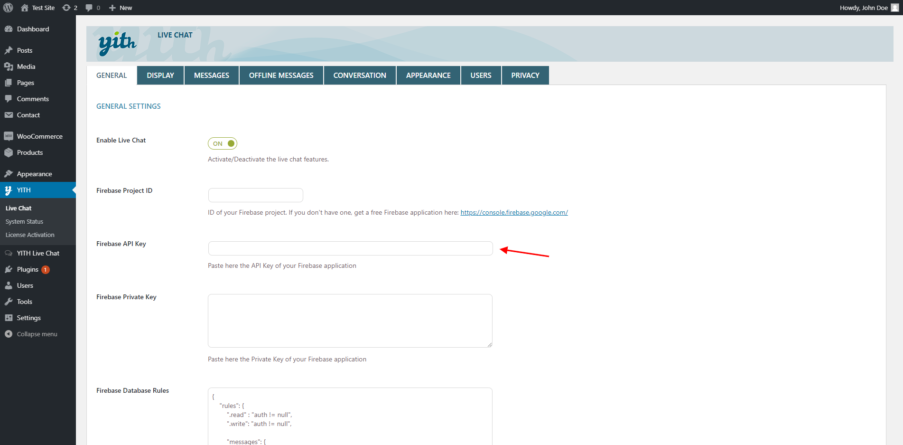
…and paste it in the field Firebase API key that you find in the plugin general settings.
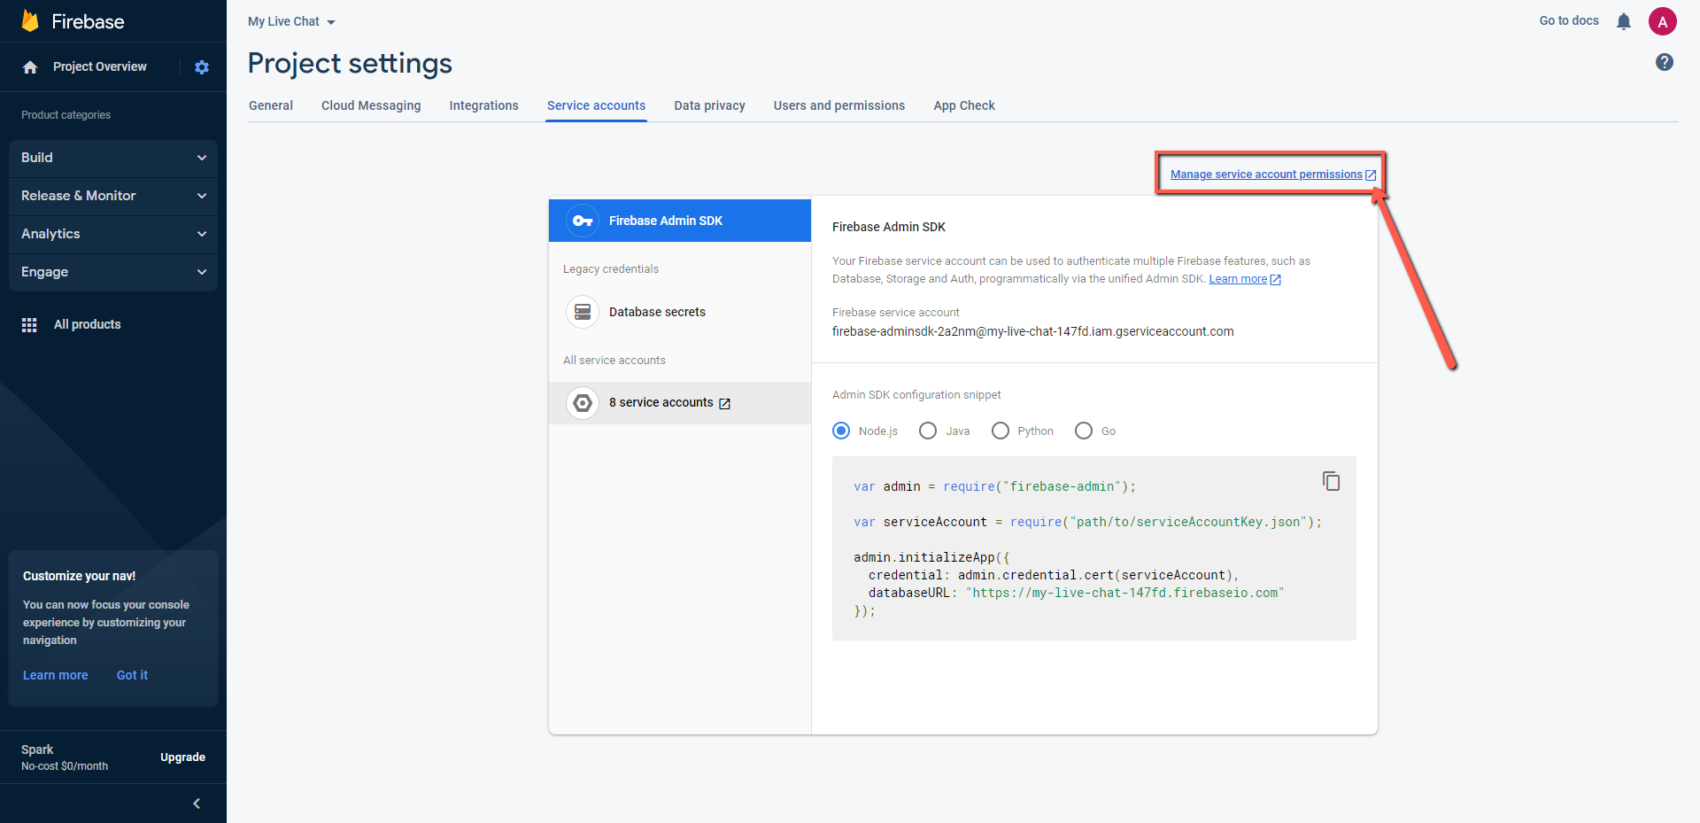
9- Now go to the section Service accounts of your project and click on Manage service account permissions.
9a – Locate the user described as Firebase Admin SDK Service Agent and click on Manage Keys in the right menu.

9b – Click on Add Key and then on Create new key.

9c – Make sure that JSON option is selected and click on Create. After downloading the file, copy its whole content and…

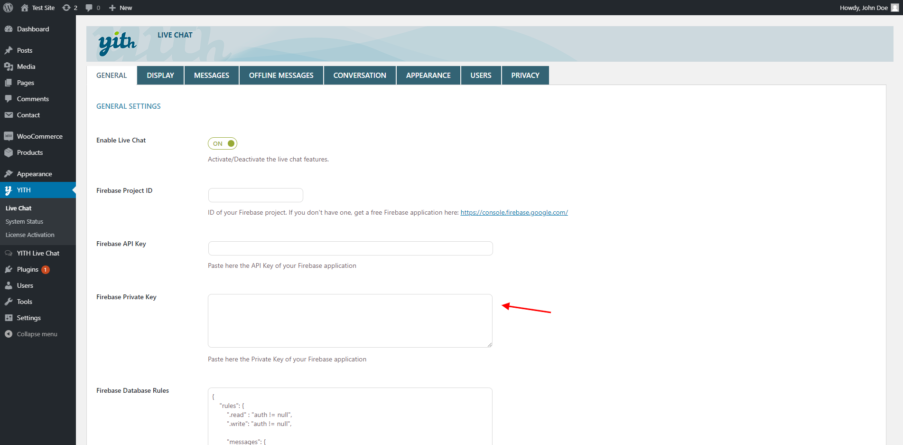
10- …paste it in the field Firebase Private key that you find in the plugin general settings.
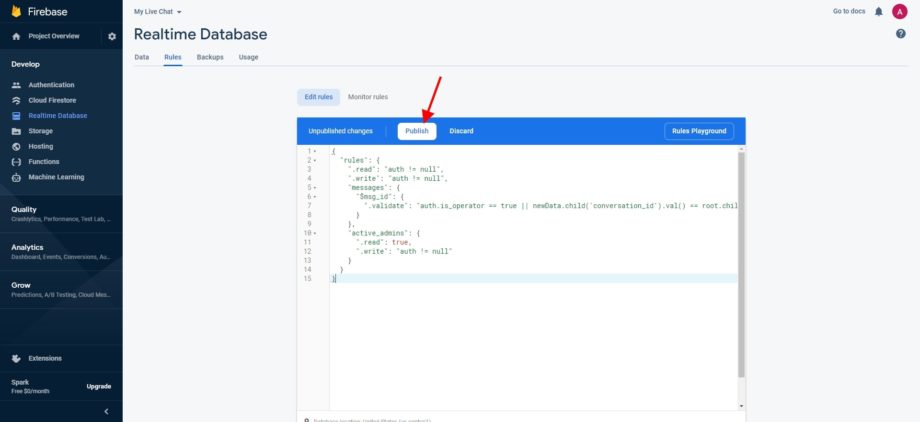
11- From the next field, Firebase Database Rules, copy the text and…

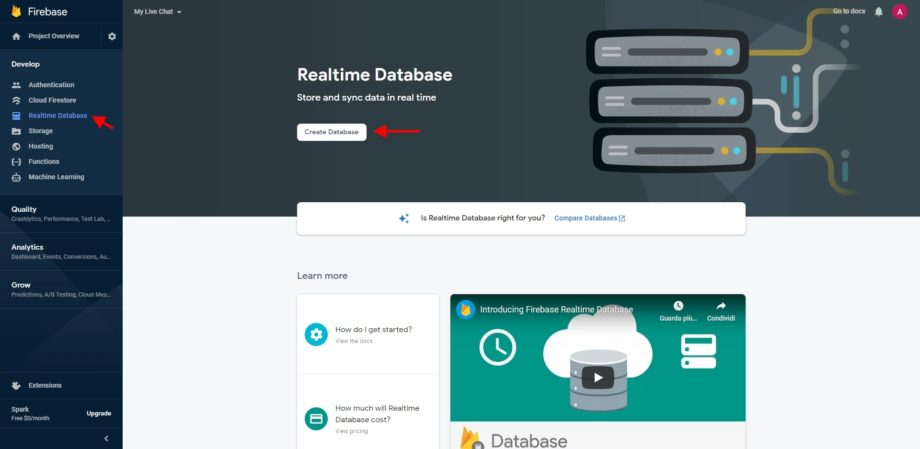
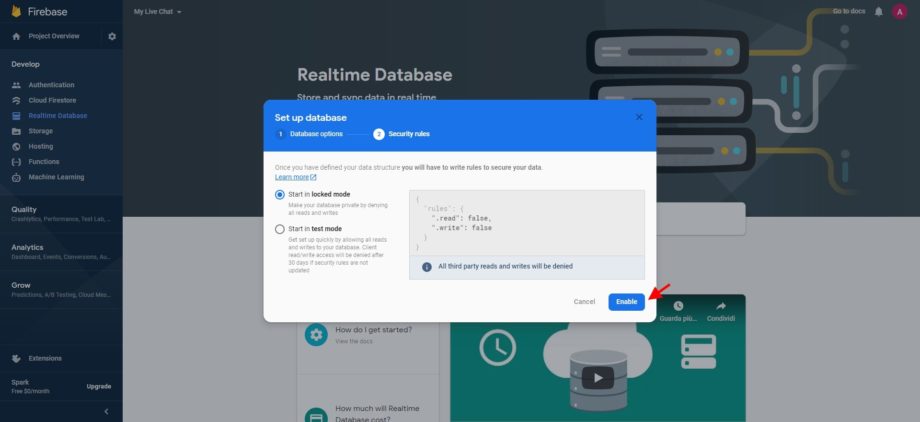
12- …go to Realtime Database and Click on the button Create database.
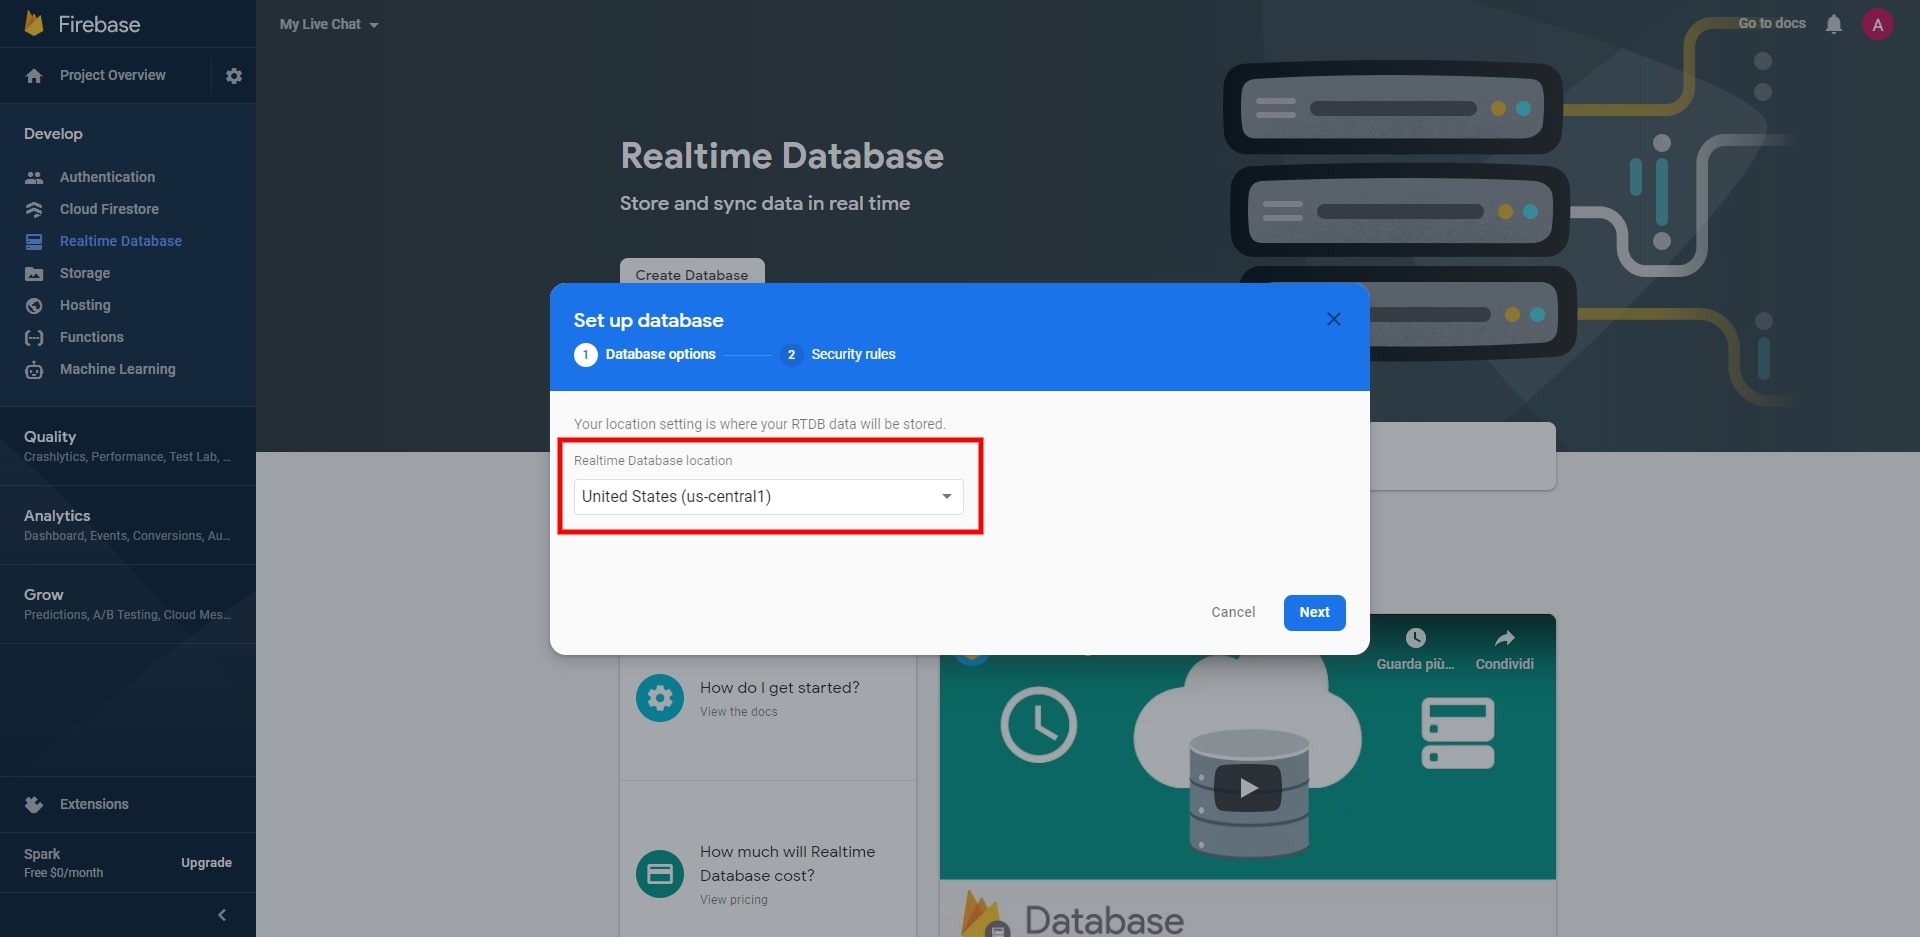
13- Make sure United States is selected. DO NOT CHOOSE Belgium or it won’t work.
14- Click on Enable.
15- In the Rules section, remove the text shown and paste the one you previously copied from Firebase Database Rules then click on Publish.
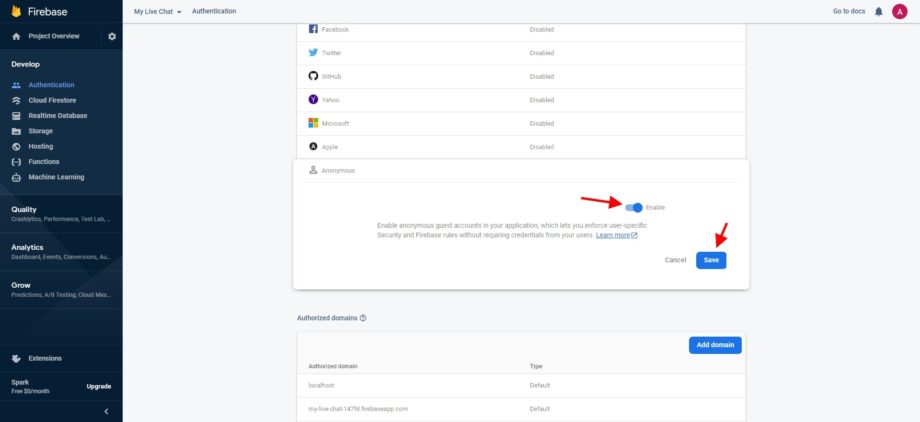
16 – Click on Authentication

17 – Click on Sign-in method then on Anonymous
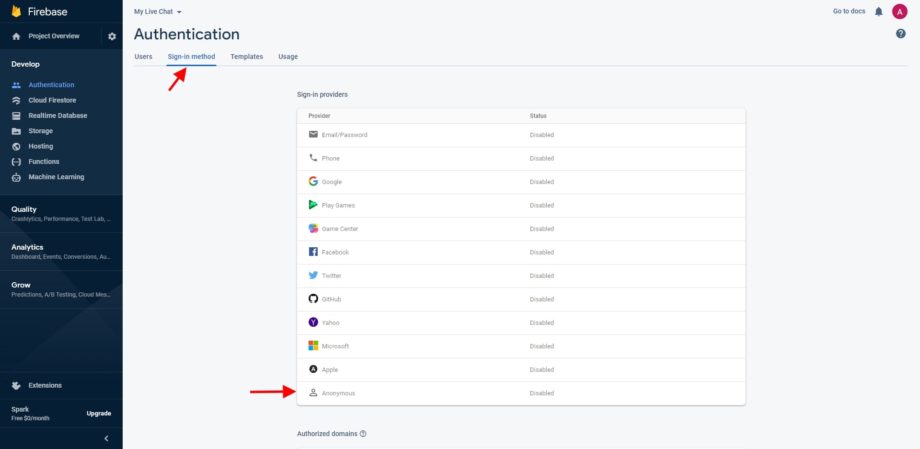
18 – As the last step, enable the authentication method and save.